


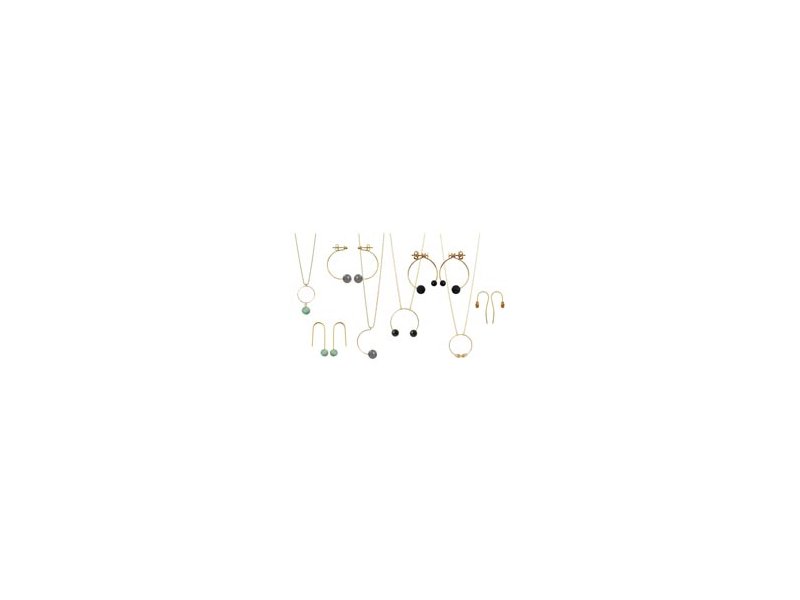
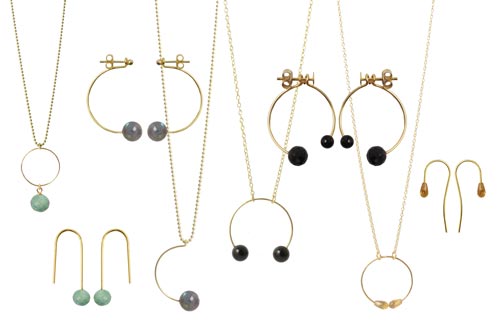
Smyks has recently acquired a range of new, delicate half‑drilled beads, and this collection is designed to inspire you with ideas for using them in earrings and necklaces. A half‑drilled bead has a hole that does not go all the way through—only a few millimetres deep—making it perfect for combining with a bail or similar fitting when creating jewellery.
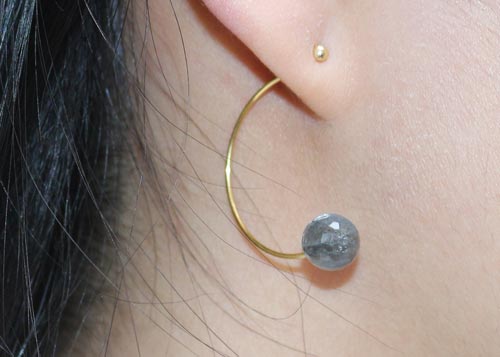
Earrings with labradorite
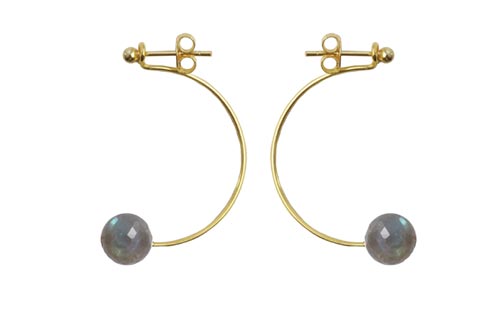
For these earrings, we used the following DIY components:
2 pcs. half-drilled labradorite, faceted, 8mm
1 pair hoop earring, gilded sterling
1 pair earstuds, 3mm ball, gold-plated sterling
1 pair of side-cutter pliers
1 pair of chain-nose pliers or flat-nose pliers
+ adhesive
These earrings are also available in sterling silver.
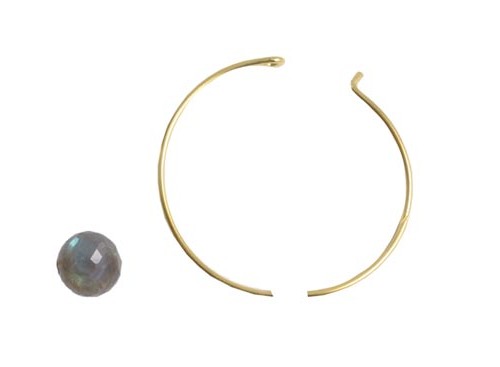
Begin by taking the side-cutter and cut the hoop-ring in half.
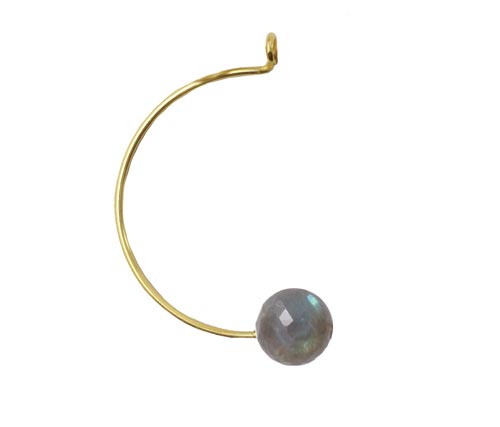
Next, you glue the bead onto the hoop-ring with adhesive and bend the eye of the hoop-ring with the chain-nose pliers like shown in the image above. The eye needs to be in a vertical position.
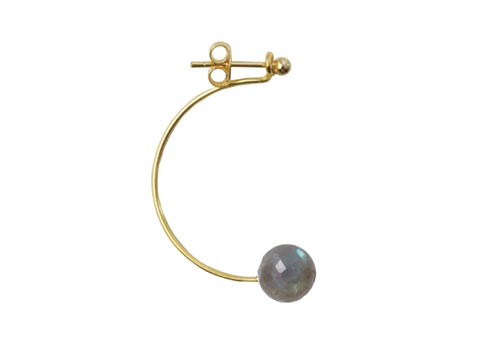
You then attach the earstud by using the eye of the hoop-ring (see picture). Your earring is now finished.
To put on the earring, simply place the eye of the hoop behind your earlobe and pass the earstud through it.
Necklace with labradorite
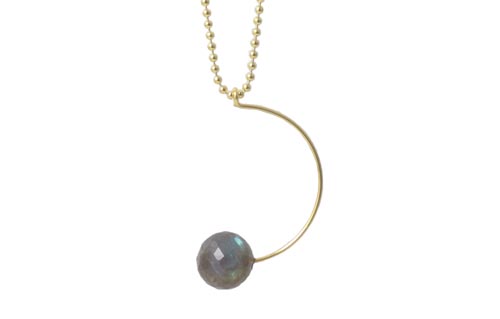
For this necklace, you will need the following materials:
1 pc. hoop earring, gilded sterling, 25mm
1 pc. half-drilled labradorite bead, 10mm
ca. 60cm ball chain, gilded sterling, with connector
1 pair of side-cutter pliers
1 pair of chain-nose pliers or flat-nose pliers
+ adhesive
This necklace is also available in sterling silver.
The process is the same, as with the labradorite earrings above.
You simply cut the hoop-ring in half, glue the labradorite onto the lower end. Then you bend the eye of the hoop-ring in a vertical position, attach the chain by passing it through the eye of the hoop-ring - and you are done. If you choose a chain with a minimum length of 50cm, you can avoid having to use a locking mechanism in the neck area.
Earrings with aquamarine
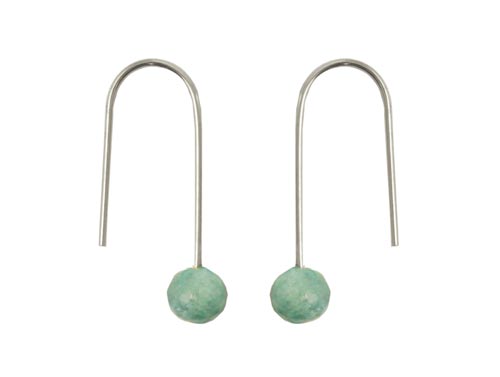
For these earrings, we used the following DIY-components:
1 pair earwires, extra long
2 pcs. aquamarine, half-drilled bead. This bead is unfortunately sold out, but you may have a look at our other half-drilled stones and pearls, right here
+ side-cutter pliers
+ adhesive
These earrings are also available in gilded sterling.
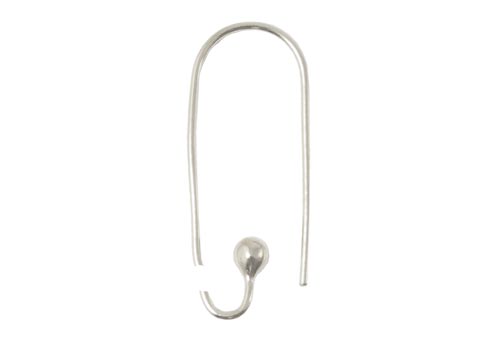
Begin by cutting the lower part of the earwire off, using the side-cutter plier.
Now, glue on the aquamarine bead with adhesive as shown in the image above. Your earrings are now done.
Necklace with aquamarine
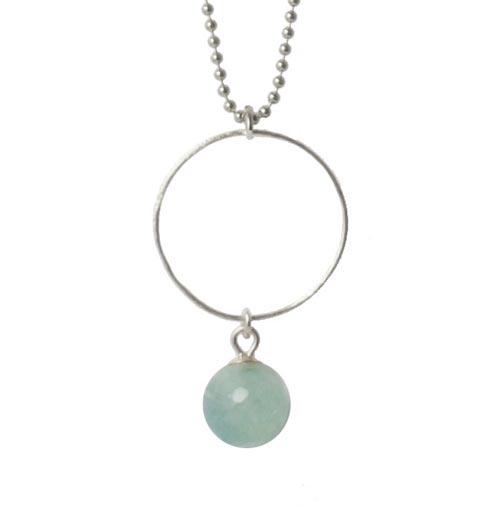
For this necklace, you will need the following materials:
1 pc. half-drilled aquamarine bead, 8mm. Sorry, it's sold out, but you might find a good alternative among our other half-drilled stones and pearls.
1 pc. bail, cup with peg/eye pin
1 pc. sterling silver rings, brushed
1 pc. jumpring, sterling, 3mm
1 pc. jumpring, silver, 4mm
ca. 60cm ball chain, sterling silver, with connector
+ adhesive
This necklace is also available in gilded sterling.
Start by gluing the bail into the half‑drilled bead. Before you add the glue, check whether the bail needs a little trimming to fit properly. Then connect the bail’s eye to the sterling ring with a 3 mm jumpring.
Next, attach a 4 mm jumpring to the sterling ring, thread the ball chain through it, and your necklace is ready. For this design, we’ve used a 60 cm ball chain so it can be slipped over the head without a clasp.
Earrings with onyx
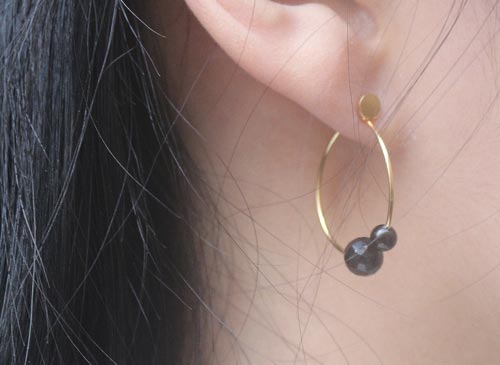
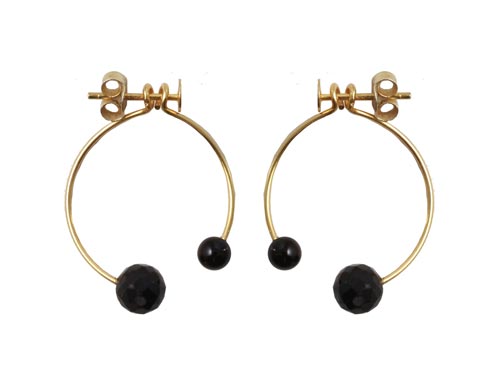
For these earrings, we used the following DIY components:
1 pair hoop earring, gilded sterling, 20mm
1 pair hoop earring, gilded sterling, 25mm
2 pcs. half-drilled onyx bead, 4mm
2 pcs. half-drilled onyx bead, 6mm
1 pair earstuds with flat pad, gold-plated
+ side-cutter pliers
+ chain-nose pliers or flat-nose pliers
+ adhesive
These earrings are also available in sterling silver.
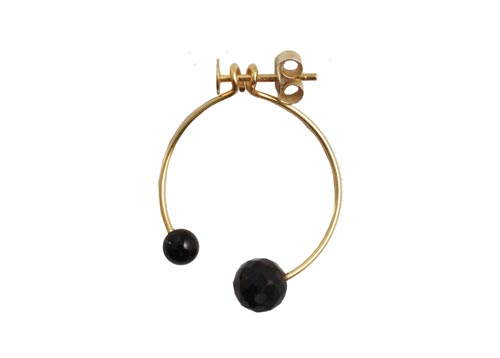
This process is the same as for the labradorite earrings above. Cut a small piece off the 20 mm hoop ring and glue the 4 mm onyx bead in place. Then cut a piece off the 25 mm hoop ring and attach the 6 mm onyx bead in the same way. How much you trim off each hoop ring depends on how much space you want between the two beads.
Finally, thread the ear stud through the eyes of both hoop rings, and your earrings are ready. In this design, the smaller piece is meant to sit in front of the earlobe, and the larger piece behind it.
Necklace with onyx
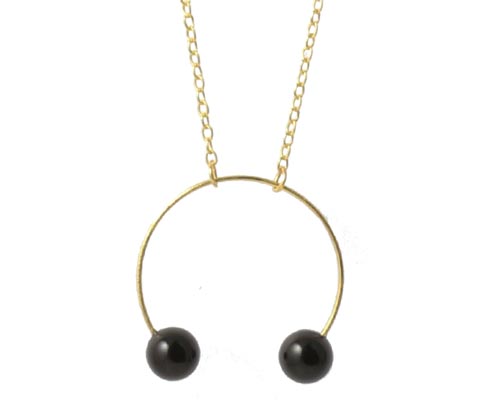
For this necklace, you will need the following materials:
2 pcs. onyx bead, half-drilled, 6mm
1 pc. gilded sterling rings, brushed, 25mm
2 pcs. jumpring, gilded sterling, 3mm
ca. 60cm cable chain, gilded (dublé)
+ side-cutter pliers
+ adhesive
This necklace is also available in gilded sterling.
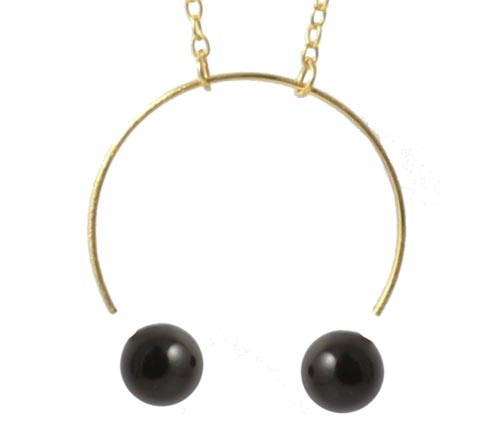
Begin by cutting a small piece off the ring with side‑cutter pliers. How much you remove depends on how much space you want between the beads.
Next, glue the beads onto the ring as shown above. Finally, attach the chain to the ring using a jumpring at each end of the cable chain.
Earrings with citrine
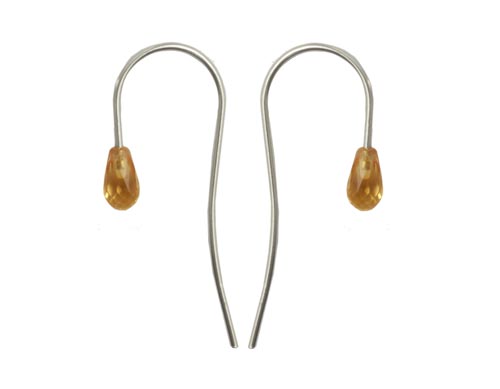
For these earrings, we used the following DIY components:
1 pair earwires with ball, sterling silver
2 pcs. citrine teardrop, half-drilled
+ side-cutter pliers
+ adhesive
These earrings are also available in gilded sterling.
Begin by using the side-cutter to cut off the end of the earwire. Then attach the citrine teardrops as shown in the image above, with adhesive.
Necklace with citrine
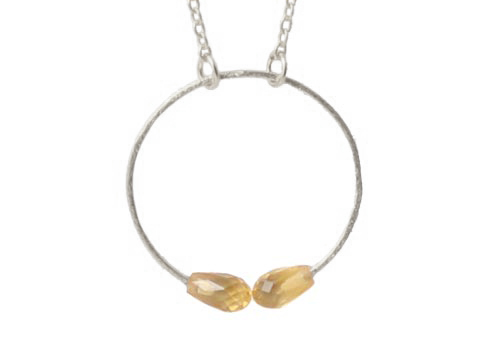
For this necklace, you will need the following materials:
2 pcs. citrine teardrop, half-drilled, 5mm
1 pc. sterling silver ring, brushed
2 pcs. jumpring, sterling silver, 4mm
ca. 60cm cable chain, sterling silver
+ adhesive
This necklace is also available in gilded sterling.
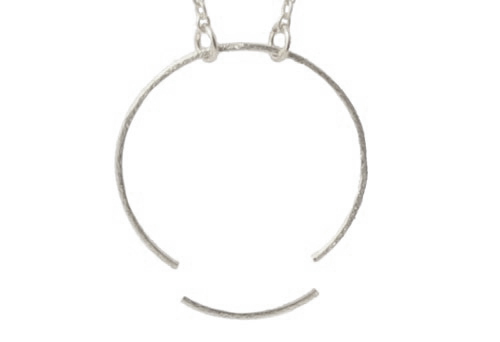
Step one: attach the cable chain to the silver ring using two jumprings, one at each end of the chain. You can also save this step for last if you prefer.
Next, use side‑cutter pliers to snip a small piece off the ring, as shown above. How much you cut away simply depends on how much space you want between the beads.
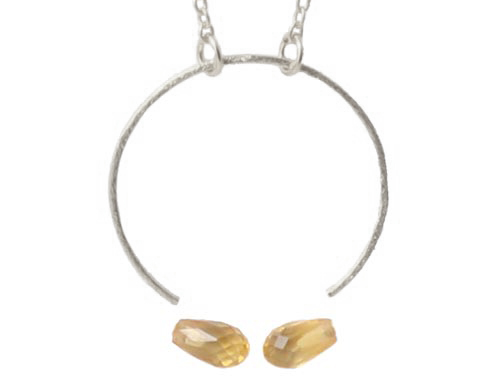
You can place the teardrop beads next to the ring to see how much space you’d like between them before cutting the piece out of the silver ring.
Step two: glue the teardrops onto the ring as shown above, and your necklace is finished.
Enjoy creating your own pieces!
If you have any questions, comments or suggestions, feel free to write in the comment field below.
We will publicly show your name and comment on this website. Your email is to ensure that the author of this post can get back to you. We promise to keep your data safe and secure.