


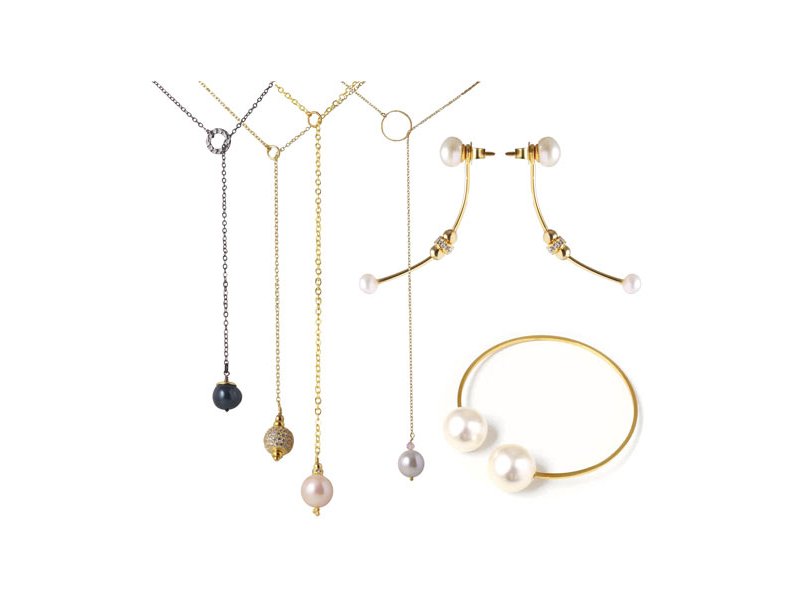
A new year has begun, and we’re back with plenty of fresh ideas and designs for your DIY jewellery.
We’re starting with a small collection that is both simple and easy to make yourself. The earrings are inspired by Bille Brahe, whose elegant designs often feature pearls as the focal point in a clean, minimalist style. The necklaces follow the same understated approach and work beautifully on their own or as part of a matching set, using the same pearl in both the necklace and the earrings.
Earwires with shell pearls
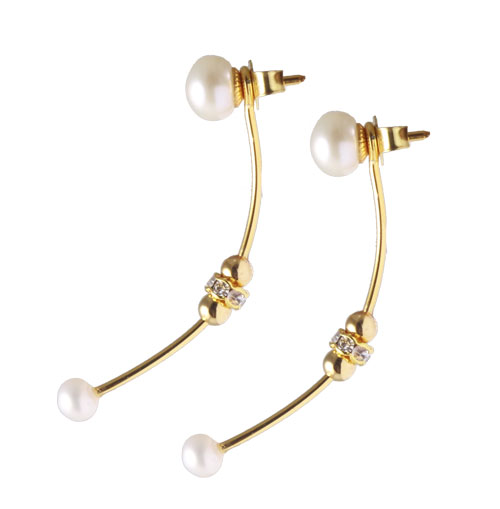
This design is made with half‑drilled shell pearls, but you can just as easily use other types of half‑drilled beads. You can explore Smyks’ selection of half-drilled pearls here.
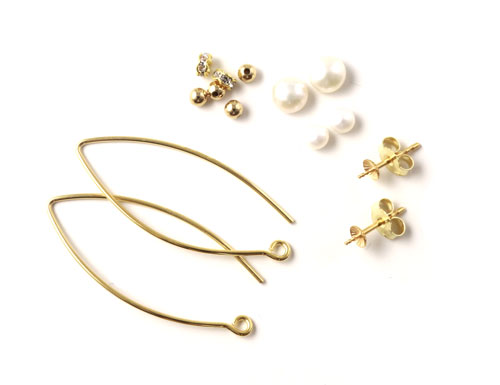
For these earrings, you’ll need the following materials:
1 pair of gilded long, oval earwires
1 pair of half-drilled 4mm shell pearls
1 pair of half-drilled 7mm shell pearls
1 pair of gilded earstuds with cup and peg
2pcs. gilded 4mm connector beads with crystals
4pcs. gilded 3mm brass beads
Jewellery tools:
1pc. side-cutter pliers
1pc. flat-nosed pliers
Jewellery glue
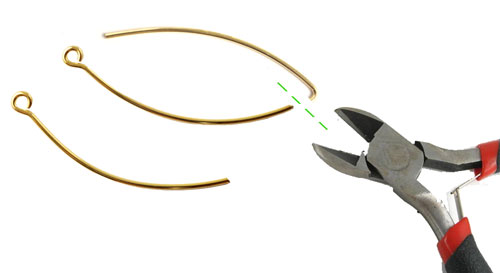
Start by cutting off the lower part of the earwires. Cut just above the curve. To ensure both pieces end up the same length, cut the first one and then place it on top of the second as a guide before cutting.
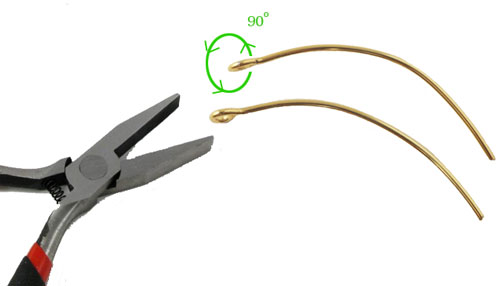
To ensure your earrings face the right way, turn the eyes on the earwires 90 degrees so they align as shown above. The easiest method is to hold the eye firmly with your flat‑nosed pliers and gently twist the earwire itself.
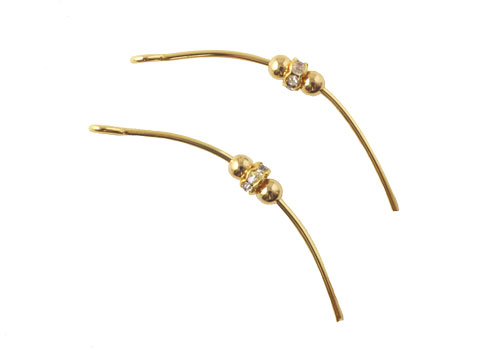
Now add a gilded brass bead, the crystal connector, and then another brass bead. Apply a tiny dab of glue to ensure the beads stay centred on the earwire. Place your glue in the middle of the earwire and gently cover it with the bead using a slight screwing motion, drawing the glue down into the bead and distributing it evenly inside. It is important to use a thick gel‑based jewellery adhesive, as it will not run.
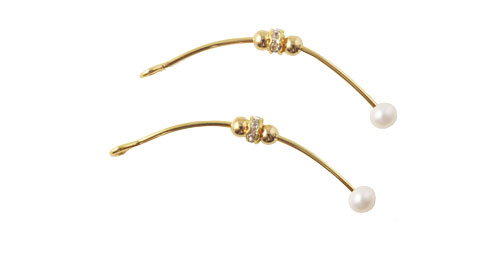
Glue the 4 mm half‑drilled shell pearls onto the ends of the earwires. If you prefer, you can also use a half‑drilled freshwater pearl.
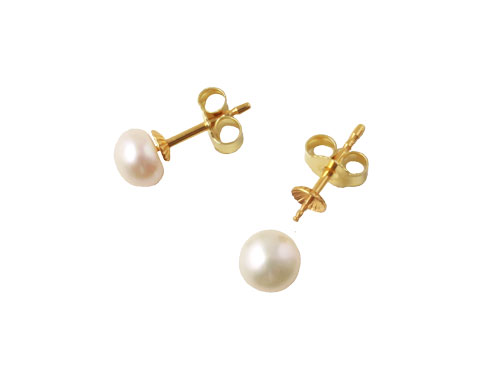
Now you’re going to make the other end of the earring. Glue the two 7 mm half‑drilled shell pearls onto the pegs of your earstuds. Trim the peg slightly to ensure it isn’t too long and that the pearl sits neatly against the cup. Apply a small dab of glue to the peg and screw the pearl on firmly. The glue will take around five minutes to dry.
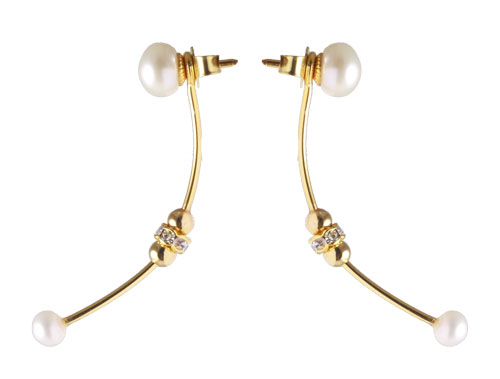
Your earrings are now finished. Insert the earstud through your ear, then place the earwire on the back of your ear. Finally, secure everything with the earnut.
Tie necklace with pink shell pearl
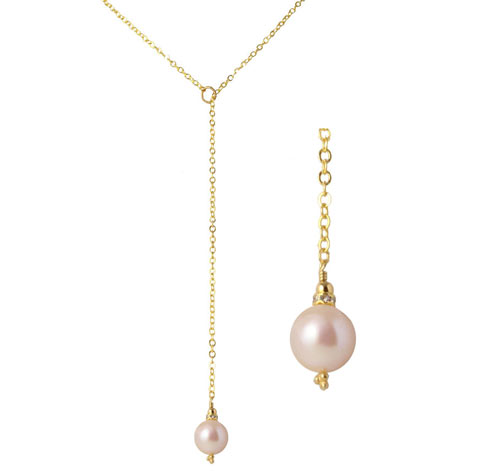
This tie necklace has a delicate, understated design with a clever clasp. In this version, a shell pearl is used at one end and a small closed ring at the other, through which the chain is pulled.
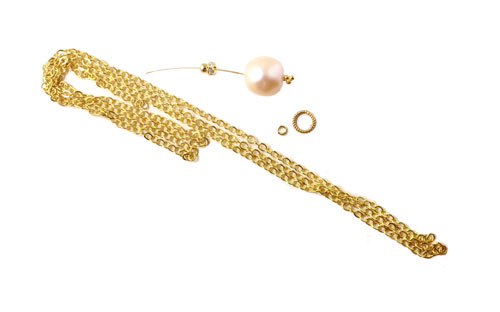
For this necklace, you’ll need the following DIY components:
70cm. 2x gold filled AR40 cable chain
1pc. twisted 7mm gilded silver ring
1pc. gilded 3mm silver jumpring
1pc. rose 10mm shell pearl
1pc. gilded headpin with 4 balls
1pc. gilded 4mm connector beads with crystals
1pc.gilded 3mm brass beads
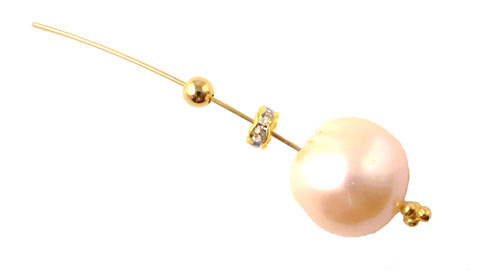
Start by threading the shell pearl on the headpin. Next, add the connector bead, and lastly the brass bead.
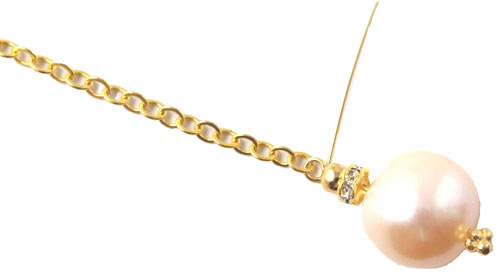
Here, I’ve passed the headpin through the end ring of the chain before forming the loop for the eye. You can also make the eye first and then attach it to the chain with a jumpring. Finally, trim off the excess headpin.
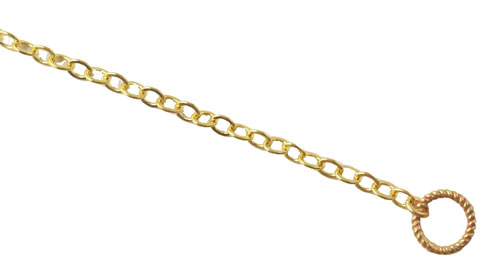
Secure the small twisted ring at the other end with a 3 mm jumpring. The easiest way to do this is by using a combination of chain‑nosed and round‑nosed pliers.
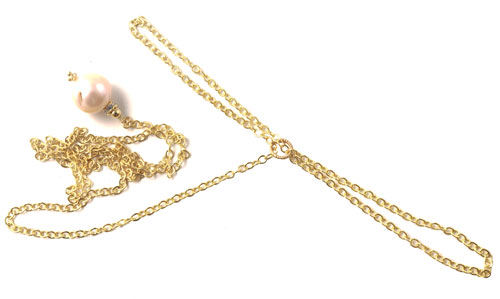
Finally, pull the chain through the twisted ring until it meets the pearl at the other end. You can now slip the necklace over your head, and the small ring will automatically be drawn up towards your neck. Make sure your chain is at least 60 cm long; otherwise, you won’t be able to put it over your head.
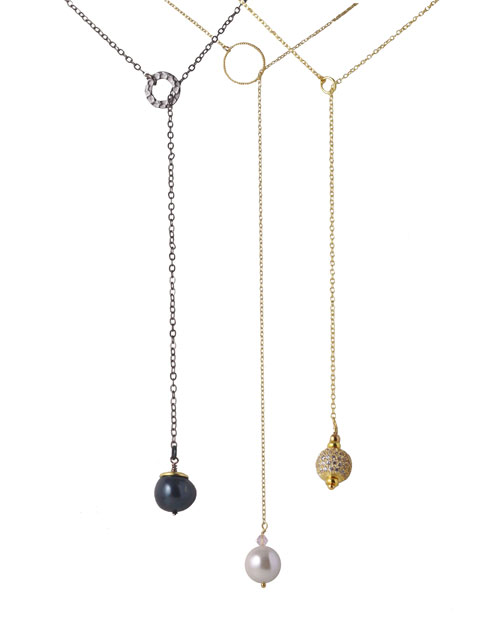
Here are three additional necklaces made in the same way.
Earwires with freshwater pearls
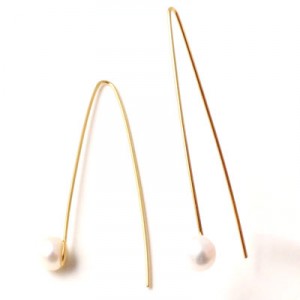
The long earrings above has been made with half drilled 6mm freshwater or shell pearls and long gold-plated silver earhooks with peg
and a little bit of glue.
Bangle bracelet with large white shell pearls
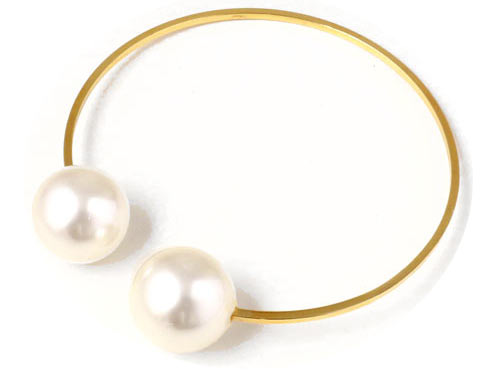
The bracelet shown here is very simple to make yourself. All you need is a bangle and two shell pearls with a 3 mm hole, plus some glue. Cut open the bangle with cutting pliers and glue the pearls onto the ends using a strong adhesive.
1 pc. golden bracelet ring
2 pcs. half-drilled shell pearls, 16 mm with 3 mm hole
Jewellery gue
Enjoy your beautiful new bracelet, earrings and necklaces.
If you have a comment, question or idea, feel free to write in the comment section below.
We will publicly show your name and comment on this website. Your email is to ensure that the author of this post can get back to you. We promise to keep your data safe and secure.