DIY pearl bracelet woven with Delica seed beads
Read on to learn how to weave a bead bracelet with Delica beads. Seed bead bracelets are one of today's hottest accessories. And in fact, it's not just in the fashion world that beads are hot. In the creative world too, DIY bead bracelets have once again become huge. Particularly popular is the classic bead weaving, where you can weave your way into bracelet designs in all sorts of patterns and colours using the tiny, delicate Delica seed beads from Miyuki.
If you love bead weaving but perhaps rarely wear bracelets, don't let that stop you. The homemade bracelets make perfect gifts for your loved ones. So there's no stopping you - take on the hobby project and weave away.
In this blog post Charlotte shows you step by step how to a make woven beaded bracelet using the traditional bead weaving technique. Once you have learned the procedure, you can vary the pattern, width and length as you like. On smyks.com you can find a vast assortment of the most popular Delica seed beads by Miyuki which are suited very well for bead weaving.
You can be sure that you will always find the right colours for your pattern design. In our bead shop in Copenhagen we offer jewellery making workshops where you can learn bead weaving from scratch. Those of you who live in Denmark and are interested: Click here to see our list of jewellery courses. The courses are held in English for those who need it.

Buy the Complete starter kit for bead weaving from Smyks here.
Woven bangle
You find the instructions on how to make this bangle at the end of this blog post.
You weave it on the beading loom, sew up all the threads and glue it on an open steel bangle.

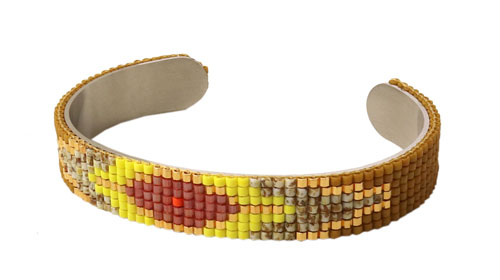
Woven bracelet with Delica beads


For this woven beaded bracelet we used the following materials:
- 1 beading loom
- Delica beads, bordeaux shiny
- Delica beads, metallic matte
- Miyuki beading thread, black
- 1 wide-eye beading needle, 6cm
- 2 cord ends for woven bracelets, 9mm metal or 9mm gold plated
- 1 chain extender, sterling silver
- 1 lobster claw clasp, 9mm, sterling silver
- 2 jumprings, 4mm, sterling silver or 4mm gold plated silver
- jewellery glue
- chain-nose pliers

This is the beading pattern for our example.

First you cut 6 threads – each with a length of 55 cm – and tie them to the upper cross bar of the frame.
The bracelet consists of 5 rows of beads, that’s why we need 6 threads.

Pull the threads through the grooves in the upper warp seperator.

Then you pull them through the grooves in the lower warp seperator, pool them and insert them into one of the holes. Tighten the threads and plug the hole with the wooden wedge to secure them.
In our example we pool all the thread ends in one hole because it is a bracelet with only 5 rows of beads. If you weave a wider bracelet with more rows of beads, you can distribute the threads equally over the two holes in the loom.

Then you cut approx. 2m of thread and tie it to the first warp thread on the left.
Fasten it with a double knot a bit above the grooves.

Take a wide-eye beading needle. It is a particularly flexible needle which can be split open in the middle to form a large eye. String the first 5 beads on the needle and leave them there for the time being. Sew underneath the warp threads from left to right and push the beads in between the threads.

Pull the needle through the beads from left to right while you continue pushing up the beads.

Then you sew back through the beads above the warp threads. Keep pushing up the beads while doing that.

Tighten the thread so the beads sit tightly together.

Make the next row in the same way. String 5 beads on the needle, sew from left to right underneath the warp threads, push the beads in beetween the threads.

Pull the needle through the beads and sew back through the beads from right to left above the warp threads.

Pull the thread again so the beads sit tightly together.

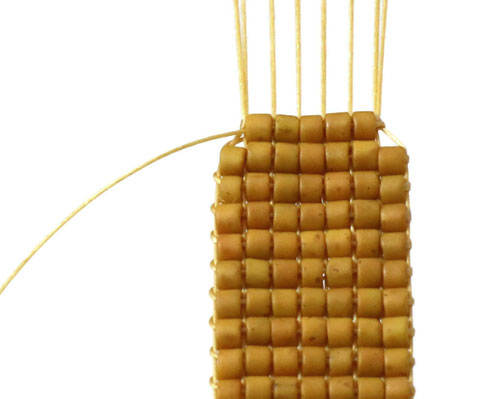
Continue like this … row after row …

When the bracelet has reached the desired length, tie the sewing thread around the warp thread on the left with a half knot.

Tighten the half knot so it sits closely to the bead. This knot’s job is to secure the last row of beads when you remove the bracelet from the loom.

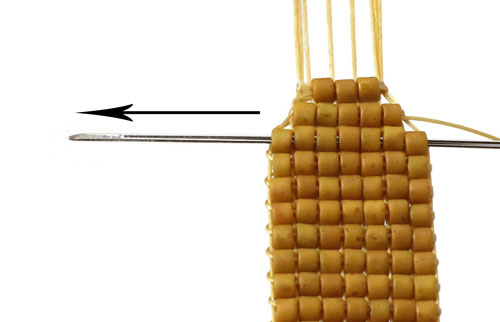
Take all the thread ends out of the hole in the loom, but leave the other end of the bracelet on the frame, because it is easier to tie the first knots while the bracelet is still fastened to the upper part of the beading loom.

Now you tie all the threads together with double knots.

Tie them in three knots that sit tightly to the beads on the one end of the bracelet.

Next you remove the upper cross bar of the frame, cut the threads and tie knots as you did on the other end of the bracelet.

Apply a bit of jewellery glue on the knots to secure them before you cut the excess threads.

Once this is done, you cut the excess threads underneath the knots.

Take the cord ends for woven bracelets and open them up a bit more with chain-nose pliers, so it becomes easier to place them over the beads as shown below.

Now you position the cord end carefully over the bracelet’s outer row of beads.

The cord end tucks away the first row of beads together with the knots.

Then you close the cord end again carefully with chain-nose or flat-nose pliers.

Finally, you fasten a lobster claw clasp to the one end and a chain extender to the other end with the help of a jumpring. In our blog post on men’s necklaces we explain how to open and close a jumpring correctly.

Your woven beaded bracelet is done.
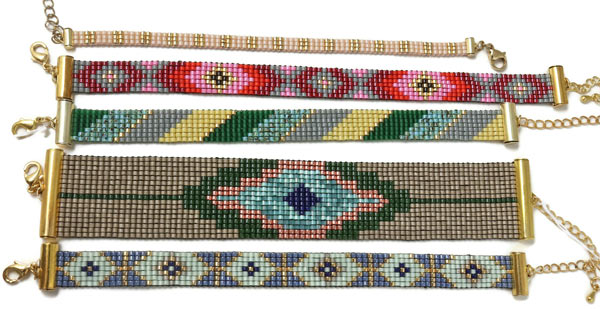
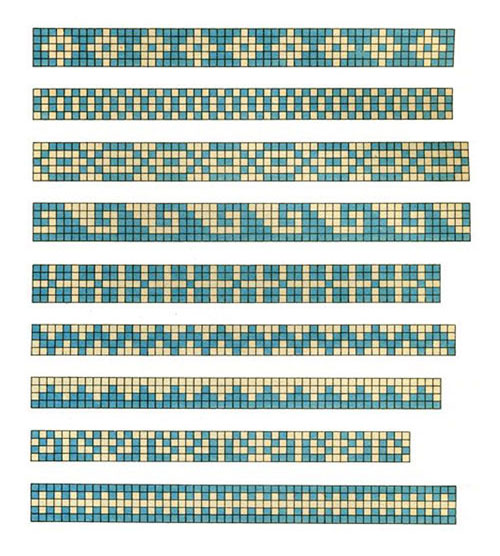
Here below you can find more inspiration, beading patterns and colour combination for beaded bracelets.
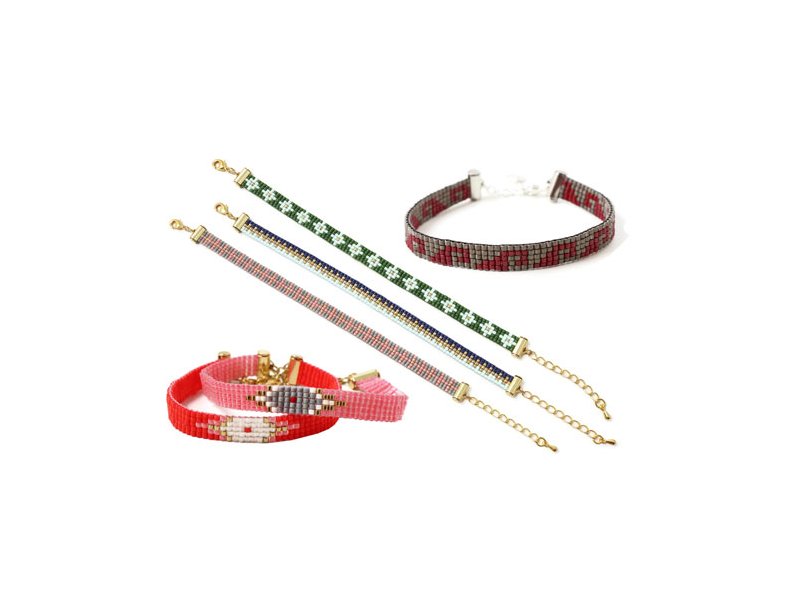
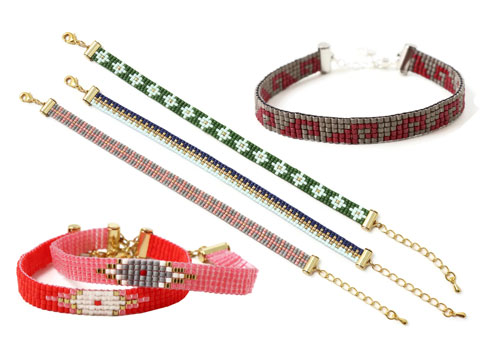
Woven bracelet with green and white beads

For this woven beaded bracelet we used the following Delica beads:
- Delica beads, avocado green
- Delica beads, sea foam
- Delica beads, cool gold
+ Miyuki beading thread, dark green
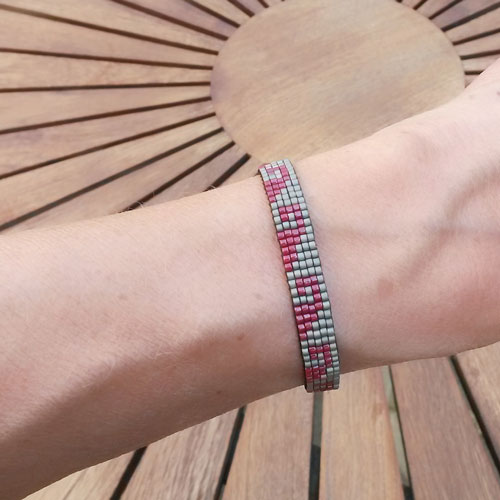
Woven bracelet with grey and pink beads

For this woven beaded bracelet we used the following Delica beads:
- Delica beads, frosted grey
- Delica beads, rose peach
- Delica beads, cool gold
+ Miyuki beading thread, dark grey
Woven bracelet with blue and golden beads

For this woven beaded bracelet we used the following Delica beads:
- Delica beads, cobalt blue
- Delica beads, sea foam
- Delica beads, cool gold
+ Miyuki beading thread, light blue
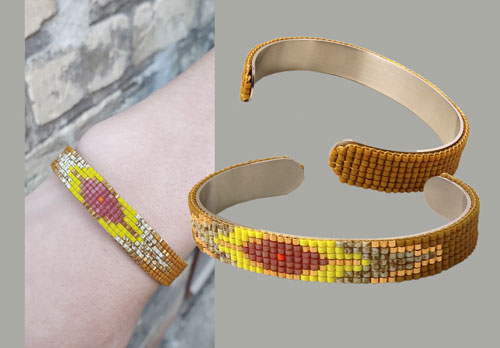
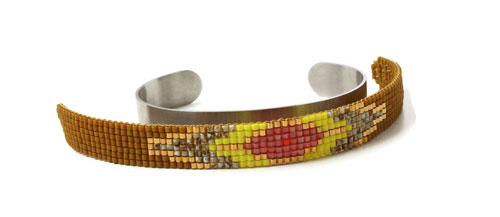
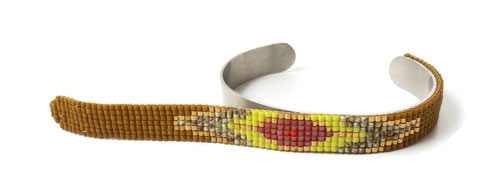
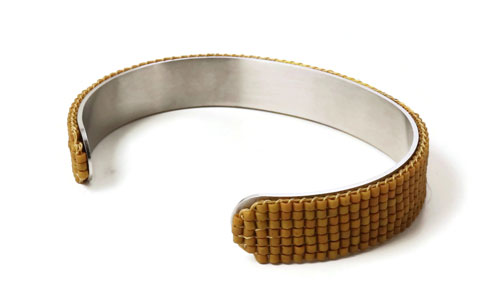
Woven beaded bangle
We used the following materials to make this beaded bangle:
- Delica beads, dark brownish yellow, DB2286
- Delica beads, 24K gold-plated, hexagonal, DBCO-0031V
- Delica beads, yellow-brown spotted, DB2262
- Delica beads, canary yellow, DB1132V
- Delica beads, dark red berry, silk effect, DB1805
- Delica beads, strong orange, DB0722V
- open bangle, matte steel, 10 mm
- Miyuki beading thread, golden
You weave the bracelet as described in this blog post, but the ends will have to be a bit longer, approx. 20cm, because we add two extra rows at both ends.
In this bracelet there are 7 beads in one row so it will fit on a bangle with a width of 10cm.
As the open bangle is rounded at the ends, the ends of the bracelet have to be narrower. Incorporate only 5 beads centered in the second last row. You can weave twice through this row in order to make it stay in place.

In the last row you only incorporate 3 beads in the centre.

Now you fasten all the threads. Start with the thread in the needle and sew back through the second last row.
.Then you sew through the third from last...
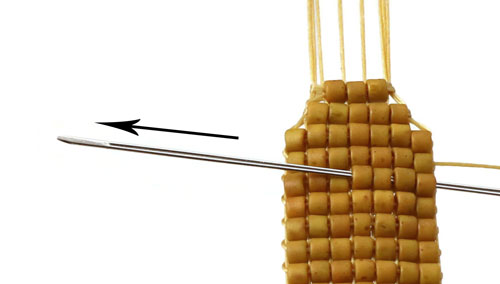
... and continue through the forth from last. Sew through the next 4 beads and cut the thread. This thread is now sewn up.
Cut all the threads somewhere in the middle of the bracelet in order to prevent any visible cut threads on the edges.
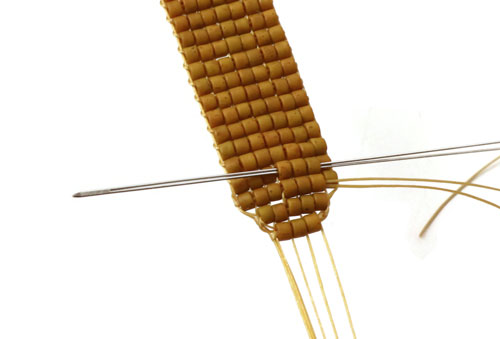
The other thread ends are sewn up in the same way. Here we fasten two threads together. You sew the thread through arbitrary beads and cut it off. You have to do that with every single thread. In case passing the needle through the beads becomes difficult, you sew a bit further away from the bracelet end.
Once the threads are sewn up and secured on both ends of the bracelet, you glue it on the bangle.

Apply a bit of jewellery glue on one of the bangle's ends and fasten the first part of the bracelet. Do it one section at a time.
Apply a bit of jewellery glue on the next part of the bangle and fasten the next section of the bracelet.
Continue gluing the bracelet to the bangle section by section.
Have fun designing and weaving your own beaded bracelets!
Weave your own homemade beaded bracelet
Is there anything better than jewelry you've created yourself? If you ask us, the answer is, of course, no. By weaving your own homemade bead bracelet, you're not only allowing yourself a cozy moment where creativity can flow freely, but you're also getting an end product that's like no other.
Weaving your own beaded bracelet may look difficult, but that's far from the case. With the help of our simple guide, you'll easily learn the tricks of the trade. That said, it's not a bad idea to be patient - while the technique is quick to pick up, weaving is a creative process that requires skill and takes time.
Create unique DIY bracelets
When it comes to DIY bracelets, the only limit is your imagination. In fact, as long as you have a loom, needle, thread and beads, you're good to go.
Maybe you have a head full of ideas for colors and patterns. If you find it difficult to translate your ideas about the look of the bracelet into the actual weaving, a tip is to draw the desired pattern on a piece of checkered paper. This way, you'll get a sense of whether the pattern looks good in your head, and you'll also have a physical step-by-step guide to the actual bead weaving.
If, on the other hand, you're stumped when it comes to diy bracelet design, there's plenty of inspiration for patterns and color combinations. Scroll through the page to see some of our examples.
We will publicly show your name and comment on this website. Your email is to ensure that the author of this post can get back to you. We promise to keep your data safe and secure.