


Many people ask us about the best way to make a pearl necklace, including which thread to use and how to attach the clasp. However, the answer depends on several factors, such as the type of pearls, the design of the necklace, and personal preference.
For “soft” beads such as freshwater pearls, wooden beads and small delicate beads, silk beading thread is usually the best choice. For stone and glass beads, however, it’s advisable to use Tigertail beading wire — a strong, nylon‑coated steel wire that withstands the friction caused by the sharp edges often found inside these beads. Beading wire is also easy to work with thanks to its sturdiness and the fact that it doesn’t fray easily.
The simplest way to attach a clasp to a pearl necklace made with beading wire is to use screw‑tite crimp beads. Their main advantages are their simplicity and durability. They also allow you to open and close the cord ends whenever you like, which is useful if you want to adjust the length of the necklace or bracelet.
A notable disadvantage of beading wire is that it is never as soft or as flexible as silk thread. As a result, a necklace strung on wire may break if it is bent or folded sharply, particularly if the beads have been strung too tightly.
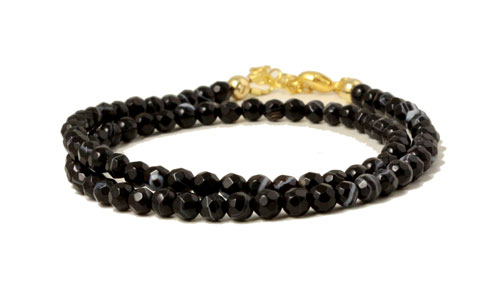
If you choose to use wire for your beads, you can create a neat and secure closure using screw‑tite crimp beads. Below, Smyks shows you how to finish a necklace or bracelet using this method.
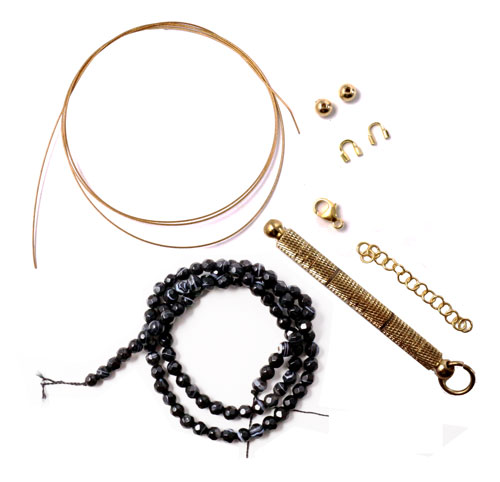
You will need the following materials:
Approx. 50cm of copper-coloured Tigertail beading wire, 0.38
1pc. strand of beads (We used black agate beads, 4mm, approx. 36cm
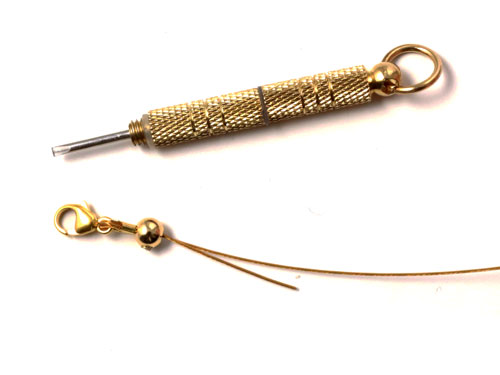
1pc. screwdriver for screw-tite cord ends
2pcs. round gilded brass screw-tite crimp beads, 4mm
2pcs. gilded brass wire protectors, 4 x 4mm
1pc. gilded Sterling silver lobster claw clasp, 9mm
1pc. gilded Sterling silver cable chain, approx. 3 – 4cm.
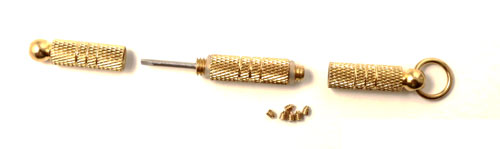
This screwdriver set includes ten extra crimps and six additional screw‑tite screws. The screwdriver itself can be taken apart into three sections: the middle section holds the tool, while the back section contains the spare screws and crimps.
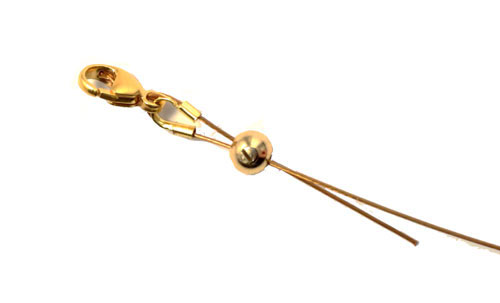
Start by carefully unscrewing the screw on the crimp bead—just enough to allow the wire to pass through the bead twice. Thread the wire through the crimp bead, then through the wire protector, and finally back through the bead again. You can attach your lobster‑claw clasp at this stage, as shown above, or you can choose to add it later using a jumpring.
Carefully pull the wire to ensure the protector and the crimp bead sit snugly together. Then tighten the screw with the screwdriver to secure the wire in place.
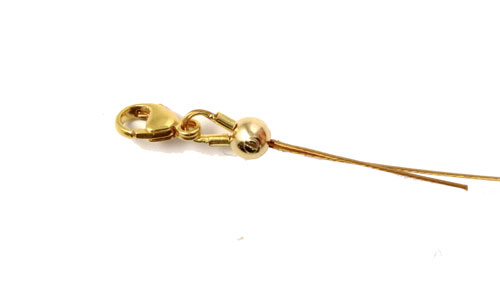
This is how it should look once the components are assembled and the screw has been tightened.
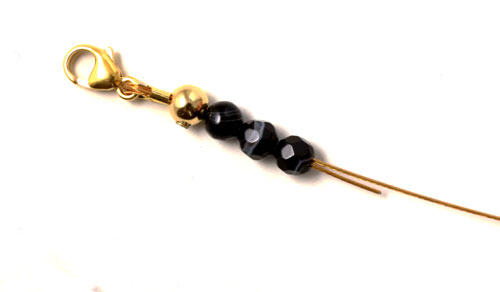
can now begin threading beads onto the wire. Allow a short length of the wire to pass through the beads twice; this strengthens the necklace and makes it easy to adjust the length later. Add as many beads as you like — we used approximately 37 cm for a double‑wrap bracelet to fit a standard woman’s wrist.
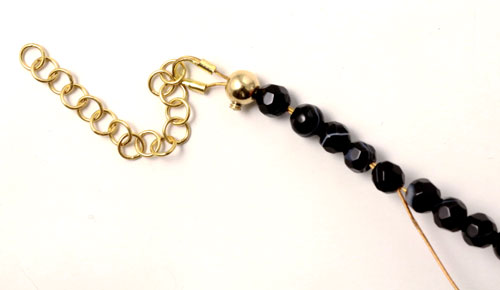
Finish your bracelet in the same way you began. Thread the wire through the screw‑tite crimp bead, through the protector, and back through the crimp bead. We have attached the cable chain at this stage, but you can also add it later with a jumpring. Finally, thread the wire back through five or six beads.
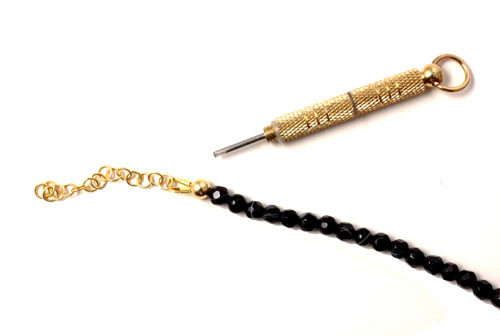
Gently pull the remaining wire that peeks out after you have threaded it back through five or six beads. This tightens the wire and ensures there is no excess space at the ends. Then tighten the screw and trim off the remaining piece of wire.
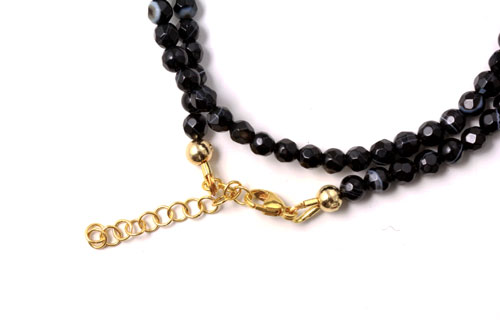
Your closure is now complete. The small length of cable chain makes the bracelet adjustable. If you do not wish to adjust the length, you can omit the cable chain and fasten the lobster‑claw clasp directly onto the wire protector.
Your bracelet is now finished.
Enjoy making and wearing your new jewellery!
See also our other blog entries featuring similar techniques:
Have you got any questions? Feel free to comment below.
We will publicly show your name and comment on this website. Your email is to ensure that the author of this post can get back to you. We promise to keep your data safe and secure.