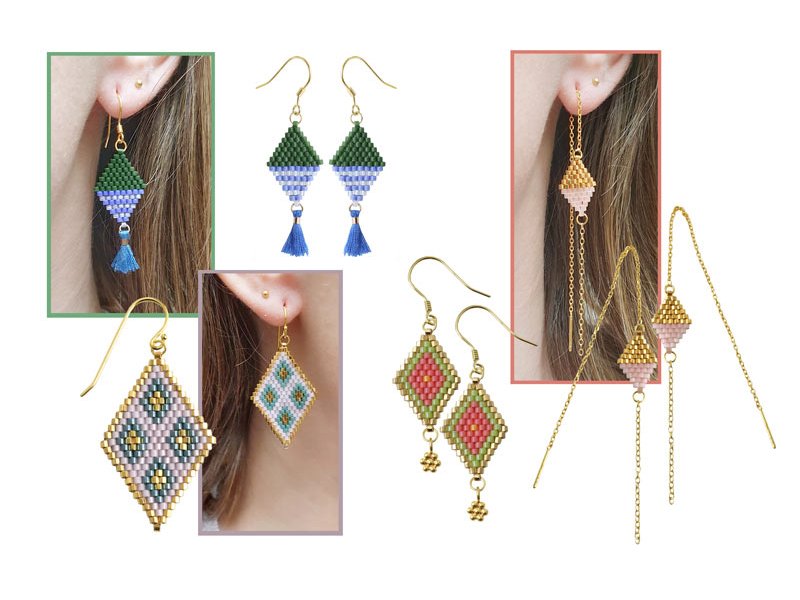

In this blog post, you can learn how to use the brick stitch technique to make colorful earrings with delicate patterns using delica beads.
The Brick Stitch jewellery technique has a fascinating history, with its origins in Native American tribal communities. The name Brick Stitch comes from the technique’s distinctive pattern, which resembles rows of brickwork. Traditionally, it was used to create bead‑embroidered pieces, with each bead stitched into the fabric one by one. Over time, the technique has evolved and found its place in modern jewellery making.
The charm of Brick Stitch in handmade jewellery lies in its versatility and its ability to produce detailed, patterned designs. By arranging beads in rows that look like tiny bricks, you can build up layers and form striking shapes – such as the diamond motifs in the earrings featured in this blog post. Once you get the hang of it, the technique gives you enormous creative freedom, whether you prefer simple geometric patterns or more intricate, artistic designs.
Brick Stitch also invites you to experiment with layers and textures, adding a sense of dimensional depth to your pieces. It’s an ideal technique if you want to create jewellery that stands out and has a detailed, handcrafted feel, complete with your own personal touch.
Click the links below to download additional patterns for Brick Stitch designs.
Take a look below, where our designer Charlotte guides you step by step through making your own Brick Stitch earrings.
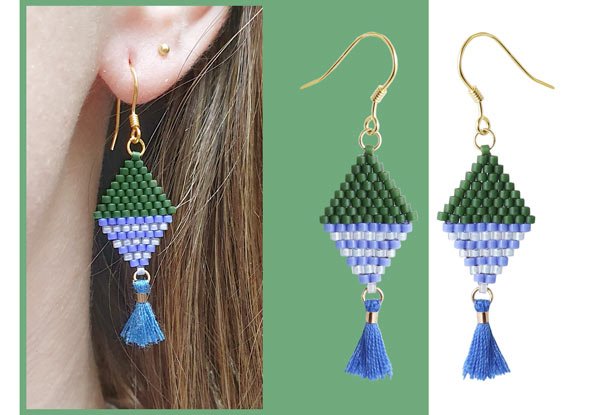
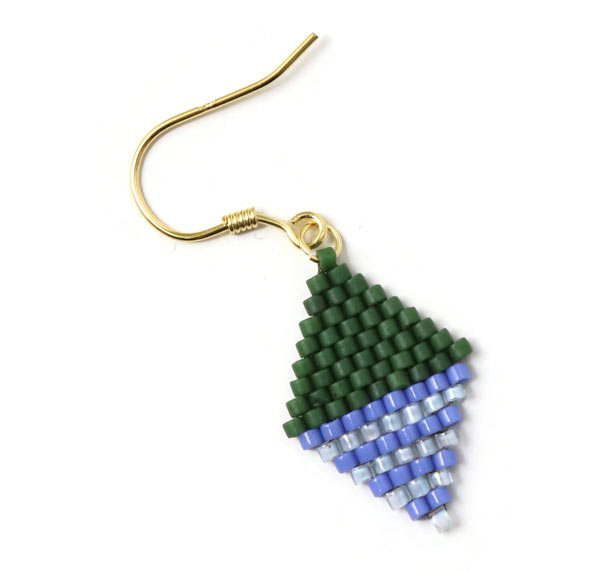
Earrings with Brick Stitch Rhombus
Click here for the print version.

We used the following components to make these earrings:
- 1 pair of earwires with loop and spiral, gold-plated sterling silver
- 2 jumprings, 3.5x0.5mm, gold-plated sterling silver
- Delica beads, matte dark olive
- Delica beads, light sapphire
- Delica beads, light aqua
- 2 mini tassels
- FireLine, 6LB, white, approx. 2x1m
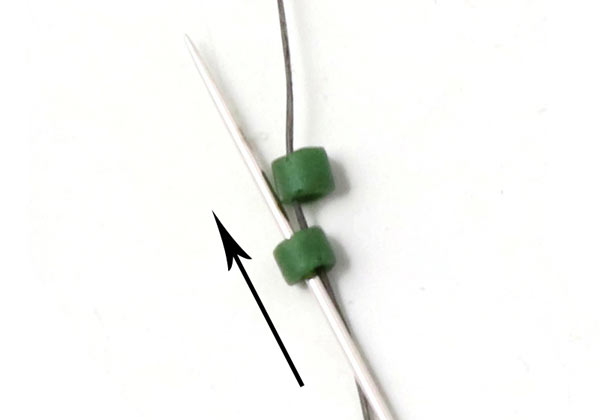
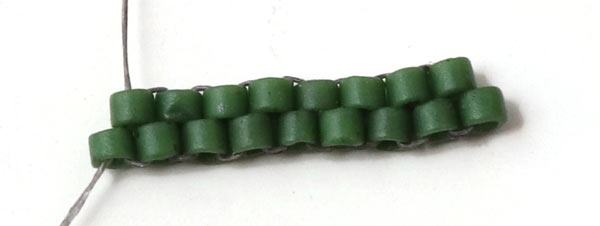
First, you thread 2 beads. Then, you sew through the 1. bead (from the bottom up).
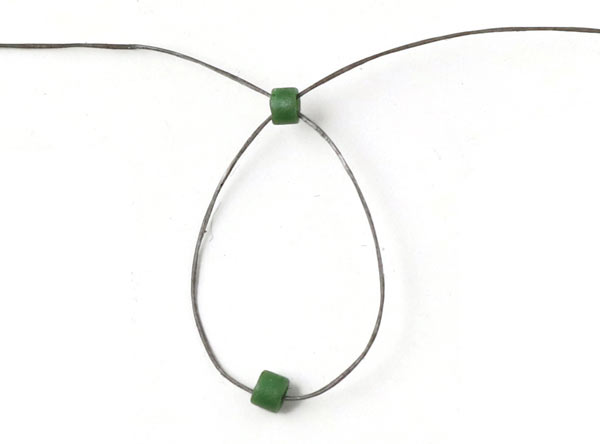
When you pull the thread, you will get a loop.
Tighten the thread, so the beads come to sit closely to each other. The end of the thread should be approx. 8-10cm long.
Sew through the bead to the right (top-down) This first row is sewn from left to right.
Thread a new bead ... and sew through the bead to the right (top-down).
Tighten the thread ... so the 3 beads sit tightly together.
Sew through the bead to the right (from the bottom up).
Thread a new bead ... and sew through the bead to the right one more time (bottom-up).
Sew through the new bead to the right (top-down).
Tighten the thread ...
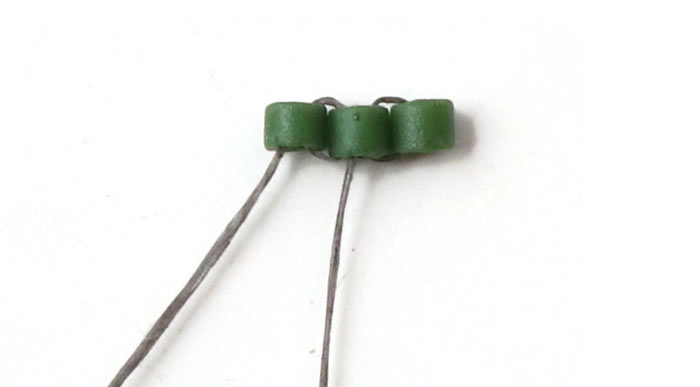
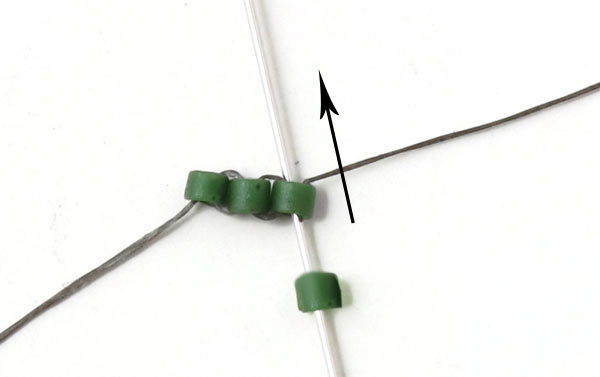
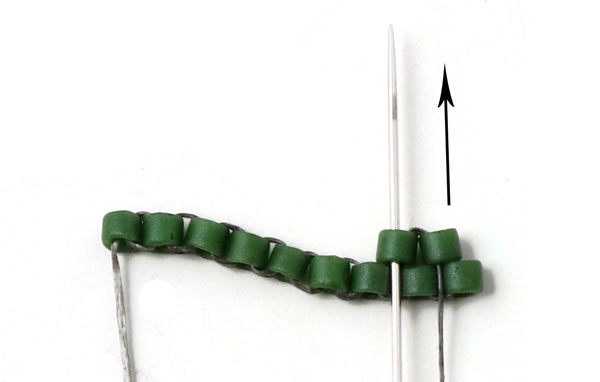
Continue like this ... adding 1 bead at a time ... until you have 9 beads that sit tightly next to each other.
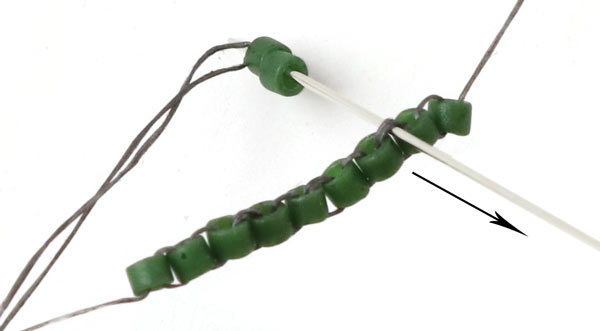
Thread 2 beads ... and sew underneath the thread between the 2. and 3. bead (towards yourself).
Tighten the thread ...
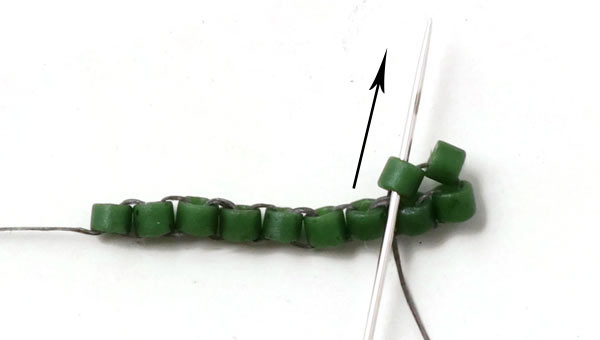
Sew upwards back through the bead to the left (see picture)...
... and continue through the bead to the right (see picture).
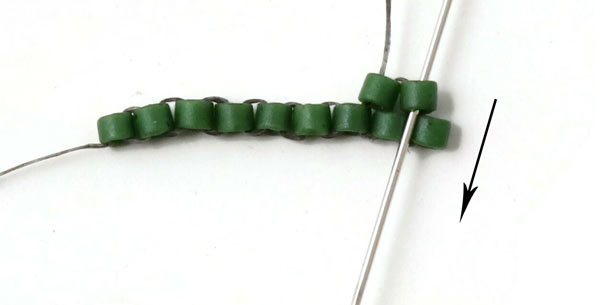
Sew back through the bead to the left one more time (see picture).
Tighten the thread. Now the first 2 beads in the 2. row are fastened (shifted).

Now you add 1 bead at a time. Thread 1 bead ... and sew underneath the thread between the 3. and 4. bead from the right (towards yourself).
Tighten the thread.
Sew back through the bead (bottom-up).

Tighten the thread. Now the first 3 beads in the 2. row are fastened (shifted).
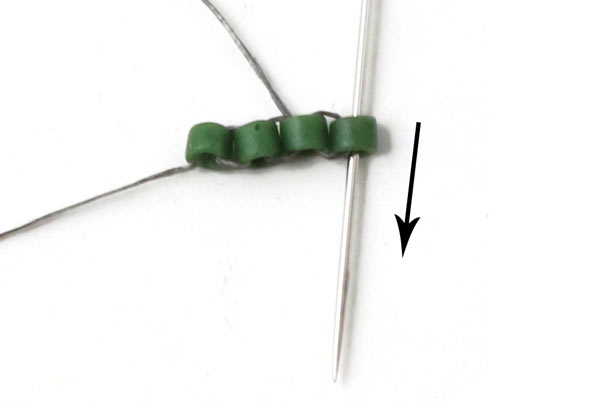
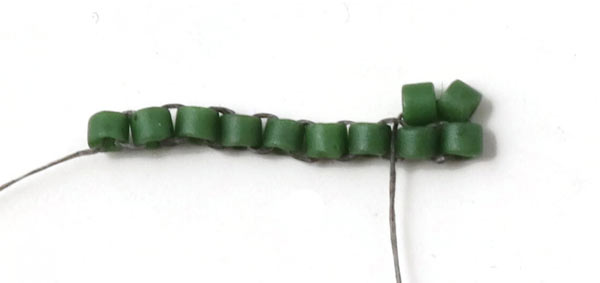
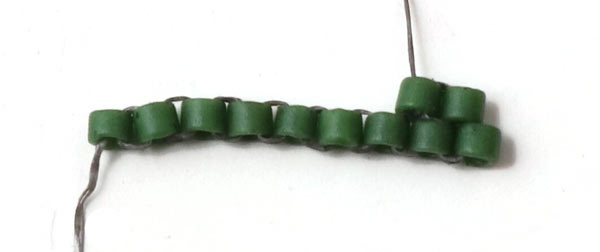
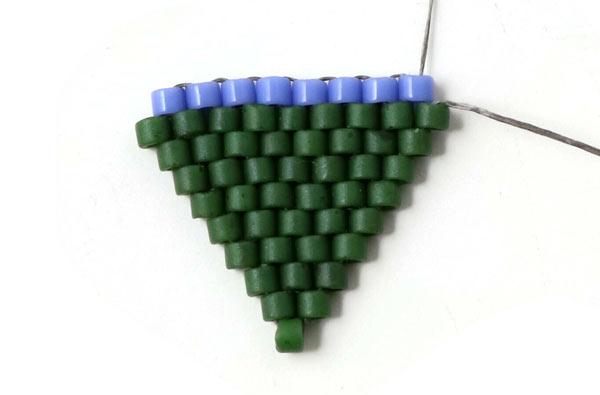
Continue like this adding 1 bead at a time ... until there are 8 beads in the 2. row.
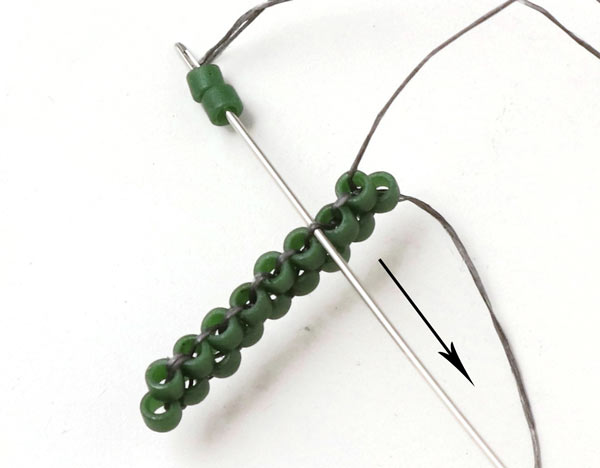
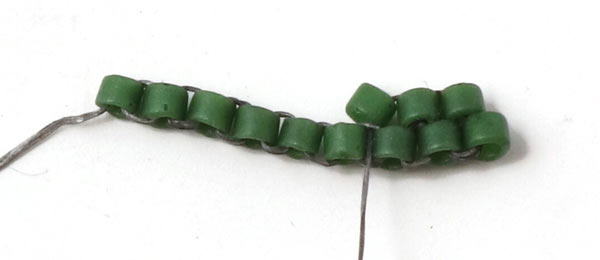
Turn your work, so you can continue sewing from right to left. Every time you start a new row, you add 2 beads and fasten them as explained above. After that, you add 1 bead at a time.
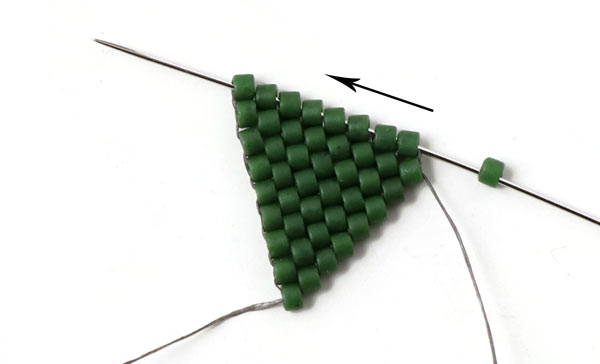
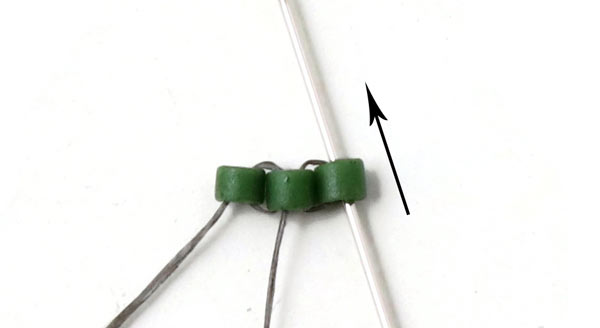
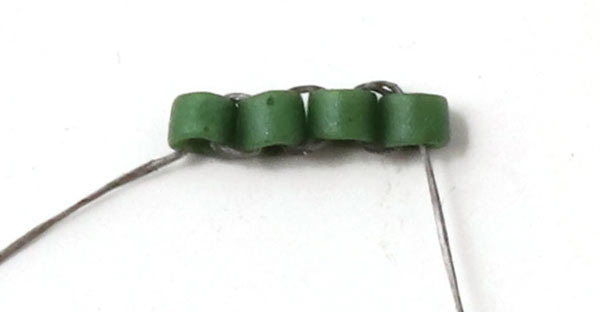
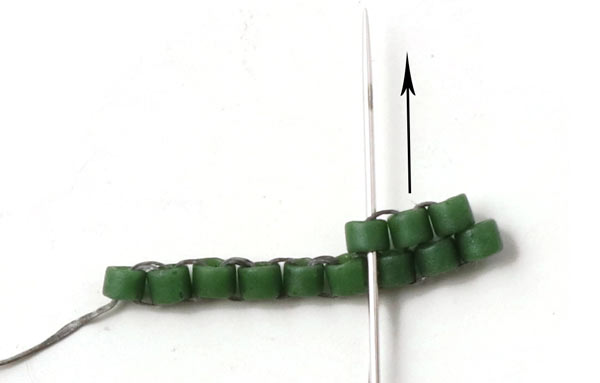
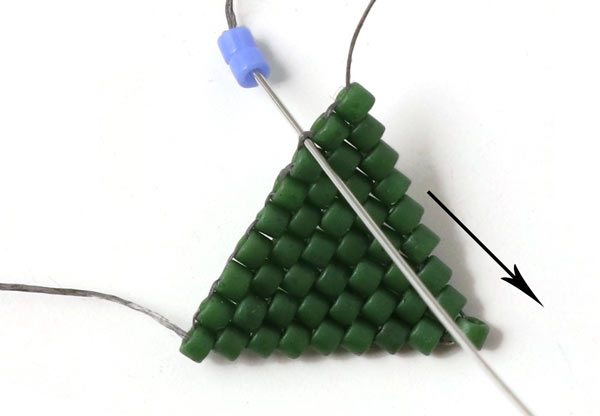
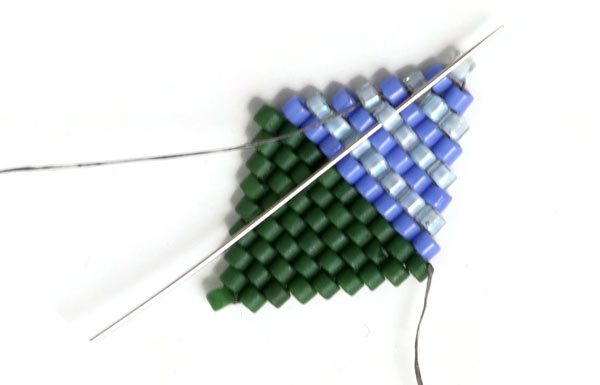
Continue like this until there is only 1 bead missing. You fasten the last bead at the tip by sewing through all the beads along the outer edge.
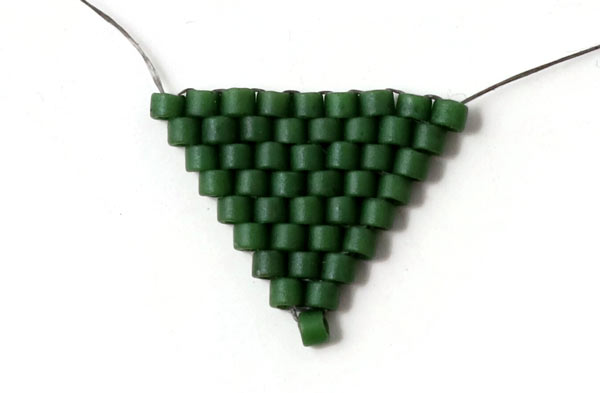
Tighten the thread. Now you can sew the second half of the earring.
You start by threading 2 blue beads. Then you sew underneath the thread between the 2. and 3. bead from the right (towards yourself).
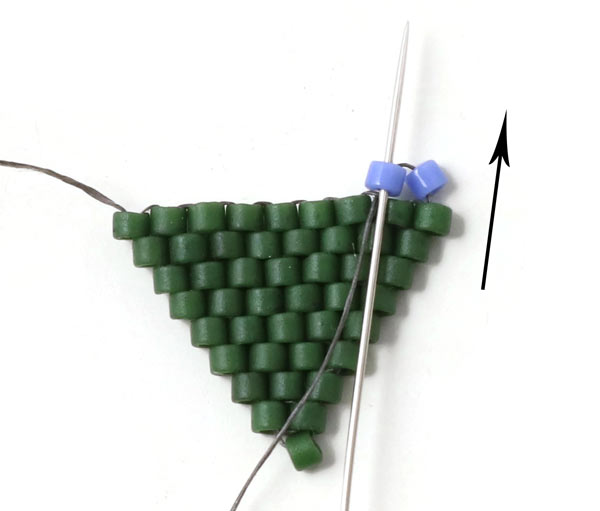
Sew back through the blue bead to the left (bottom-up)...
... and continue through the blue bead to the right (top-down).
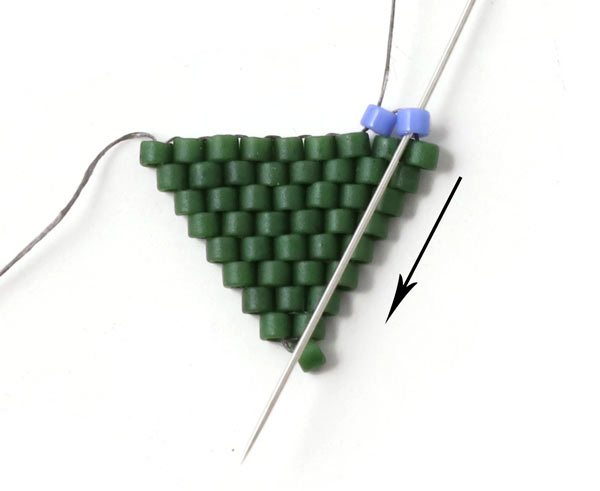
One more time through the bead to the left (bottom-up). Continue like this ... adding 1 bead at a time.
When you have fastened 8 beads, you turn your work.
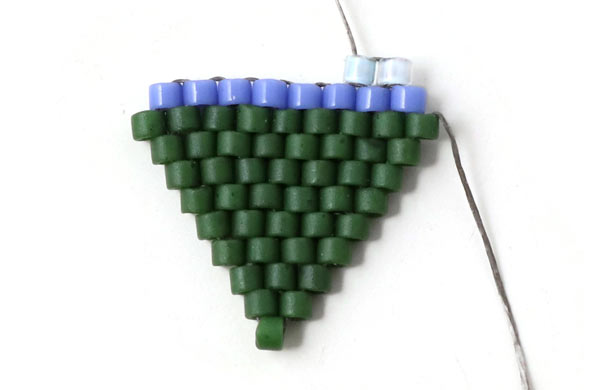
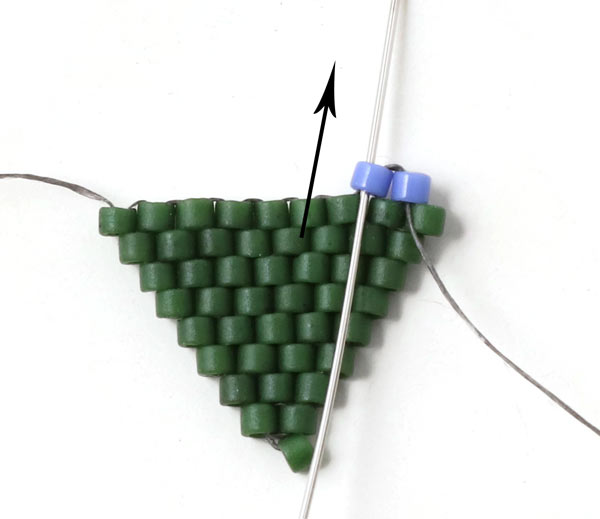
After that, you sew on the next row in the same way. You start by threading 2 beads.
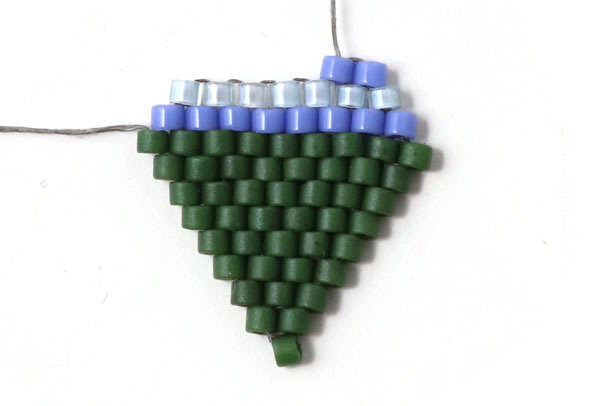
Continue adding rows of beads alternating between blue and light turquoise.
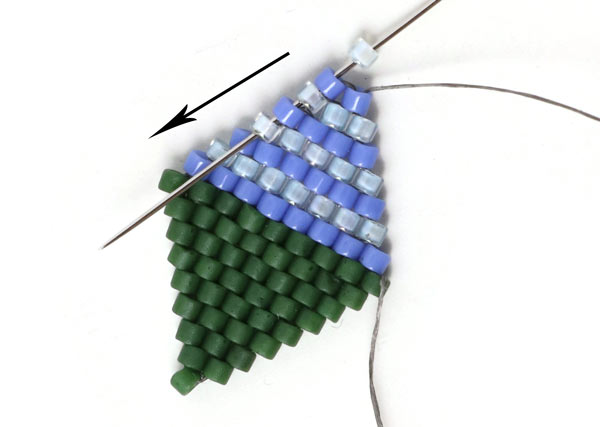
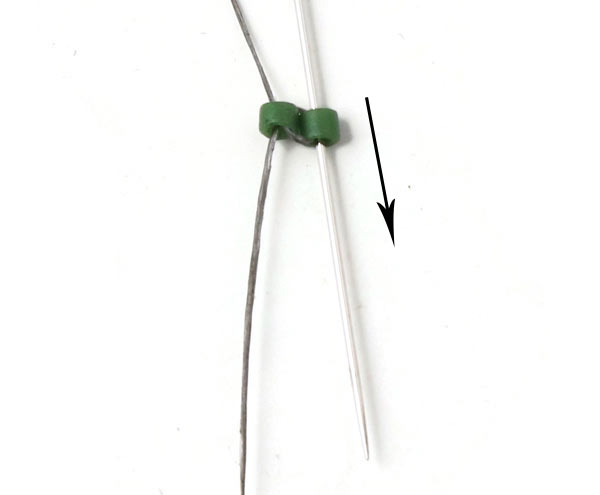
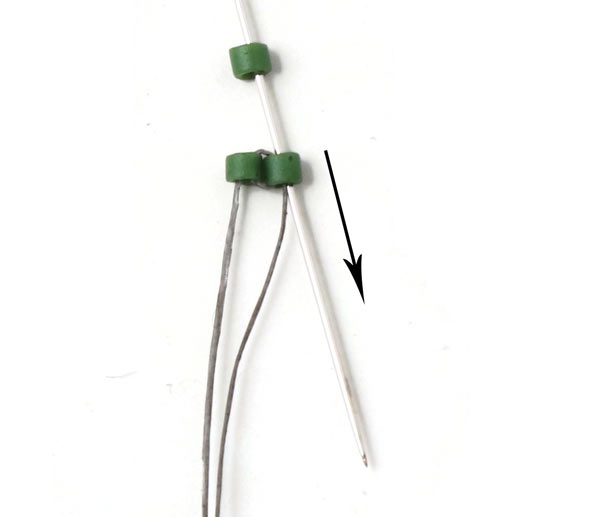
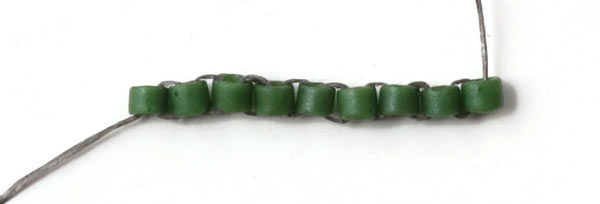
Now you fasten the last bead and sew up the thread. Sew through the first 4 beads along the outer edge.
Fasten the thread by sewing it up through 4-5 random beads. Make sure that he thread remains invisible. After that, you sew up the other end of thread in the same way.
Pull a jumpring through the green bead on top and insert the jumpring into the eyelet of the earwire.
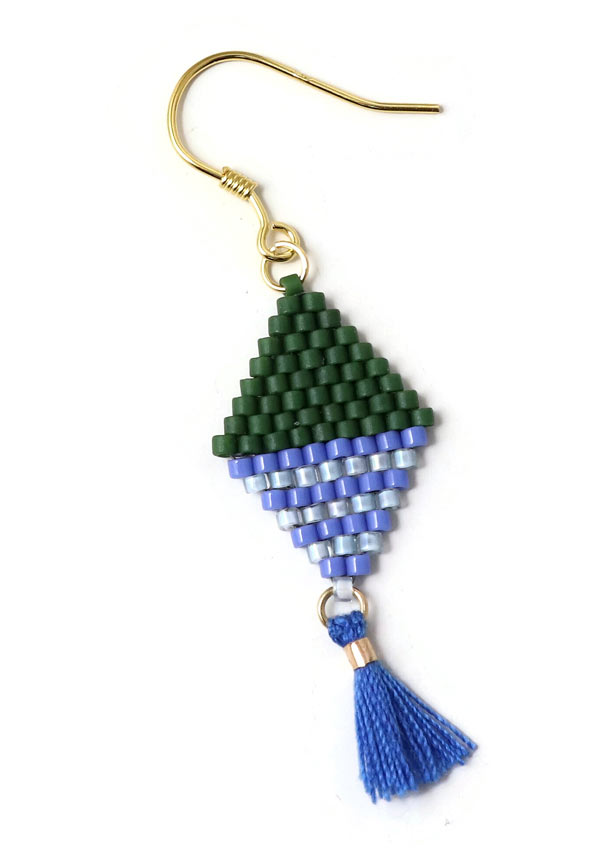
Open the eyelet of the tassel ... pull it through the bead at the bottom ... and close the eyelet again carefully.
Now your first earring is done. Make your second one in the same way.
Earrings with Large Brick Stitch Rhombus
We used the following components to make these earrings:
- 1 pair of earwires with ball, gold-plated sterling silver
- 2 jumprings, 3.5x0.5mm, gold-plated sterling silver
- Delica beads, 24 carat gold inlaid, hexagonal
- Delica beads, pale rose
- Delica beads, dark teal
- FireLine, 6LB, white, approx. 2x1.5m
The procedure is the same as described in the 1. example.
Earthreads with Small Brick Stitch Rhombus
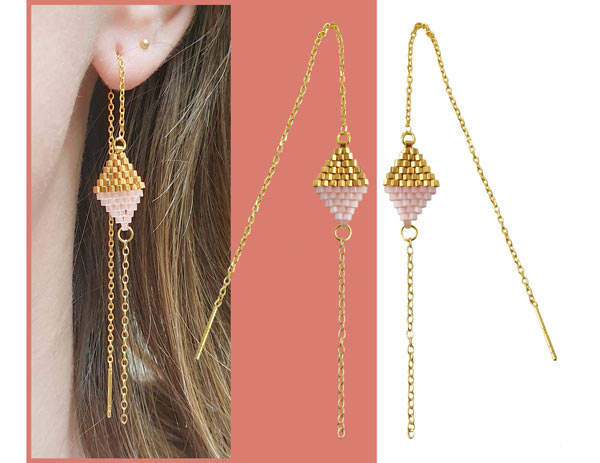
We used the following components to make these earrings:
- 1 pair of earthreads, cable chain with peg and loop, 10cm, gold-plated sterling silver
- cable chain, 2x4cm, gold-plated sterling silver
- 2 jumprings, 3.5x0.5mm, gold-plated sterling silver
- Delica beads, 24 carat gold inlaid, hexagonal
- Delica beads, rose peach, silk effect
- FireLine, 6LB, white, approx. 2x1m
The procedure is the same as described in the 1. example. Finally, you open the eyelet of the earthread and insert it into the top bead of the rhombus.
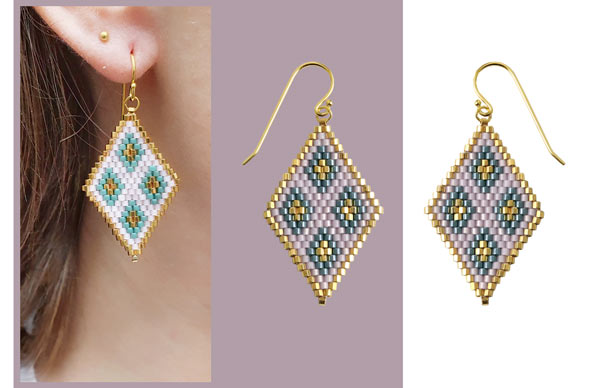
Earrings with Brick Stitch Rhombus and Flower
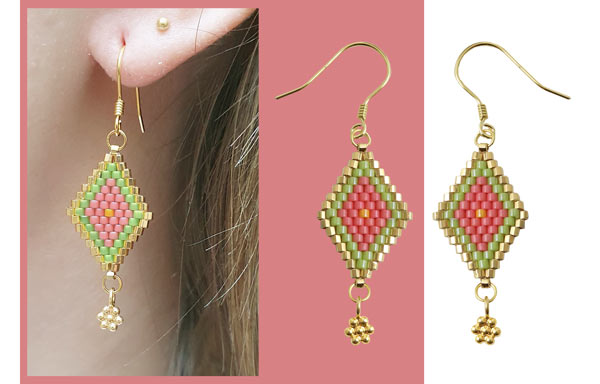
We used the following components to make these earrings:
- 1 pair of earwires with spiral and loop, gold-plated sterling silver
- 4 jumprings, 3.5x0.5mm, gold-plated sterling silver
- Delica beads, 24 carat gold inlaid, hexagonal
- Delica beads, chartreuse
- Delica beads, water melon
- Delica beads, egg yolk yellow
- 2 flowers with eyelet, gold-plated sterling silver
- FireLine, 6LB, white, approx. 2x1m
The procedure is the same as described in the 1. example.
We will publicly show your name and comment on this website. Your email is to ensure that the author of this post can get back to you. We promise to keep your data safe and secure.