Dear guest
In this jewellery blog by Smyks, we teach you a knotting technique that is particularly up-to-date. It is used to make the popular friendship bracelets, among other things. This technique is a bit time-consuming but not difficult once you get started, and the result is worth it.
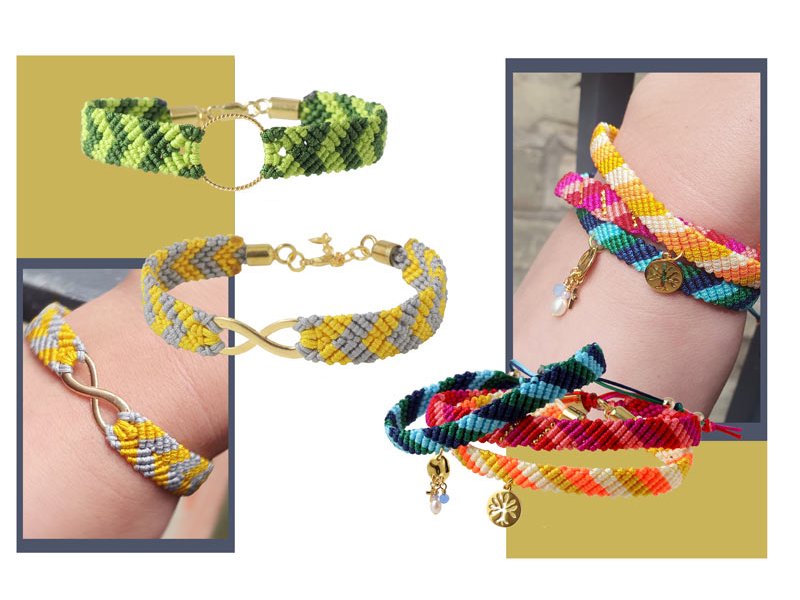
Charlotte designed these bracelets with beautiful colour transitions and made them with classic, cheap and durable nylon cord, which is available in many beautiful colours and diameters. Finally, she decorated the bracelets with various jewellery pendants and jewellery clasps.
If you prefer wider and more robust bracelets, you can take cord with a diameter of 1.2mm or 1.5-2mm instead of the 0.9 mm cord used in the examples.
In our instructions, we refer to a special knotting board, but you can make do with a regular board with a nail in it (or something similar) to attatch the strings to.
Enjoy :-)
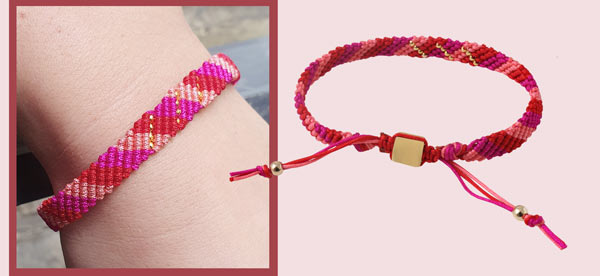
Friendship Bracelet in Shades of Red
We used the following DIY components to make this bracelet:
- 2 x 80cm nylon cord, 0.9mm, red
- 2 x 80cm nylon cord, 0.9mm, deep pink
- 2 x 80cm nylon cord, 0.9mm, pink
- 1 square bead, 8x8cm, gilded steel
- crimp beads, 2x1.5 mm, gilded brass
- 2 gilded breads (doublé), 4mm
+ scissors
+ lighter (to melt the cord ends with)
This bracelet is closed with the classic macramé closure that allows to adjust the length by pulling the two cords.
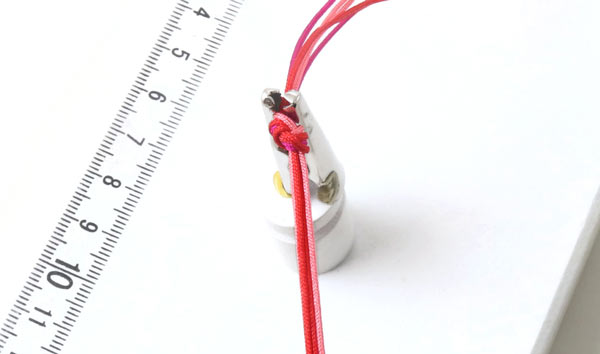
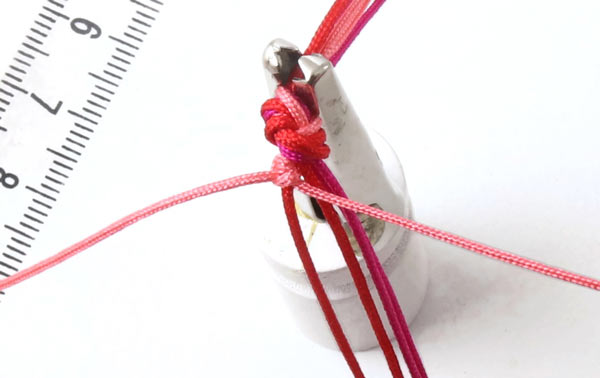
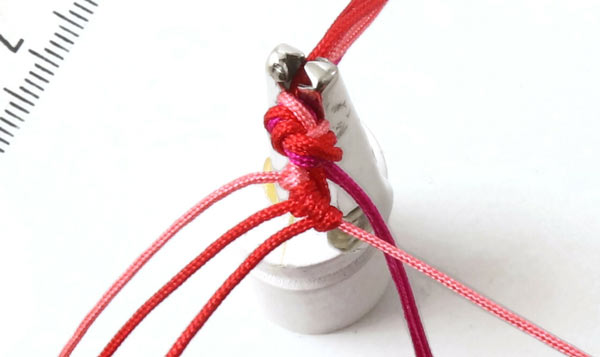
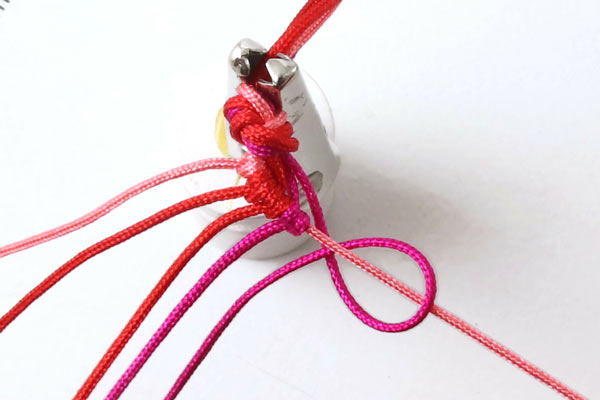
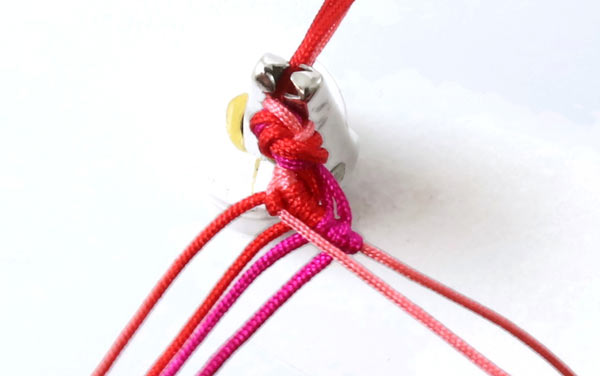
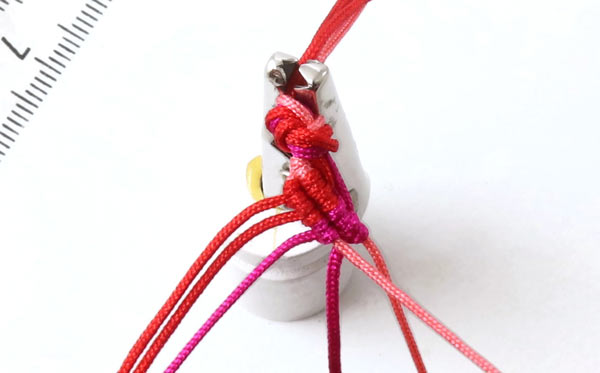
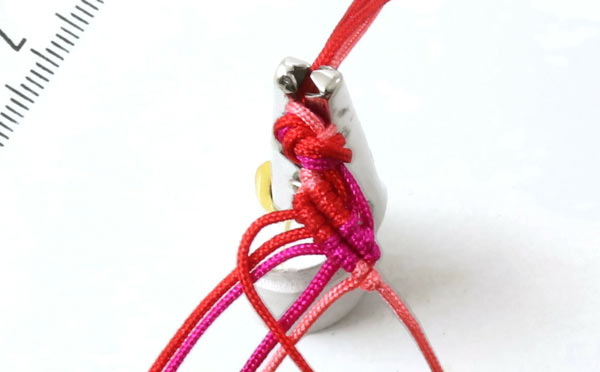
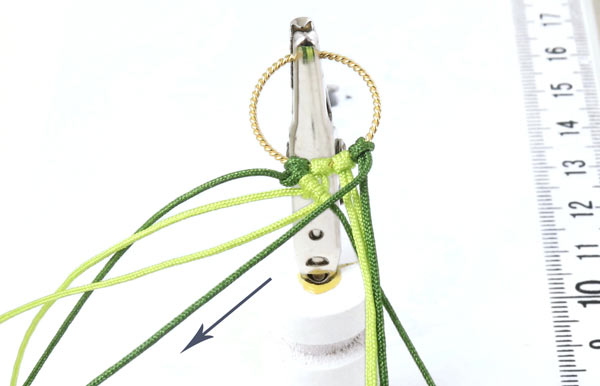
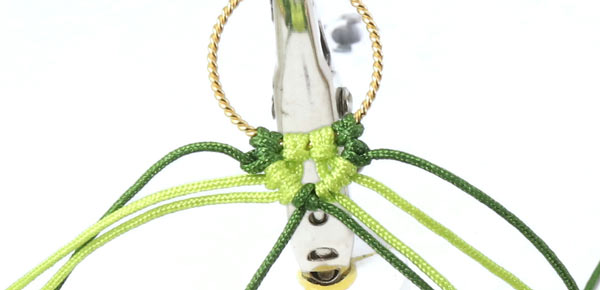
Combine all the strings in one knot. The cord ends should be approx. 15cm long. Fasten the strings to the knotting board´s clip.
Arrange the colours ... 2 cords in each colour.
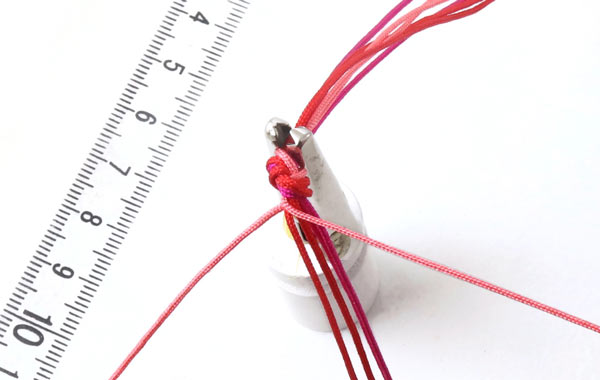
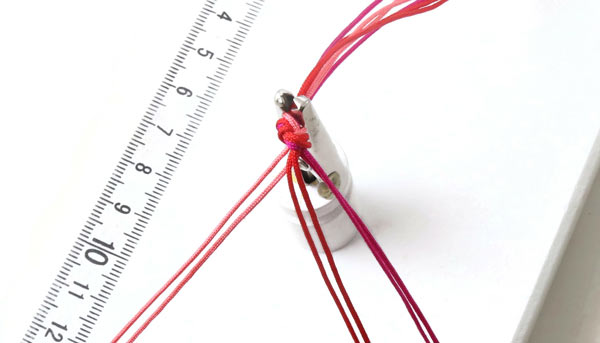
Pull one of the pink cords to the right (from now on, we will call it the anchor cord because all the other cords are knotted around this one).

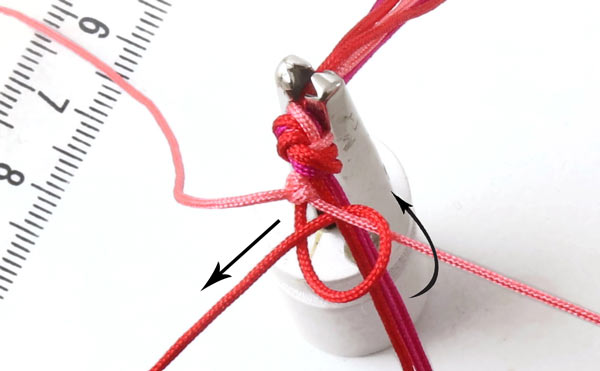
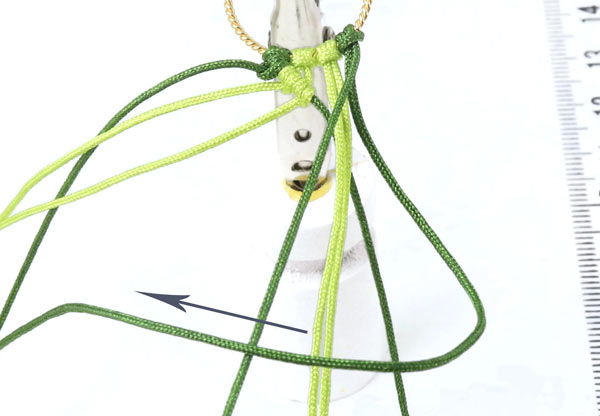
Place the other pink cord over the anchor cord ... from the left to the right.
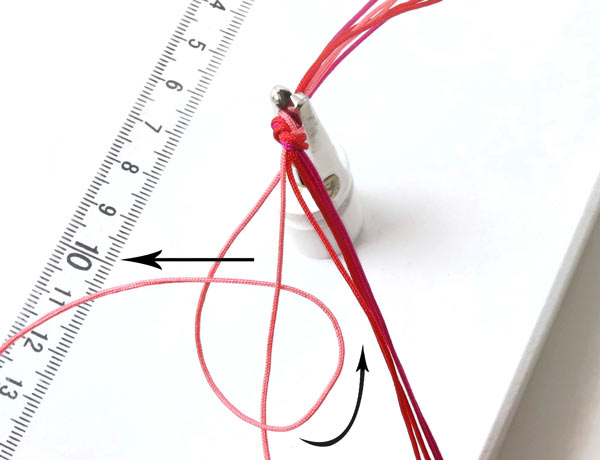
Direct the cord back underneath the achor cord ... and make it cross above itself.
Pull the anchor cord to the right while tightening the knot. You always tauten the anchor cord when you tie a knot around it. This is the first knot.
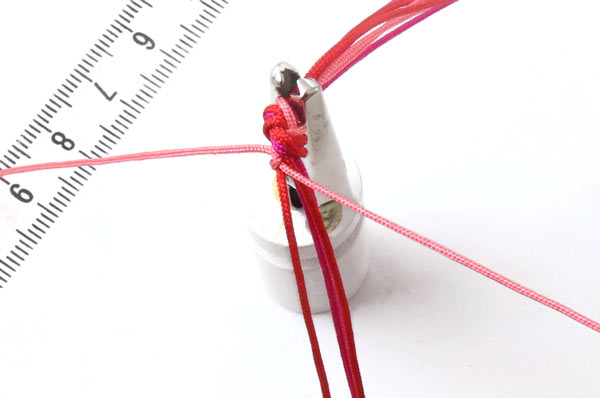
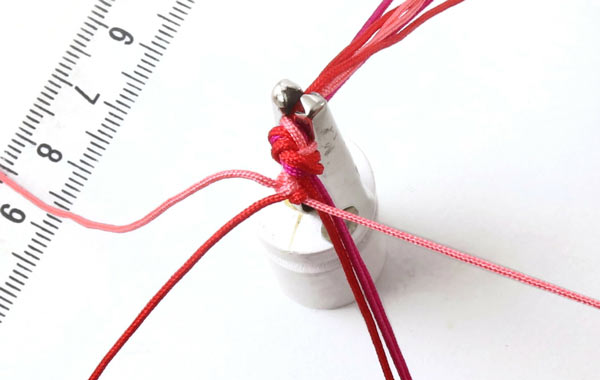
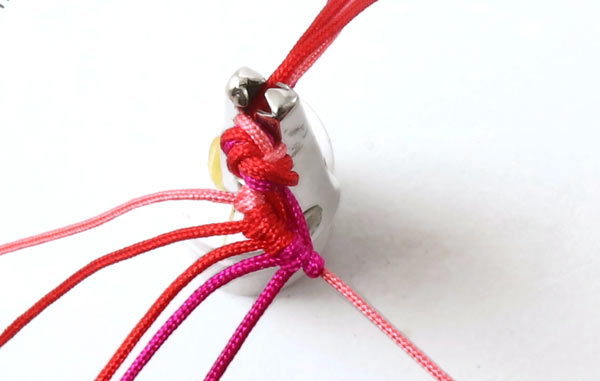
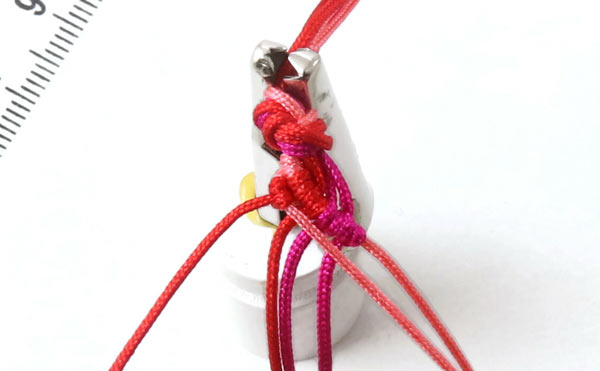
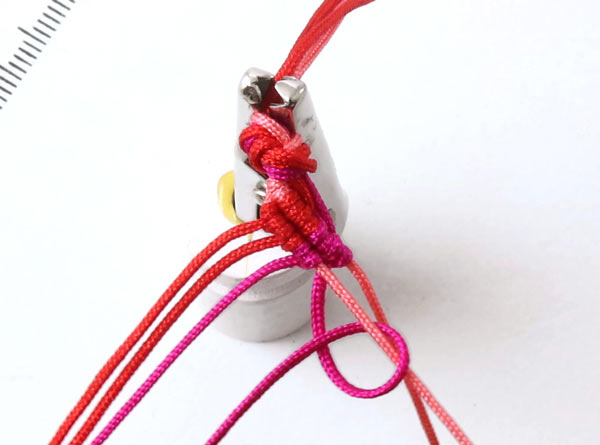
Then you tie a second knot with the pink cord ... in the same way. You always tie 2 knots with every cord.
Tighten the knot. The first two knots are done.
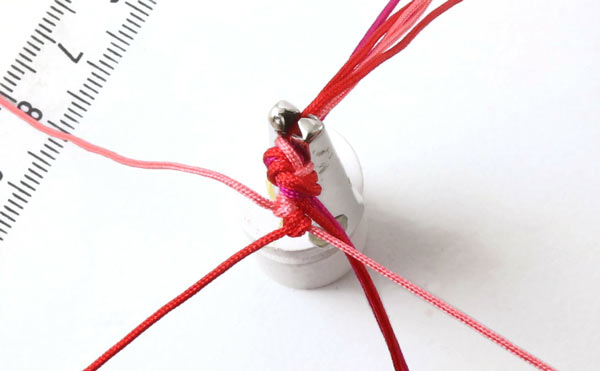
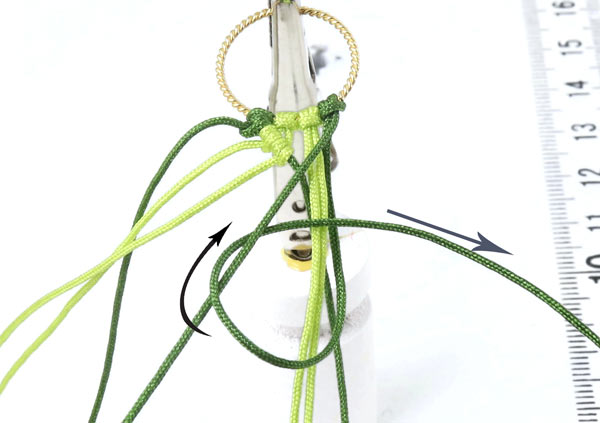
Now you take the red cord ... and tie a knot around the anchor cord in the same way you did before.
The anchor cord is always placed avove the other cords.
Tighten the cord. Now the first knot with the red cord is done.
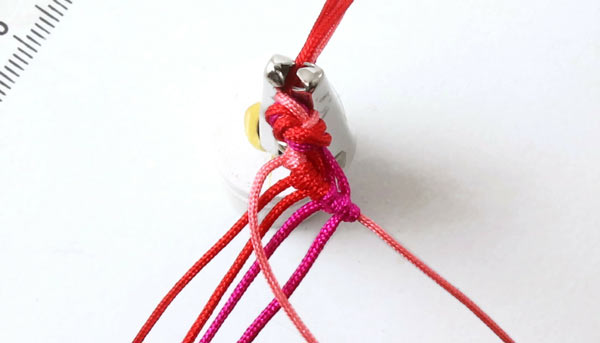
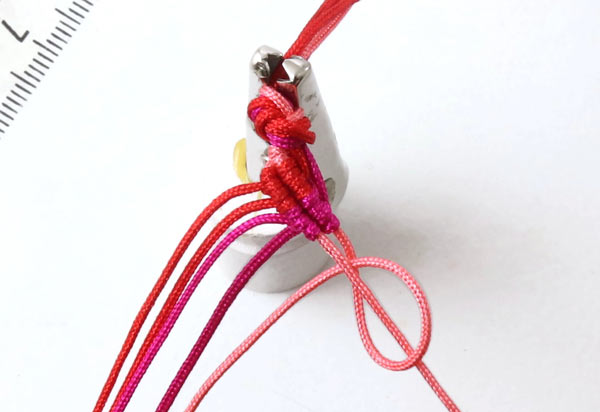
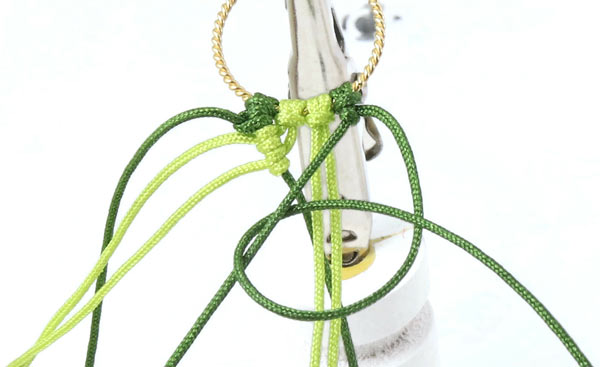
Tie a second knot with the red cord in the same way. Now you have 2 red knots.
Next, you tie 2 knots with the other red cord. Once that is done, there are 4 red knots in all.
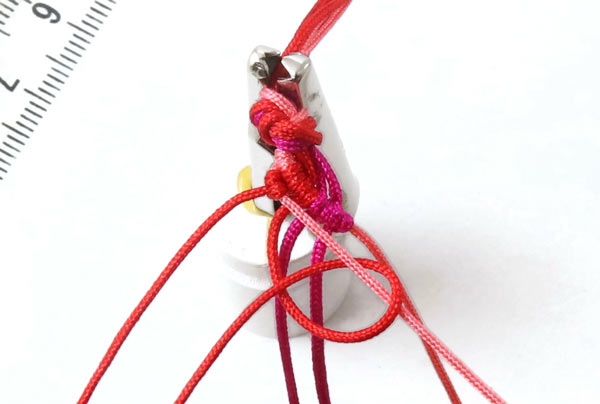
After that, you take the deep pink cord and tie a knot around the pink anchor cord in the same way.
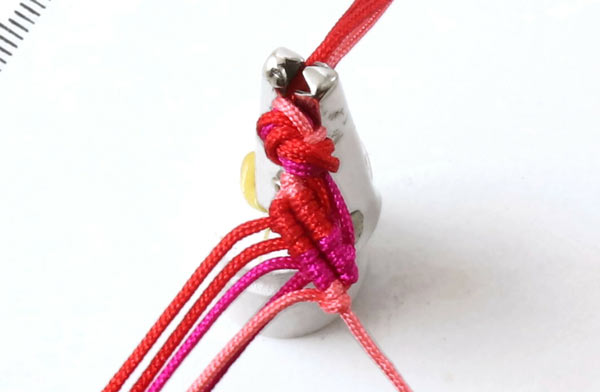
Tighten the knot.
Tie another knot with the deep pink cord.
Take the next deep pink cord and tie a knot.
Tighten the knot ...
... and tie a second knot. You always tie 2 knots with every cord.
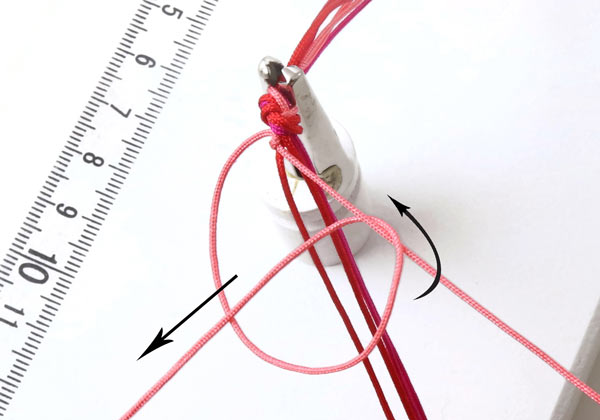
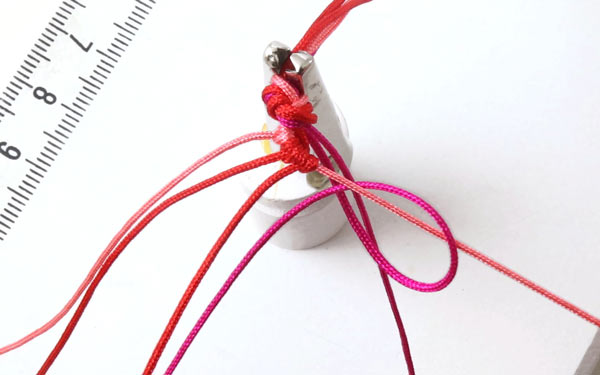
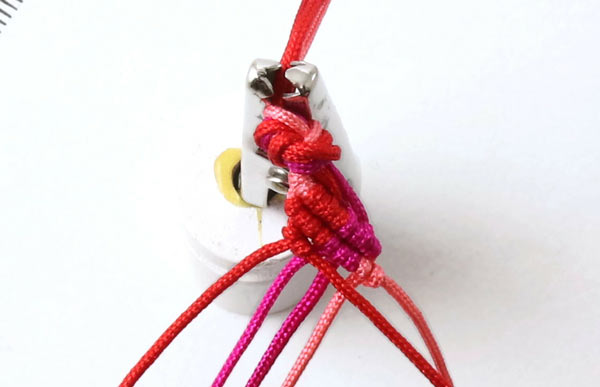
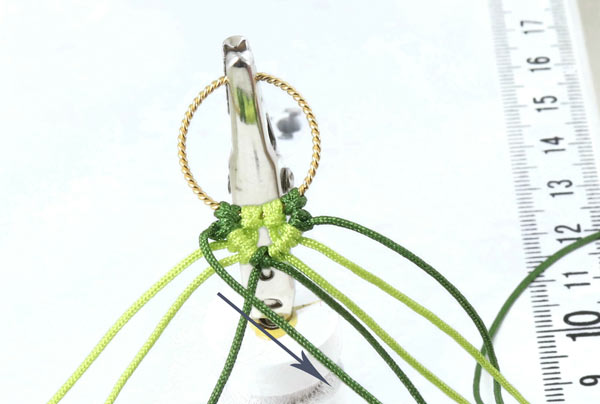
Take the pink cord on the left and pull in over the other cords to the right. This is going to be the next anchor cord.
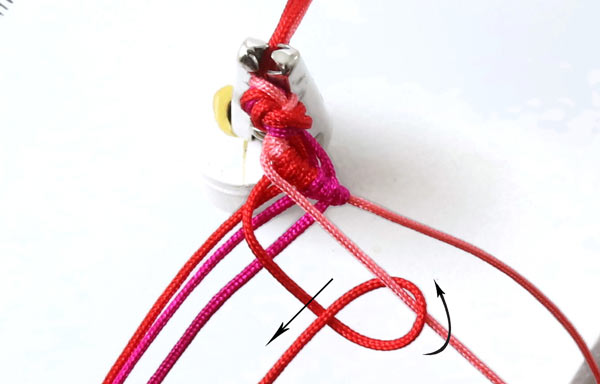
Tie a knot with the red cord (on the left) around the new anchor cord.
Tighten the knot. This is the first knot in the second row.
Tie another knot with the same red cord.
Then you tie 2 knots with the next red cord ...
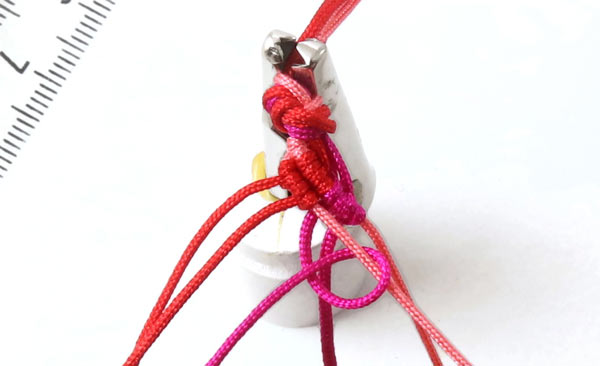
... and 2 knots with the first deep pink cord.
Now there are 2 knots made with the first deep pink cord.
Tie 2 knots with the second deep pink cord.
Now there is only the pink cord left. Tie again 2 knots with the pink cord.
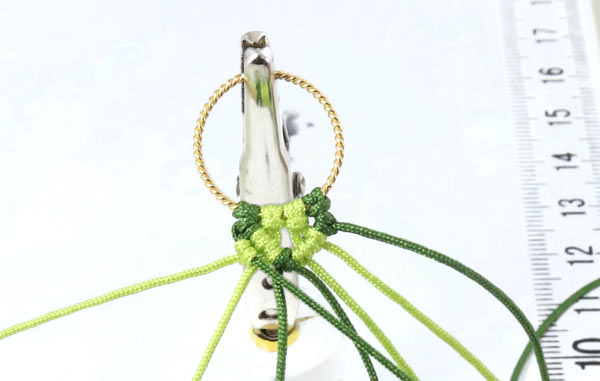
Now the second row is done.
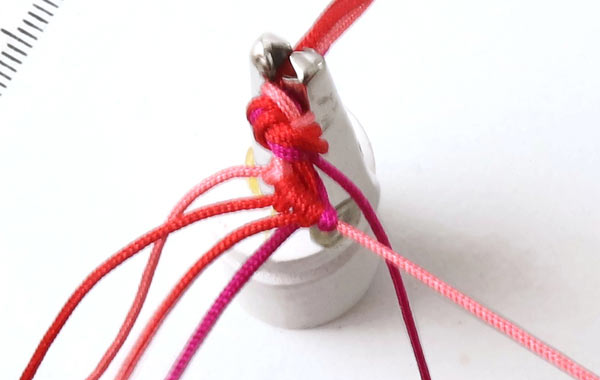
The red cord on the left will now become the anchor cord in row 3.
Tie the knots in row 3 in the same way. Pull the new anchor cord to the right ... and tie 2 knots around it with each of the other cords in the order in which the are placed.
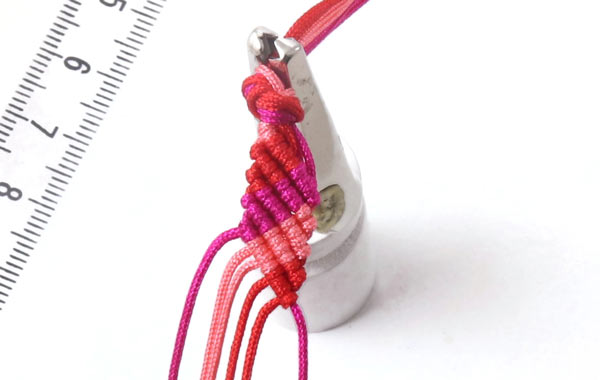
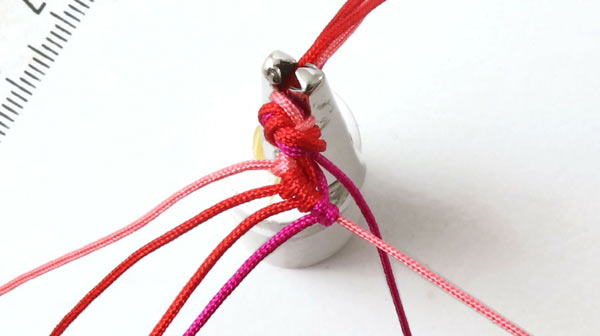
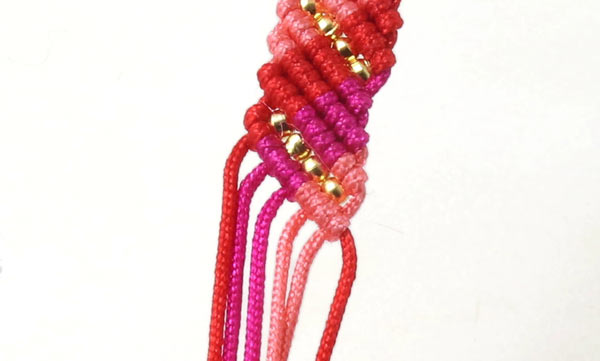
Continue like that ... row after row ... creating a striped pattern.
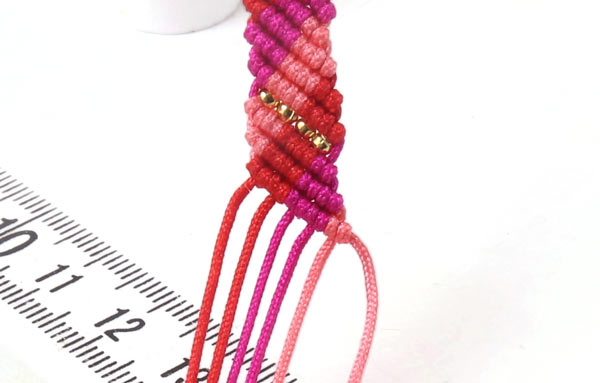
As a decoration, you add a row with small "golden beads". The "golden beads are small crimp beads.
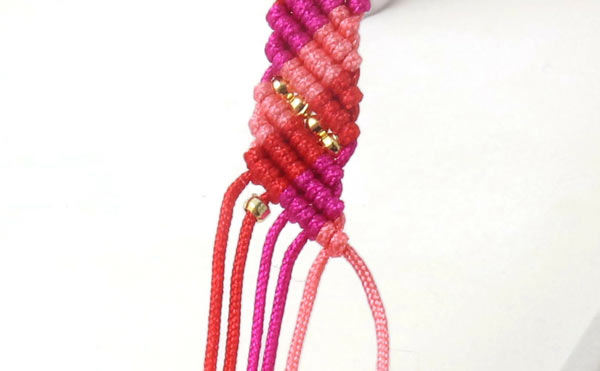
String the first bead on the 2. bead from the left.
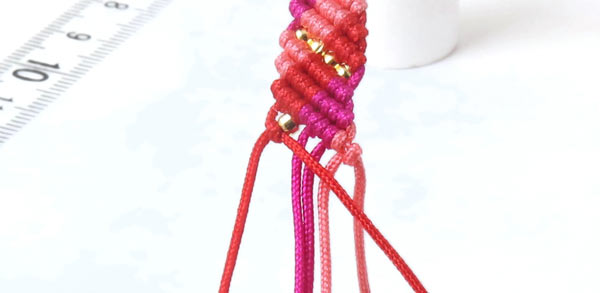
Then you pull the first red cord to the right. Now, this is the new anchor cord. Tie a knot around the new anchor cord with the other red cord.
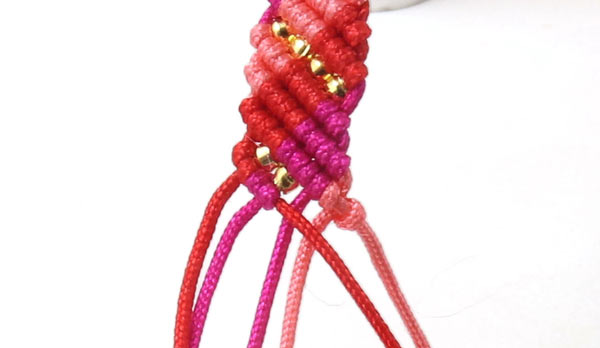
Tie another knot with the red cord. String a bead on the next cord (deep pink) and tie two knots with this cord.
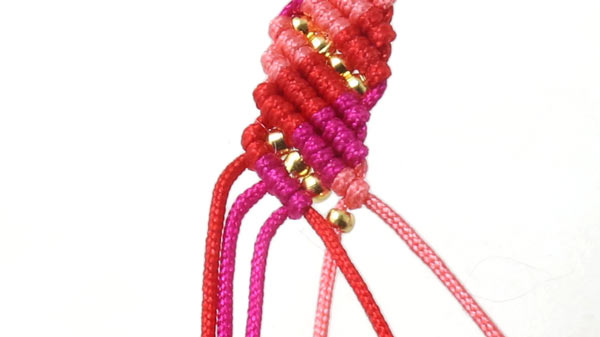
String a bead on the second deep pink cord and tie two knots. String a bead on the pink string ...
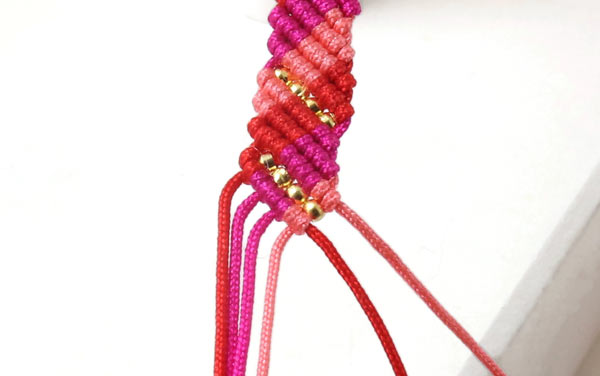
... and tie two knots.
Finish the row with two knots with the last pink cord.
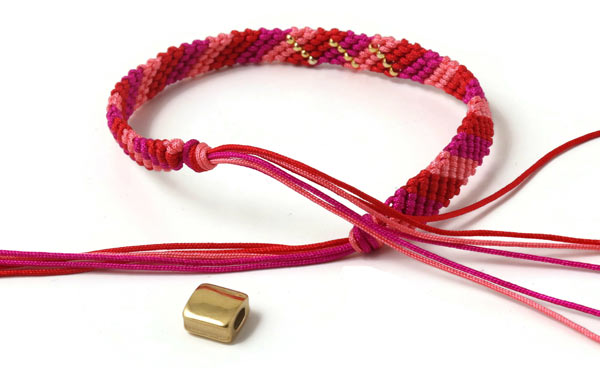
Continue like this until the bracelet has reached the right length. Tie a knot with all the cords together to finish off the bracelet.
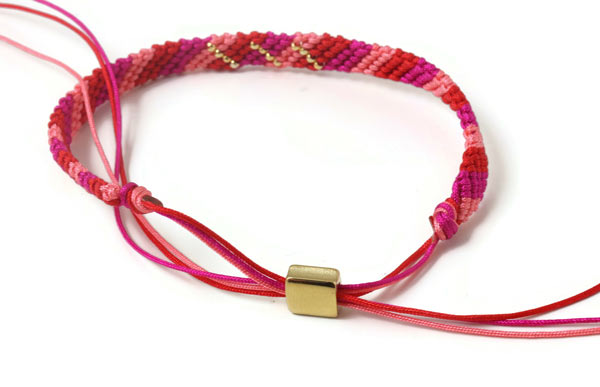
Cut off 3 cords on each side and melt them with the lighter them so they do not come undone. Now there are 3 cords left on each side of the bracelet.
Pull these 3 cords through the square bead from there respective side.
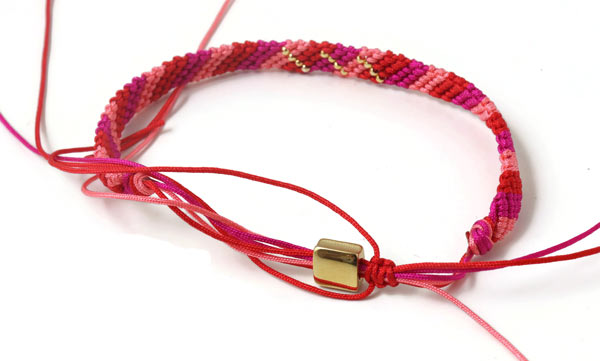
Knot a piece of macramé with red cord on one side of the square bead ...
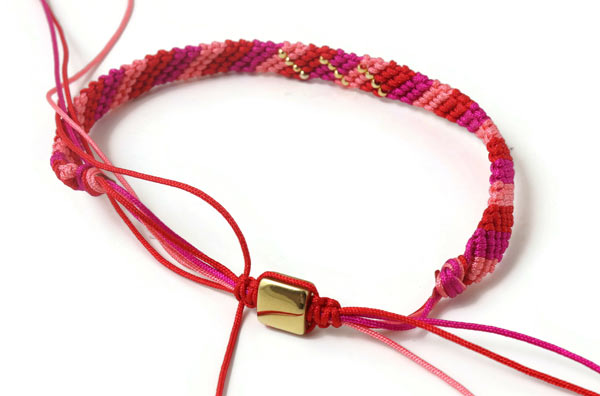
Place the cord in the furrow of the bead ... and knot a piece of macramé on the other side of the bead.
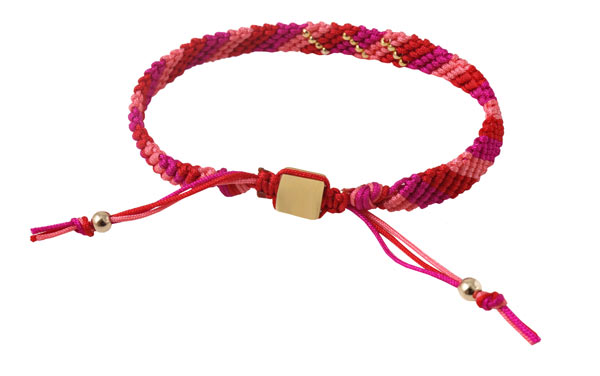
Melt the ends. String a bead on the cords on each side ... secure them with a knot .... and cut off the excessive cord.
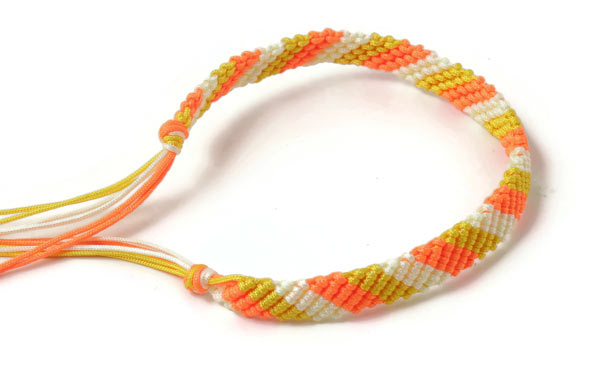
Friendship Bracelet in Shades of Yellow
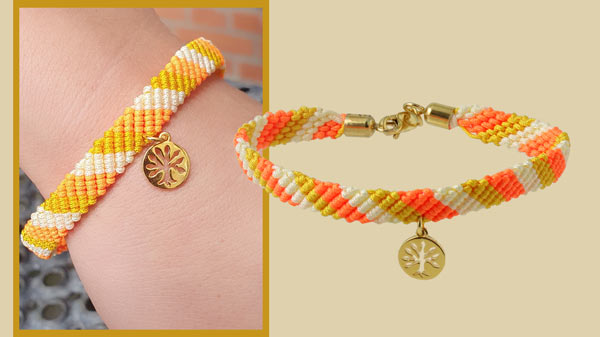
We used the following DIY componets to make this bracelet:
- 2 x 80cm nylon cord, 0.9mm, golden yellow
- 2 x 80cm nylon cord, 0.9mm, off-white
- 2 x 80cm nylon cord, 0.9mm, bright orange
- 2 glue-in cord ends, 5/4,5mm, gilded sterling silver
- 1 lobster claw clasp, gilded sterling silver
- 2 jumprings, 5mm, gilded sterling silver
- 1 pendant, tree of life, gilded sterling silver
+ scissors
+ lighter
You knot the bracelet in the same way as described in the example above ... and finish it off with a knot on either side of the bracelet.
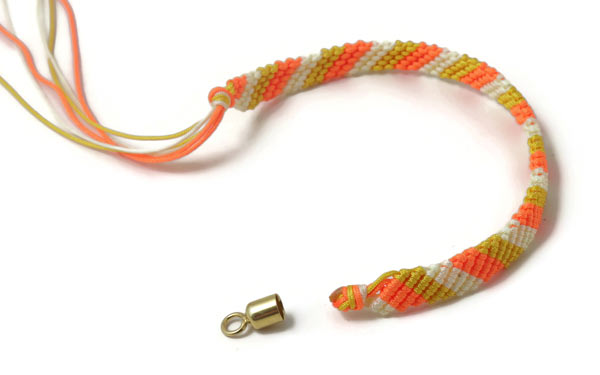
Then you cut off the cords a few millimetres from the knots ... and melt the ends so they do not come undone.
After that, you glue the knots into the glue-in cord ends.
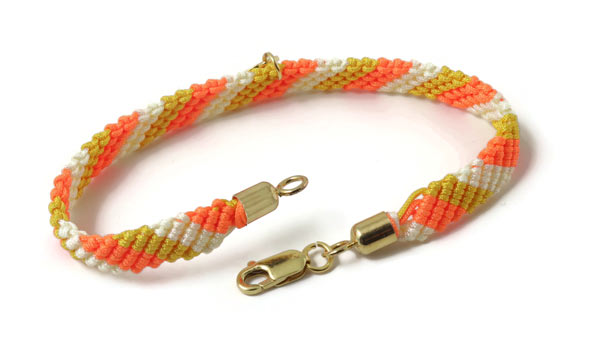
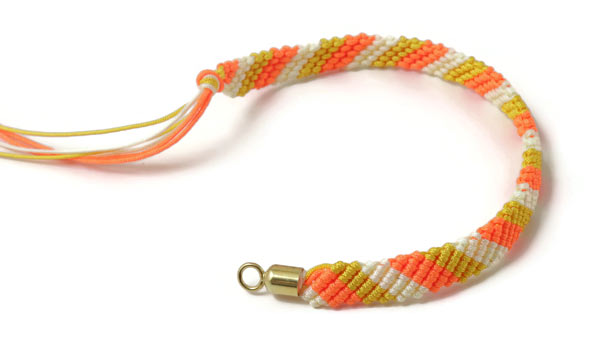
Fasten the lobster claw clasp to one of the glue-in ends with a 5mm jumpring.
Optionally, you can add a chain extender to make the length ajustable.
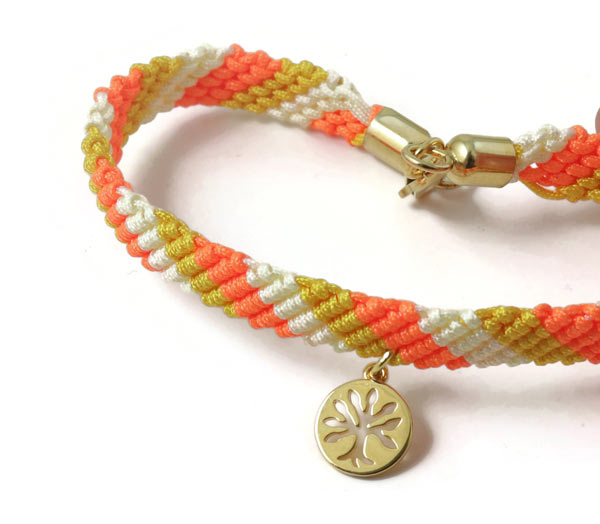
Finally, you attatch a pendant with the tree of life to the bracelet with a 5mm jumpring. Use an awl to make a hole, this way it becomes easier to pull the jumpring through the bracelet.
Friendship Bracelet in Shades of Blue and Green
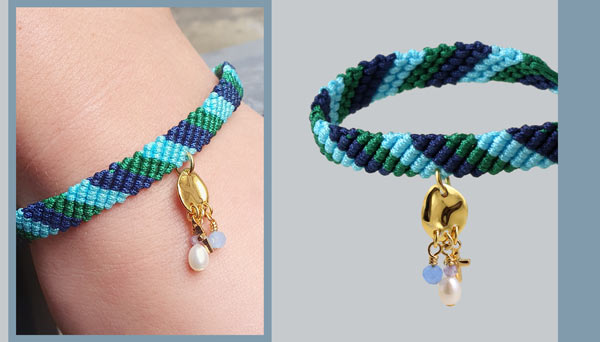
We used the following DIY components to make this bracelet:
- 2 x 80cm nylon cord, 0.9mm, navy blue
- 2 x 80cm nylon cord, 0.9mm turquoise
- 2 x 80cm nylon cord, 0.9mm, bottle green
- 1 pendant, uneven surface, 9x8mm, gold-plated sterling silver
- 2 gilded beads (doublé), 4mm
- 1 jumpring, 5mm, gilded sterling silver
+ scissors
+ lighter (to melt the cord ends with)
This bracelet is closed with the classic knotted macramé closure that can be adjusted by pulling the cord ends.

You knot the bracelet the same way as drescribed in the first example ... and finish it off by tying a knot with all the cords on either side.
Then you cut off 4 cords and melt them so they do not come undone ... and knot a macramé closure around the last 2 cords. String a bead on either end and secure it with a knot.
The small pendant is decorated with various small beads and a little cross. Use headpins with a pad and 3mm jumprings to fasten the beads with.
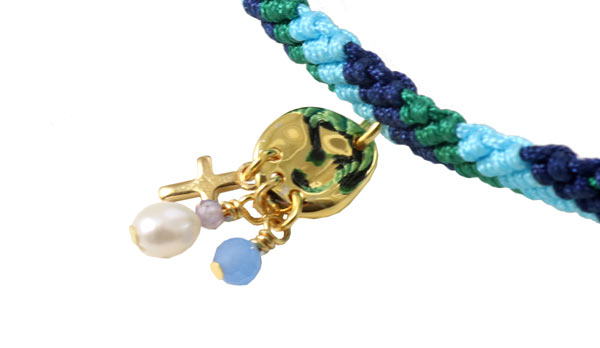
The pendant is attached to the bracelet with a 5mm jumpring. Use an awl to make a hole, That makes it easier to pull the jumpring through the bracelet.
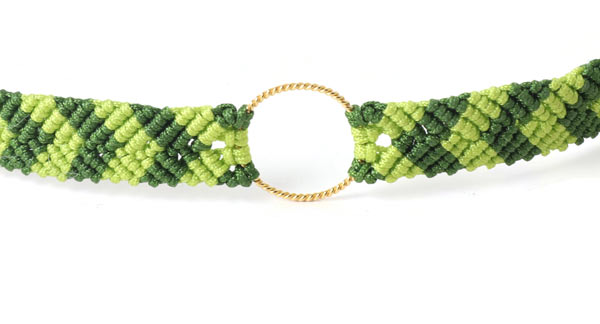
Friendship Bracelet with Herringbone Pattern
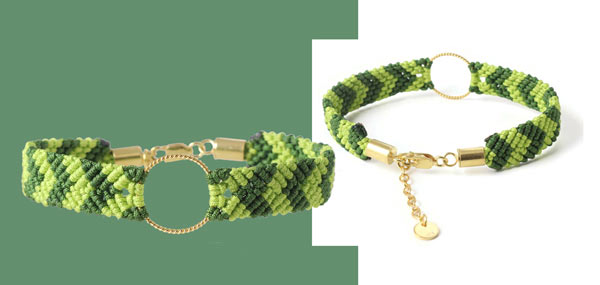
We used the following DIY components to make this bracelet:
- approx. 4 x 1m dark green nylon cord, 0.9mm
- approx. 4 x 1m yellow green nylon cord, 0.9mm
- 1 closed ring, twisted, gilded sterling silver, 16mm
- 1 clasp set with lobster caw clasp and glue in ends, 5/4mm, gilded sterling silver
+ scissors
+ lighter (to melt the cord ends with)
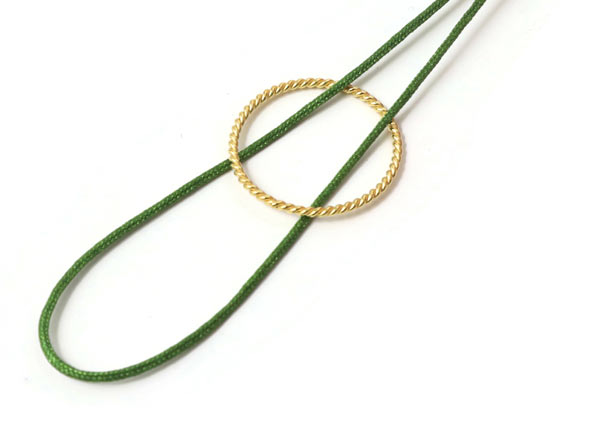
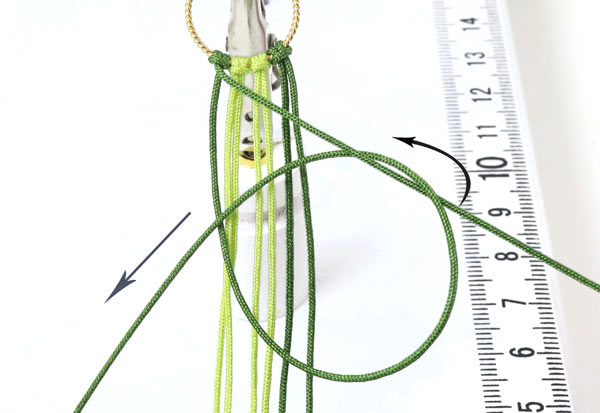
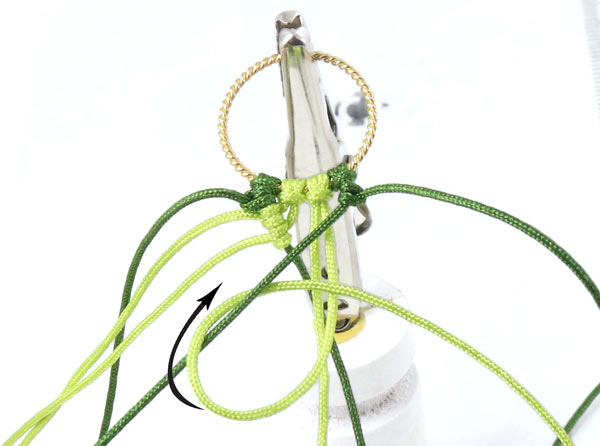
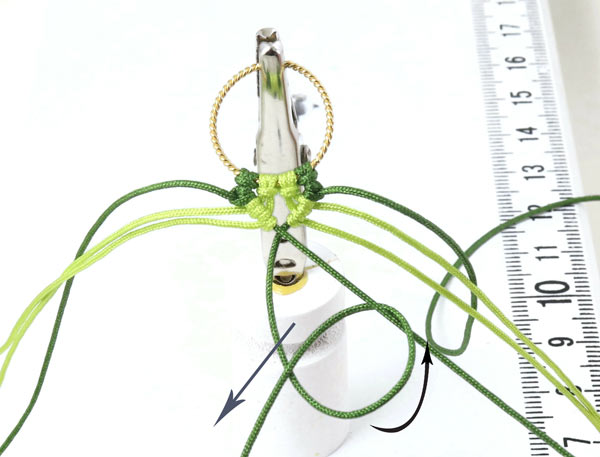
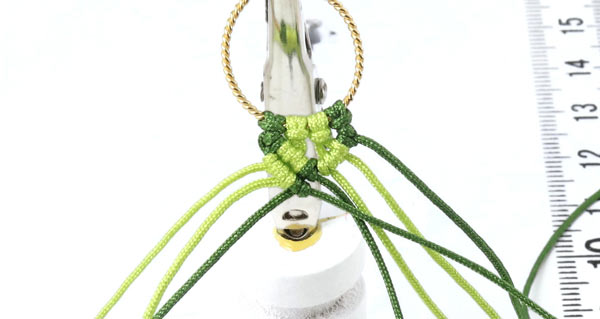
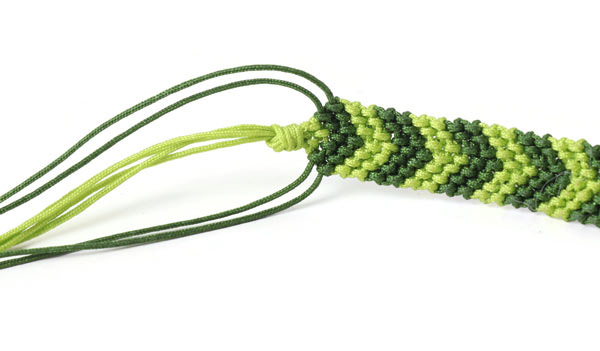
Fold a dark green cord in the middle and pull it through the ring.
Then you pull the cord ends through the loop (see picture).
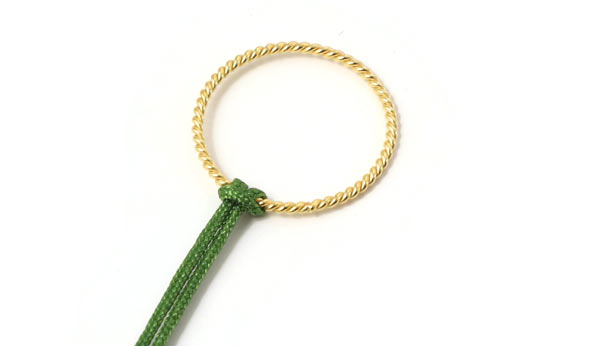
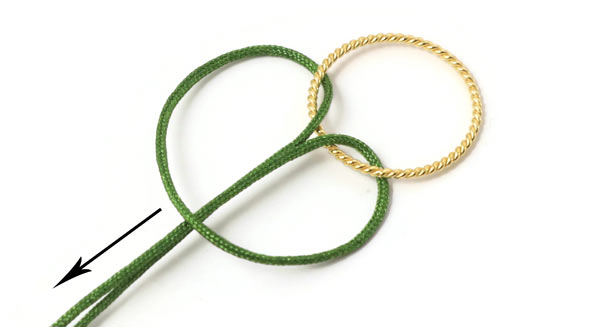
Tighten the knot. Now the first cord is fastened to the ring.
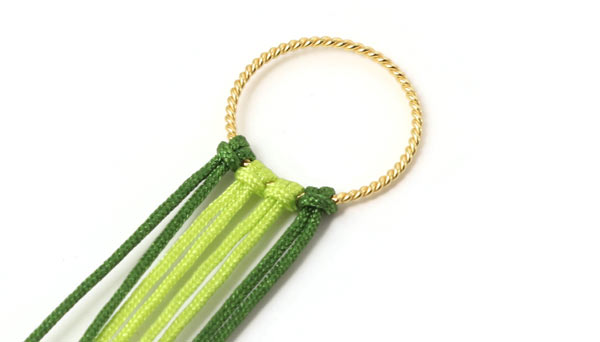
Fasten the other 3 cords to the ring in the same way. The two yellow green cords are placed in the middle.
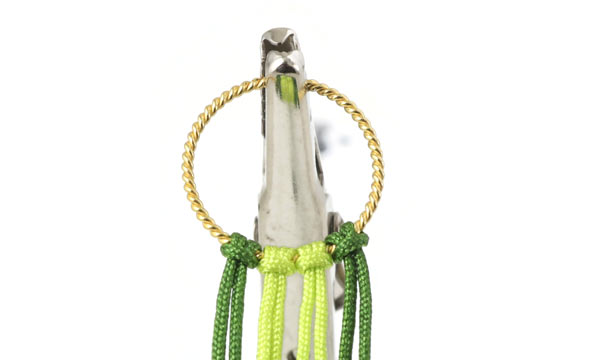
Here the ring is held by the clip of the knotting board.
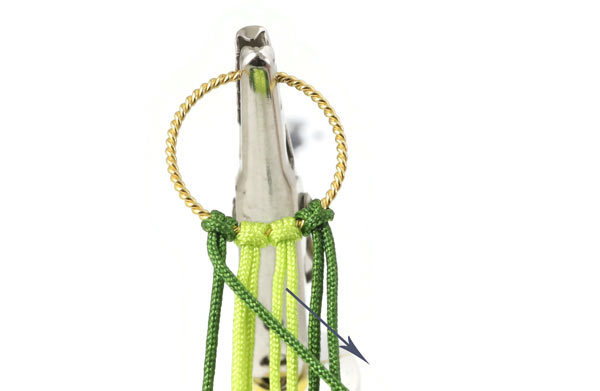
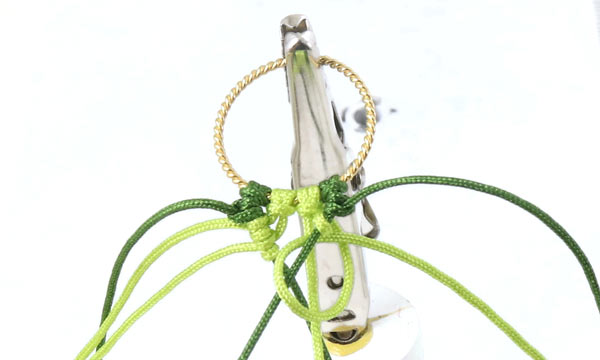
Pull the cord on the left to the right ... this is now the anchor cord.
You use the same knotting technique as decribed in the first example ... but this time knot knot both ways. In other words, one half is knotted around an achor cord from the left to rhe right and the other half around an anchor cord from the roight to the left.
Place the next dark green cord over the anchor cord ... from the left to the right.
.... pull it underneath it and over itself.
Tighten the cord ... and the first knot is done. Tie one more knot with the same cord.
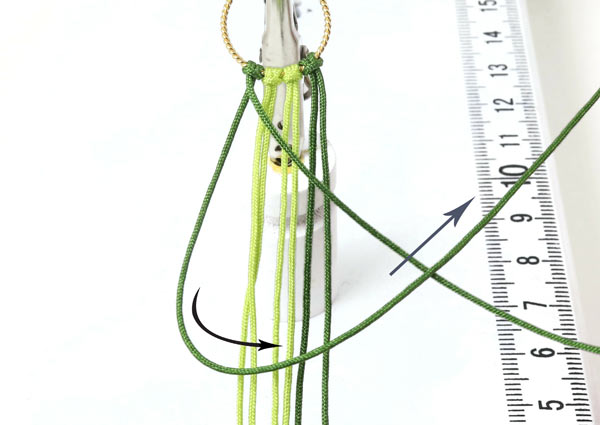
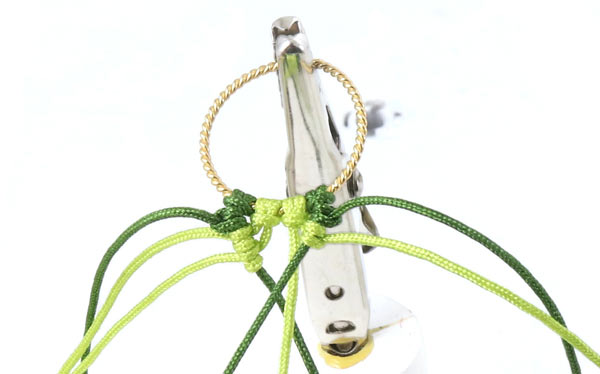
Tie the next knot with the yellow green cord on the left in the same way. You tie the knot around the same anchor cord. Make one more knot with the same cord. You always tie 2 knots with one cord.
Now you tie 2 knots with the next yellow green cord.
The first row on the left-hand side is done. Each side consists of 6 knots.
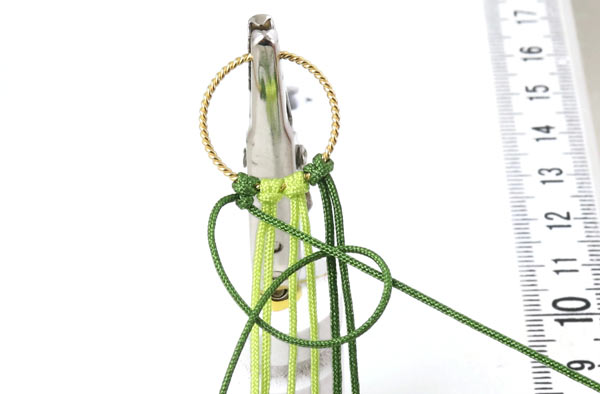
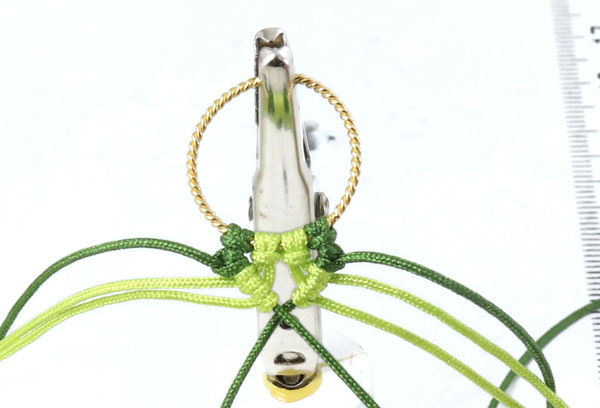
Next, you pull the dark green cord on the right to the left. This is the new anchor cord.
Now you tie the same knot ... but mirror-inverted. Pull the second dark green cord (from the right) underneath the new anchor cord and place it over it - from the right to the left.
Pull it underneath the anchor cord ... from the left to the right ... and over itself (see picture).
Hold the anchor cord tightly to the left ... and tighten the knot by pulling the other cord to the right.
Tie another knot with the same cord.
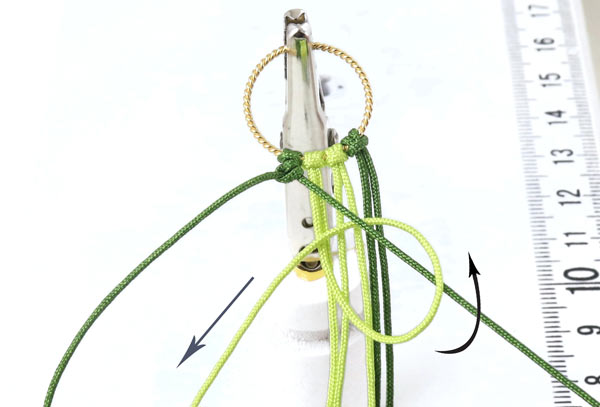
In the same way, you make a knot with the yellow green cord on the right.
Tighten it ... and tie another knot with the same cord.
Now you have made two knots with the same cord around the anchor cord.
In the same way, you tie 2 knots with the next yellow green cord. Now you have tied 6 knots with 3 cords on each side of the bracelet.
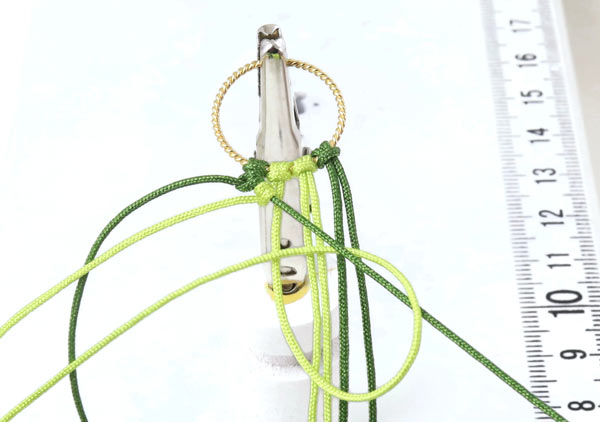
Next, the two anchor cords are tied together. Place the anchor cord on the right over the anchor cord to the left (you can do it the onther way round ... but it should be the same way each time).
Pull the anchor cord from the left tightly to the right (it is the anchor cord for the next knot). Then you tie the other dark green ord around it.
Tighten the cord ... and tie another knot in the same way. Now you have made 2 knots and the two halves of the bracelet are combined.
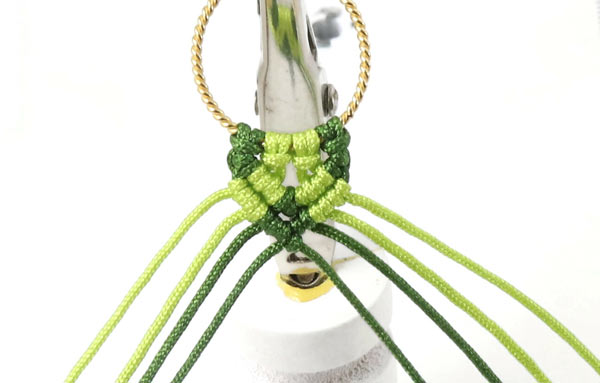
After that, you knot the second row on the left side. Place the cord on the left over all the other cords ... and pull it tightly to the right. This is the new anchor cord.

First, you tie knots with the yellow green cord on the left.
Tie 2 knots.
All in all, you tie 6 knots in the second row.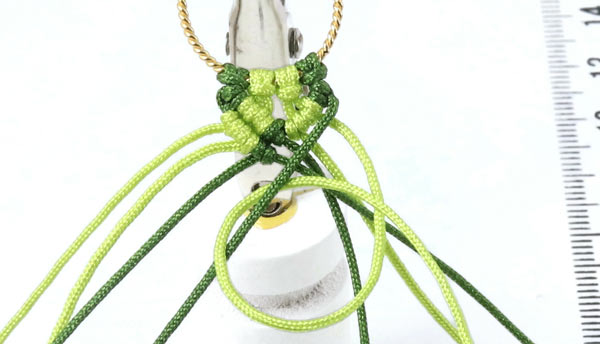
After that, you tie 6 knots in the second row on the right ... the same way you did in the first row. 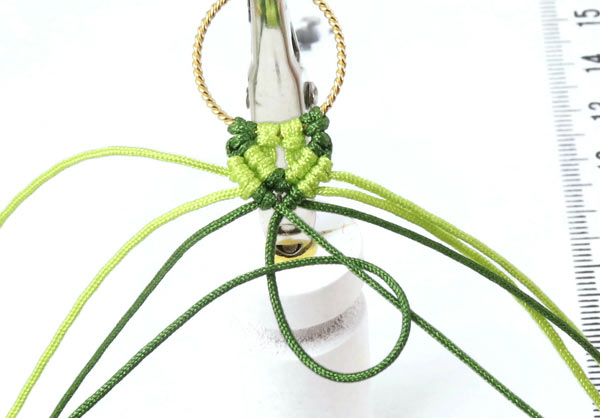
Once you have made 6 knots, you tie the bracelet together in the middle. You tie 2 knots with one of the anchor cords around the other anchor cord ... in the same way as described earlier.
Tighten the knots. Now you are done with the second row on each side.
Continue like that ... knotting one row after the other ... until this side of the bracelet is as long as you want it to be.
Then you knot the other side of the bracelet in the same way.
Tie the yellow green cords in the middle together in one knot.
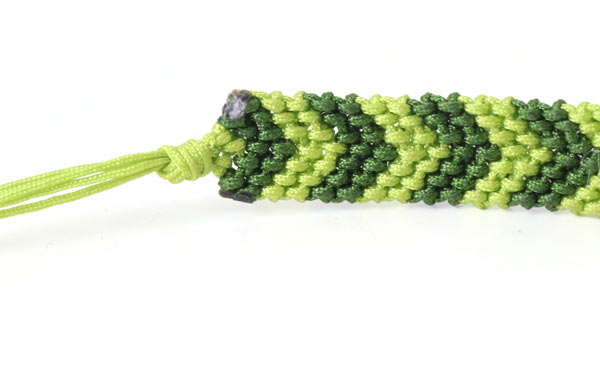
Cut off the dark green cords ... and melt the ends with a lighter so they do not come undone.

Cut off the yellow green ends and melt them, too. Proceed the same way on the other side of the bracelet.
Now you glue the knots into the glue-in cord ends.
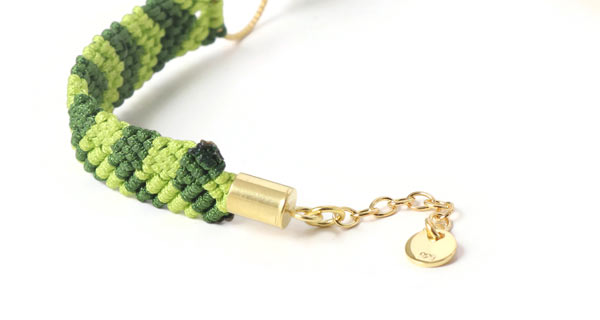
Optionally, you can fasten a chain extender with a jumpring if you want your bracelet to be adjustable.
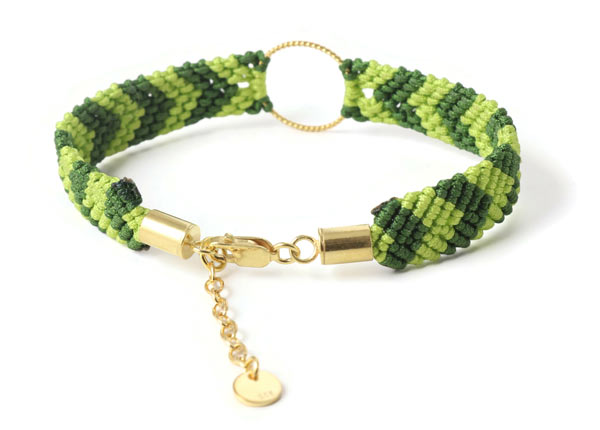
Your bracelet is done.
Friendship Bracelet with Eternity Symbol
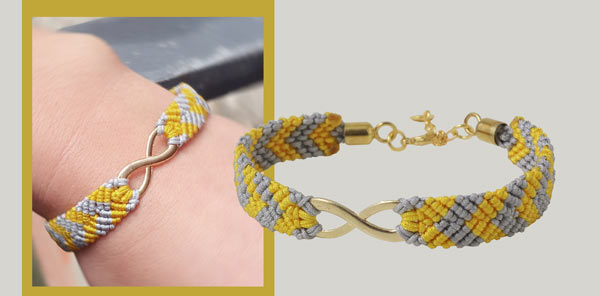
We used the following DIY components to make this bracelet:
- approx. 4 x 1m grey nylon cord 0.9mm
- approx. 4 x 1m yellow nylon cord, 0.9mm
- 1 pc pendant, infinity symbol, gilded brass
- 1 pc clasp set with lobster claw clasp and glue-in ends, 5/4mm, gilded sterling silver
+ scissors
+ lighter (to melt the cord ends with)
The bracelet is knotted in the same way as described above.
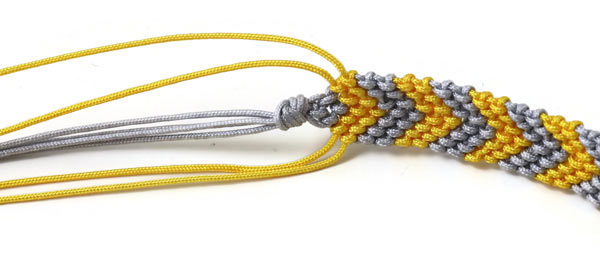
Tie the two grey cords in the middle together in one knot.
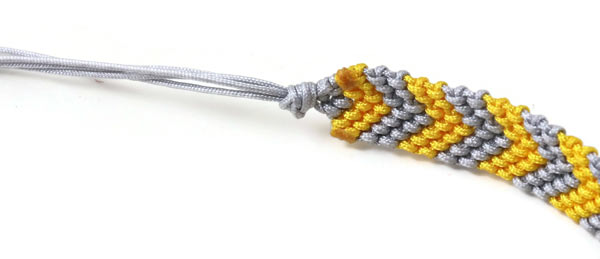
Cut off the outer cords on each side ... and melt the ends so they do not come undone.
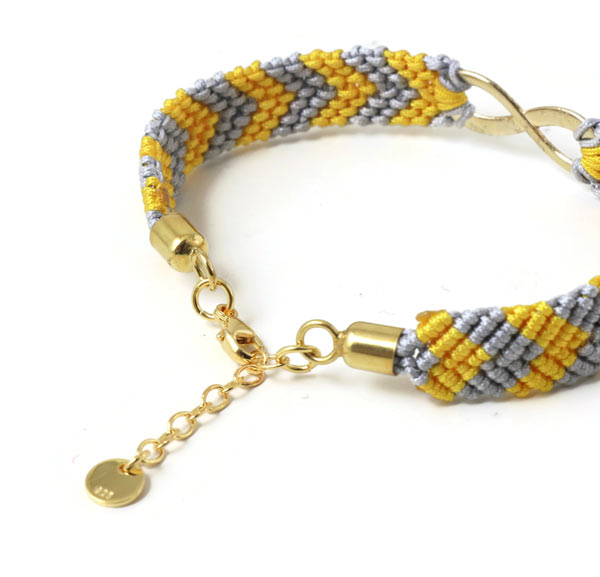
Cut off the other cord ends and melt them so the knot does not come undone, either. Proceed the same way on the other side of the bracelet.
Finally, you glue the knots into the glue-in ends. If you want the bracelet to be adjustible, you can additionally fasten a chain extender with a jumpring.
We will publicly show your name and comment on this website. Your email is to ensure that the author of this post can get back to you. We promise to keep your data safe and secure.