Dear visitor
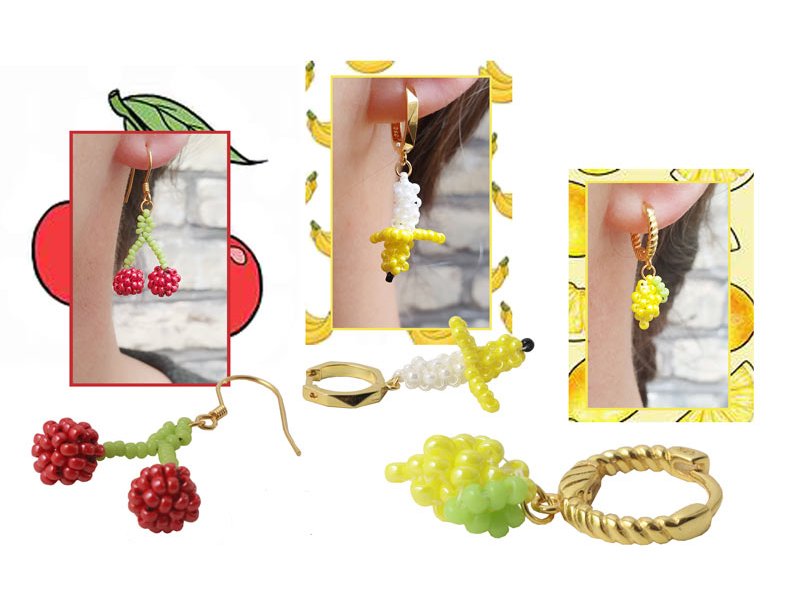
In this blog post, our jewellery designer Charlotte presents some sewing techniques that you can use to make little fruits out of seed beads. With these designs, you can assemble jewellery with a beautiful, fresh and playful look that you can't buy anywhere! Here you find instructions on how to sew bananas, lemons and cherries with tiny beads. Charlotte walks you through the various designs step-by-step so that everybody can join in - the experienced DIY'ers and also he beginners.
The different kinds of fruits can easily be fastened to different kinds of earrings with a jumpring. Besides, you can use your beaded fruits in bracelet and necklace designs. And now immerse yourself into the world of beaded fruits together with Smyks! :-)
See also the related blog post Bracelets with mini-fruits
 |
 |
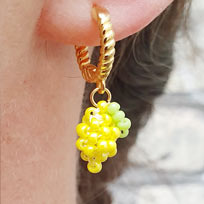 |
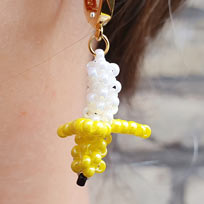
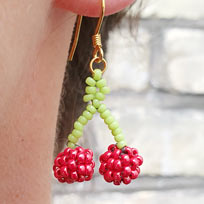
| Hoop with banana | Earhook with cherries | Hoop with lemon |
 |
|
|
Guides:
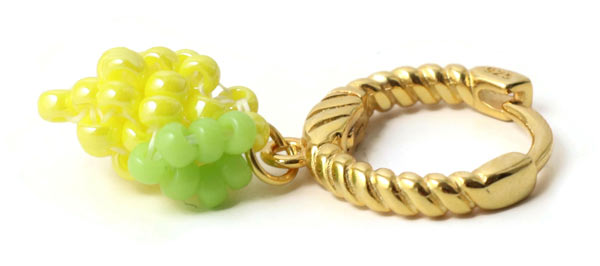
Hoop with small Banana
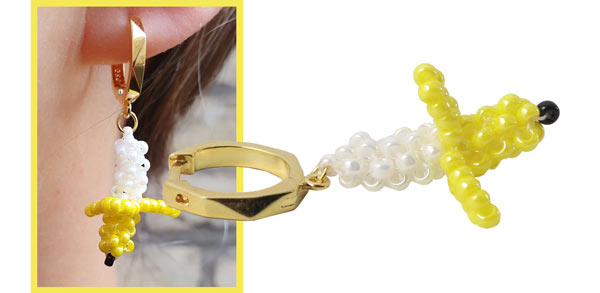
We used the following components to make this earring:
Miyuki seed beads, size #11, yellow luster
Miyuki seed beads, size #11, ivory pearl
Miyuki seed beads, size #11, shiny black
FireLine, white, 6LB, 2 x 60cm
Jumpring, 3.5x0.5mm, gilded silver
Hinged hoop with soft facets, gold-plated silver
P.S. For our example, we use black FireLine thread because it is easier for you to see.
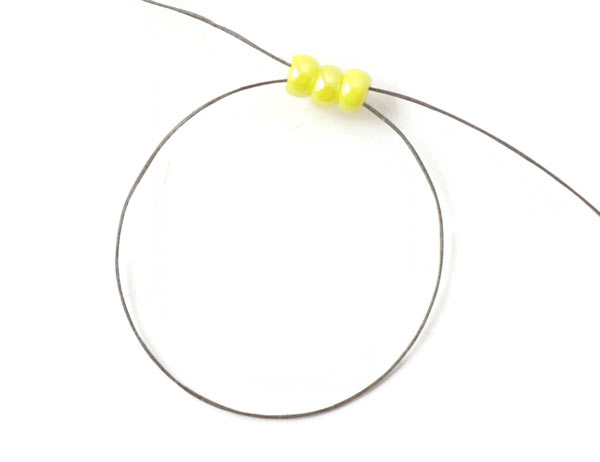
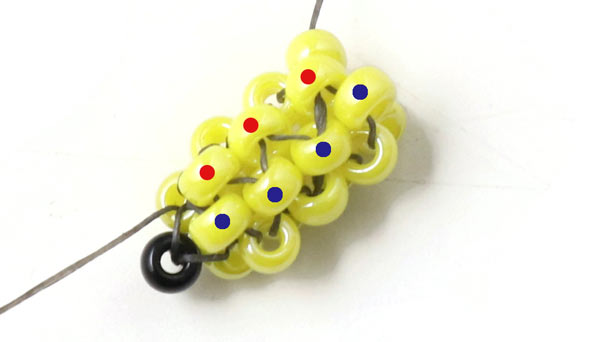
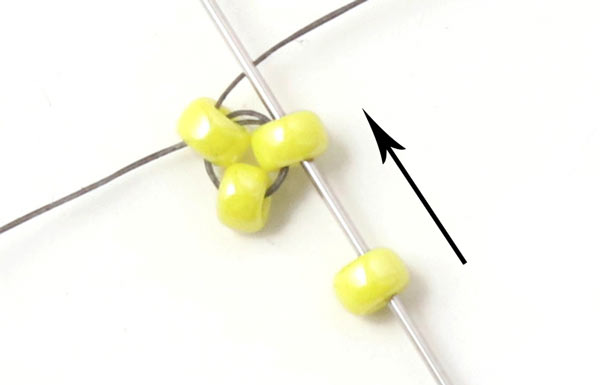
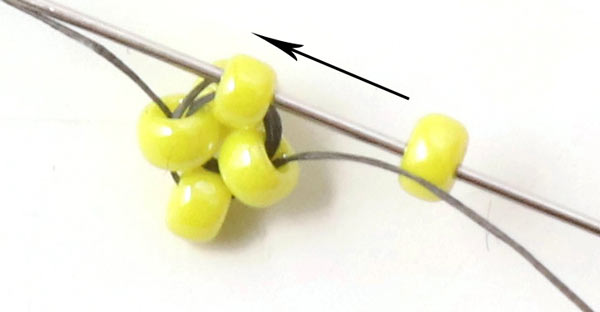
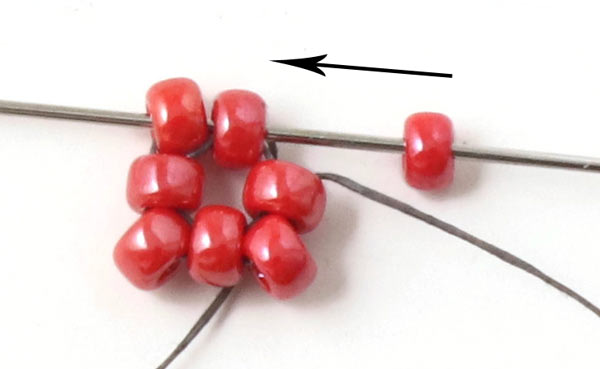
Cut off approx. 60cm of thead. String 3 beads ... and sew through the beads so you get a loop.

Sew through the first bead one more time ... and continue through the other beads. Then you tighten the thread. The thread end should be approx. 8 cm long.
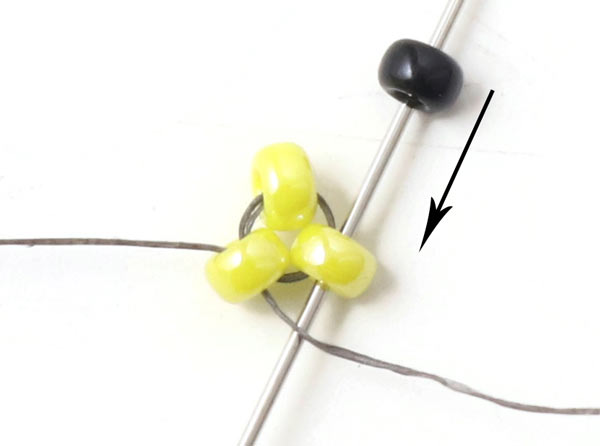
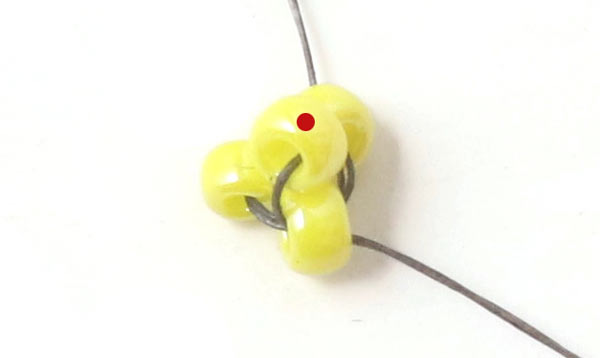
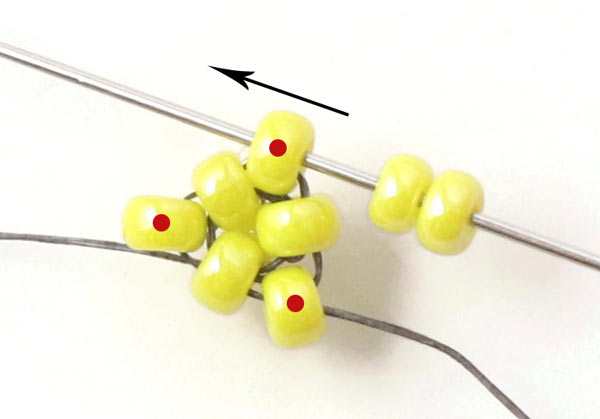
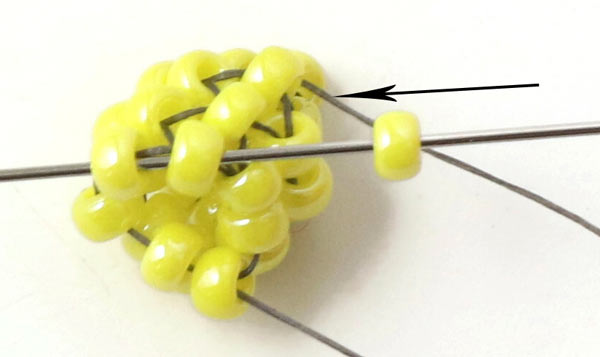
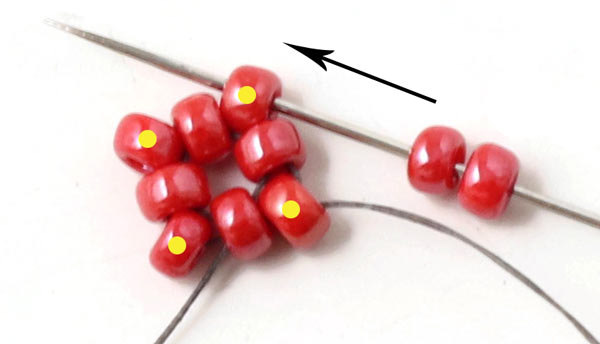
String 1 black bead ... and sew through the next bead in the circle - but in the opposite direction.
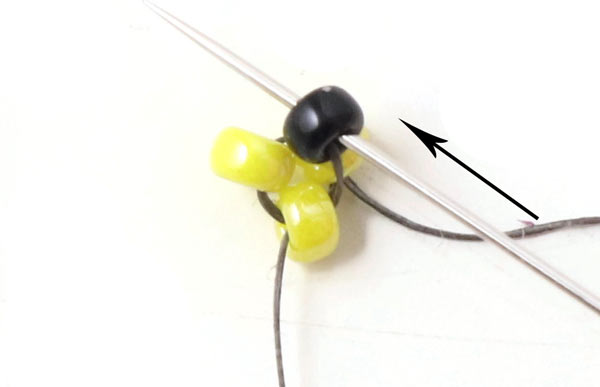
The black bead is now sitting on top of the 3 yellow beads. Sew through the black bead...
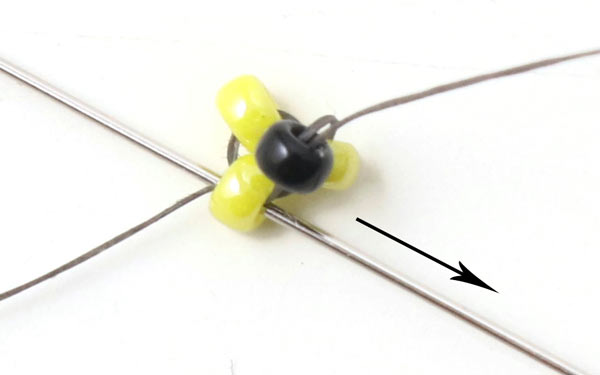
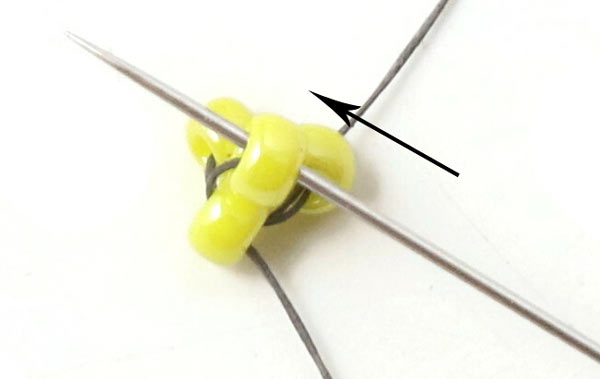
.... and continue through the first yellow bead. Both thread ends are now coming out of the same yellow bead.
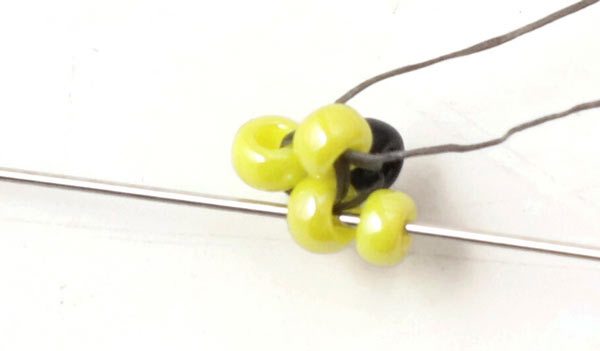
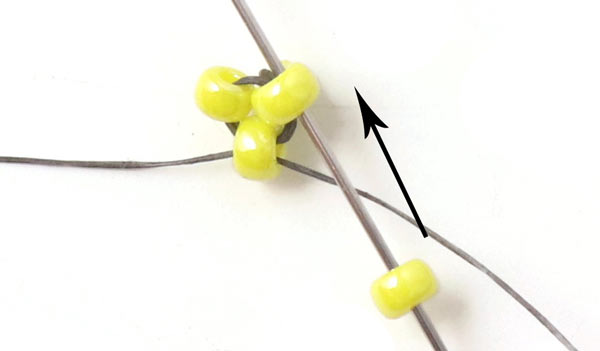
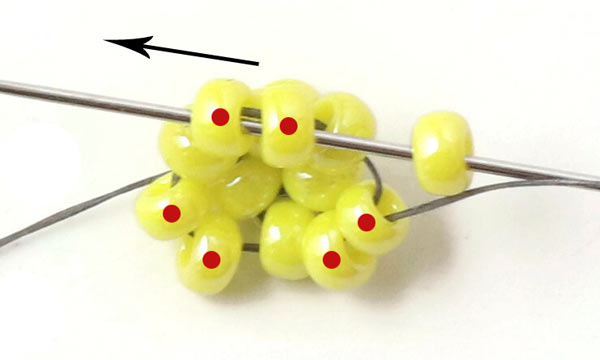
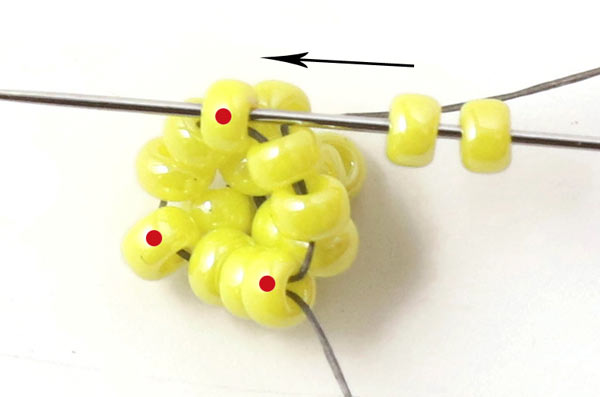
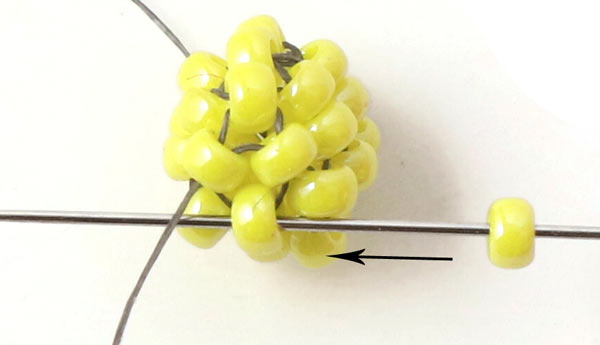
Turn over your needlework so the black bead is facing downward. String a yellow bead and sew through the next yellow bead.

String 1 more bead and sew through the next bead.
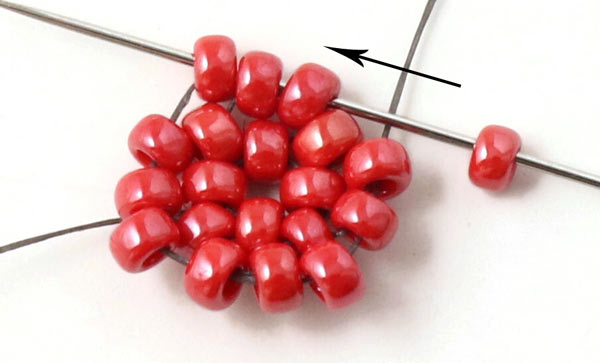
Now you fasten the last yellow bead in this round the same way ... but as it is the last bead, you sew through the next 2 beads (to prepare the next round).

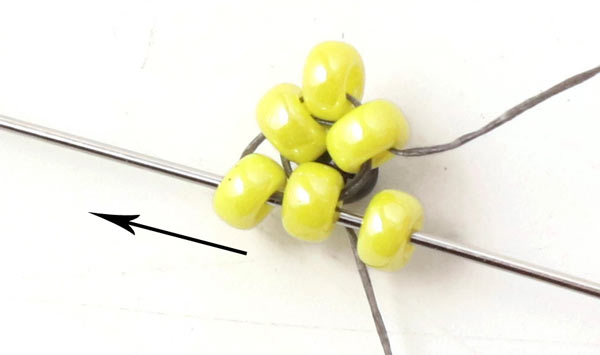
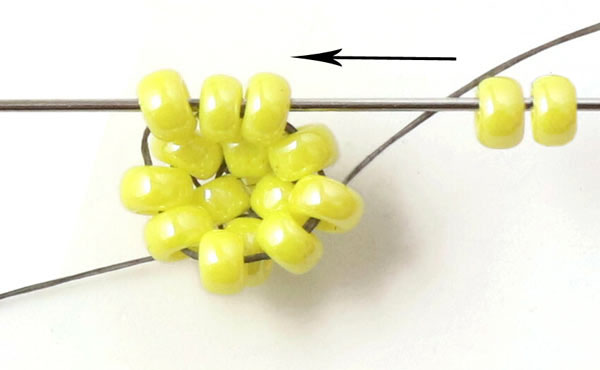
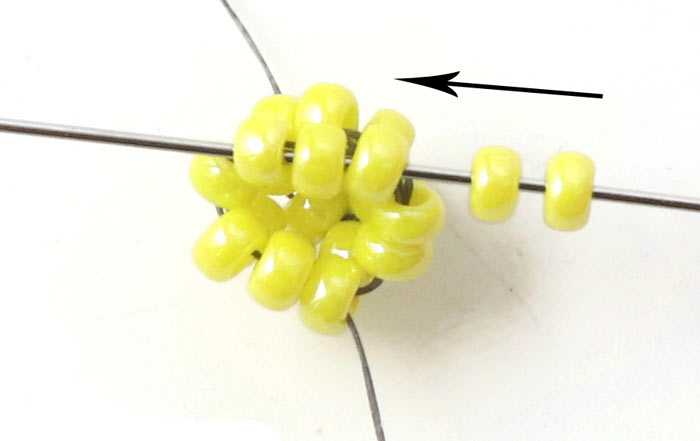
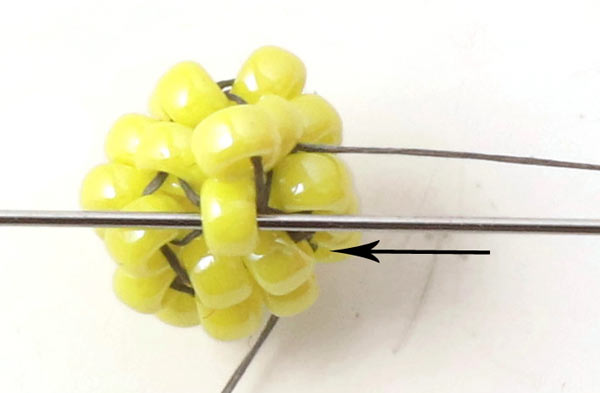
String 1 bead ... skip 1 bead and sew through the next one.
Repeat this one more time.

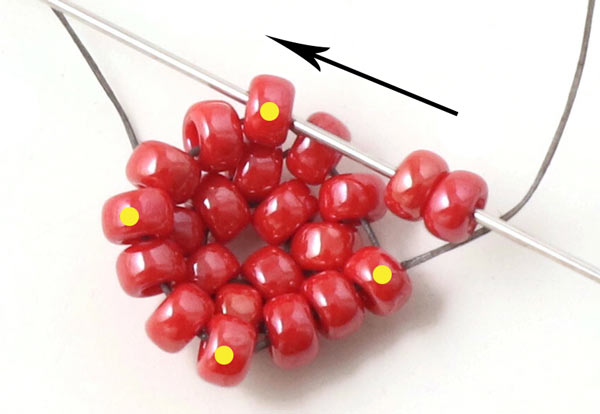
After adding the last bead in this row, you sew through 2 beads (to prepare the next round).

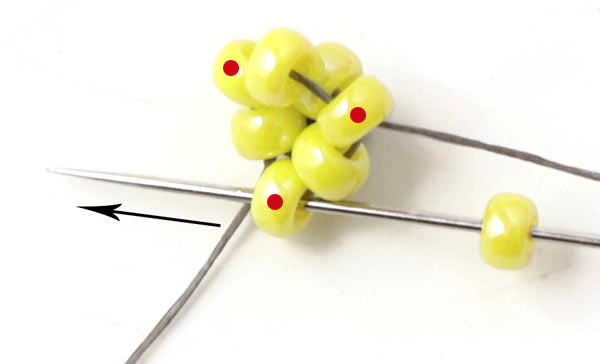
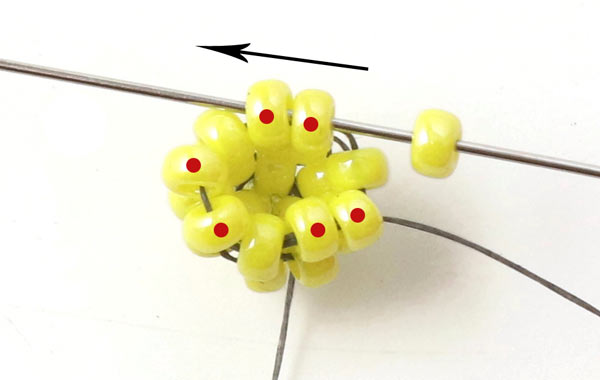
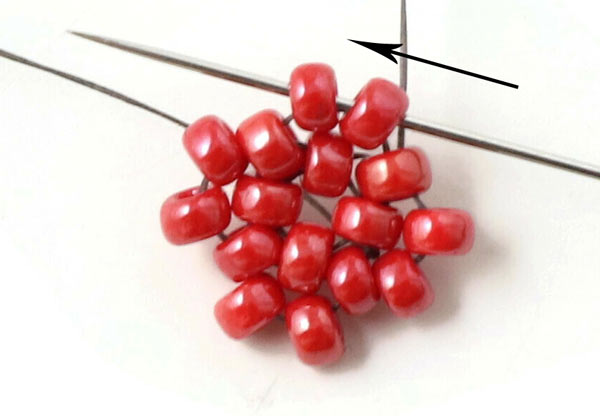
Continue like this and add one bead at a time ... all in all 3 beads per round ... and you always sew through 2 beads before you start the next round.
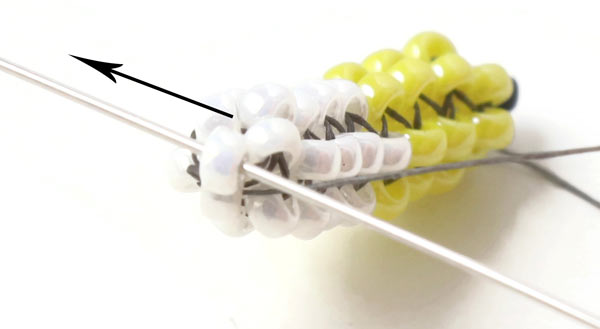
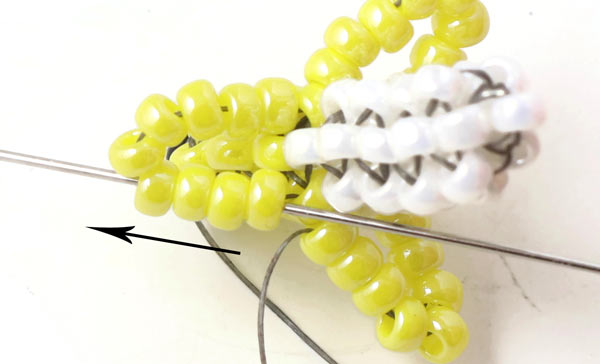
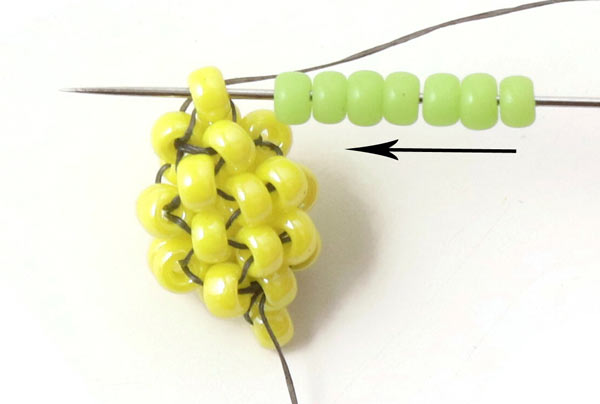
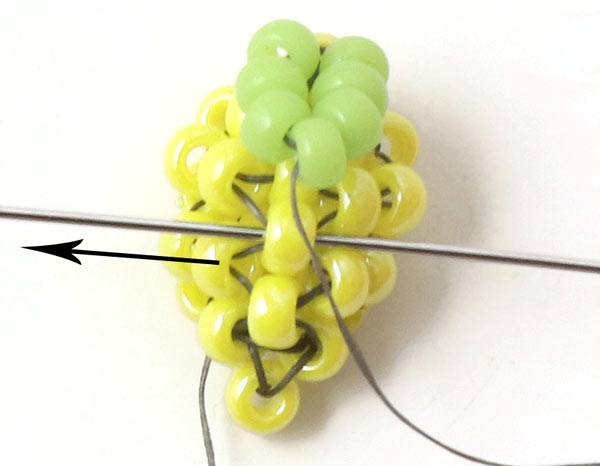
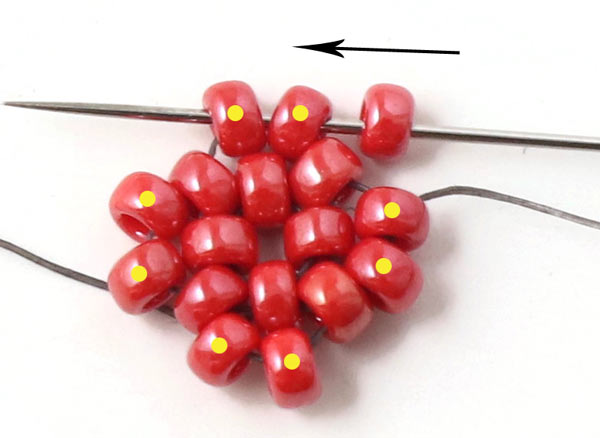
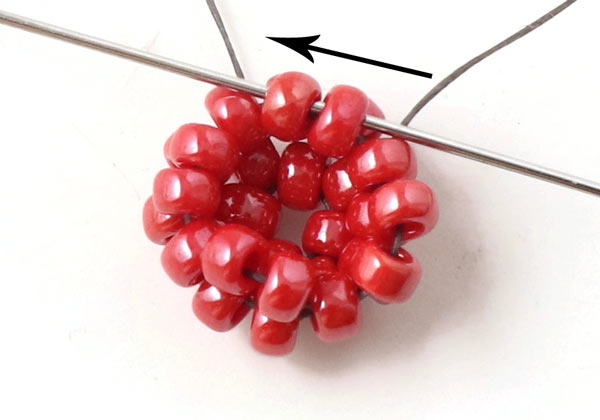
Continue until you have reached the length you want. For our banana, we have chosen an length that corresponds to alternately 3 and 4 beads in each row.
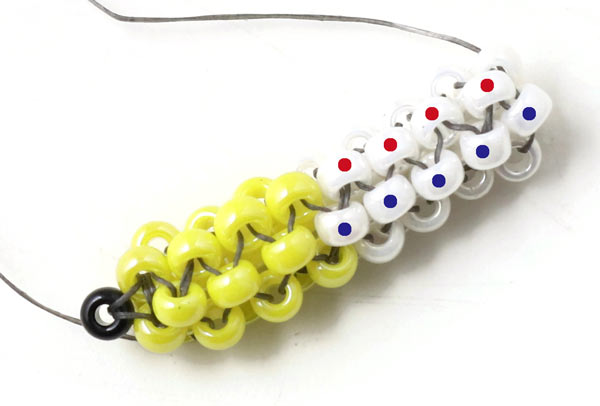
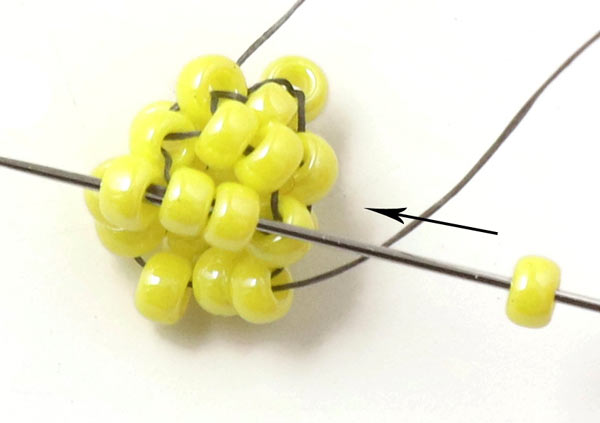
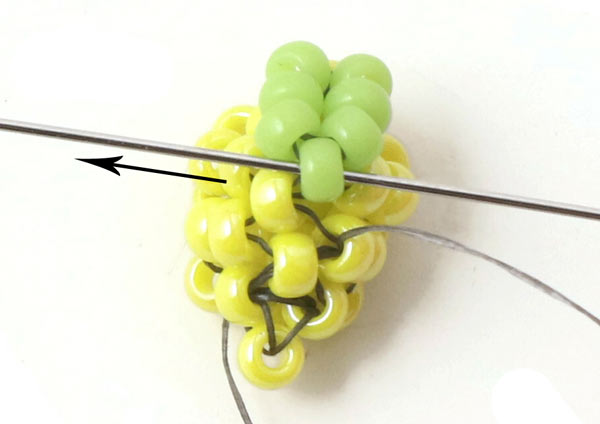
Continue sewing with white beads ... until you have reached a length of 4 respectively 5 in each row..
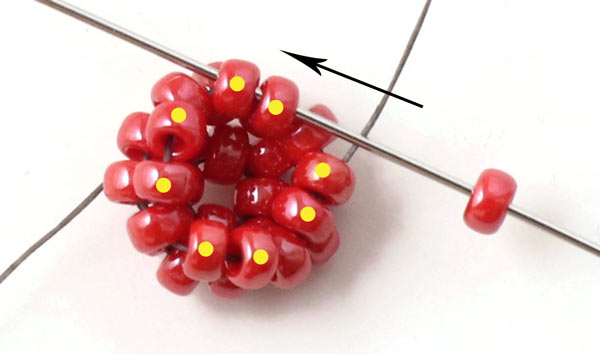
Tighten the top of the banana by sewing through the last 3 beads a few times.
Now, you are going to fasten the last white bead at the top. String the bead ... and sew through the next bead - but in the opposite direction - so the bead is placed on top.
Sew through the top bead one more time ...
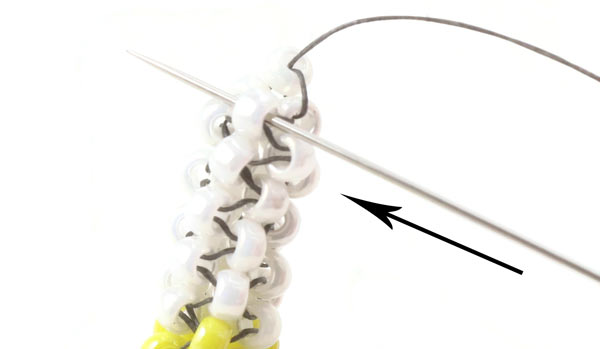
... and then through the bead right underneath.
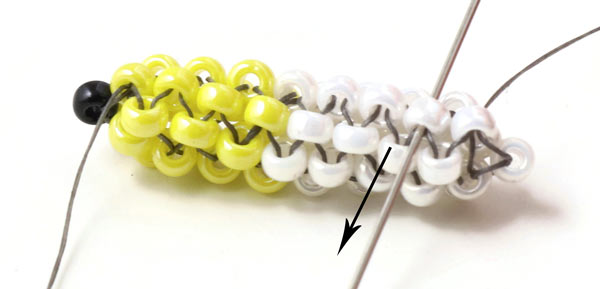
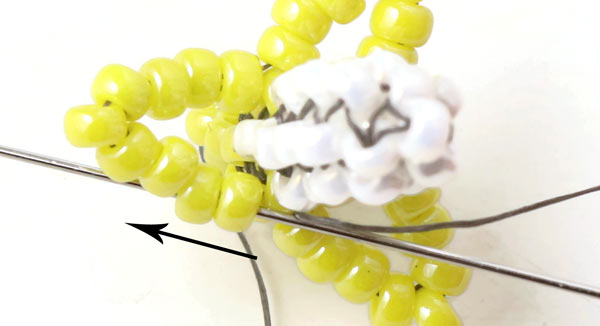
Sew downward through every single white bead in the same row ... alternately from the right to the left and from the left to the right, so the thread remains invisible.
Continue until you have sewn through the first yellow bead.
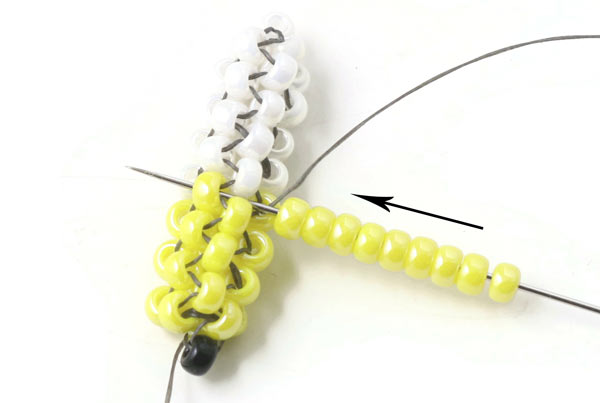
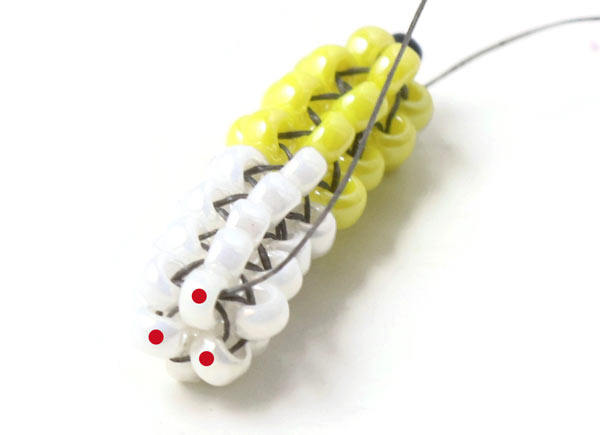
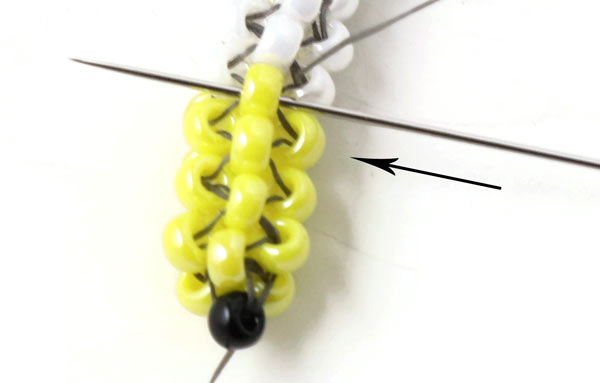
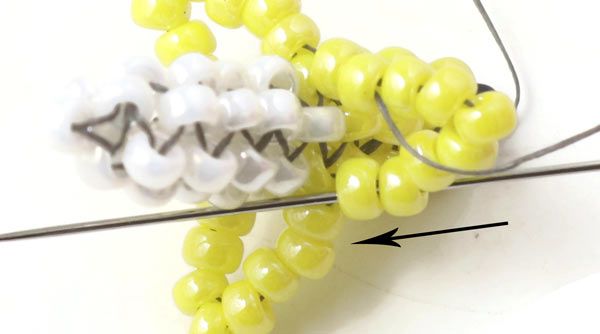
String 9 yellow beads and sew through the next yellow bead in the same round.
Fasten 9 more beads in the same way.
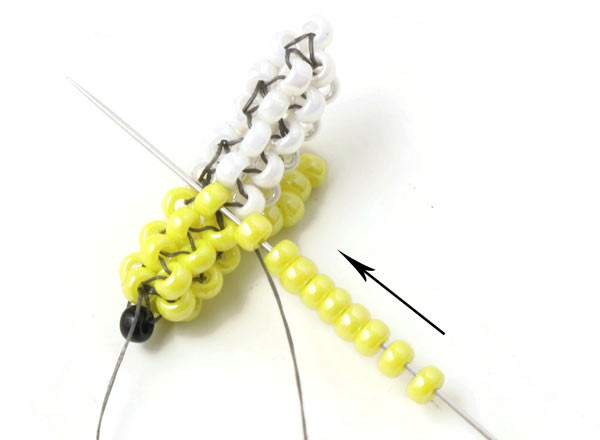
Again you string 9 beads and sew through the next yellow bead in this round ... but this time you continue sewing through the first 4 beads in the "banana peel".
Skip the next bead ... and sew through the last 4 beads in the peel.
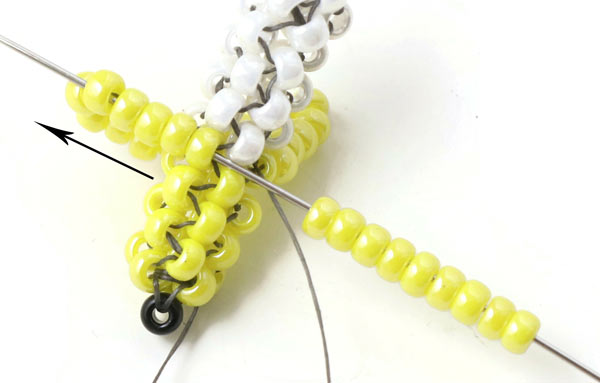
Sew through the other 2 banana peels in the same way.
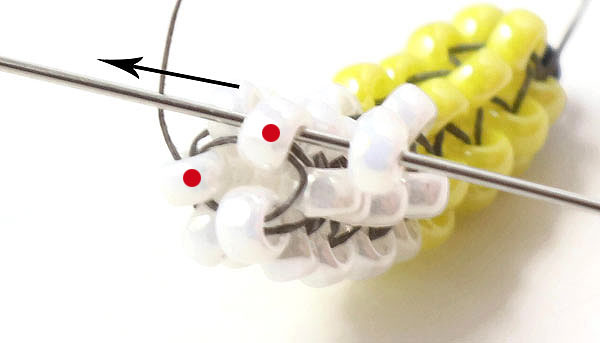
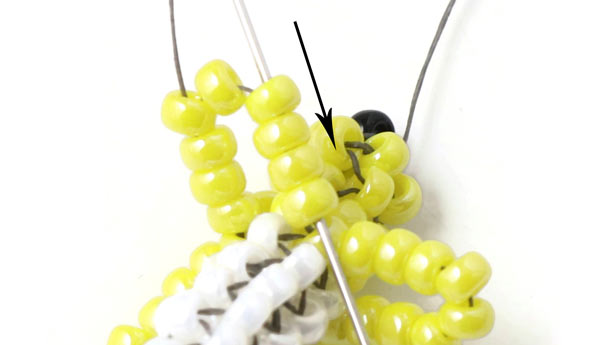
Now you are going to sew through the 3 banana peels one more time: Sew through the first 2 beads in the peel ...
.... skip the next 5 beads ... and continue through the last 2 beads in the peel. Sew through the next 2 banana peels in the same way. Fasten the 2 thread ends by sewing them up through random beads. After that, you cut off the excess thread.
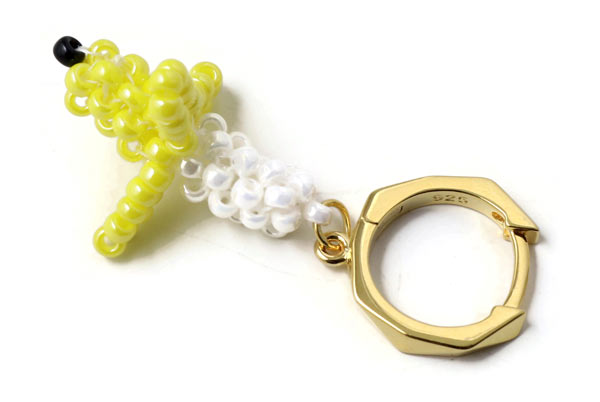
Finally, you pull a jumpring through the last white bead ... and through the eyelet of the hoop.
The finished banana in the picture above was sewn with white thread.
Hoop with Lemon
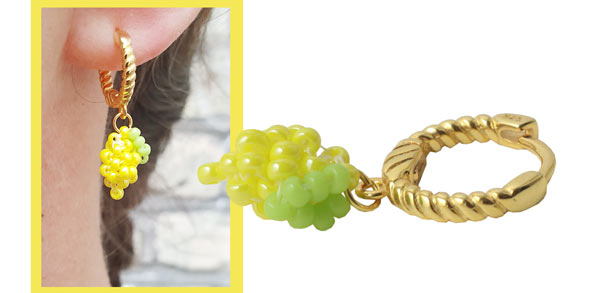
We used the following components to make this earring:
Miyuki seed beads, size #11, yellow luster
Miyuki seed beads, size #11 light green
FireLine, white, 6LB, 2 x 50cm
Jumpring, 3.5x0.5mm, gilded silver
Hinged hoop with twisted ornamentation, gold-plated sterling silver
P.S. For our example, we use black FireLine thread because it is easier for you to see.
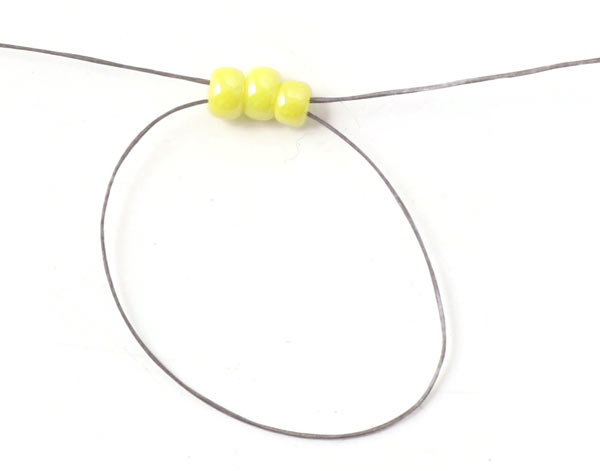
First, you string 3 yellow beads ... and sew back through the 3 beads to form a loop.
Sew through the first bead one more time ...
... and tighten the thread. Now you have a circle.
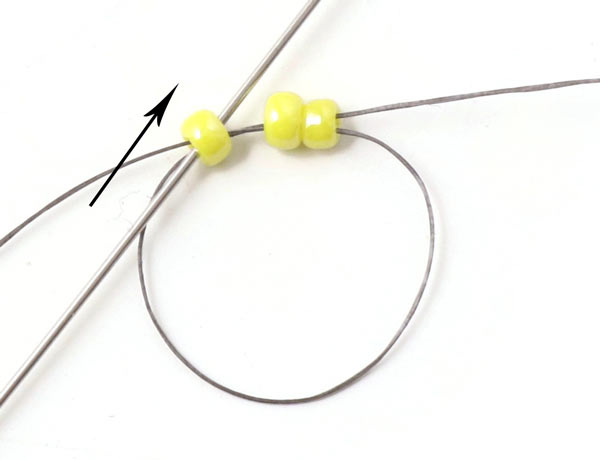
String 1 bead ... and sew through the next bead - but in the opposite direction.
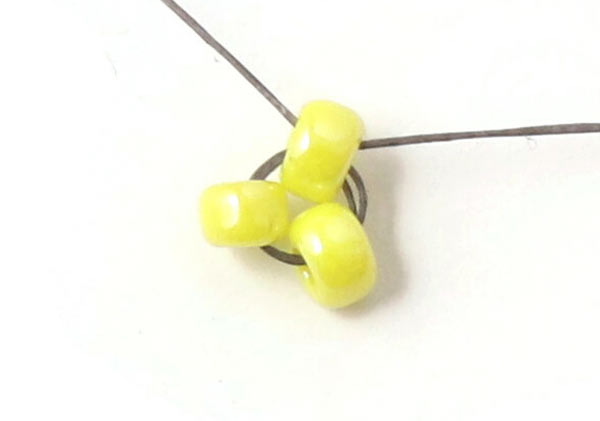
Tighten the thread. The last bead is now placed on top of the others.
Sew through the top bead one more time ...

... and then back through the 1. bead. After that, both thread ends come out of the same bead.
Turn over your needlework so the top bead faces downwards. String 1 bead and sew through the next bead.
String 1 more bead and sew through the next one in the circle.

Again, you string 1 bead - but now you sew through the next 2 beads in order to prepare for the next round.
String 2 beads ... skip 1 bead ... and sew through the next one. Repeat this twice.
When the last 2 beads are sewn on, you sew through 3 beads to prepare for the next round.
String 1 bead ... skip 1 bead ... and sew through the next 2 beads.
When the last 2 beads are sewn on, you sew through 3 beads to prepare for the next round.
String 2 beads ... skip 2 beads ... and sew through the next bead.
When the last 2 beads are sewn on, you sew through 3 beads to prepare for the next round.
String 1 bead ... skip 1 bead ... and sew through 2 beads.
When the last bead is sewn on, you sew through 3 beads to prepare the next round.

String 1 bead ... skip 2 beads ... and sew through the next bead.
When the last bead in the round is sewn on, you sew through 2 beads to prepare the next round.

Sew through the last 3 beads a few of times to tighten the top of the lemon.
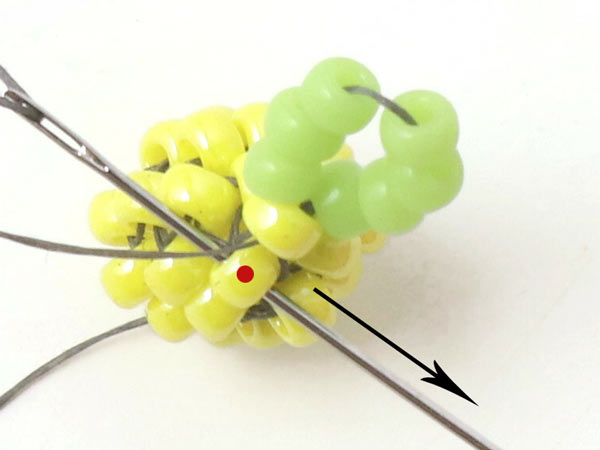
String 1 yellow bead and sew through the next one - but in the opposite direction.
Sew through the bead right underneath the top bead...
.... and one more time through the top bead. String 7 green beads ... sew back through the top bead ...
... and the bead underneath the top bead.
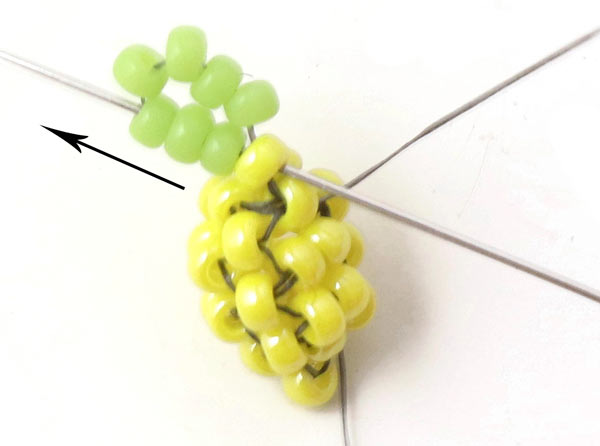
Sew through the top bead one more time ... and continue through the first 3 green beads.
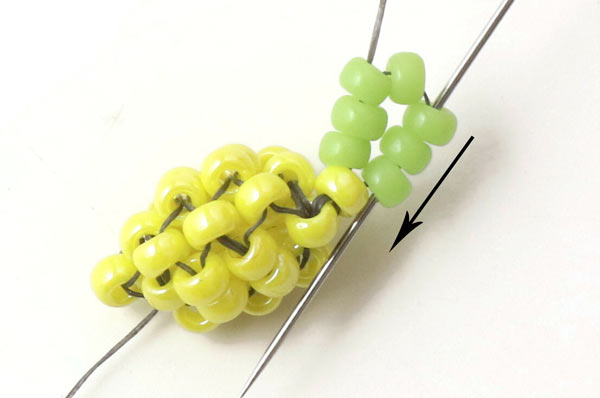
Skip 1 green bead ... sew through the last 3 green beads...
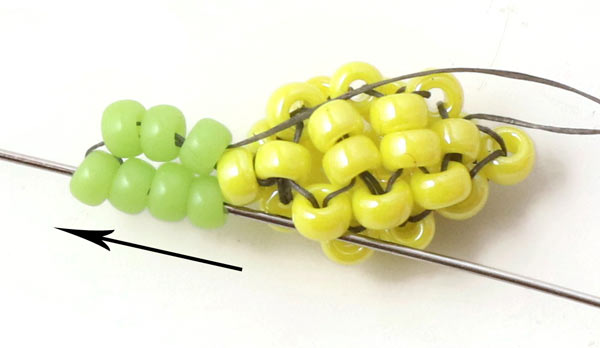
... and through the first 4 green beads.
Fold the leaf down to the lemon and sew through the nearest yellow bead.
Continue sewing through random yellow beads around the lemon until the thread comes out of the leaf again. Then you sew through the 4. yellow bead (the tip of the leaf). Fasten both thread ends by sewing them up through random beads. After that, you cut off the excess thread.
Finally, you pull a jumpring through the top bead and the eyelet of the hoop. Close the jumpring again carefully.
The finished lemon on the picture above was sewn with white thread.
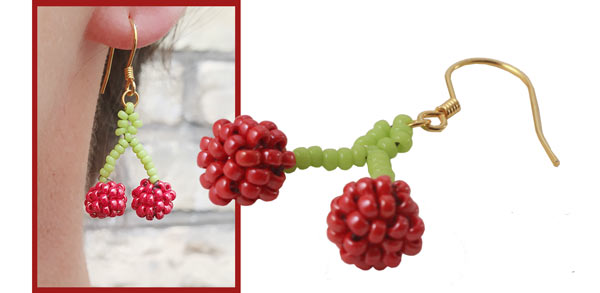
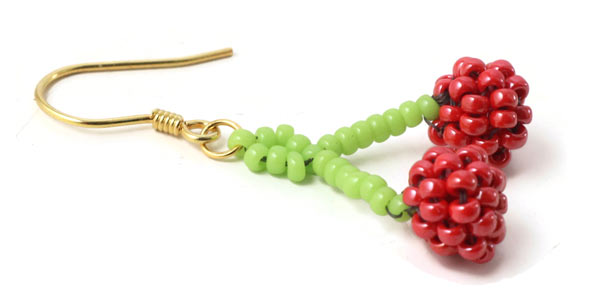
Earwire with Cherries
We used the following components to make this earring:
Miyuki seed beads, size #11, red luster
Miyuki seed beads, size #11, light green
FireLine, black, 6LB, 2 x 60cm
Jumpring, 3.5x0.5mm, gilded sterling silver
Earwires with loop and spiral, gold-plated sterling silver
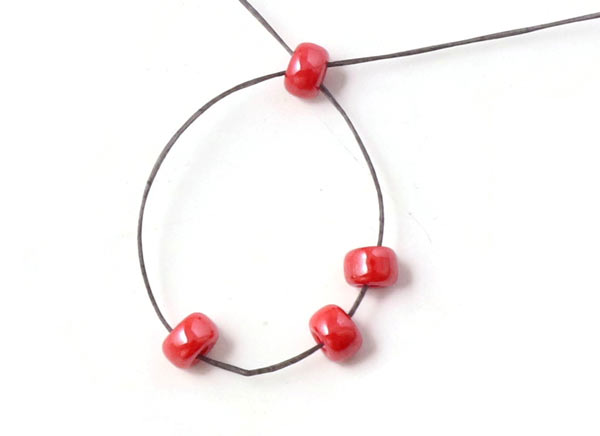
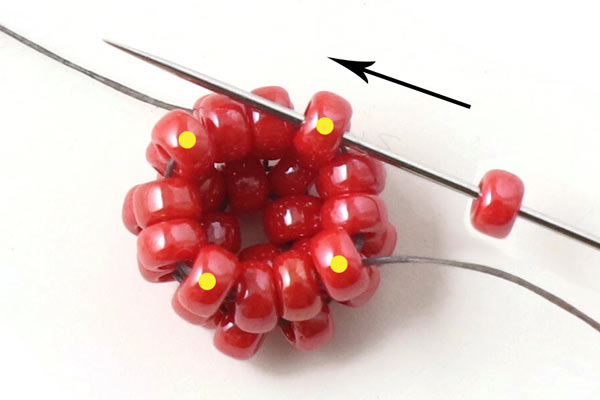
String 4 red beads ... and sew back through the first bead to form a loop. The thread end should be 8cm long.
String 1 bead and sew through the next bead.
Again you string 1 bead ... and sew through the next bead.
Repeat this one more time.
The 4. bead is the last one in this round. Sew through 2 beads to prepare for the next round.
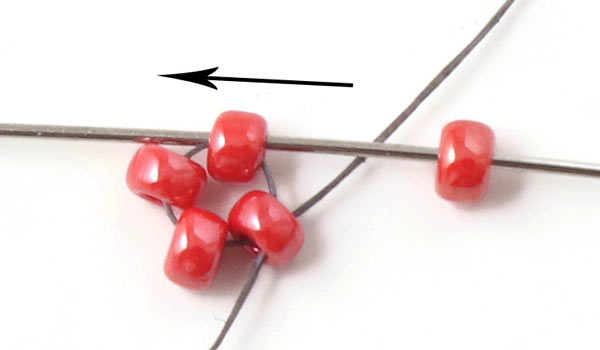
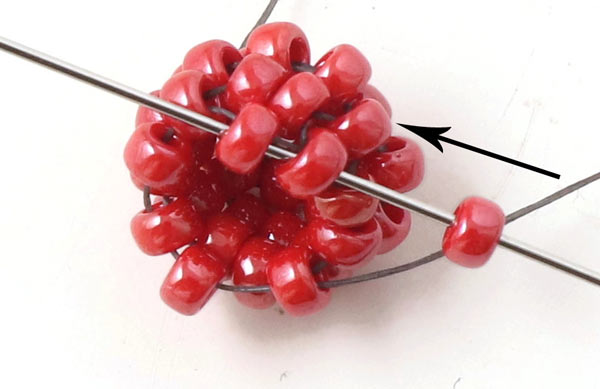
String 2 beads ... skip 1 bead ... and sew through the next bead. Continue like this all the way round.
When the last 2 beads are sewn on, you sew through 2 beads to prepare the next round.
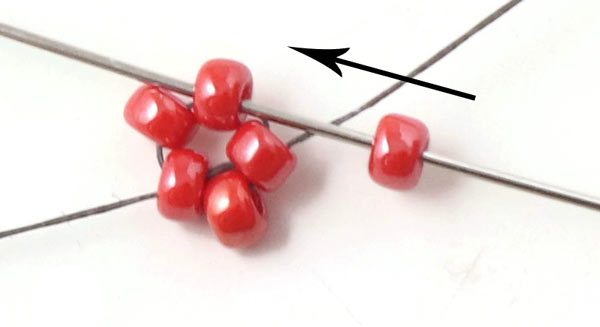
String 1 bead ... skip 1 bead ... and sew through the next 2 beads. Continue sewing on one bead at a time all the way around the circle.
After that, you sew through 3 beads in order to prepare the next round.
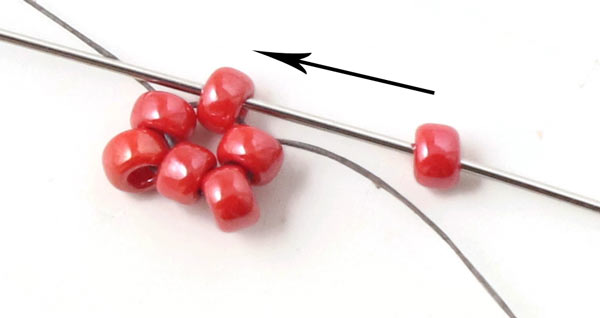
Now you sew one round where you add 2 beads at a time.
After you have sewn through the one bead, you sew through the next 2 beads. Now you have sewn through 3 beads and are prepared for the next round.
String 1 bead ... and sew through 2 beads. When you have sewn all the way around the circle, you sew through 3 beads.
String 1 bead ... skip 2 beads ... and sew through the next bead.
You finish this round by sewing through 2 beads.
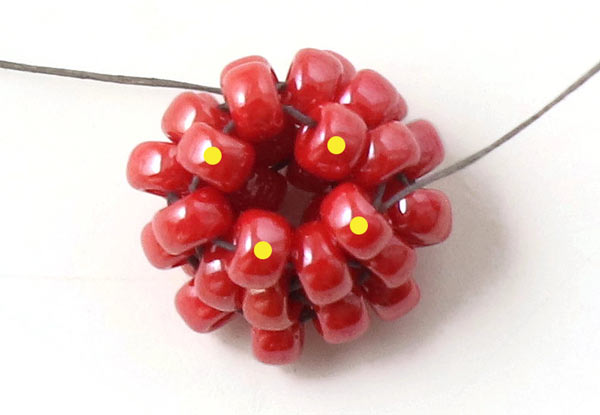
Now, you sew through the last 4 beads a few times and tighten the thread to close the cherry.
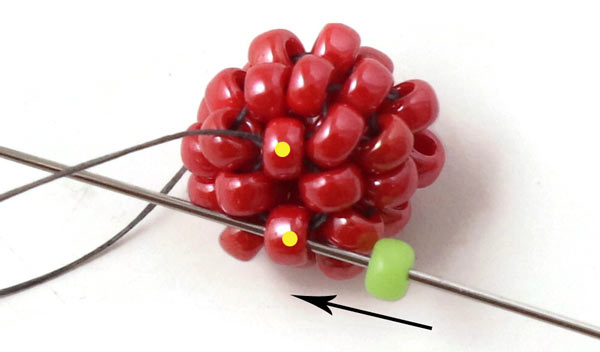
String 1 green bead ... and sew through the bead right opposite to it - but in the opposite direction.
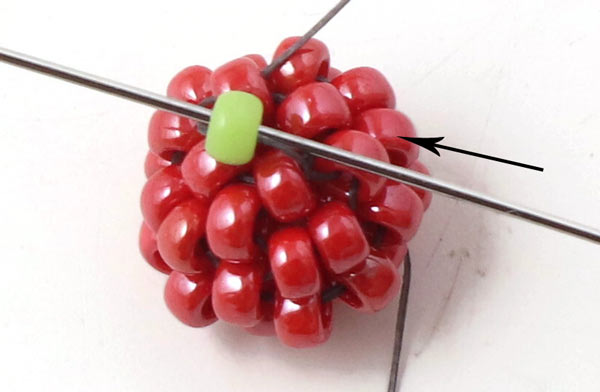
The green bead is now placed right on top of the cherry. Sew through the green bead one more time - in the opposite direction.
Now you sew through the red bead on top one more time.
The green bead is now fastened on top of the cherry.
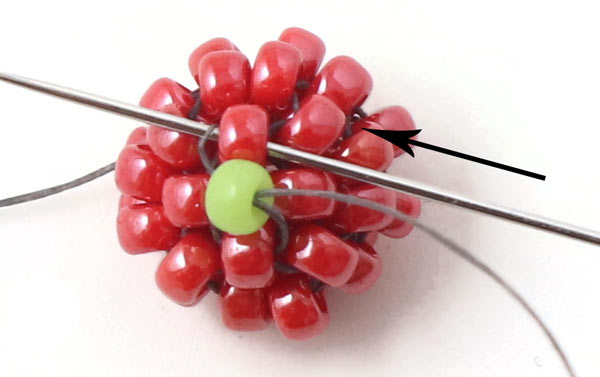
Sew one more cherry in the same way. Sew up three of the thread ends ... but keep the one that comes out of a green bead on top.
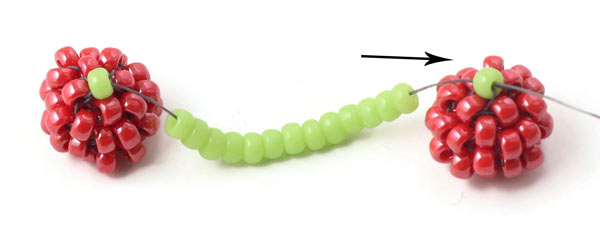
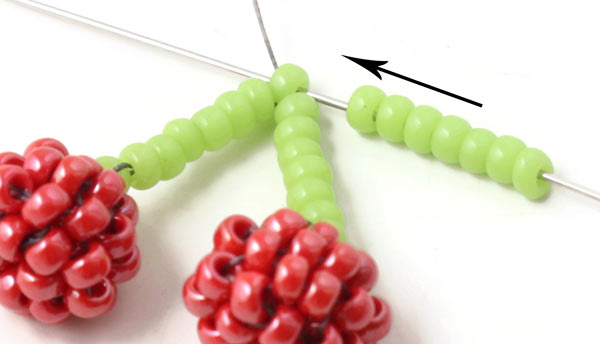
String 13 green beads ... and sew through the green bead on top of the other cherry.
Sew back through 6 green beads.
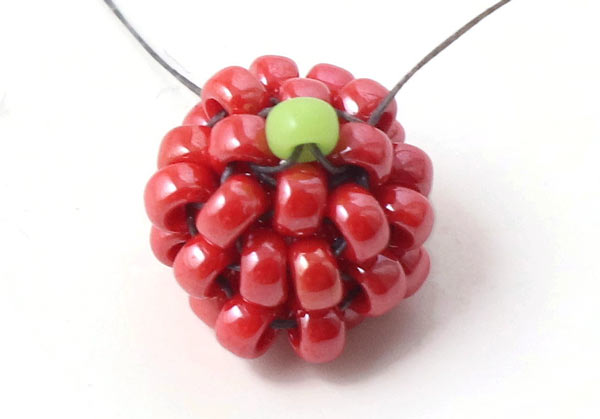
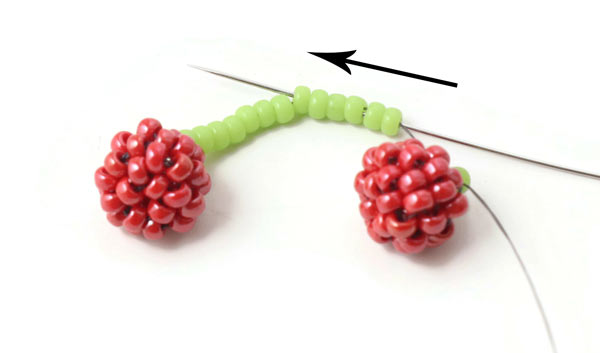
Skip 1 green bead ... and sew through the 7 green beads ...

.... through the red bead right underneath the first green bead...
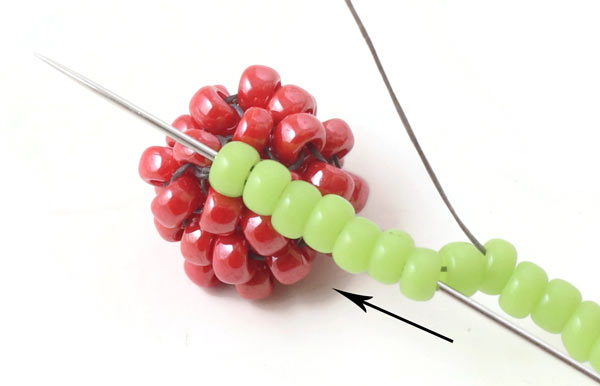
... and through 8 green beads.
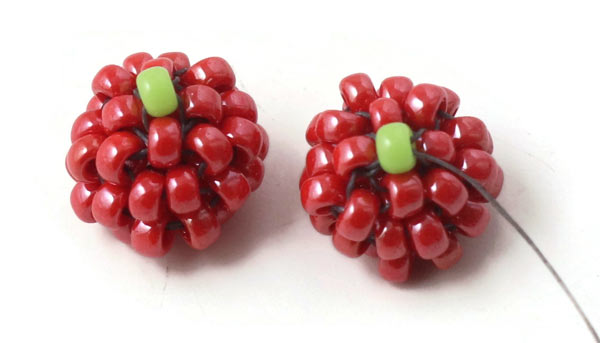
String 7 green beads ... and sew through the green bead in the middle in order to form a circle.
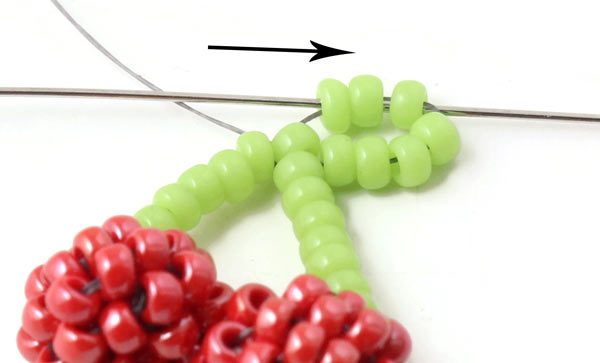
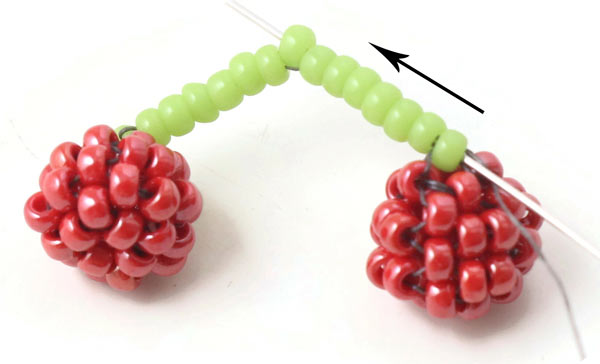
Sew through the next 3 beads in the circle.
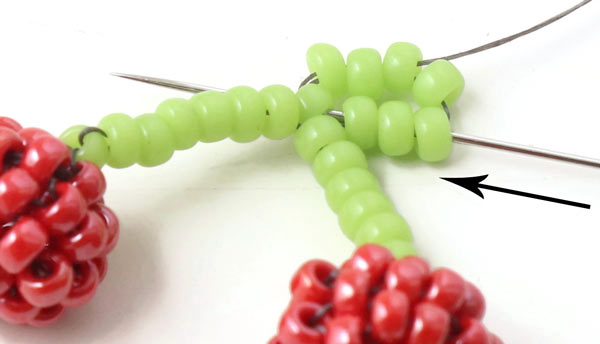
Skip 1 bead ... and sew through the next 4 beads.
Sew through the last green bead ... and fasten the thread by sewing it up through random beads in the cherry.
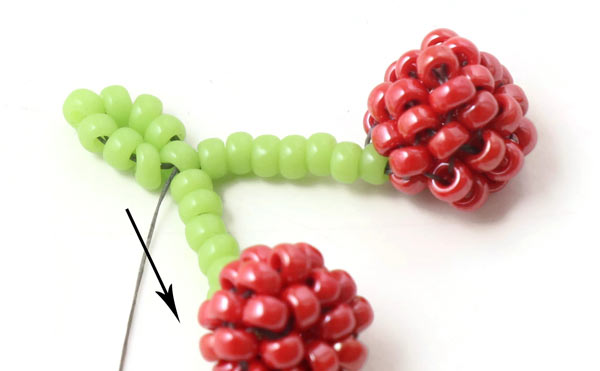
Finally, you connect the cherry to the earwire with the help of a jumpring.
We will publicly show your name and comment on this website. Your email is to ensure that the author of this post can get back to you. We promise to keep your data safe and secure.