


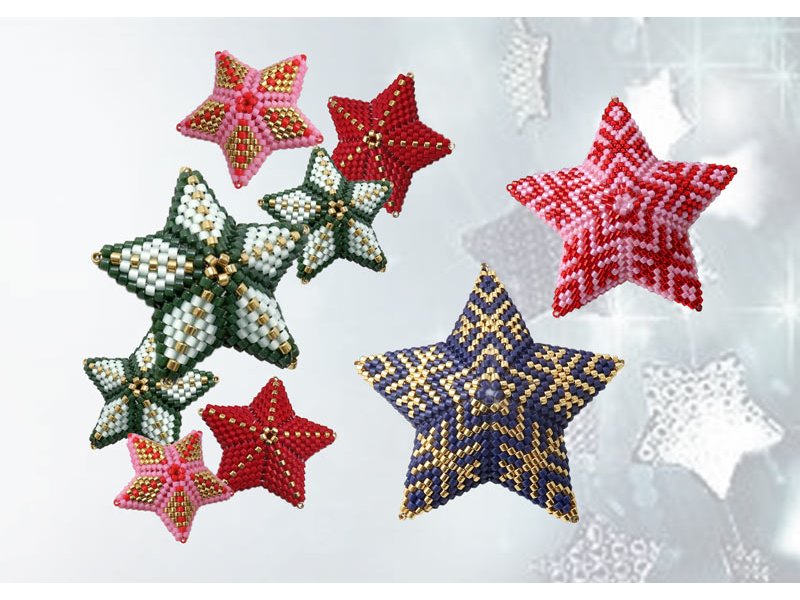
Make your own DIY Christmas stars with small beads
In this blog post, Smyks' designer Charlotte works with the well-known peyote stitch beading technique and explains how to make three-dimensional stars in beautiful colours and patterns using Delica seed beads.
The star shown as example was sewn in 7 seven rounds and has a width of approx. 3cm. If you want to make larger stars, you simply sew more rounds. Additionally, you can fill the star with cotton wool to help it hold its shape. Charlotte uses the popular Delica beads size #11 by Miyuki to to obtain a shiny and elegant surface.
Once you have learned the technique, you can use the stars as window decoration, Christmas tree ornamens, gift tag or as pendants for earrings and necklaces.
Please note that this is an advanced tutorial, so it is advisable that you are already familiar with the basic peyote stitch. You can find peyote stitch tutorials that are more suitable for beginners in the following blog posts:
DIY Peyote Folded Leaf
DIY Peyote Stitch Jewellry
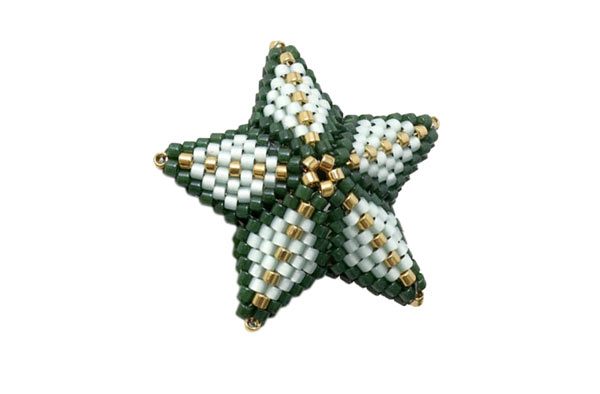
We used the following DIY components to make this star:
Delica beads, forest green, size #11
Delica beads, sea green, size #11
Delica beads, 24-carat gold-plated
Approx.. 3m Fireline, LB3, black
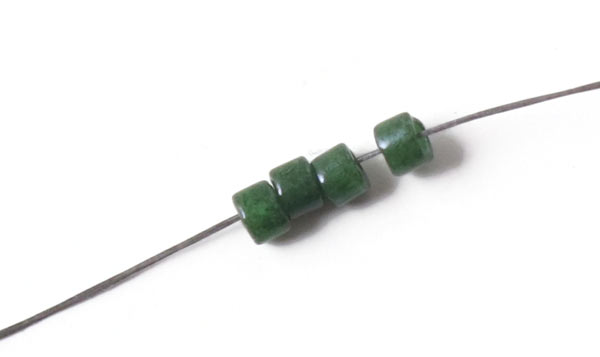
String 4 beads.
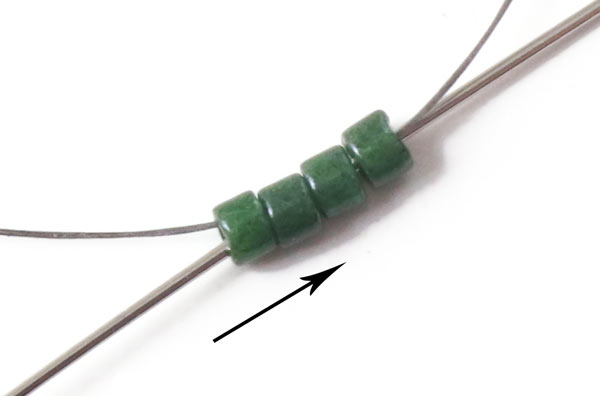
Sew through all 4 beads one more time ...
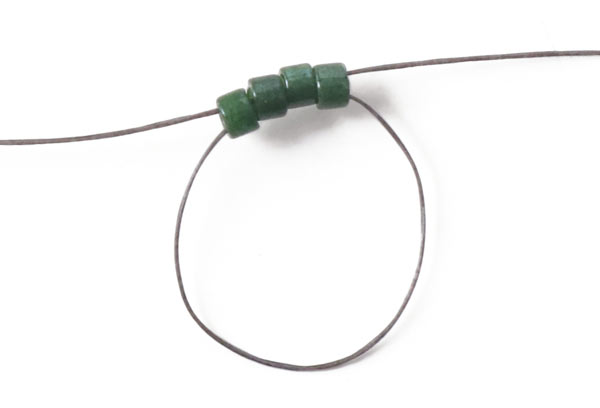
... in order to form a loop.
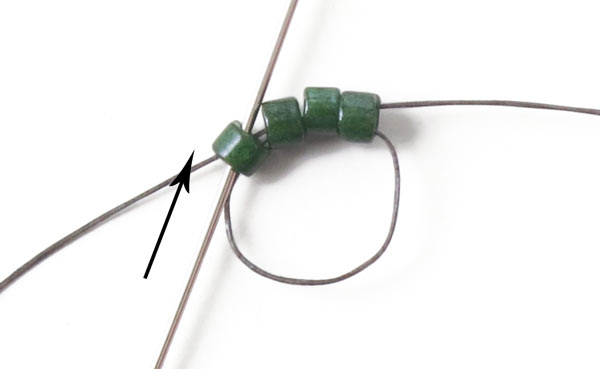
Continue into the same direction ... sew through 1 bead.
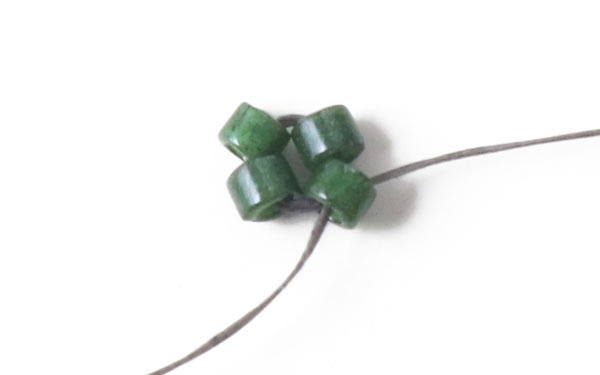
Tighten the thread. Now the first round is done.
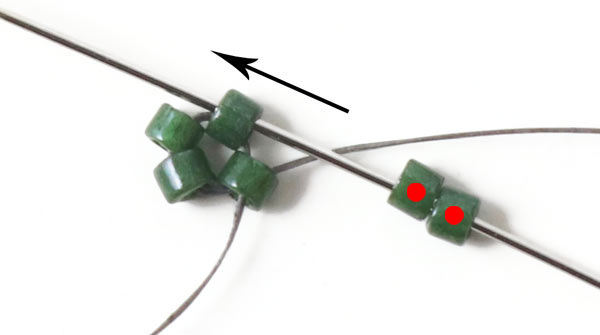
String 2 beads ... and sew through the next bead. Continue sewing into the same direction.
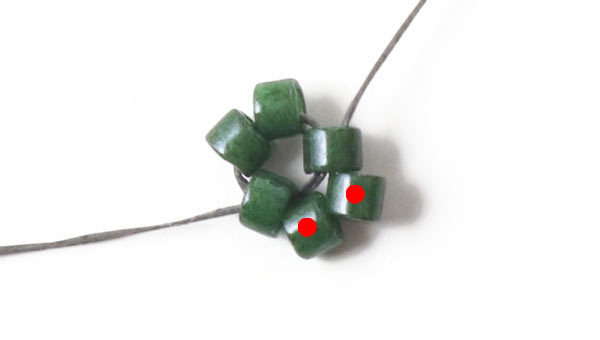
Tighten the thread. The 2 new beads now lean on each other.
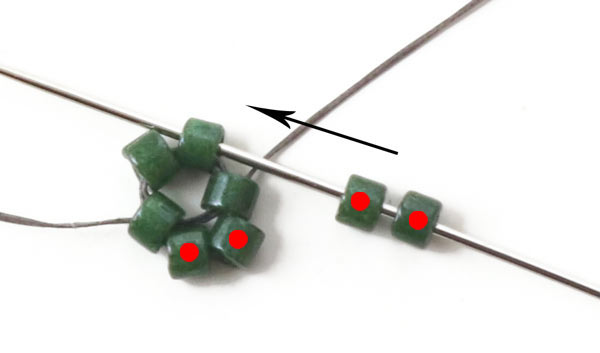
Repeat these steps: String 2 beads ... and sew through the next bead.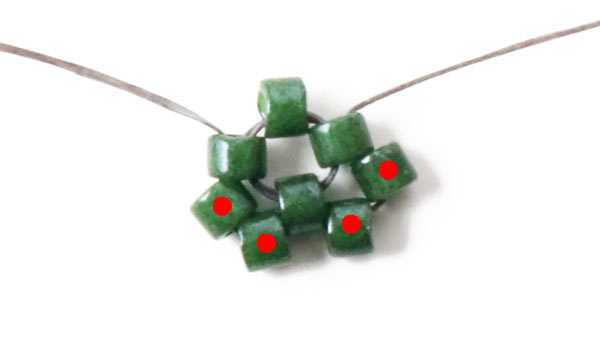
Tighten the thread.
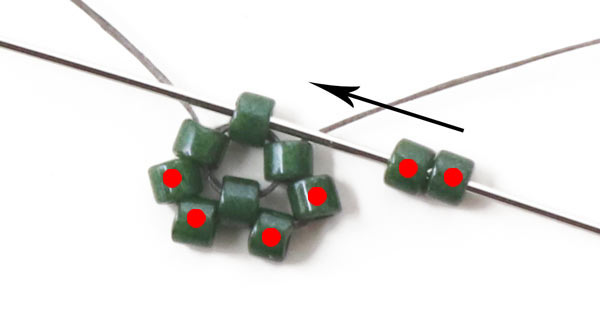
Repeat again: String 2 beads ... and sew through the next bead.
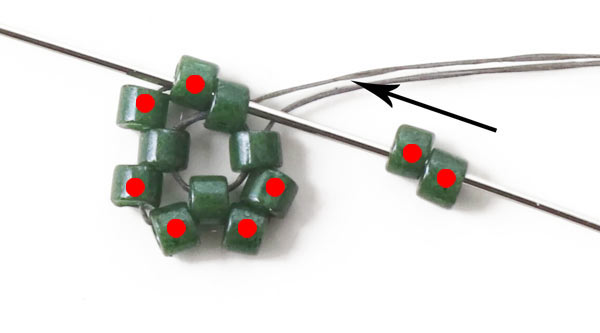
Now you are about to add the last 2 beads in this round. String the beads and sew through 2 beads to prepare for the next round. You do this every time you have finished one round.
Now the second round is done.
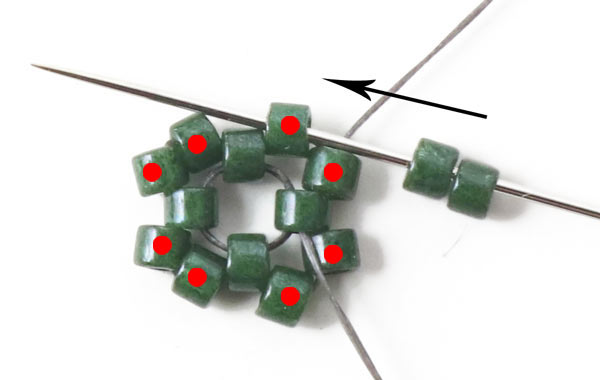
You start the third round by stringing 2 beads and sewing through the next bead.
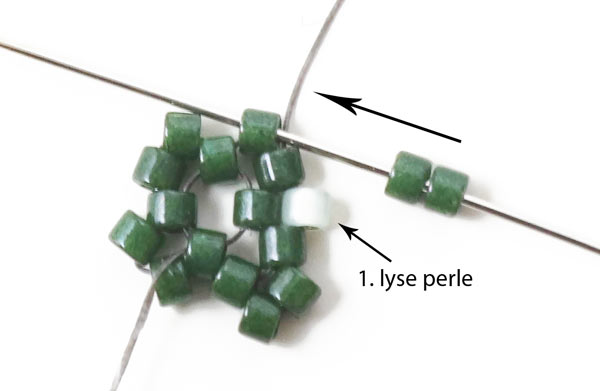
Then you string 1 light-coloured bead and sew through the next green bead that sticks out. After that, you string 2 green beads and sew through the next bead.
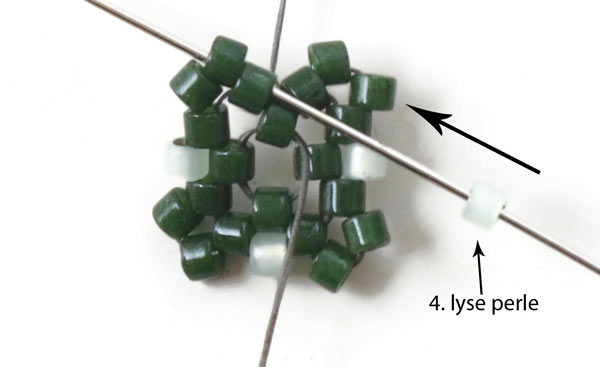
Continue like this all the way around the circle. You add 3 green beads at a time (they form the 4 corners) and 1 light-coloured bead at a time (it fills out the space in between the corners).
Remember: When you have added the last light-coloured bead, you sew through 2 beads in order to prepare for the next round.
Now you have finished the third round.
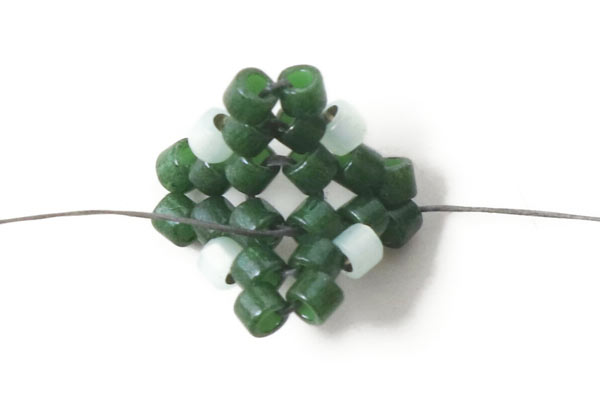
Tighten the thread. Now your piece of needlework will automatically start to fold up.
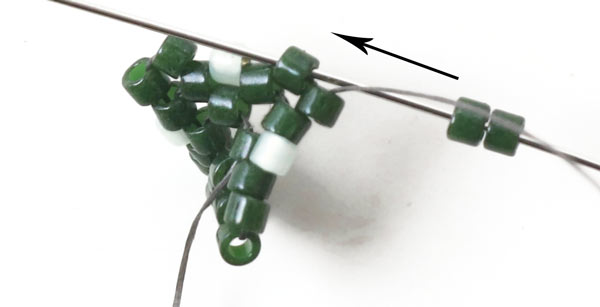
Star the fourth round by sewing on 2 green beads.
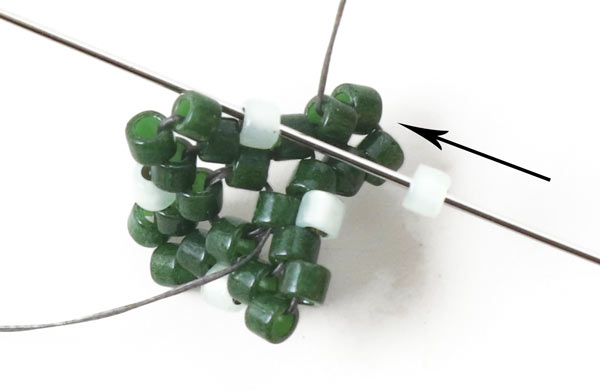
String 1 light-coloured bead and sew through the light bead that sticks out.
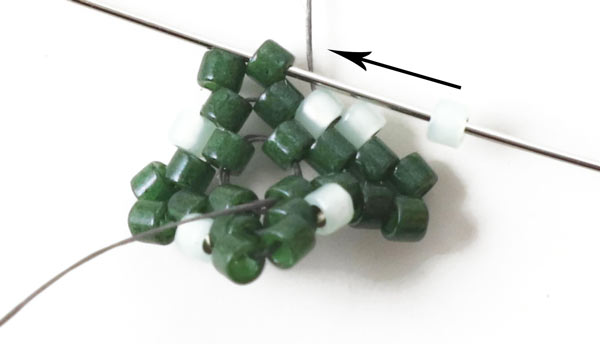
String another light bead and sew through the next green bead that sticks out.
Thew light-coloured beads fill out the spaces, the green beads form the edges of the star.
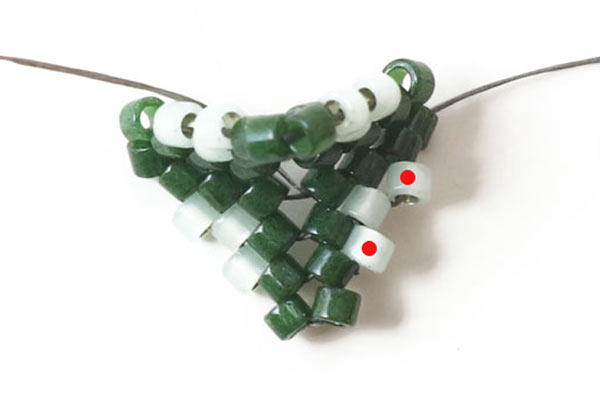
Continue like that all the way round. Now the fourth round is done ... and 2 light-coloured beads stick out on each side.
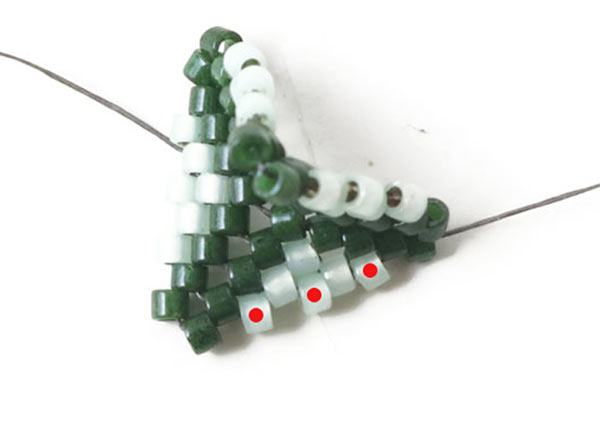
Sew the fifth round in the same way. Once you are done, 3 light beads will stick out on every side.
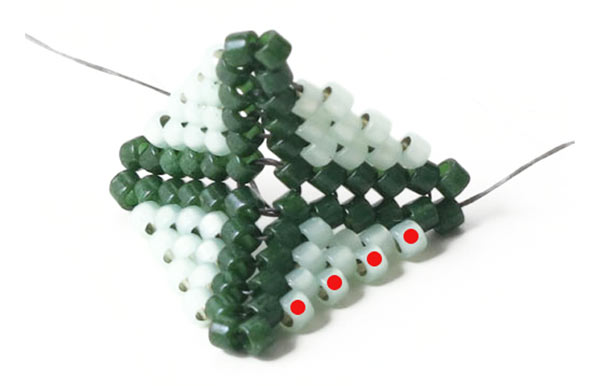
Then you sew the sixth round in the same way. After that, 4 light beads will stick out on every side.
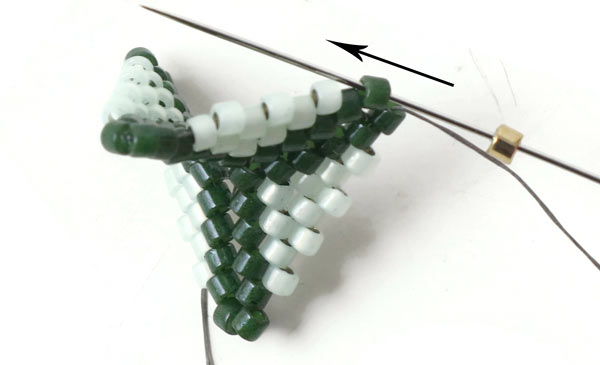
Now you are going to start the seventh round. String 1 golden bead and sew through the next green bead.
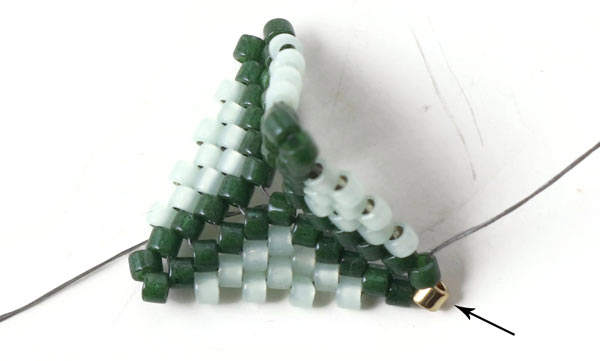
Tighten the thread. In the last round, you only add 1 golden bead at a time around the egdes.
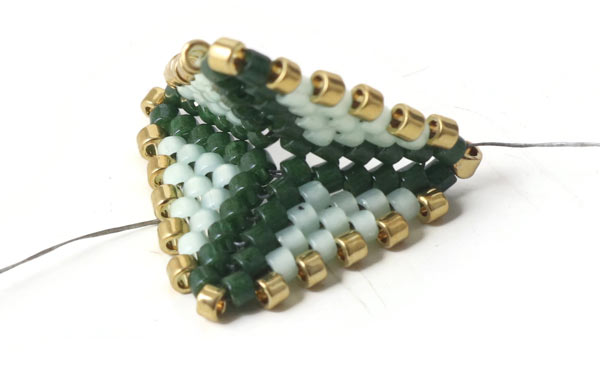
Continue adding 1 golden bead at a time all the way around. After that, you sew up the thread ends.
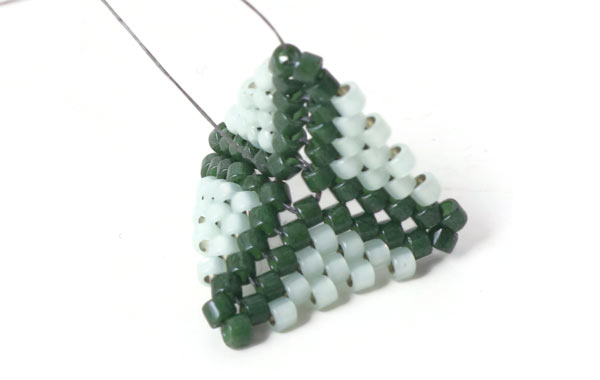
Sew a second square in the same way ... but without the last round with golden beads.
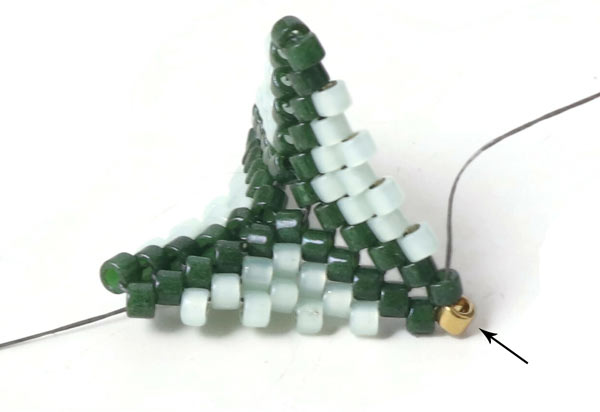
Sew on 1 golden bead.
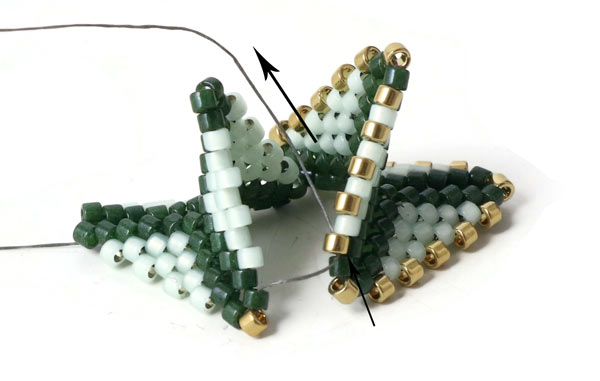
Now you are about to sew the first two tips together.
Sew through the first golden bead on the first tip (the golden bead that sticks out).
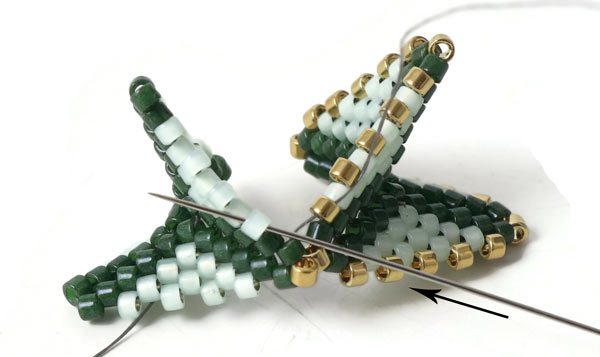
Then you sew through the first light-coloured bead in the second square (the bead that sticks out)...
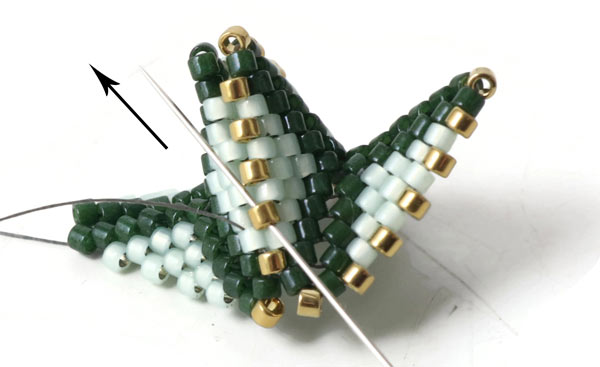
.. and then through the second golden bead that sicks out in the first square.
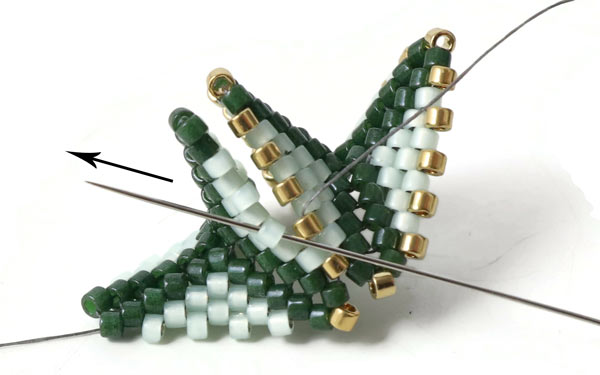
Continue sewing together the two squares in this way ... zigzagging between the beads that stick out.
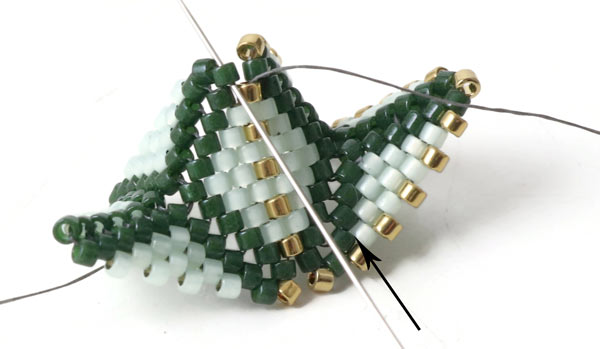
At the tip, you sew through the upper green bead and ...
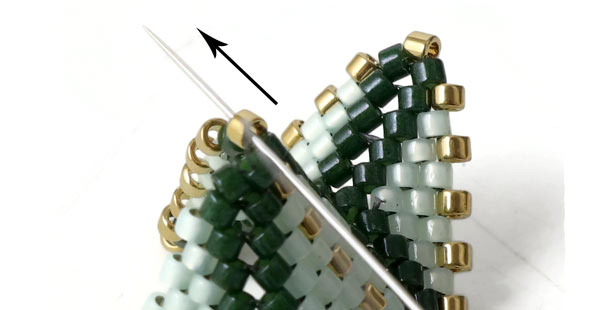
... continue through the upper golden-bead in the first square...
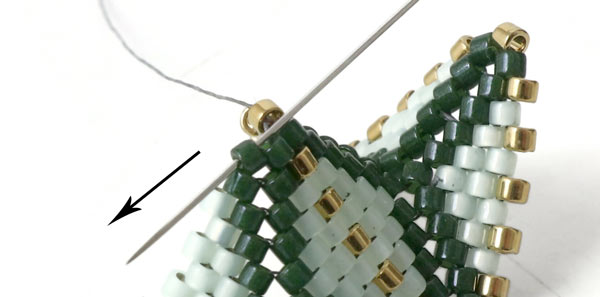
... and the 2. green bead in the 2. square (see picture).
Continue sewing like this on the other side.
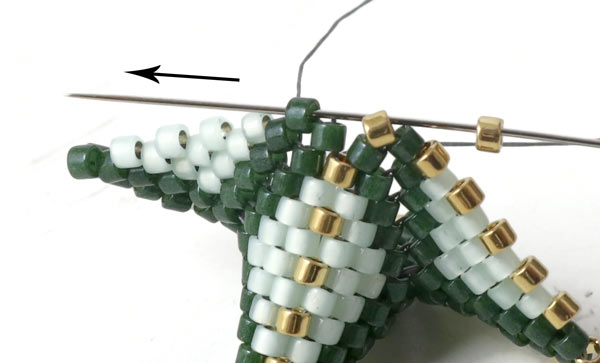
When the two squares are fastened to each other, you sew on golden beads in the same way as before - 1 golden bead at a time...
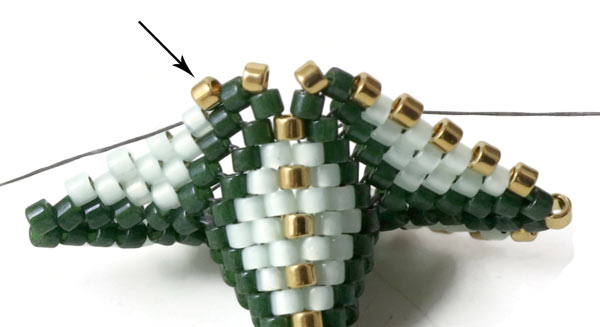
... all the way along the edge.
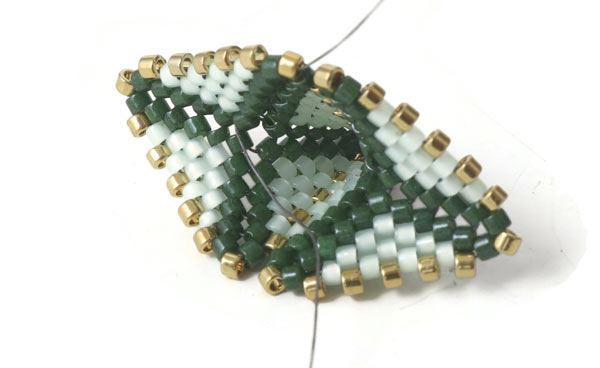
The two squares are now fastened to each other and form the first 2 tips of the star.
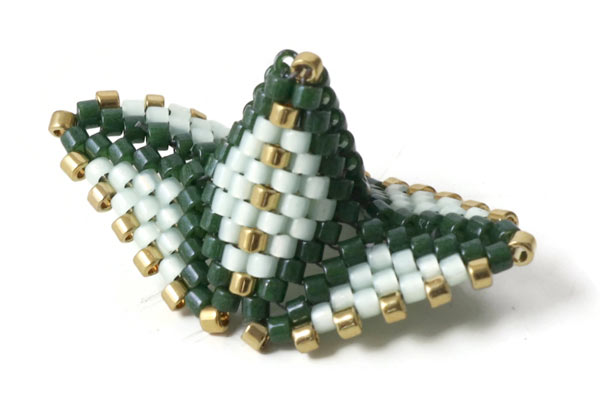
Sew up the ends.
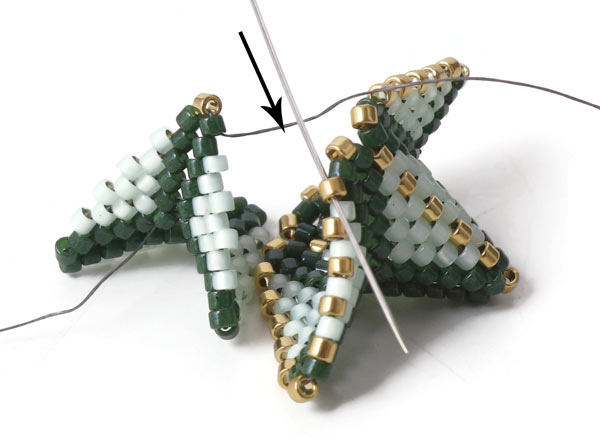
Sew 1 more square. Then you sew this new square to the first 2 squares in the same way.
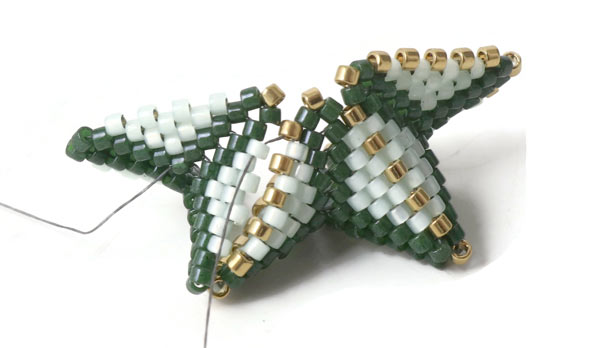
Zig-zag between the beads that stick out.
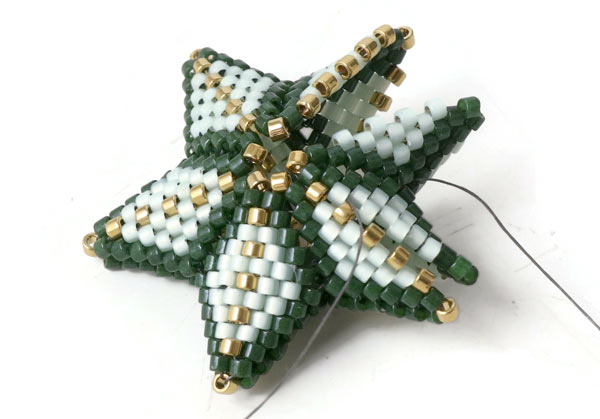
Continue in the same way: Sew a square... and sew it to the other squares. The star consists of a total of 5 squares that are sewn together.
Here you see how the 5th and last square is sewn on (see picture).
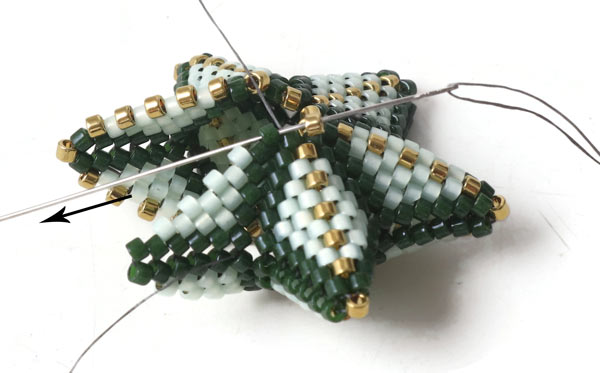
Remember to always sew 1 golden bead to each tip of the star for this pattern...
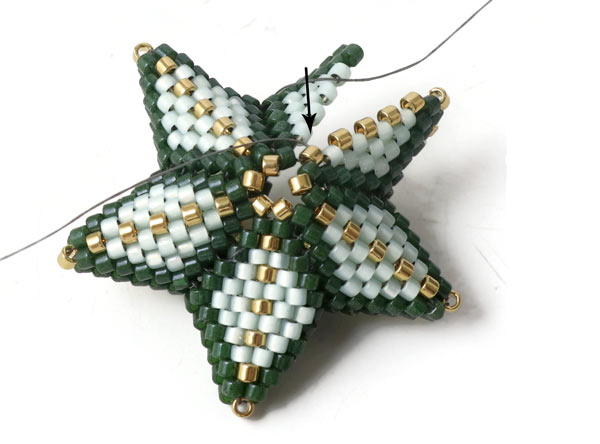
...i order to form a centre with 5 golden beads in a circle.
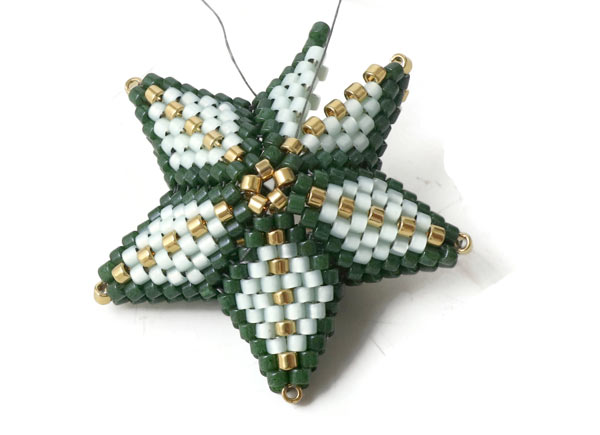
Tighten the thread. If necessary, sew an extra round in the circle before you continue ...
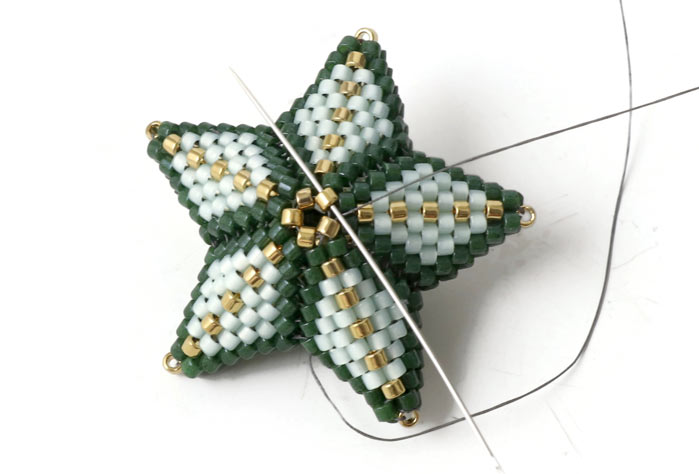
On the other side, you also sew an extra round in the circle.
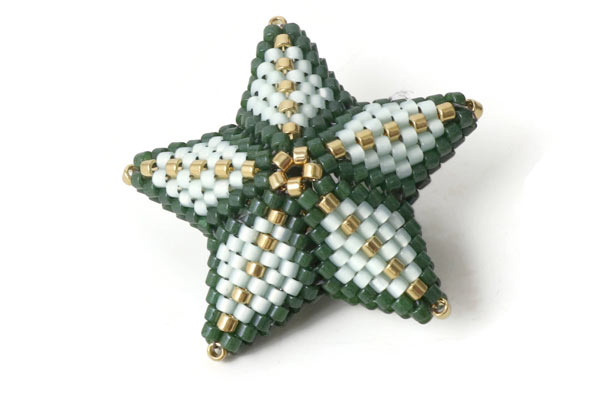
Secure the end of the thread.
Congratulations! Your star is now finished :-)
The stars you see here below are worked in seven rounds (including the round with golden beads). They measure roughly 3 cm across and just under 1.5 cm in thickness. You can make a larger star simply by adding extra rounds before finishing with the final round of gold beads.
This size holds its shape well without any stuffing, but if you choose to make a bigger star, adding a little wadding will help it keep its form.

Peyote Star with Snowflake Pattern

You need the following DIY components to make this star:
Delica beads, size #11, navy blue
Delica beads, size #11, gold-plated
Approx. 5m FireLine, 6LB, black
+ Filling material

This is what the pattern for the snowflake star looks like. The four central beads make up the first round. With each round you sew, the round gets longer and longer. This pattern is also shown in the printable version at the top of this blog post.
There are 11 rounds in this star, and it measures approx. 5cm in diameter.
The general beading technique for this star is demonstrated in our first example in the blog post. The example below shows how to read and sew this particular pattern.

The first round consists of 4 beads. These are the beads marked with the number 1 in the pattern.

The second round consists of 8 beads... the beads marked with the number 2 in the pattern.

The third round consists of 12 beads… the beads marked with the number 3 in the pattern. Now there is a gold bead on each of the four sides.

Row 4 consists of 16 beads… the beads marked with the number 4 in the pattern. This row consists entirely of blue beads.
 Row 5 consists of 20 beads… the beads marked with the number 5 in the pattern. In this row, there are 3 gold beads on each side.

Continue in the same way... follow the pattern for each round. Once you have completed the last round (round 11), the pattern will look like this:

The next point of the star is made in the same way... here is the final round, round 10.

Sew... as shown in the first example... 1 bead is added to the tip...

...before you sew the first two points of the star together.

Make sure the pattern lines up.

Stuff the star with wadding and sew a closed ring onto the tip of the star (if you like) ... before we sew the last side together.

Snowflake Star in Red and Pink

You need the following DIY components to make this star:
Delica beads, size #11, red / silver-lined
Delica beads, size #11, rosewater
Approx. 5m FireLine, 6LB, white
+ Filling material
Snowflake Star in Mint and Silver

You need the following DIY components to make this star:
Delica beads, size #11, light mint
Delica beads, size #11, silver-plated
Approx. 5m FireLine, 6LB, white
+ Filling material
We will publicly show your name and comment on this website. Your email is to ensure that the author of this post can get back to you. We promise to keep your data safe and secure.