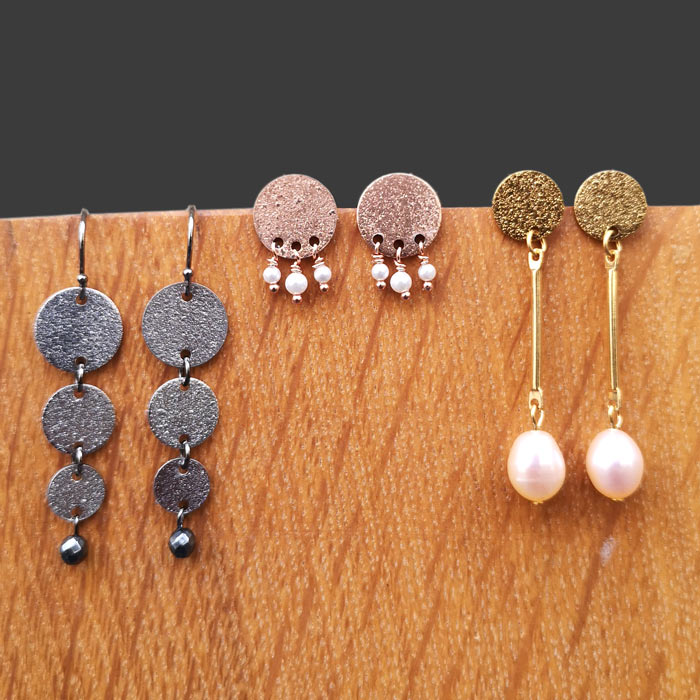
Click here to see the stardust coins used for these earrings.
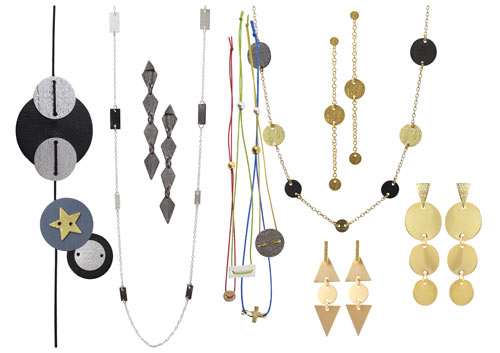
In the illustration above you see a little DIY collection consisting of necklaces, bracelets and earrings made of jewellery parts in simple geometrical shapes.
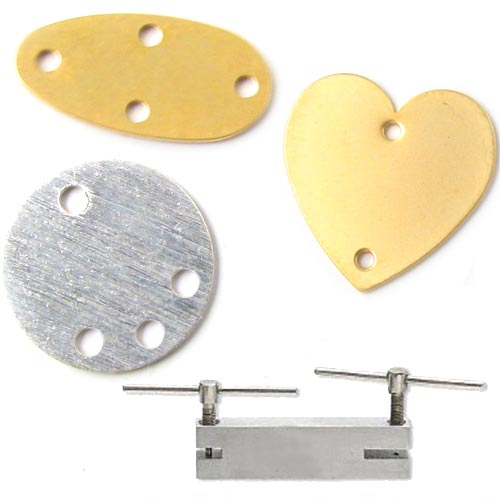
We customised all jewellery components by providing them with extra holes so we could be even more inventive and combine them in a new and individual way.
Every time you punch an additional hole, the back of the metal piece becomes a bit uneven. You can correct this little flaw by filing it. But be careful not to scratch too deep into the metal, otherwise you might remove the gilding or the oxidised surface.
It is a good idea to paste a piece of cellotape on the metal before you start punching, that way the punching pliers will not leave marks.
Hole punch unit for jewellery components
Small and convenient tool that punches extra holes (1.5mm or 2mm in diameter) into jewellery components made of silver, brass, copper and other soft metals with a thickmess of max. 1mm.
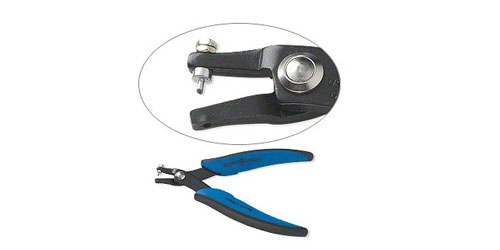
Punching pliers
These handheld punching pliers punch holes that are 1.25mm in diameter. The pliers are made of extra hard carbon steel and have soft plastic handles.
You can use them for jewellery parts that are made of copper, silver or other soft metals and are up to 1mm thick. Overall length of the pliers: 15.5cm; jaw length: 12cm; tip width: 3.5mm.
Extra pins to punch 1.8mm holes can be purchased seperately.
Earrings with oxidised diamond-shapes
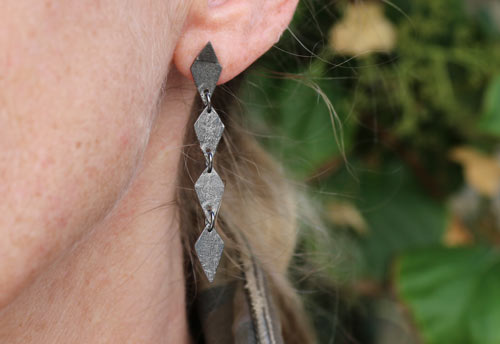
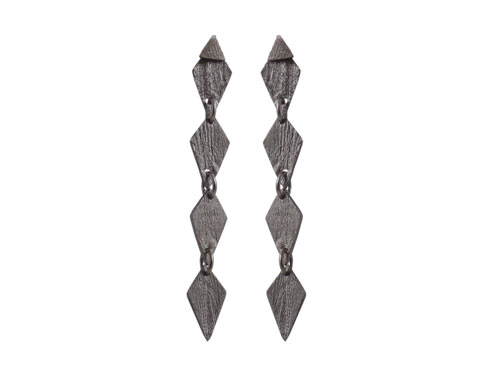
You need the following materials and tools to assemble these earrings:
- 1 pair of earstuds with small triangle, oxidised sterling silver
- 8 pointed diamonds, brushed, oxidised sterling silver ( or teardrop)
- 6 jumprings, 5mm, oxidised sterling silver
- 1 pair of hole punching pliers
- 1 pair of flat-nose pliers
- 1 pair of chain-nose pliers
- 1 file
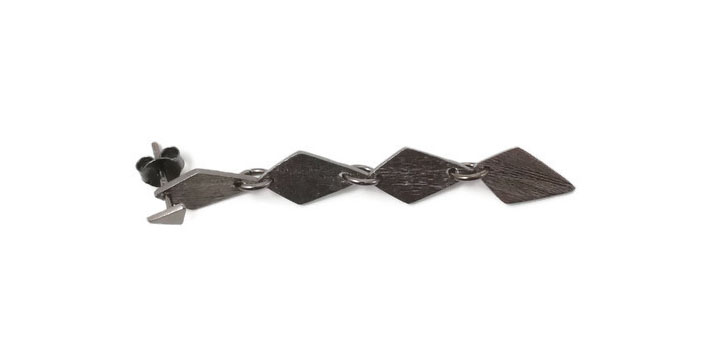
You punch a hole in the upper and the lower tip of the diamonds, except the one which is going to hang the lowest. This one only needs one hole in the upper tip.
Once you have done that, you connect the diamond-shapes to each other with jumprings. You can learn how to open and close a jumpring correctly in this earlier DIY tutorial.
Finally, you slide the peg of the earstud through the hole in the upper diamond-shape.
Necklace with chain and squares
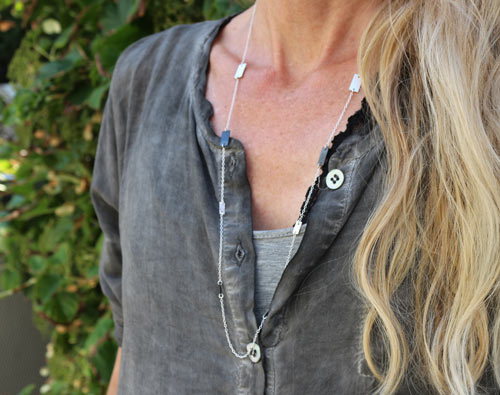
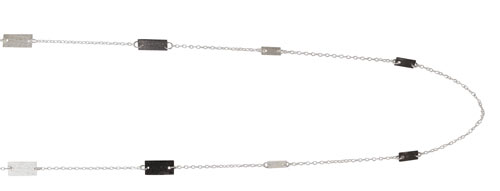
You need the following materials and tools to assemble this necklace:
- 60cm cable chain, AR30, sterling silver
- 2 brushed squares, 12x6mm, sterling silver
- 2 brushed squares, 12x6mm, oxidised sterling silver
- 2 brushed squares, 8x4mm, sterling silver
- 2 brushed squares, 8x4mm, oxidised sterling silver
- 16 jumprings, 3.5×0.5mm, sterling silver
- 1 pair of hole punching pliers
- 1 pair of chain-nose pliers
- 1 pair of flat-nose pliers
- 1 file
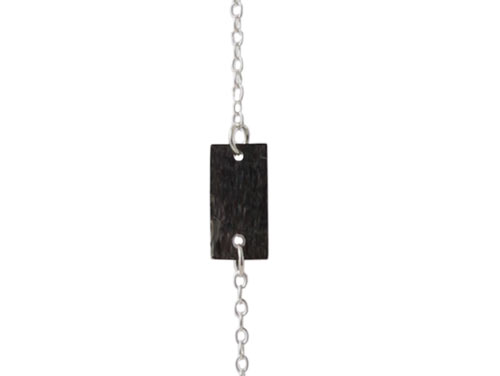
Cut the chain on the spots you want the squares to be. Then you fasten the squares to the chain with jumprings. You can learn how to open and close a jumpring correctly in this earlier DIY tutorial.
Bracelets with locking beads
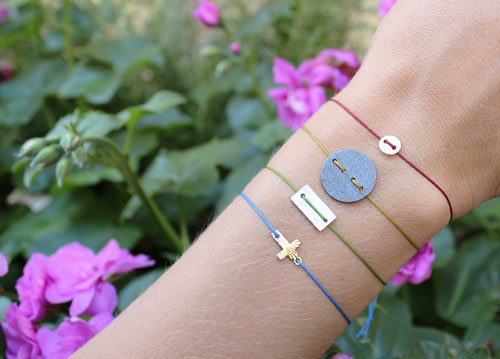

You need the following materials and tools to assemble these bracelets:
- polyester cord 0.5mm, various colours
- 1 coin, 15mm, oxidised sterling silver
- 1 brushed square, 12x6mm, sterling silver
- 1 coin, 6mm, gilded sterling silver
- 1 cross, gilded brass
- locking beads, gilded sterling silver
- locking beads, sterling silver
- 1 pair of hole punching pliers
- 1 file
Du nimmst die Lochzange und versiehst damit die Schmuckkomponenten mit extra Löchern. Dann fädelst du die Polyesterschnur durch die Löcher.
Take your punching pliers and provide the jewellery components with extra holes. Then you slide the polyester cord through the holes. Use a locking bead to close the bracelet. In our earlier DIY tutorial Delica jewellery with locking bead we explain how you do it.
Necklace with chain and coins
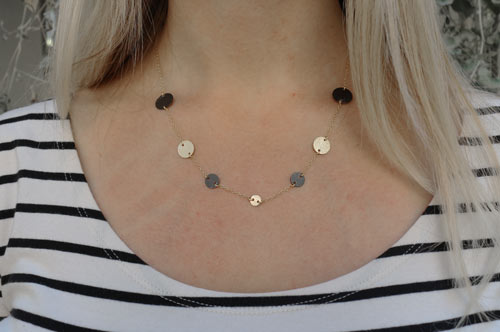
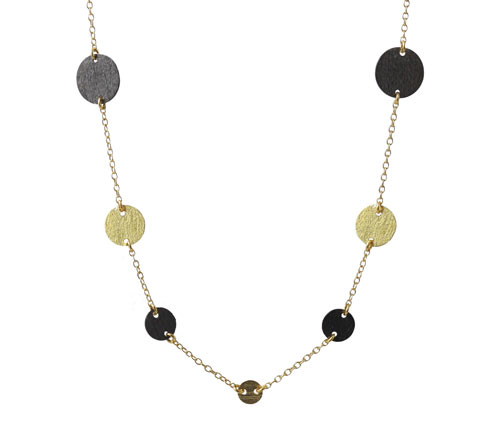
You need the following materials and tools to assemble this necklace:
- 60cm gilded cable chain, AR30
- 2 brushed coins, 12mm, oxidised sterling silver
- 2 brushed coins, 8mm, oxidised sterling silver
- 2 brushed coins, 10mm, gilded sterling silver
- 1 brushed coin, 6mm, gilded sterling silver
- 14 jumprings, 3mm, gilded sterling silver
- 2 jumprings, 4mm, gilded sterling silver
- 1 lobster claw clasp, 9mm, gilded sterling silver
- 1 pair of hole punching pliers
- 1 pair of flat-nose pliers
- 1 pair of chain-nose pliers
- 1 file
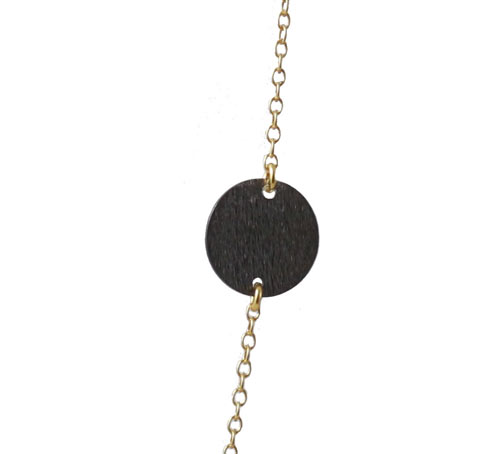
Cut the chain on the spots where you want to insert the coins. Then you fasten the coins to the chain with 3mm jumprings. You can learn how to open and close a jumpring correctly in this earlier DIY tutorial.
Now you take the lobster claw clasp and attach it to the one end of the chain with a 4mm jumpring. Finally, you fasten a 4mm jumpring to the other end of the chain.
Earrings with chain and coins
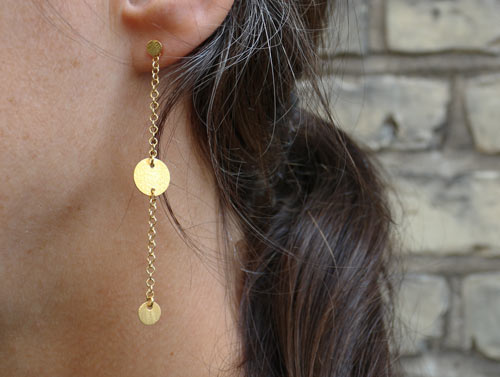
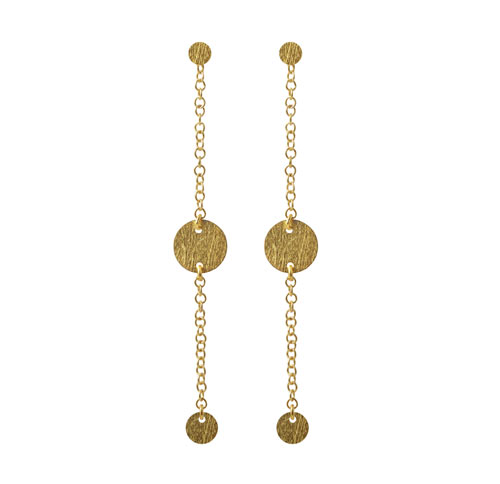
You need the following materials and tools to assemble these earrings:
- 1 pair of earstuds with flat pad, 4mm, gilded sterling silver
- 2 brushed coins, 10mm, gilded sterling silver
- 2 brushed coins, 6mm, gilded sterling silver
- 6 jumprings, 3mm, gilded sterling silver
- 12cm small cable chain, gilded sterling silver
- 1 pair of chain-nose pliers
- 1 pair of flat-nose pliers
- 1 pair of hole punching pliers
- 1 file
First, you punch an additional hole into the large coin. Then you connect the chains and coins with jumprings. You can learn how to open and close a jumpring correctly in this earlier DIY tutorial. Finally, you set the last link of the cable chain on the peg of the earstud.
Earrings with gilded coins
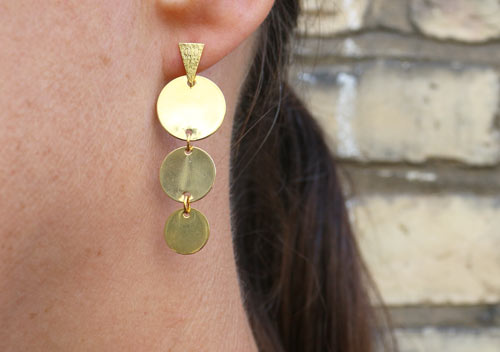
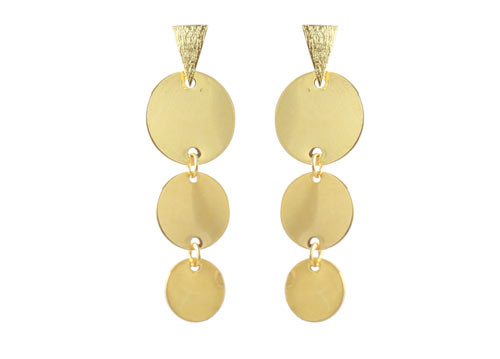
You need the following materials and tools to assemble these earrings:
- 1 pair of earwires with brushed triangle, gilded sterling silver
- 2 coins, 15mm, gilded brass
- 2 coins, 12mm, gilded brass
- 2 coins, 10mm, gilded brass
- 4 jumprings, 4mm, gilded brass
- 1 pair of hole punching pliers
- 1 pair of flat-nose pliers
- 1 pair of chain-nose pliers
- 1 file
First, you punch an additional hole into each of the two larger coins. Then you fasten the three coins to each other with jumprings. You can learn how to open and close a jumpring correctly in this earlier DIY tutorial.
Finally, you connect the earwire and the coins by sliding the earwire’s opened eyelet through the second hole in the large coin.
Earrings with coin and triangles
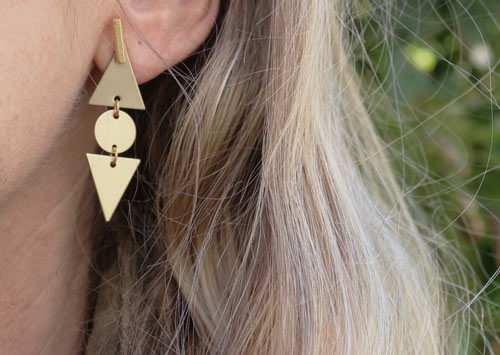
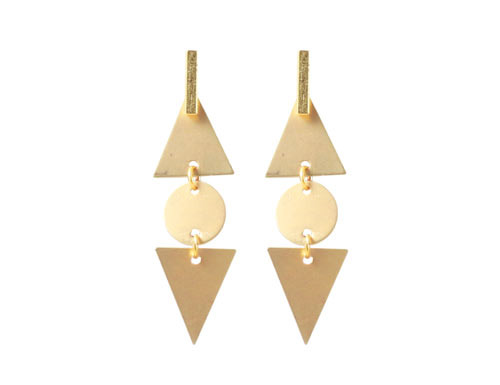
You need the following materials and tools to assemble these earrings:
- pair of earstuds with brushed bar, gilded sterling silver
- 4 triangles, gilded brass, frosted
- 2 coins, 10mm, gilded brass, frosted
- 4 jumprings, 4mm, gilded brass
- 1 pair of hole punching pliers
- 1 pair of flat-nose pliers
- 1 pair of chain-nose pliers
- 1 file
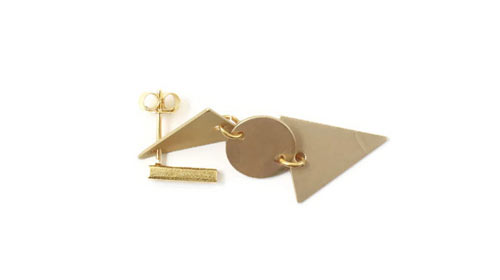
First, you punch an extra hole into the tip of one of the triangles and into the coin. Then you connect the jewellery components with jumprings. You can learn how to open and close a jumpring correctly in this earlier DIY tutorial. Finally, you slide the peg of the earstud through the second hole in the triangle.
Bracelet with leather and silver coins
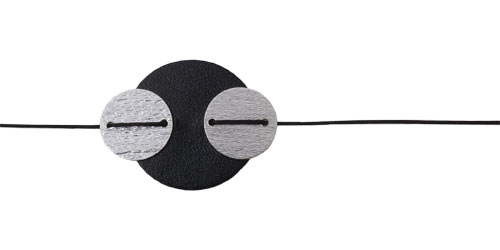
You need the following materials and tools to assemble this bracelet:
- 1 leather coin, 22mm, black
- 2 coins, 12mm, sterling silver
- 30cm polyester cord, 0.5mm, black
- 1 locking bead, sterling silver
- 1 pair of hole punching pliers
- 1 wide-eye needle
Take your punching pliers and provide each of the silver coins with an additional hole. Then you punch two holes into the leather coins. Alternatively, you can use an awl to prick out the holes. Then you slide the cord through the silver coins and the leather coin with the help of a wide-eye needle. Finally, you close the bracelet with a locking bead. In our earlier DIY tutorial Delica jewellery with locking bead we explain how you do it.
Buttons made of leather and sterling silver
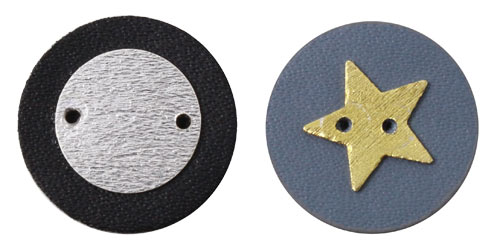
You need the following materials and tools to make these buttons:
- 1 leather coin, 18mm, black
- 1 leather coin, 18mm, grey
- 1 coin, 12mm, sterling silver
- 1 star, 11mm, gilded sterling silver
- 1 pair of hole punching pliers
First, you glue the silver coin or the star onto the leather coin. After that, you take your punching pliers and punch the leather through the hole in the metal. Then you punch an additional hole through metal and leather together.
Have fun making your own jewellery!
Have you got any questions, suggestions or comments? Please write in the commentary field below. Thank you!

We will publicly show your name and comment on this website. Your email is to ensure that the author of this post can get back to you. We promise to keep your data safe and secure.