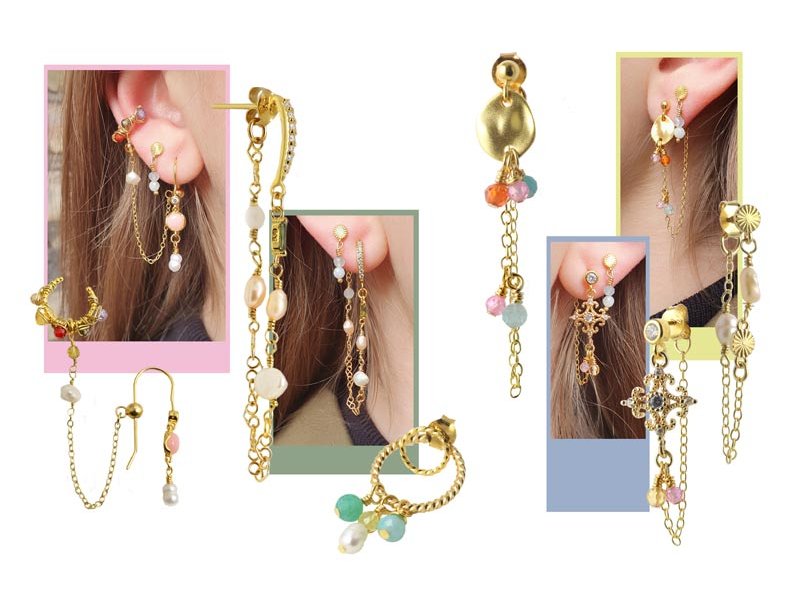
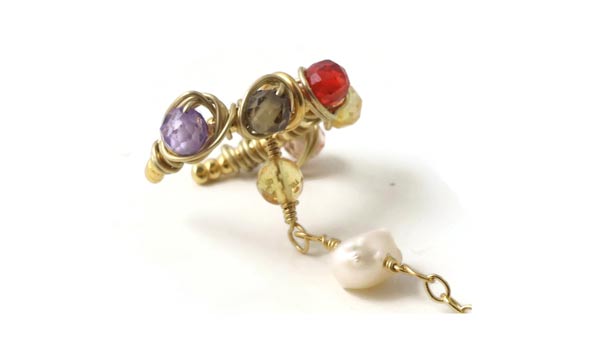
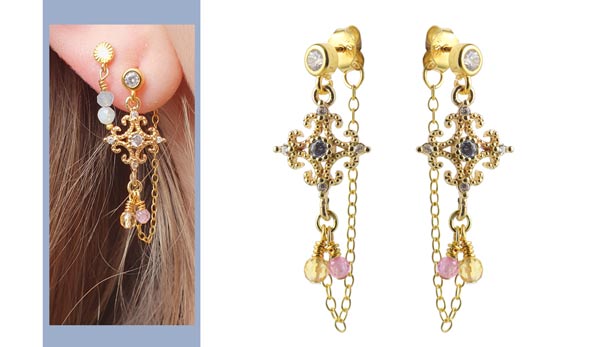
Here you can find a lot of inspiration to make your own "behind the ear" earrings. All these earrings have in common that one of their elements ends behind the ear. The chain or beads are fastened to the ear nut.
In order to make these earrings, you need to know how to make loops with windings and how to interlink beads and pearls with wire.
Here you can find lots of inspiration for making your own Behind The Ear pearl earrings. Common to all these earrings is that one part of the earring ends behind the ear. The chain or beads are attached to the clasp on the stud.
You need to be able to make loops and twists and "link" beads together to make these earrings. Here we have these guides, This is how you make a loop and Earrings with gemstone bead links, which will walk you through this technique step-by-step, so take heart! We're sure you can easily get started with your homemade Behind The Ear bead earrings.
You can also learn this technique in our ongoing Basic Course.
With this flexible design, you can get creative with all your favorite crystals, gemstones, freshwater pearls, moonstones, and charms.
Let your jewelry reflect the many different sides of you through small and large links, simple and lavish chains, and different kinds of jewelry parts and charms.
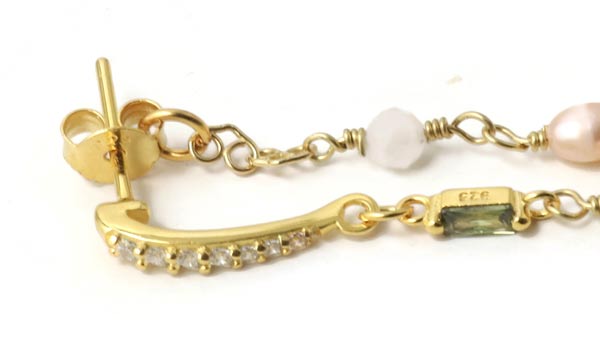
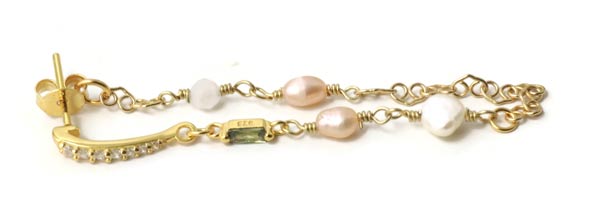
Earring with Ear Cuff and Earwire
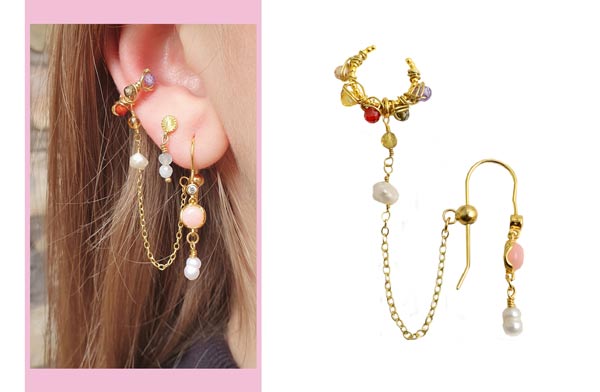
We used the following DIY components to assemble this earring:
- 1 ear cuff, rippled ring, gold-plated sterling silver
- 1 pair of earwires with zirconia, gold-plated sterling silver
- cubic zirconia, 3mm
- freshwater pearls
- approx. 6cm cable chain, gold-plated sterling silver
- wire, 0.4mm, gold-plated sterling silver
- connector with pink opal, gold-plated sterling silver
- locking bead with eyelet, gold-plated sterling silver
- headpin with 1.5mm pad, gold-plated sterling silver
- jumpring, 4mm, gold-plated sterling silver
First, you decorate your ear cuff. In our blog post on Ear Cuffs, you can find step-by-step intructions on how to make various kinds of ear cuffs.
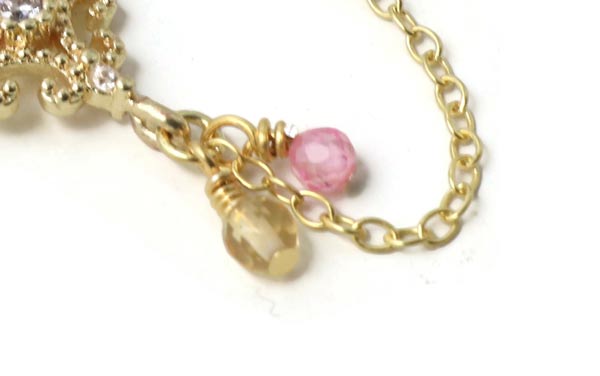
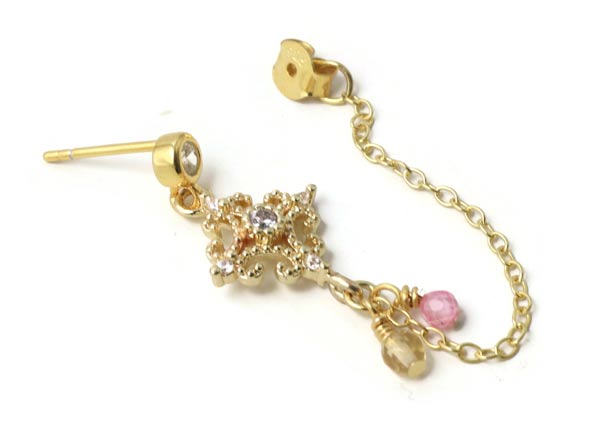
Then, you fasten 1 freshwater pearl and 1 cubic zirconia bead to one chain end. You do that by interlinking the bead and the pearl with the help of wire, loops and windings. After that, you connect the beaded side of the chain to the ear cuff with a 4mm jumpring.
The other end of the chain is connected to the eyelet of the locking bead with the help of a jumpring.
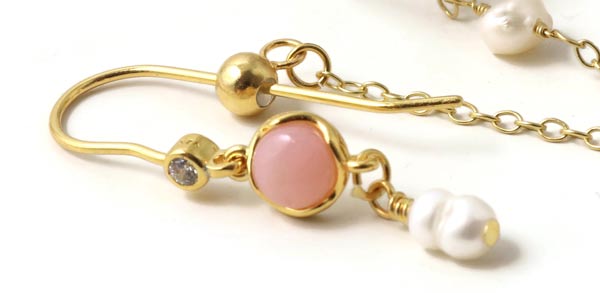
Next, you open the loop of the earwire carefully, insert the connector with the pink opal ... and close the loop again. Pull a headpin through the freshwater pearl and make a loop with windings. Finally, you connect this loop with the lower eyelet of the connector with a jumpring.
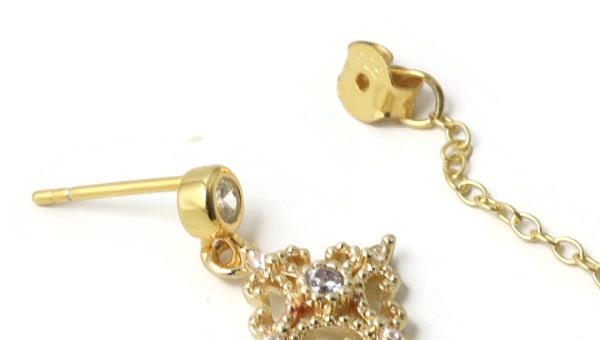
When all your elements are done and connected, you can put on the ear cuff and the earwire and close the earwire with the locking bead.
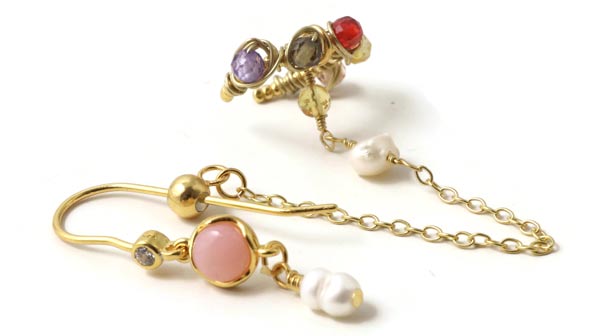
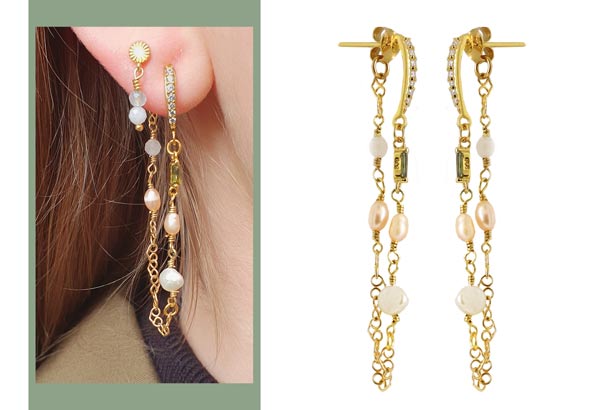
Earstuds with Freshwater Pearls
We used the following DIY components to make these earrings:
- 1 pair of bow-shaped earstuds with zirconia, gold-plated sterling silver
- 2 connectors with green zirconia, gold-plated sterling silver
- approx. 6cm cable chain, small hearts, gold-plated sterling silver
- wire, 0.4mm, gold-plated sterling silver
- freshwater pearls
- 2 jumprings, 0.3mm
- 2 jumprings, 0.4mm
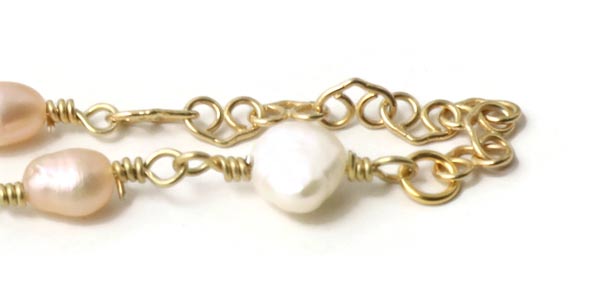
First, you interlink the pearls of your choice with 0.4mm wire and connect them to the heart chain with the help of a 0.3mm jumpring. (You do not need an extra jumpring if you link the pearls to the heart chain directly.)
In this example, the other end of the chain of pearls is fasted directly to the connector. Alternatively, you can use an jumpring.
Fasten the other eyelet of the connector to the loop of the earstud using a 3mm jumpring. For our example, we inserted two heart chain links at the other end of the interlinked pearls and connected the heart links to the ear nut with a 4mm jumpring.
When you put on your ear stud and close it with the ear nut, the heart chain with freshwater pearls will end behind the ear.
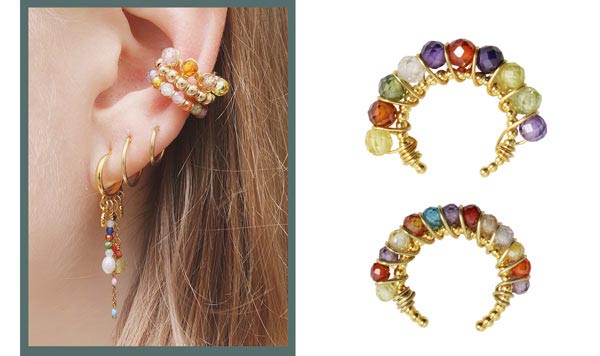
Earstuds with Twisted Rings
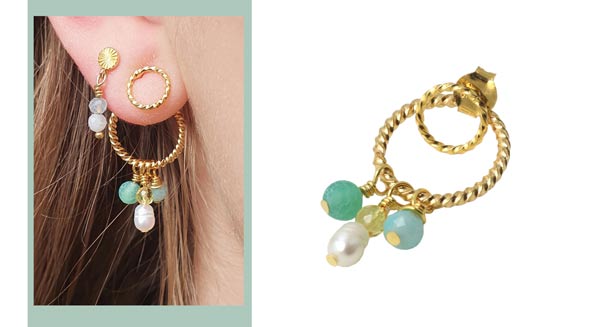
We used the following DIY components to assemble these earrings:
- 1 pair of earstuds with twisted ring, gold-plated sterling silver
- 2 twisted rings, open, 15mm, gold-plated brass
- headpin with 1.5mm pad, gold-plated sterling silver
- various small gemstone beads and freshwater pearls
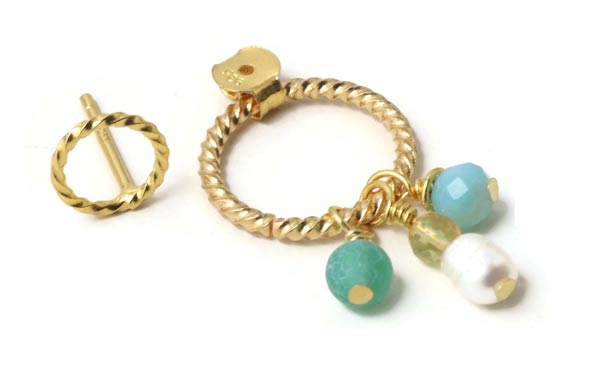
First, you assemble the pendants of your choice. Pull a headpin through the pearl or bead ... and make a loop with windings.
Open the twisted ring ... insert the pendants ... and pull the ring through the one side of the ear nut. Close the ring again. When you close the earstud with the ear nut, the large ring will be placerd behind the ear lobe.
Earstuds with Ball, Chain and Cubic Zirconia
We used the following DIY components to assemble these earrings:
- 1 pair of earstuds with 3mm ball, gold-plated sterling silver
- 2 connectors, round, uneven, gold-plated sterling silver
- cubic zirconia, 3mm
- approx. 15cm cable chain, gold-plated sterling silver
- 10 headpins with 1.5mm pad, gold-plated sterling silver
- 2 jumprings, 0.4mm
First, you make the three pendants. Pull a headpin through the bead of your choice ... and form a loop. Before you make the windings, you pull the loop through one of the holes in the round connector. Once you have done that, you make the windings.
Open the loop of the earstud ... insert the other hole of the connector and one end of the chain ... and close the loop again. Connect the other end of the chain to the ear nut with a 4mm jumpring.
Make two more pendants in the same way. Form a loop, connect it to the chain and make the windings after that.
Earstuds with Round Cubic Zirconia
We used the following DIY components to make these earrings:
- 1 pair of earstuds with round zirconia, gold-plated sterling silver
- 2 connectors, star with zirconia, gold-plated brass
- cubic zirconia, 3mm
- 4 headpins with 1.5mm pad, gold-plated sterling silver
- approx. 6cm cable chain, gold-plated sterling silver
- 2 jumprings, 0.3mm
- 2 jumprings, 0.4mm
Make two pendants with a headpin and a ziconia bead. Open a 3mm jumpring ... insert the two pendants, one end of the chain and one eyelet of the connector ... and close the loop again. The chain and the pendants are now connected to the star-shaped connector.
Fasten the other end of the chain to the ear nut with the help of a 4mm jumpring. Open the eyelet of the earstud carefully ... insert the other loop of the connector ... and close the eyelet again.
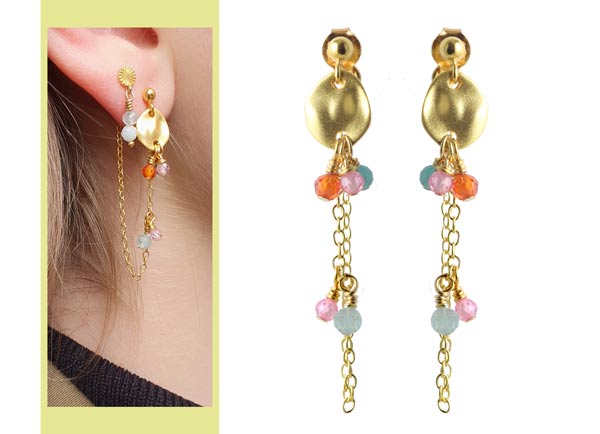
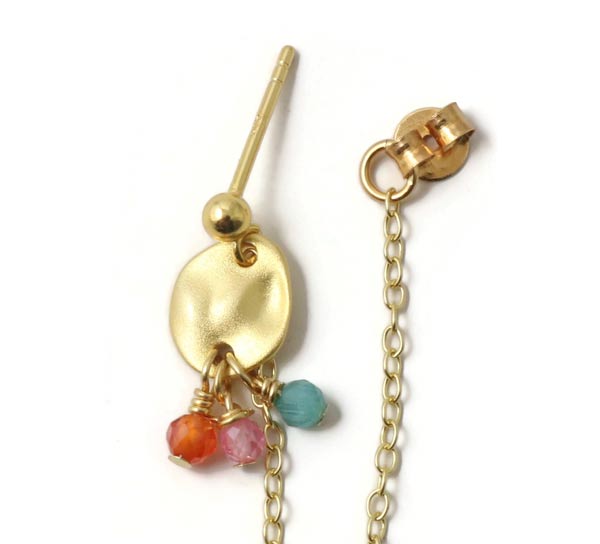
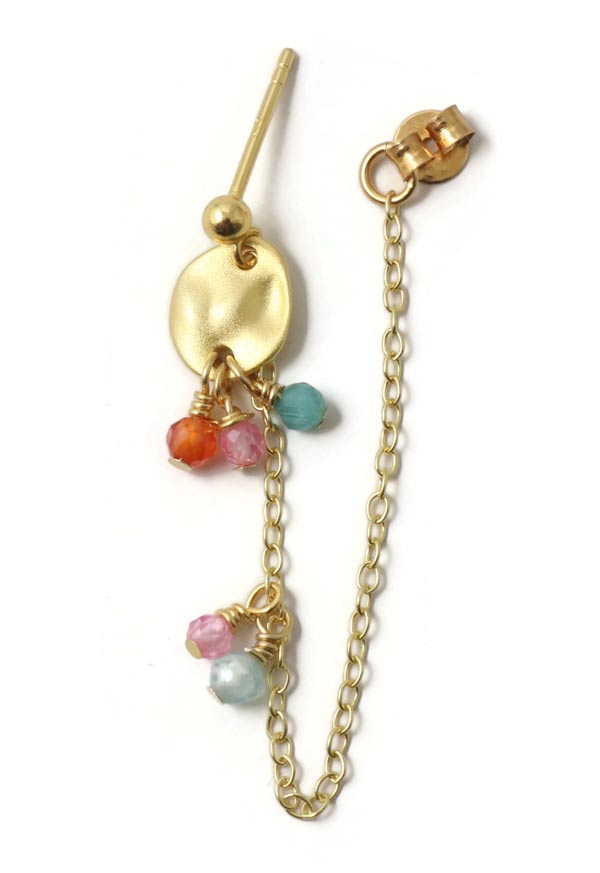
Earstuds with Coins and Freshwater Pearls
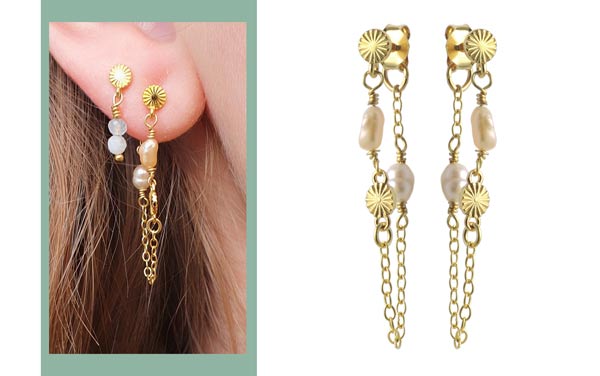
We used the following DIY components to make these earrings:
- 1 pair of earstuds, round, faceted, gold-plated silver
- 2 connectors, round, faceted, gold-plated silver
- approx. 4cm cable chain, gold-plated sterling silver
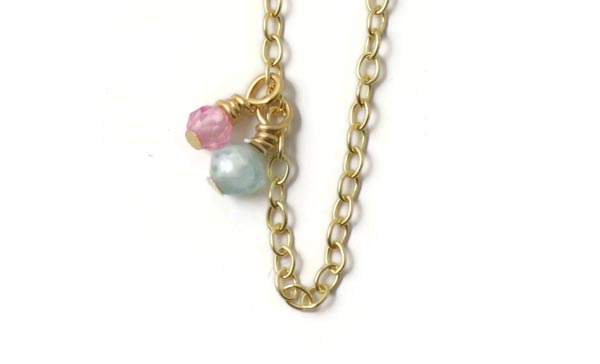
- 4 freshwater pearls
- wire, 0.4mm, gold-plated sterling silver
- 2 jumprings, 0.3mm
- 2 jumprings, 0.4mm
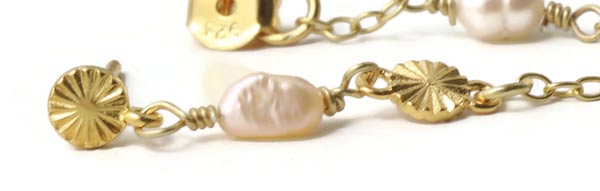
Connect the first pearl the connector (forming a loop with windings with jewellery wire). After that, you open the eyelet of the earstud and fasten the other end of the wire to the earstud (again with a loop and windings).
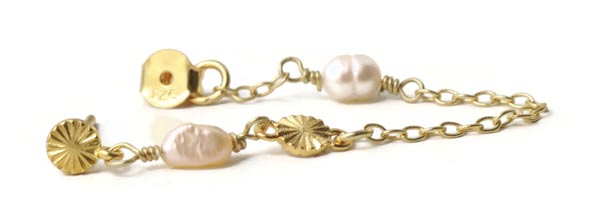
Fasten the chain to the other side of the connector, using a 3mm jumpring. Cut off a piece of chain ... it will be set in between the second pearl and the ear nut.
Now you take the second pearl and form loops with wire on either side. Connect the loops dirctly to the to different pieces of chain and make windings. Finally, you connect the last link of the chain with the eyelet of the ear nut with a 4mm jumpring.
We will publicly show your name and comment on this website. Your email is to ensure that the author of this post can get back to you. We promise to keep your data safe and secure.