
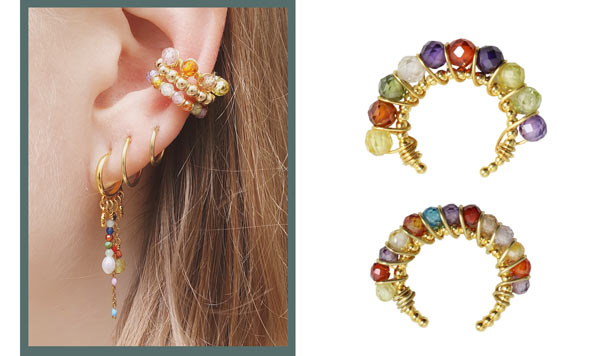
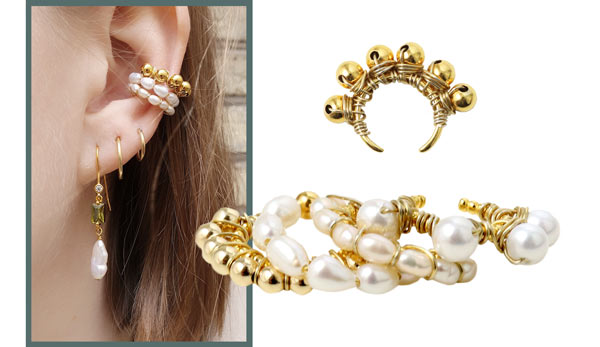
In this blog post, we show you different designs you can make yourself with the popular jewelry "Earcuffs". A piece of jewelry that doesn't even require pierced ears.
Earcuffs are smart pieces of jewelry that can add a unique and personal touch to your style, and making them yourself can be a great idea for several reasons. Firstly, they are incredibly versatile and can be customized to your taste and preference, so you can create something that really suits your personal style.
Additionally, they don't require a lot of different materials and when it comes to tools, you only need a flush-cutter pliers and a pair of chain-nose pliers. This makes them perfect for DIY projects, even for beginners. Making your own earcuffs also allows you to experiment with different designs, colors and textures, which can lead to unique and eye-catching pieces that stand out.
Our designer Charlotte has shown below different designs you can easily make with our different types of earcuffs, as well as how to shape an earcuff yourself with sterling silver wire. So take a look below and create your own personalized earcuffs!
Ear Cuffs with Cubic Zirconia
We used the following DIY components to assemble these ear cuffs:
- 1 pair of ear cuffs, rippled ring, gold-plated sterling silver
- approx. 30cm wire, 0.4mm, gold-plated sterling silver
- approx. 10 cubic zirconia, 3mm
First you wind the wire around the ear cuff a few times.
Then you thread the desired number of beads. For our example we used 10 cubic zirconia with a diameter of 3mm.

After that, you wind the other wire end around the other end of the ear cuff.
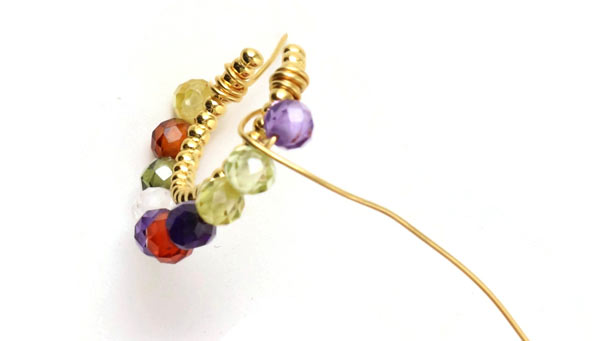
Now you wind the wire backwards around the ear cuff. The first winding is in between the 1. and 2. bead.
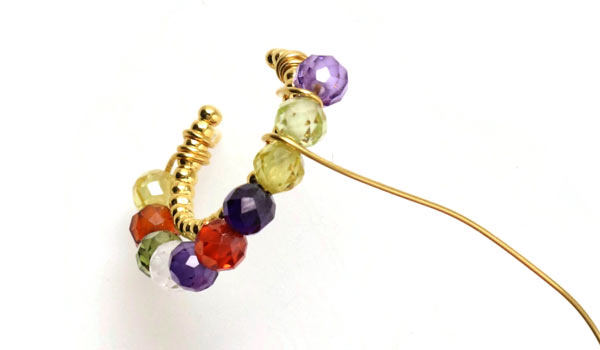
The next winding is around the 2. and 3. bead. Continue like this and wind the wire around between the beads.
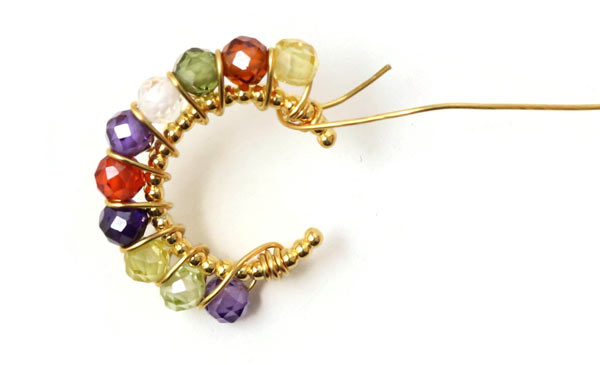
Once you are done, you wind the wire around the ear cuff a few times behind the last bead.
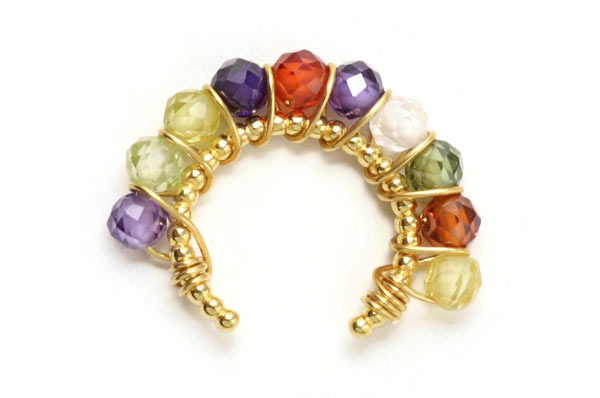
Finally, you cut off the excess wire and press the wire ends carefully inwards with chain-nose pliers.
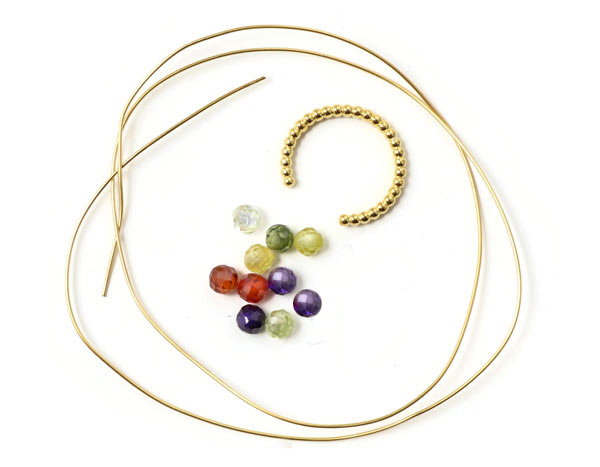
Ear Cuffs with Gilded Beads
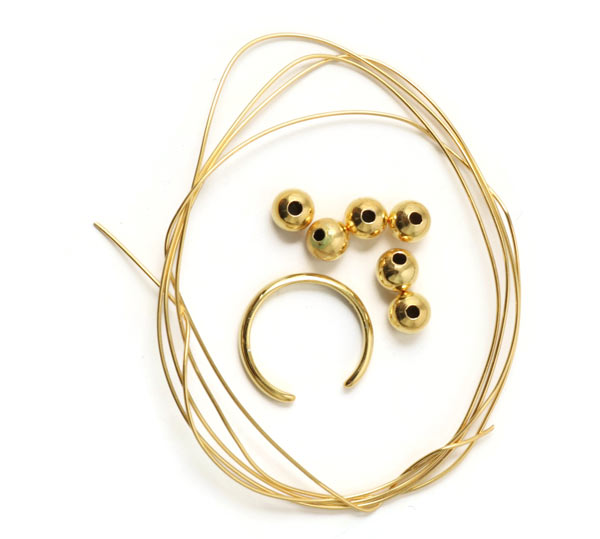
We used the following DIY components to assemble these ear cuffs:
- 1 pair of ear cuffs, gold-plated sterling silver
- 6 beads, 4mm, gold-plated sterling silver
- approx. 50cm wire, 0.4mm, gold-plated sterling silver
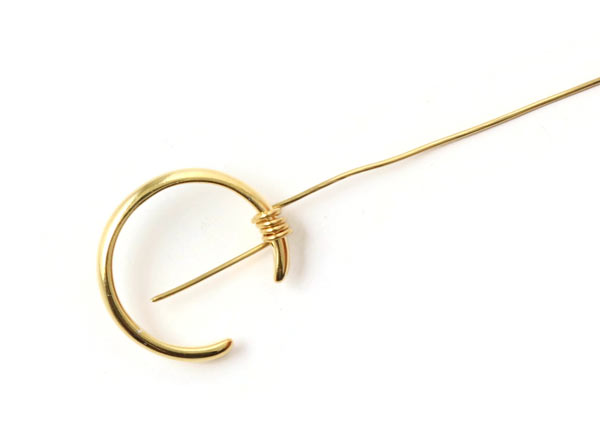
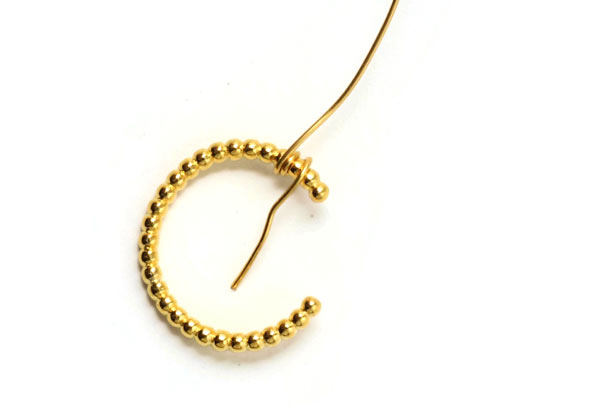
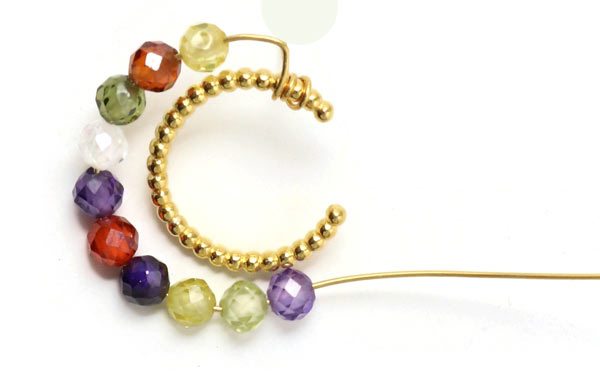
First you wind the wire around the ear cuff a few times.

Then you thread the first bead ... and position it at the outside of the ear cuff.
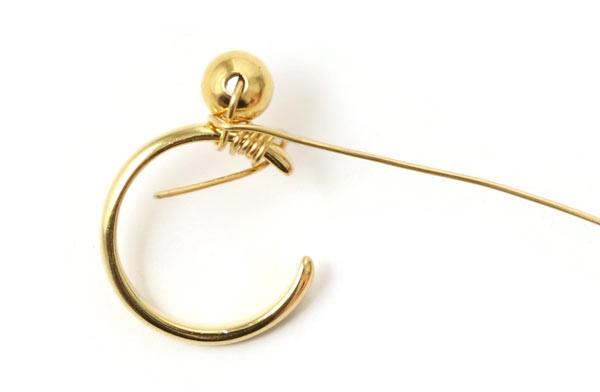
Then you wind the wire around the bead...
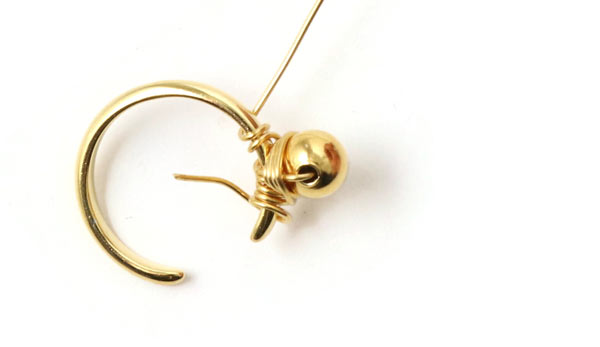
... all in all 4 times ... and after that around the ear cuff again a couple of times.
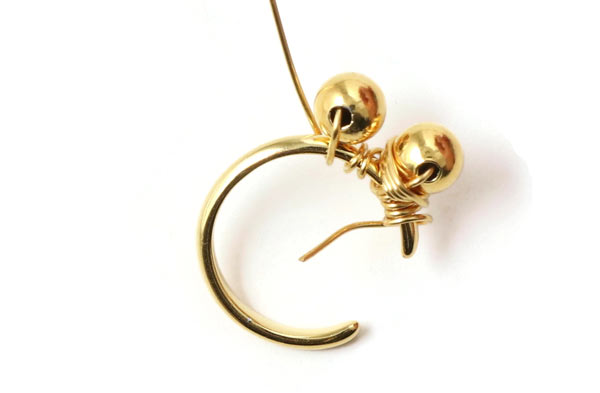
Position the next bead in the same way.
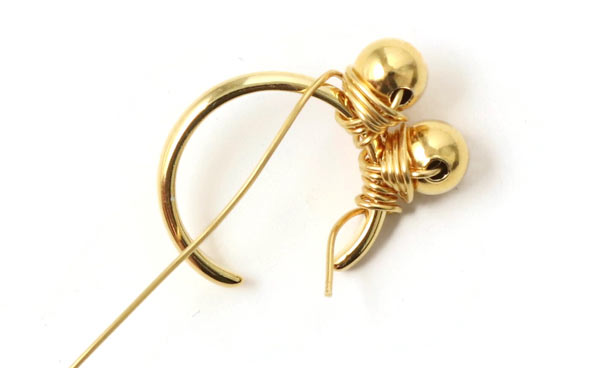
Wind the wire around the bead 4 times again.
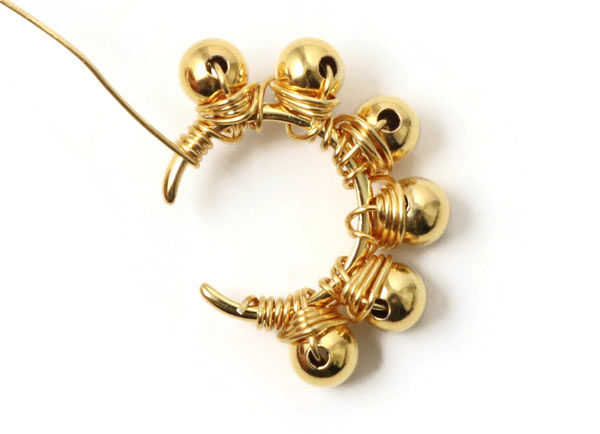
Once all the beads are fastened around the ear cuff, you finish by winding the wire around the ear cuff a few times.

Cut off the excess wire and press the wire ends inwards with chain-nose pliers.
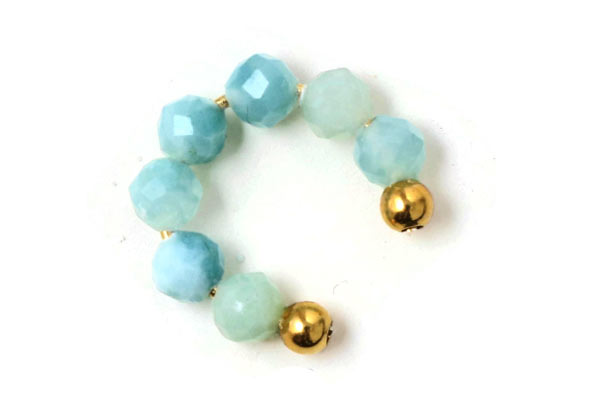
Ear Cuffs with Amazonite Beads

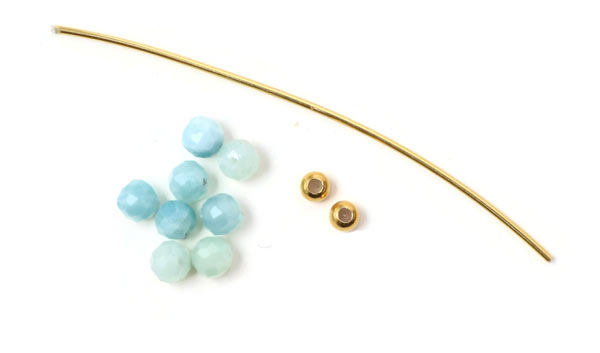
We used the following DIY components to assemble these ear cuffs:
- approx. 6cm wire, 0.6mm, gold-plated sterling silver
- 2 locking beads, 3mm, gold-plated sterling silver
- 7 amazonit beads, 4mm
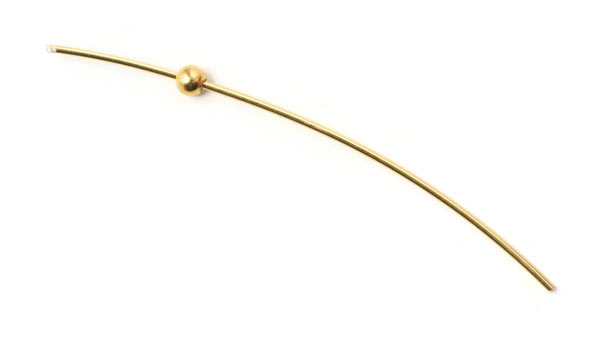
First you string a locking bead ....

... then the desired number of beads ... and finally one more locking bead.
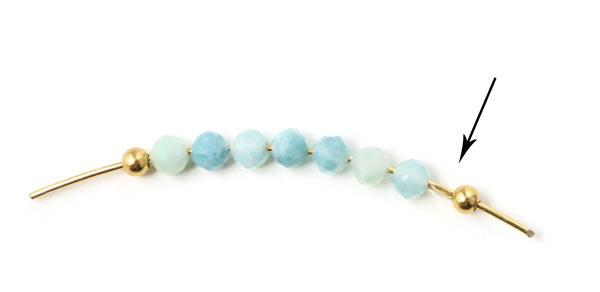
Pull the locking bead a bit aside ... apply some glue on the wire ... and slide the bead back.
Then you glue the other locking bead to the wire in the same way.

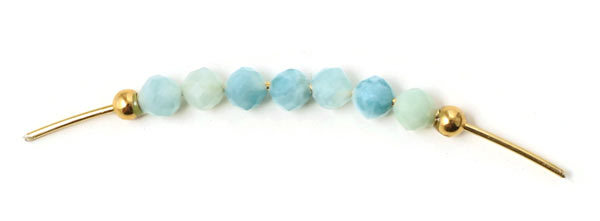
Once the glue is dry, you bend the wire into ear cuff shape.
Finally, you cut off the excess wire.
We will publicly show your name and comment on this website. Your email is to ensure that the author of this post can get back to you. We promise to keep your data safe and secure.