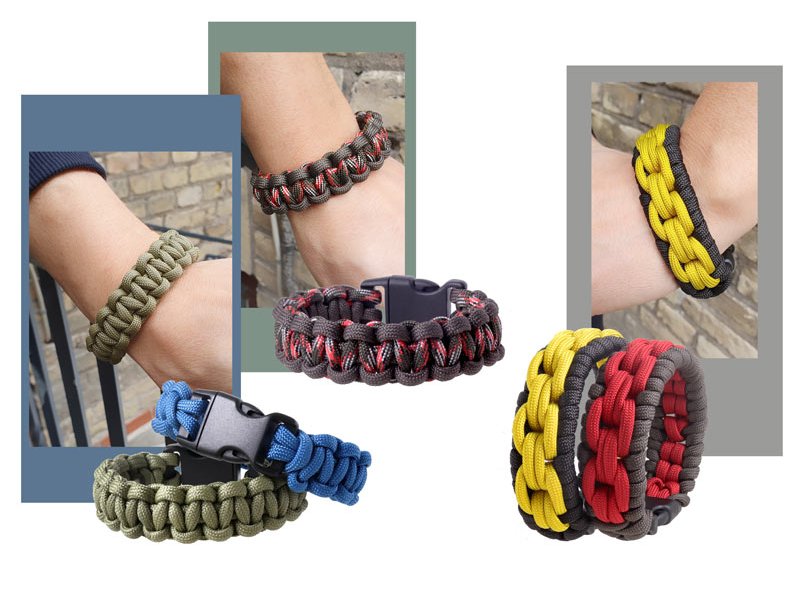
DIY Army Bracelets / Survival Bracelets, Brecelets with Paracord
In this blog post by Smyks, we go through a few techniques you can use to make the popular knotted macramee bracelets with parachute cord which are also called army bracelerts or survival bracelets. Paracord is available in several varieties of which some of the most popular is type 550 (used for the examples shown in this post) or the thinner type 425. Both varieties consist of two layers of nylon and are well suited for knotting and for outdoor activities. Parachute cord is avilable in many colours, reflective and luminescent.
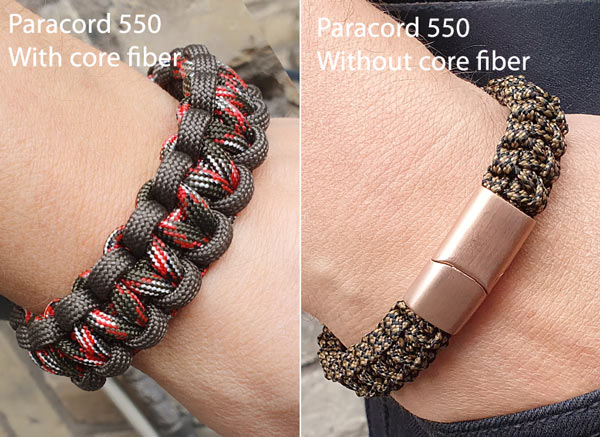
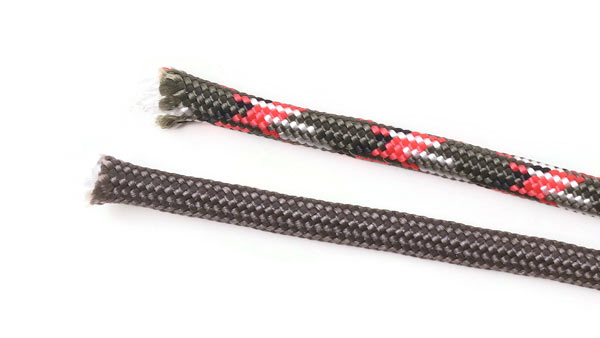
All kinds of paracord are composed of an outer layer and an inner nylon core. The outside consists of a woven surface and the inside of long and strong nylon fibres which usually allows a single cord to lift 120 kg or more.
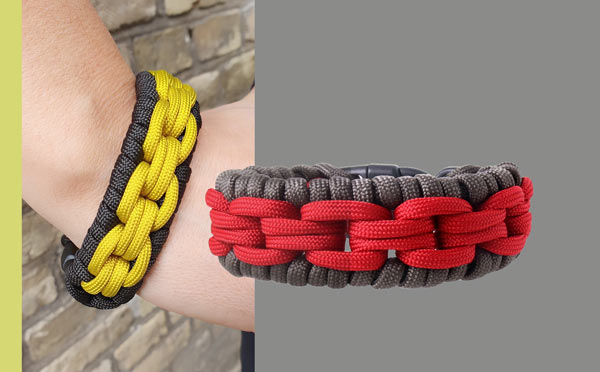
If you want to use paracord for jewellery, you can remove the inner layer in order to make a narrower and more compact bracelet. You can see the difference in the pictures underneath. The bracelet in the picture on the left is closed with a broad magnetic clasp fastened with jewellery glue.
You can also combine the bracelet with various accessories, such as a small compass, a whistle or a firing pin, or you can use a metal shackle as a bracelet lock, so you always have a waist with you if you need to pull or lift heavy objects.
Paracord from Smyks.com is of the professional quality used in the army. The cord is manufactured by a Ukrainian company in factories in Ukraine and, after the beginning of the war, also in Poland.
For more inspiration, please read Smyks' related blog posts Paracord bracelet with charms and
og Men's bracelets with semi-precious stones.
Paracord or parachute cord originates from the military. Paracord, a durable rope made of nylon, was initially used as parachute lines during World War II. It was employed to secure parachutes and had the advantage of being lightweight, durable, and capable of bearing significant weight.
Following the war, surplus paracord was sold in the civilian market, making it available for various purposes. Since then, it has proven to be versatile and useful in many contexts. Paracord possesses several characteristics that make it attractive for bracelets:
Durability: Paracord is incredibly sturdy and can withstand substantial tension and pressure.
Lightweight: Despite its strength, paracord is relatively light, making it comfortable to wear as a bracelet.
Functionality: Apart from being a decorative element, paracord bracelets can also be unraveled into smaller ropes, proving useful in emergencies such as binding or repairing objects.
Popular in survival gear: Due to its versatility and utility in emergencies, paracord has found its way into survival kits and outdoor equipment.
Today, paracord is frequently used to craft bracelets in various styles, not just for its robustness but also as a fashion statement or as a component in survival gear, useful in emergencies. Paracord has secured a solid place in the trend we see in outdoor living. These bracelets can be woven in different patterns and colors, offering an aesthetic appeal alongside their functional purpose.
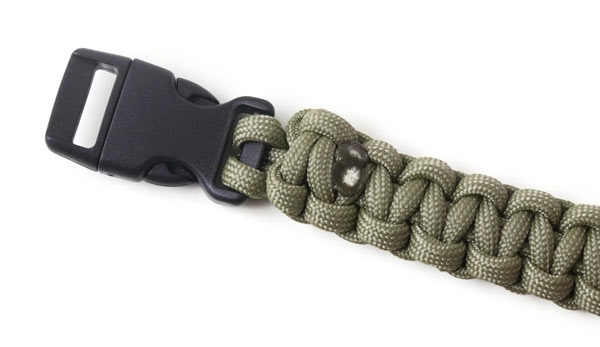
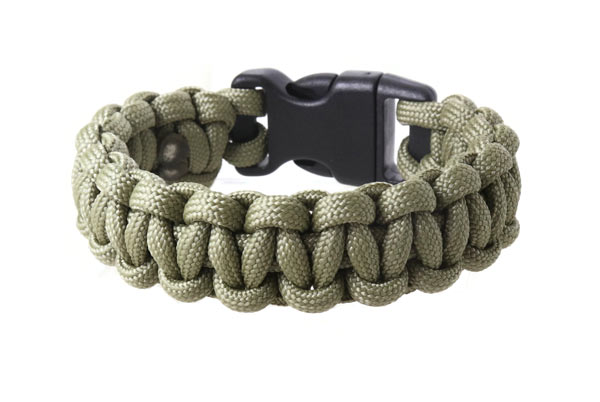
Paracord Macramé Bracelet, Classic Version
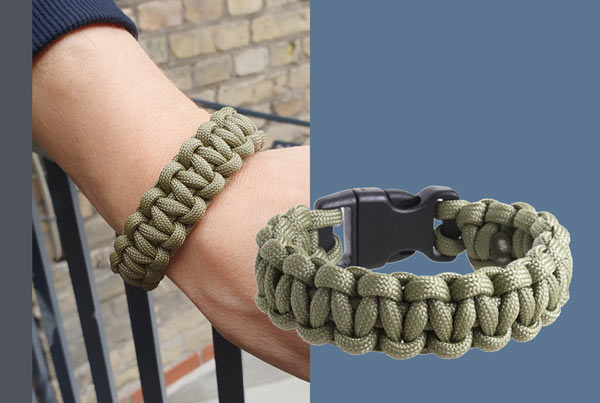
We used the following components to make this bracelet:
(+ 1 extra buckle clasp to fasten the cord to the other side of the braiding loom)
+ scissors
+ lighter

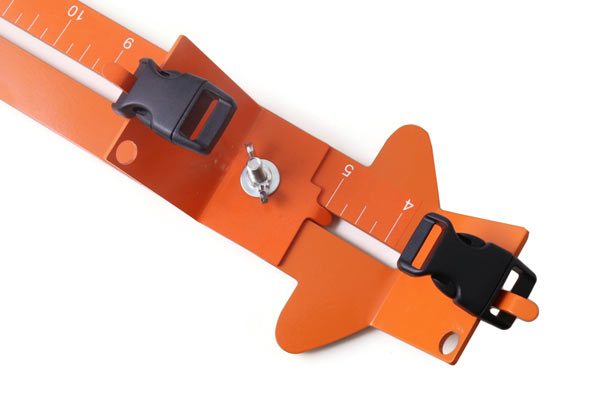
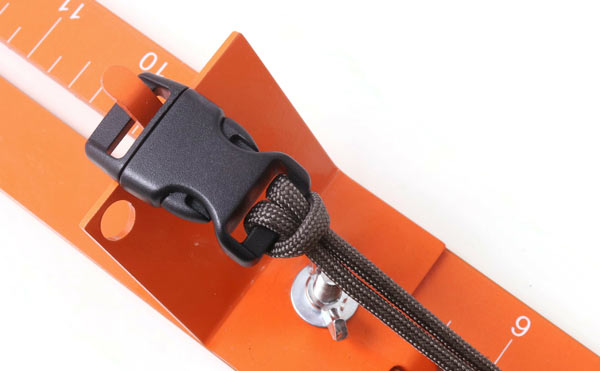
First, you attach one buckle clasp on either end of the braiding loom. Adjust their distance from each other - according to the length you want you finished bracelet to have. Once the bracelets is done, you will take the clasps off the braiding loom, remove the parts of the clasps that are not connected to the bracelet and put together the two remaining clasp parts- combining them to one clasp.
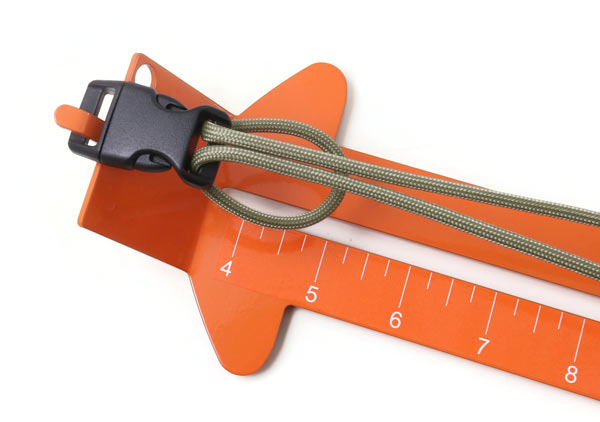
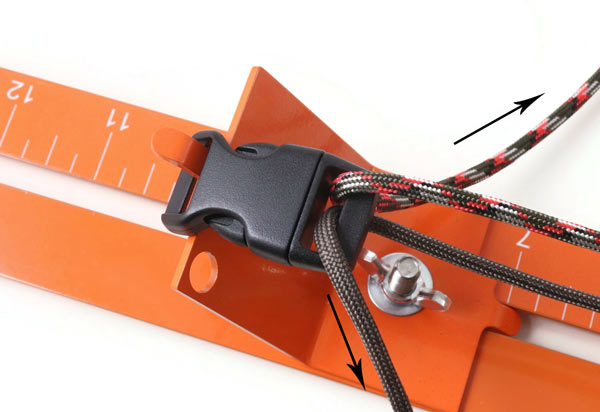
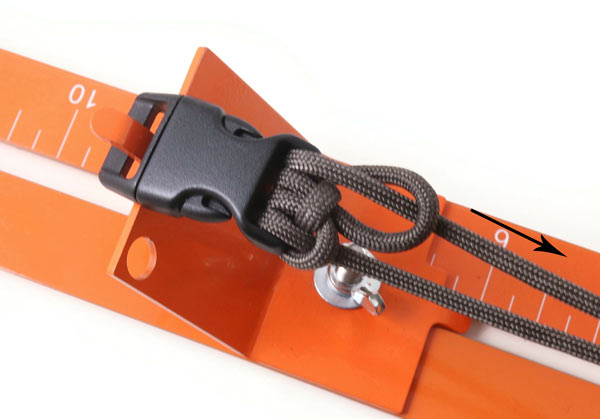
Fold the cord in the middle and pull the loop through the clasp ... top down.
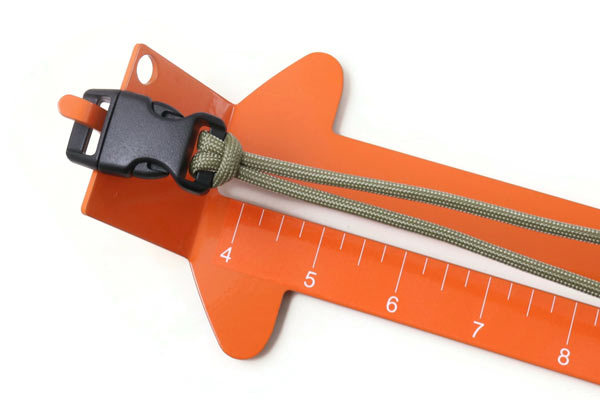
Pull the 2 cord ends thriugh the loop and tighten it.
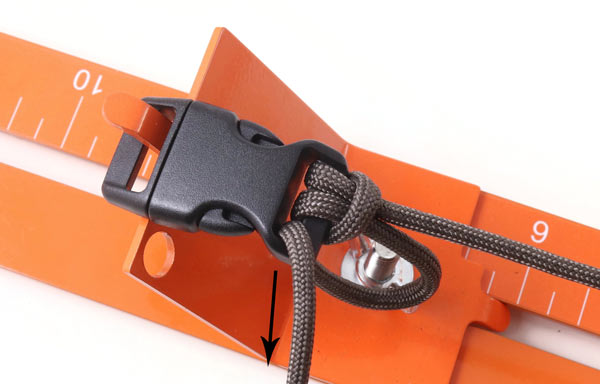
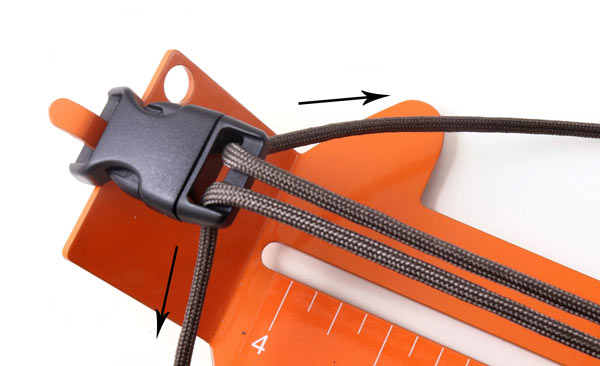
Then you pull the 2 cord ens through the other buckle clasp ... top down . Place the clasp according to the length you want you finished bracelet to have.
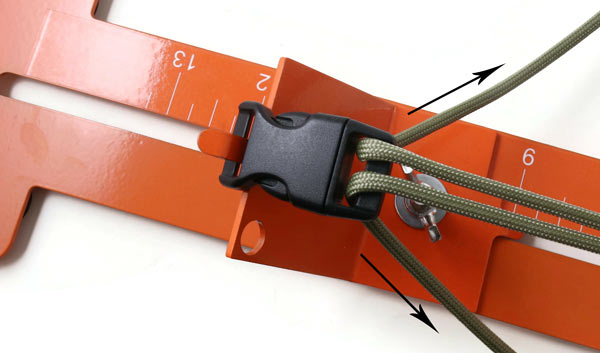
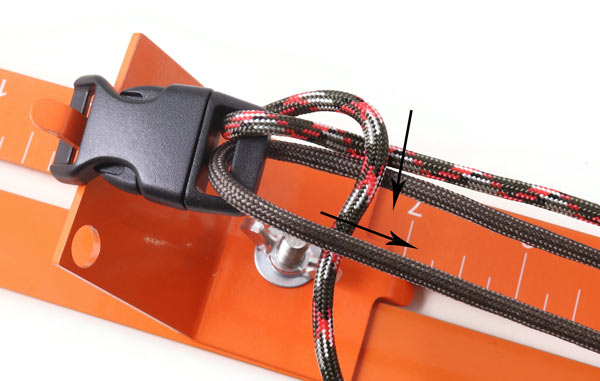
Pull the cord on the left over the 2 cords in the middle ... and under the cord on the right.
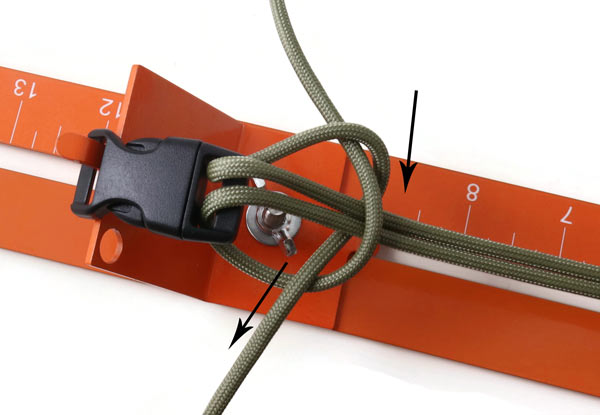
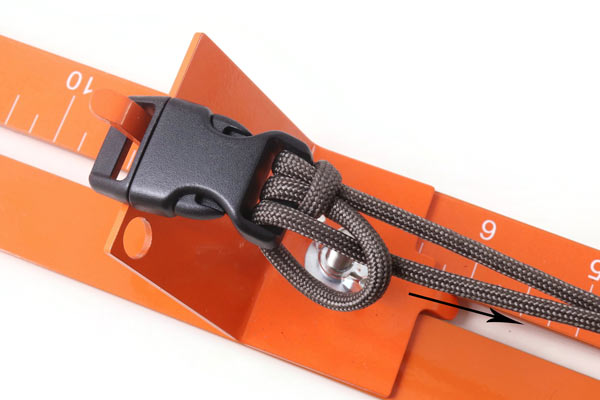
Then you pull the cord on the right under the 2 cords in the middle ... and over the cord on the left.
Tighten the knot. Now you have finished the first part.

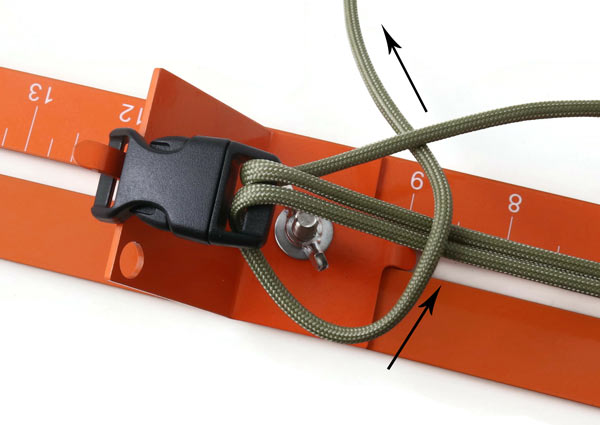
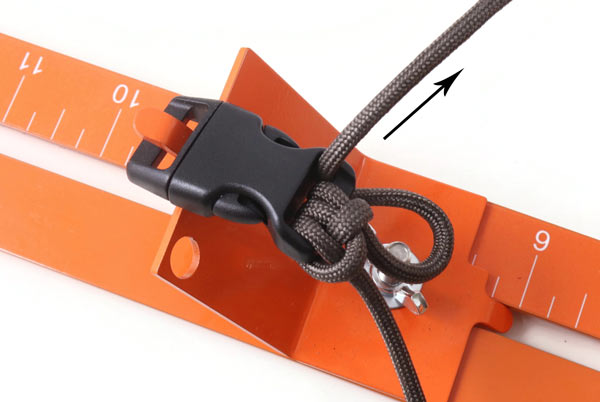
Make the same kind of knot - just the other way round. Pull the cord on the right over the 2 cords in the middle ... and under the cord on the left.
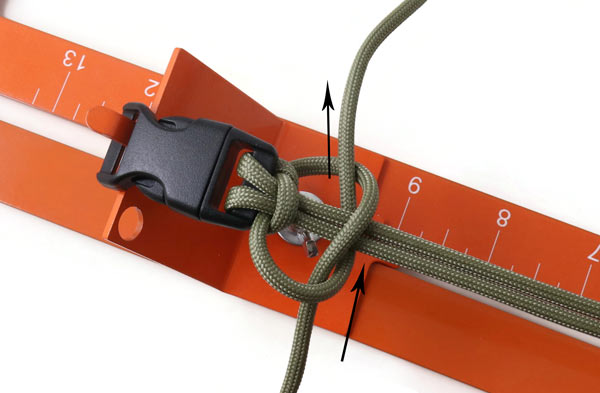
And again ... the other way round ... you pull the cord on the left under the 2 cords in the middle ... and over the cord on the right.
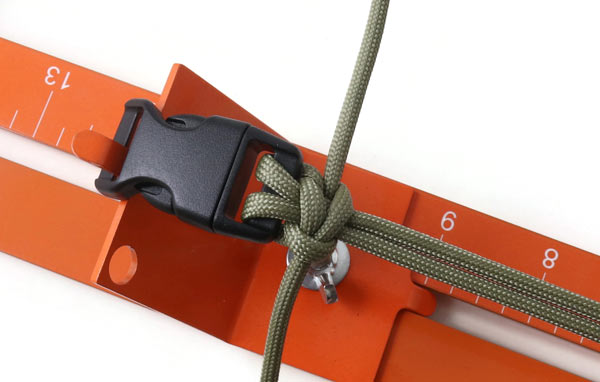
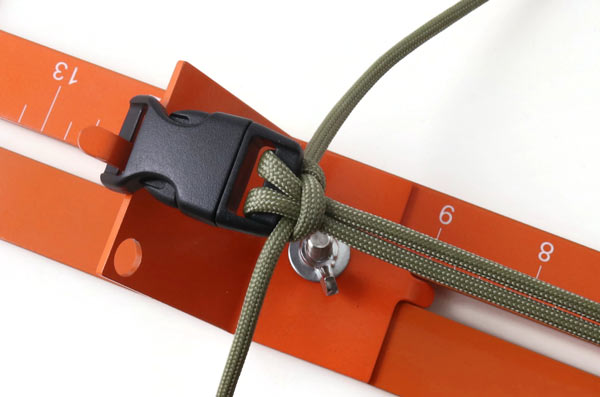
Tighten the cords. Now the first knot is made.
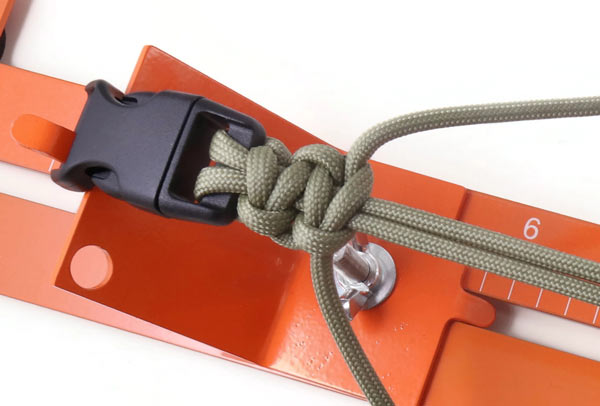
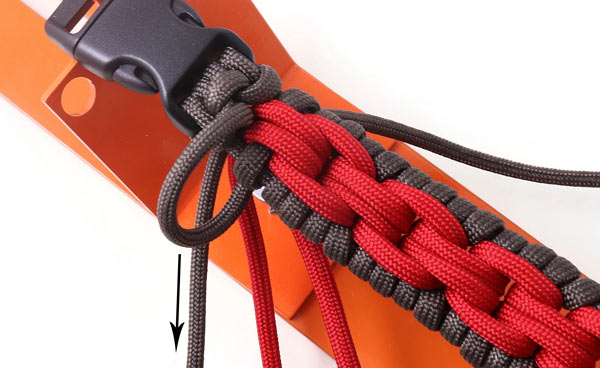
Continue knotting in the same way....
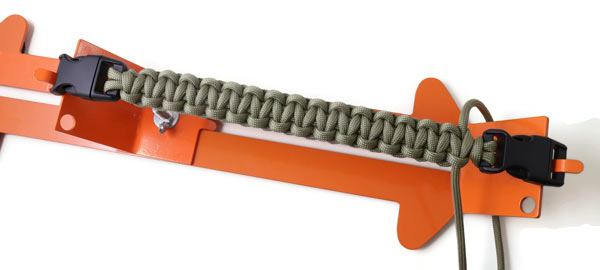
.... until you have reached the end of the bracelet.
The last knot should be very close to the end of the bracelet.
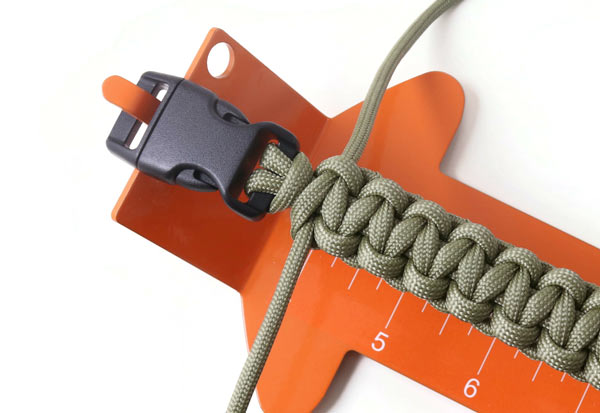
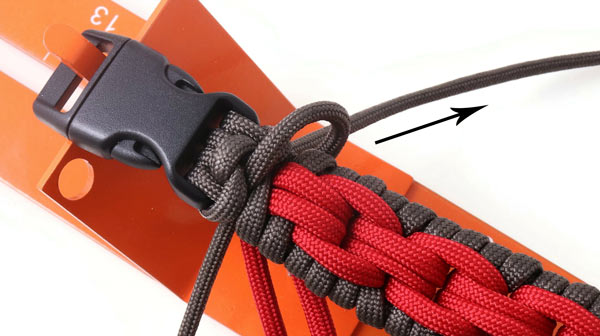
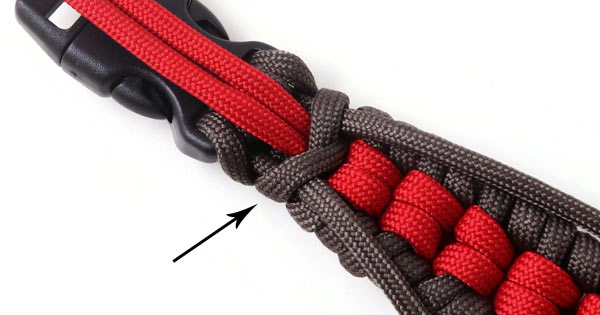
Take the bracelet off the braiding loom ... and turn it around. Loosen the last knot a bit...
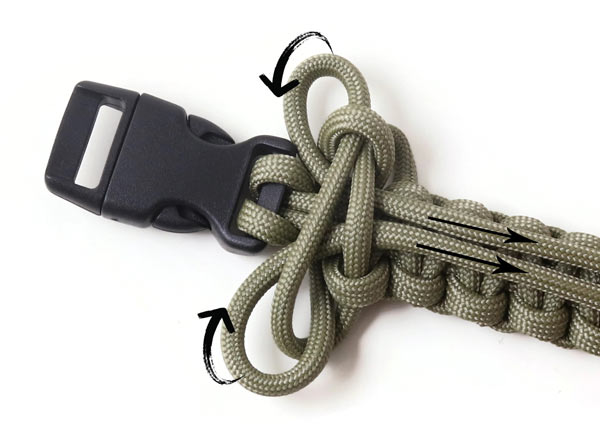
... and pull the cord ends through this last knot.
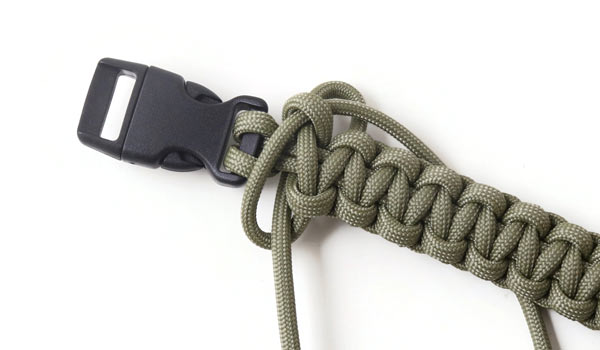
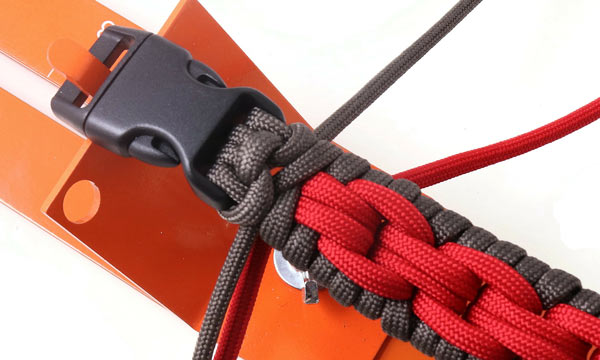
Tighten the knot...
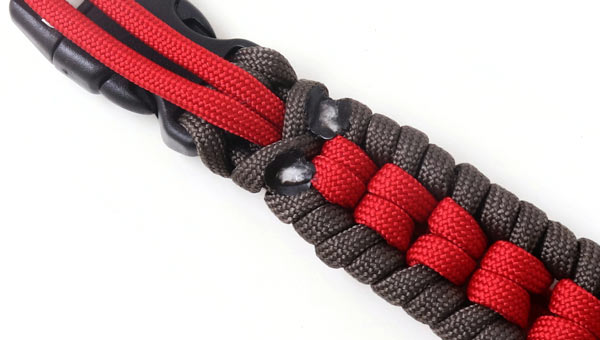
... and then the 2 cord ends.
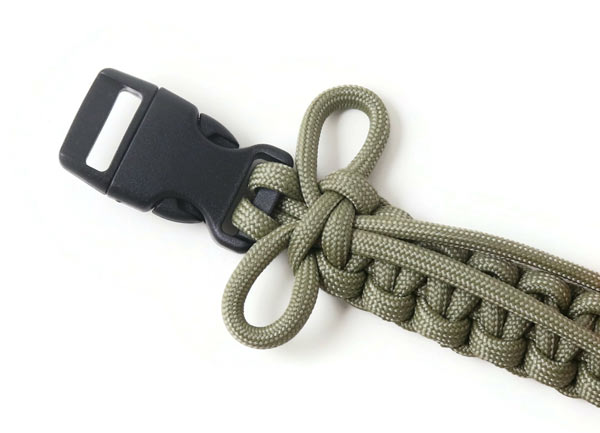
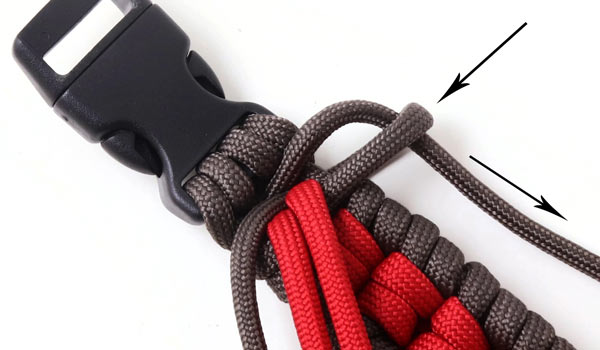
Cut off the excess cord close to the bracelet.
Melt the cord ends with the help of a lighter and press them flat.
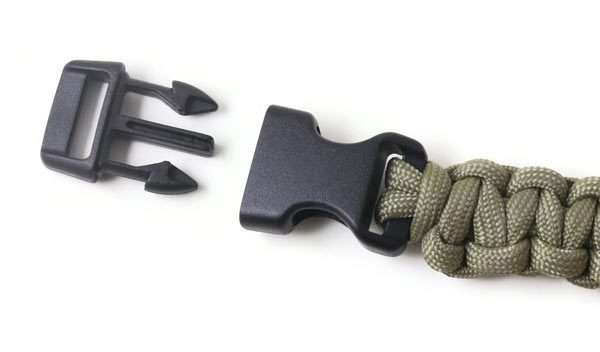
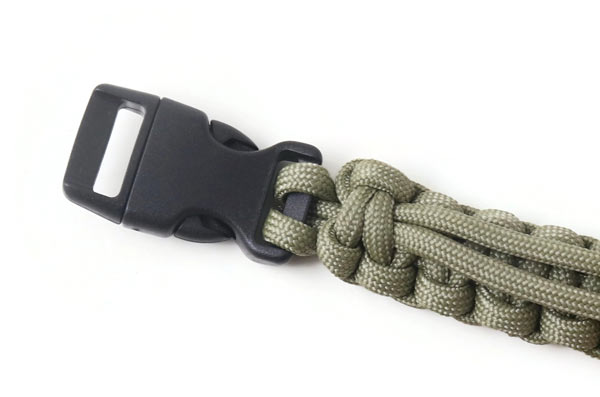
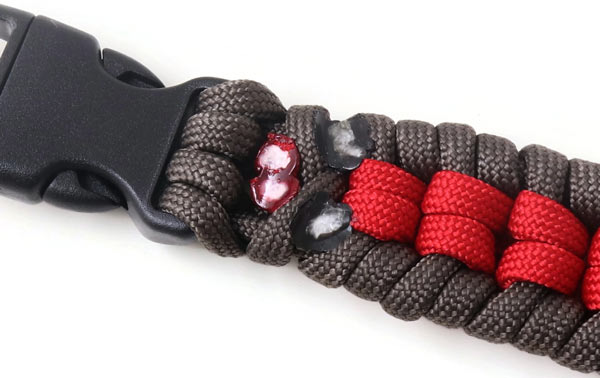
Remove one part of the buckle clasp on one end of the bracelet...
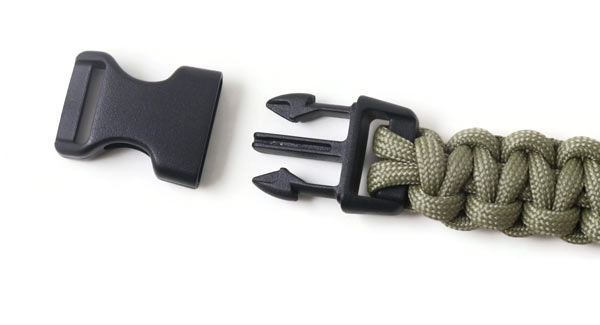
... and then on the other end of the bracelet.
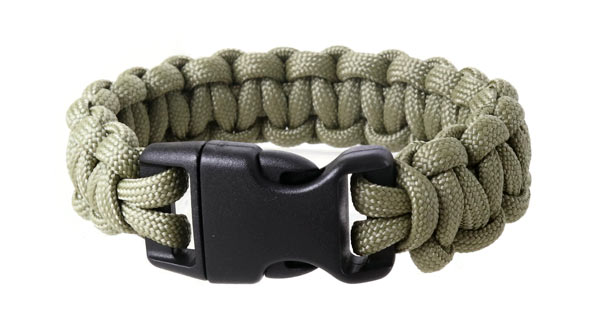
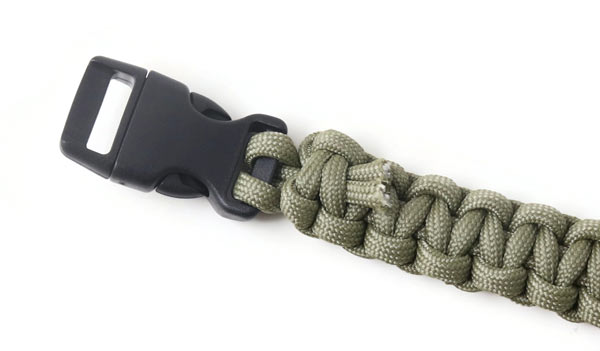
Now the two remaining parts can be put together and the bracelet is done.
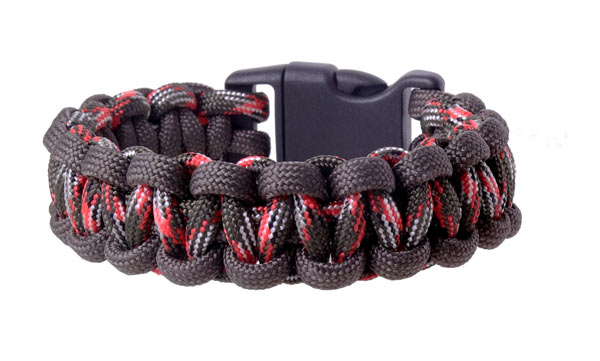
Paracord Cobra Macramé Bracelet
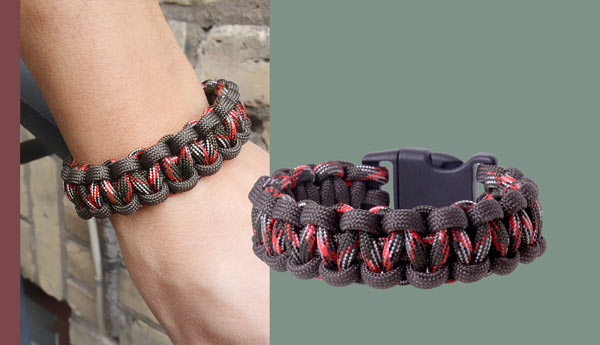
We used the following components to make this bracelet:
- Paracord, army green, 3-4mm, approx. 1.5m
- Paracord, striped, camouflage, 3-4mm, approx 1.5m
- 1 buckle clasp, 40x22.5mm
(+ 1 extra buckle clasp to fasten the cord to the other side of the braiding loom)
+ scissors
+ lighter
Hold the string ends closly together and melt them with a ligher... until a small bubble appears on each string.
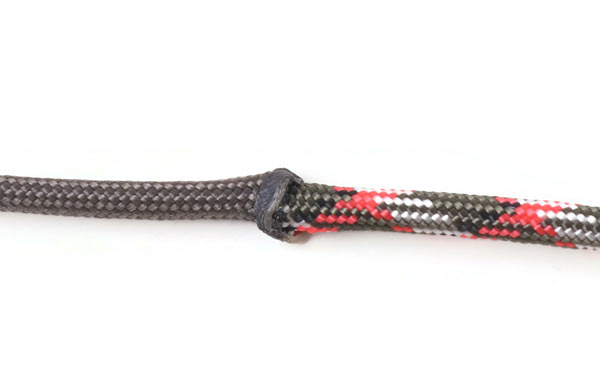
Press them together gently until they have fused.

Fold the cord and fasten it to one of the buckle clasp ... as explained in the example above. Place the section where the two cords are fused a bit away from the clasp.
Fasten the cord ends to the other buckle clasp. In this example, one cord end is pulled through the clasp from bellow and the other from above.
But you can also do it as in the first example, i.e. both cord ends from above.
Now you tie macramé knots as explained in the example above. Here you start with the striped cord on the right in order to place the patterned cord in the middle.
Finally, you finish the bracelet in the same way as described in the first example.
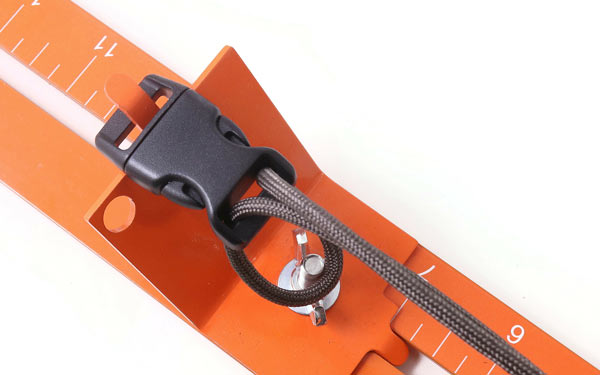
Paracord Bracelet with Incorporated Compass
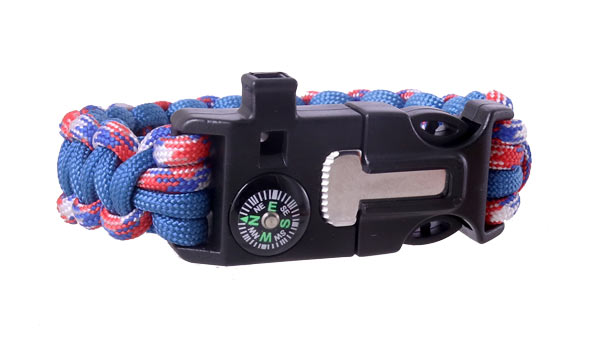
For this bracelet, you need the same components as in the example above - except for the buckle clasp. You take a buckle clasp with built-in compass, fire-maker and whistle instead.
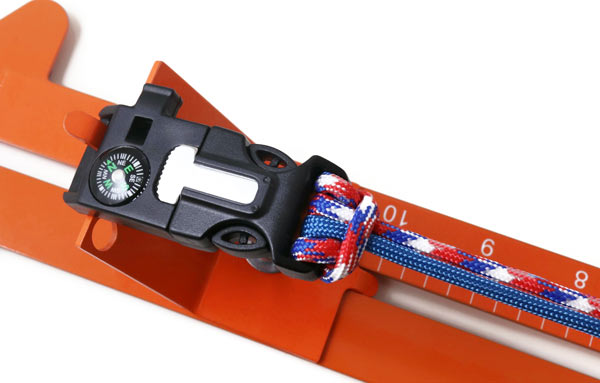
As this buckle clasp is a bit broader, you coil the cord around it one more time to fill the space.
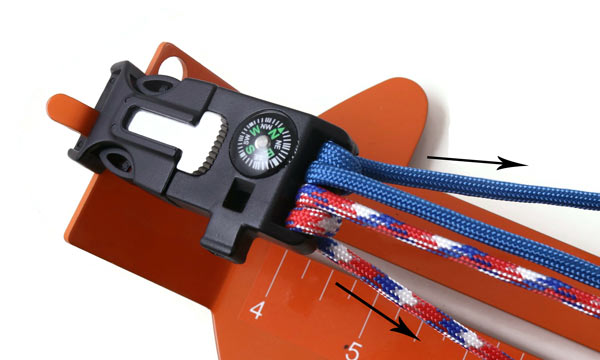
You do the same at the other end ... coil the cord ends around one more time before you start with the first knot.
You knot and finish the bracelet as described in the first example.
Paracord Links Bracelet
We used the following components to make this bracelet:
(+ 1 extra buckle clasp to fasten the cord to the other side of the braiding loom)
+ scissors
+ lighter
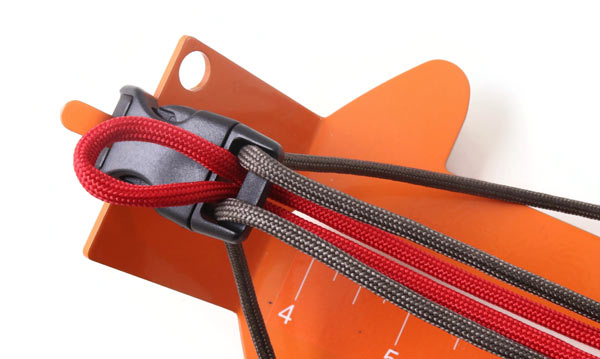
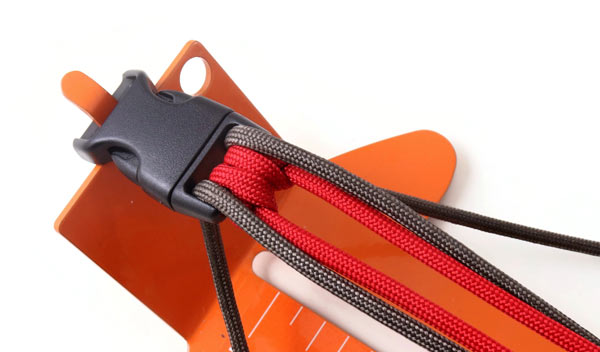
First you fold the green cord in the middle. Pull the loop through the clasp from above.
Pull the cord ends through the loop and tighten the knot.
Pull the cord on the left through the clasp from below...
.... continue through the loop ... and tighten the cord.
Do the same with the cord on the right ... pull it through the clasp from below ...
... continue through the loop ... and tighten the cord. Now the green paracord ist fastened to the first buckle clasp.
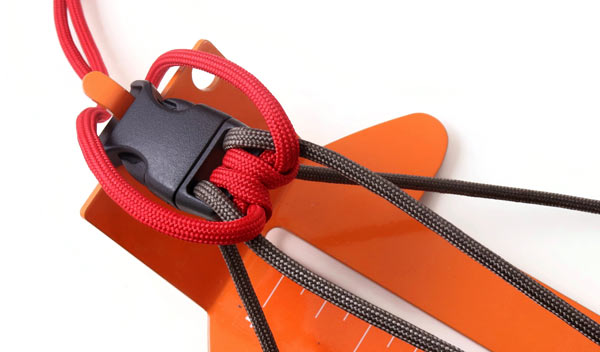
Pull the 2 green cord ends through the other buckle clasp from above. Place the clasp according to the length you want you finished bracelet to have.
Next, you fold the red cord in the middle and pull the loop through the casp from below ... between the 2 green cords.
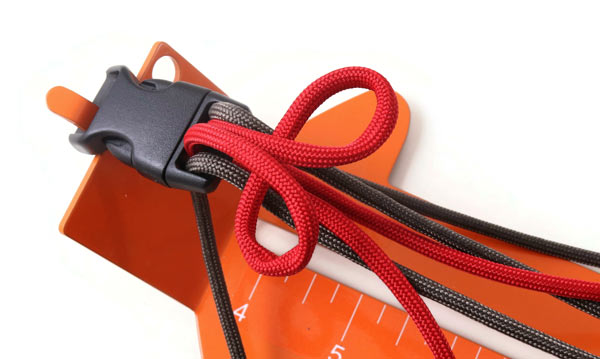
Place the red cord as shown in the picture.

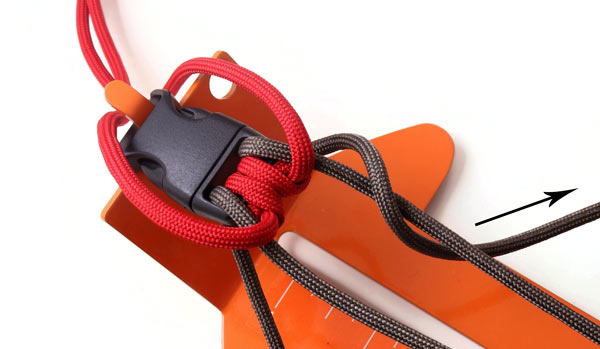
Now you pull the 2 red cord ends through the 2 loops ... from below (see picture).
Tighten the cords.
Place the 2 red strings upwards.
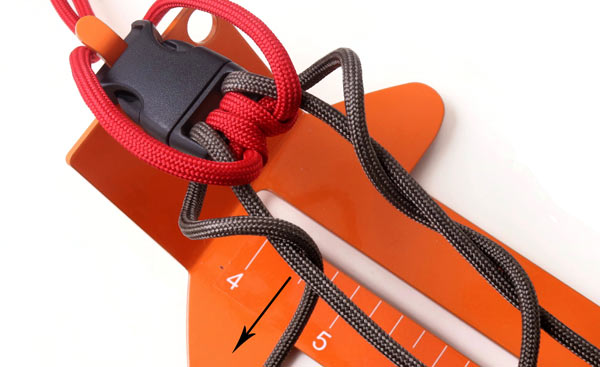
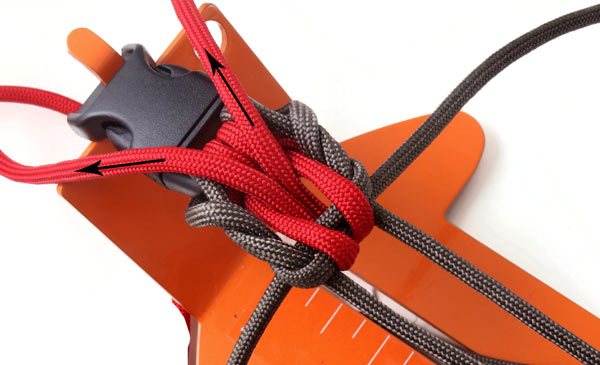
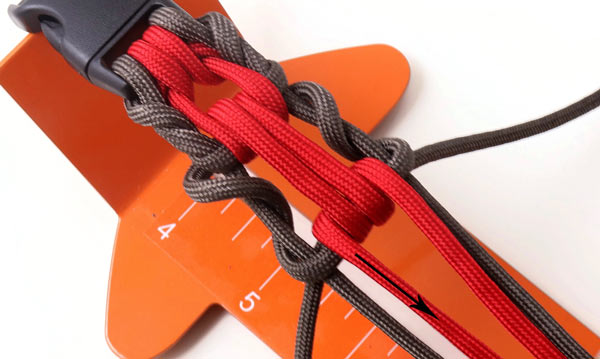
Then you wind the green cord on the right around the centre-right cord (see picture)...
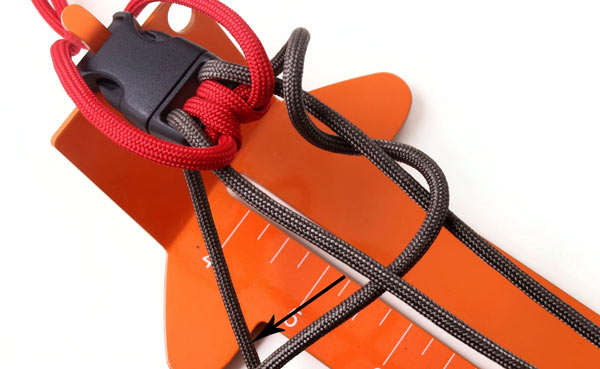
.... continue over the cord and under the centre-left cord ...
In the same way, you wind the green cord on the left arount the centre-left cord...
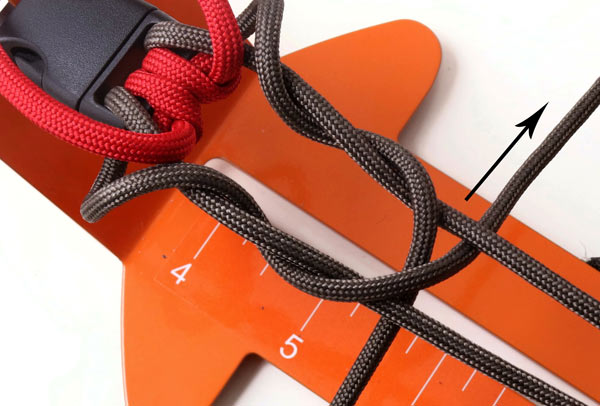
... continue over the cord and under the centre-left cord.
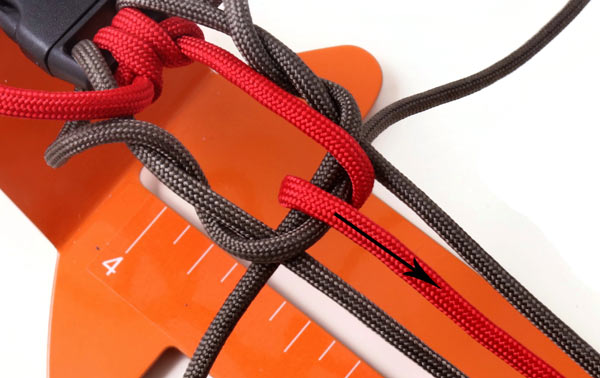
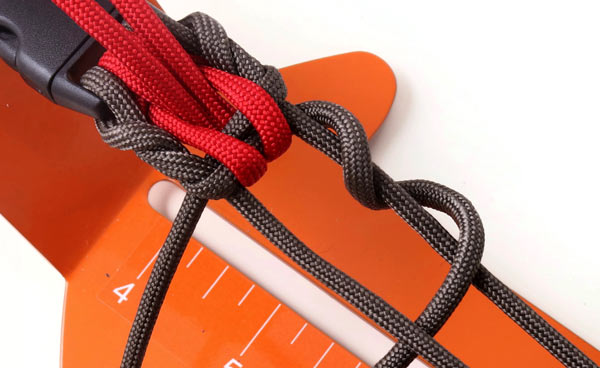
Wind the red string on the right around the 2 green strings.
In the same way, you wind the red cord on the left around the 2 green strings. Place the cord ends in the middle.
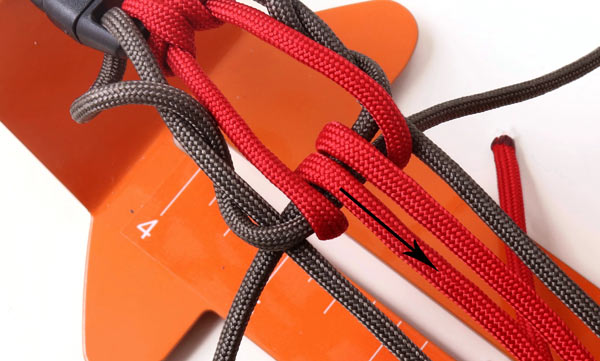
Pull the green and red strings upwards and tight. Place the red cords upwards.
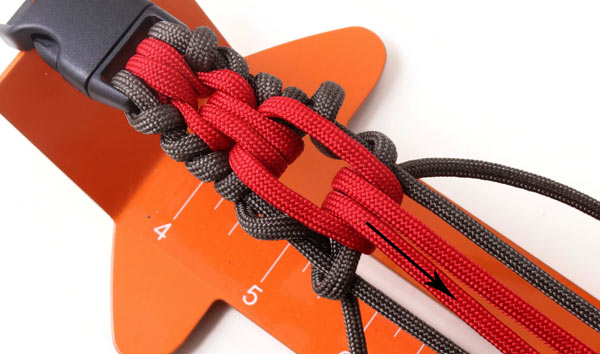
Wind the green cord on the right around the centre-right cord - as you did before.
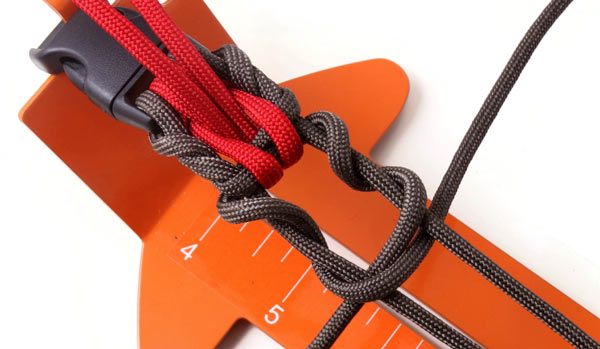
Then, you wind the green cord on the left around the centre-left cord - as you did before.
Wind the red cord on the right around the 2 green cords.
Wind the red cord on the left around the 2 green cords. This time, you place the 2 red cords at the outside.
Pull the green and red cords upwards and tight. Place the red cord upwards.
Continue knotting like this until the bracelet is done.

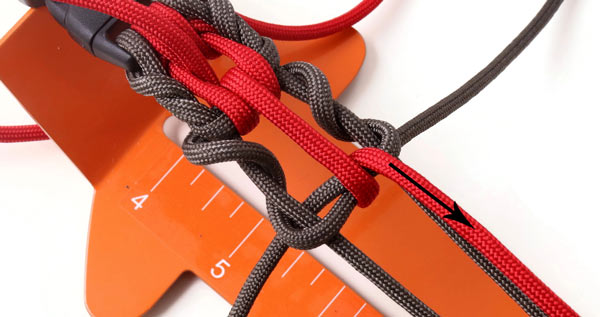
You finish the bracelet by pulling the green cord down through the centre ... pull to the right.
Then you pull the green string on the right down through the centre ... and to the left.

Pull the red string on the right down through the centre ...
... and then the red string on the left.
Pull the green cord on the left down through the centre ... pull it straight down.
Then you pull the green cord on the right down through the centre ... pull it straight down.
Tighten the cords.
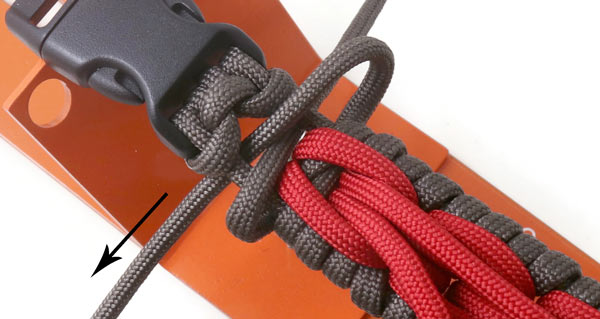
Take the bracelet off the braiding loom ... and turn it around. Loosen the one cord a bit and pull the cord through the loop.
Then you loosen the other cord a bit and pull the cord through the loop. Tighten the cord.
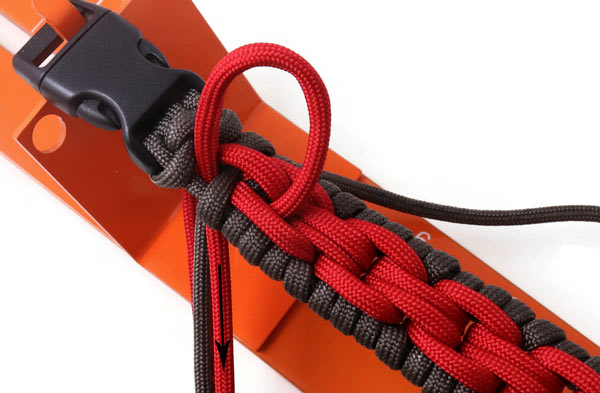
Cut off the 2 green cords close to the bracelet, melt them and press them flat.
Finally, you cut off the 2 red cords close to the bracelet, melt them and press them flat.

Your bracelet is done.
We will publicly show your name and comment on this website. Your email is to ensure that the author of this post can get back to you. We promise to keep your data safe and secure.