


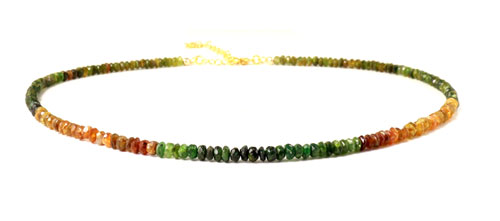
In this blog post from Smyks.com, we show you how to create a beautiful necklace or bracelet using Tigertail beading wire and genuine semi-precious stones.
Beading wire, also known as Tigertail wire, is the ideal choice for making jewellery with sharp-edged or larger beads, such as gemstone or glass beads. It consists of fine, flexible steel wires coated with a layer of clear nylon, which helps prevent fraying and improves durability.
Tigertail wire should not be knotted. Instead, use crimp beads, which are small metal tubes that are squeezed tightly around the wire using chain-nose pliers or crimping pliers. Once secured, the crimp beads hold the necklace or bracelet together.
Tigertail wire is available in various thicknesses and colours. For most necklaces and bracelets, the 0.30 mm to 0.38 mm wire in a steel-coloured or gold-coloured finish is the most popular choice. For designs featuring particularly large or heavy beads, we recommend using a thicker wire, such as 0.45 mm.
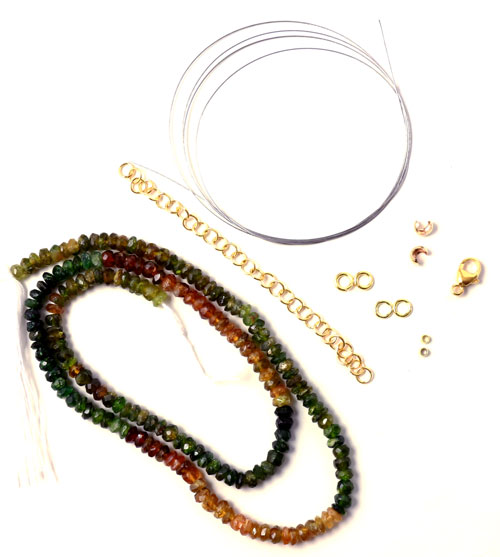
For this necklace, you will need the following materials:
1pc. bead strand with amber and green tourmaline mix
Approx. 60 cm wire (Tigertail) metallic 0.2mm
2pcs. closed jumprings, gilded silver, 4x0.7mm
2pcs. open jumprings, gilded silver, 4x0.7mm
2pcs. crimp beads, gilded brass
2pcs. crimp covers, gilded silver, 4mm
1pc. lobster claw clasp, gilded silver, 9mm
Approx. 8cm of gilded cable chain
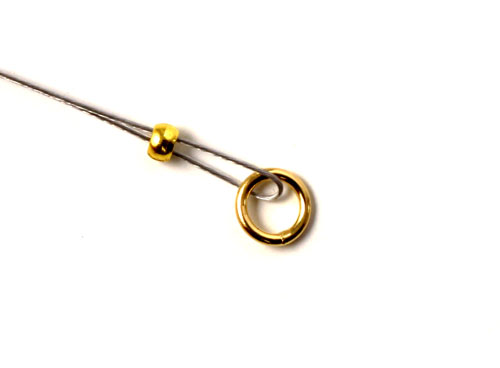
Start by threading the beading wire through a crimp bead. Then pass the wire through the closed jumpring and back through the crimp bead to form a small loop.
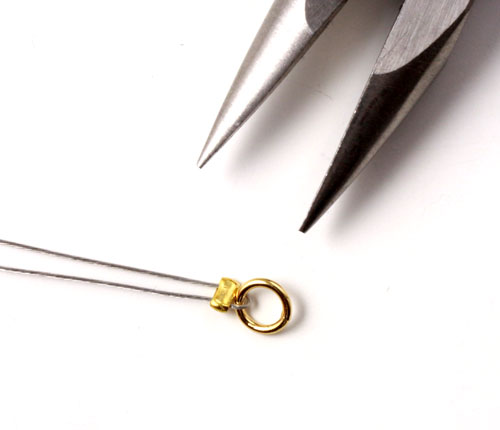
Then move the crimp bead right up against the jump ring and flatten it firmly with the pliers. For the strongest and most secure finish, use professional crimping pliers. However, ordinary flat-nose pliers can also be used, as demonstrated here.
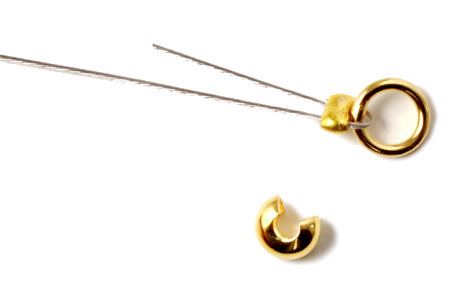
Then trim the excess wire leaving about 3-4 cm beyond the crimp bead. You can reinforce your necklace by leaving a short length of wire and threading this excess wire back through 3–6 beads.
Because a flattened crimp bead is not very decorative, many jewellery makers choose to cover it with a crimp cover. This small, open metal bead is placed around the crimp bead and gently closed with pliers, creating the appearance of a neat gold-coloured bead at the end of the necklace or bracelet.
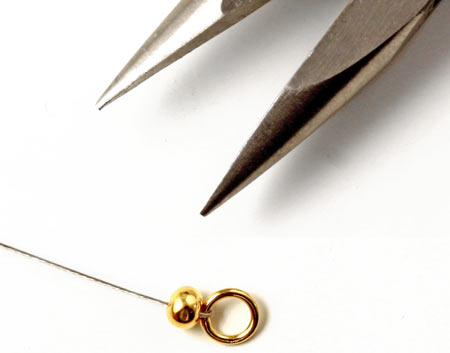
Here you can see what the crimp cover looks like once it has been closed. Use a pair of standard flat-nose pliers or narrow flat-nose pliers to gently squeeze the crimp cover closed around the crimp bead.
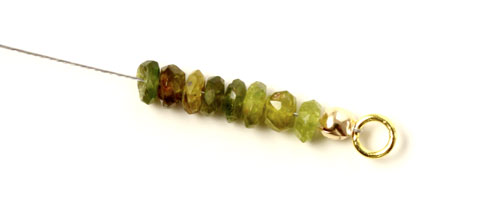
Thread the beads onto the wire. Since beading wire is slightly stiff, there is no need to use a beading needle. Simply thread the beads directly onto the wire.
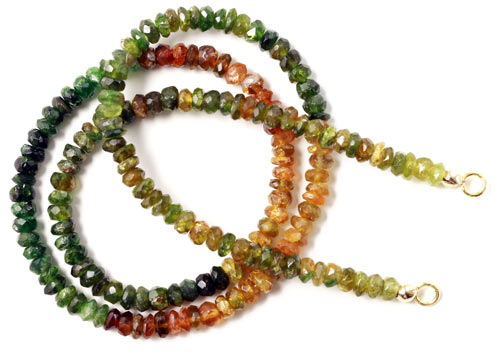
Move to the other end of the necklace. As before, thread a crimp bead onto the wire, then pass the wire through the jumpring and back through the crimp bead to create a small loop. Pull the wire gently to tighten the loop, then squeeze the crimp bead flat with the pliers. Finally, cover the crimp bead with a crimp cover, just as you did at the other end.
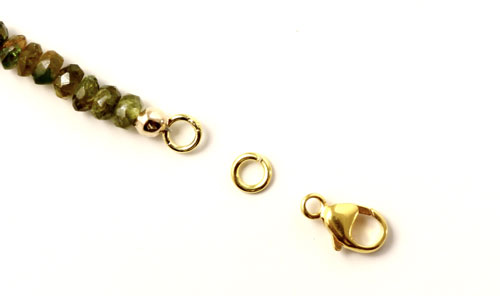
Now you need to attach a length of chain and a clasp to your necklace. Take a 4 mm jumpring (4 mm) and a lobster clasp (9 mm) for one end.
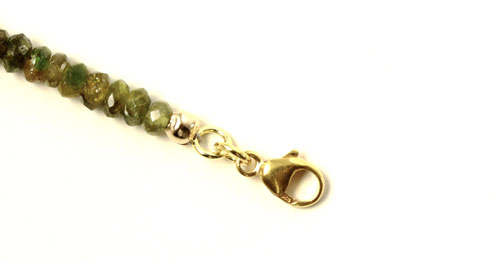
Use the open jumpring to attach the closed ring on the wire to the lobster clasp.
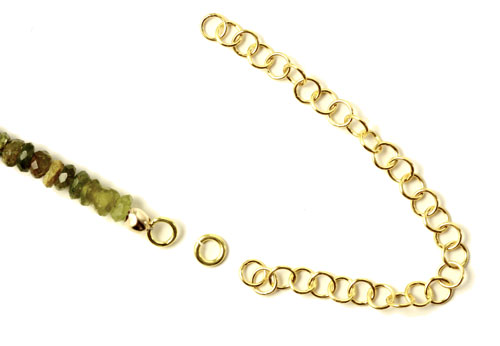
For the opposite end of the necklace, take another 4 mm jumpring and a length of cable chain measuring approximately 8 cm.
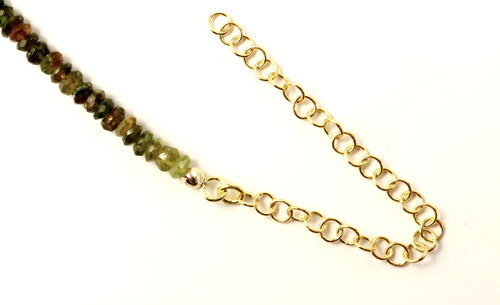
Now attach the closed ring on the wire to the cable chain using the open jumpring.
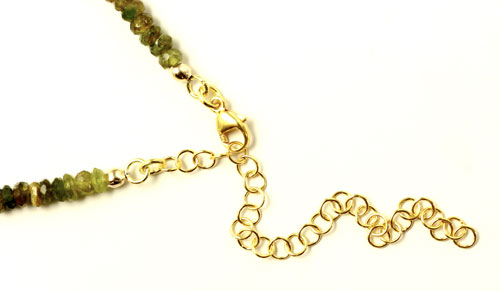
The extension chain allows you to adjust the fit, so you can fasten the necklace at the length that suits you best.
Please note that adding a cable chain is optional. The cable chain simply allows you to adjust the length of the necklace for a more flexible fit.
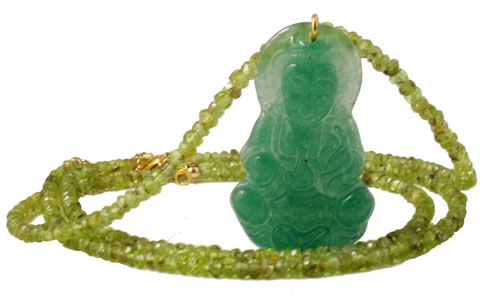
The necklace shown above was made using the same method. It consists of two strands of peridot beads and is finished with a Buddha pendant in green jade.
You can find more blog posts and DIY guides on jewellery with beading wire here:
DIY Necklaces with large gemstones
DIY How to attach a clasp with screw-tite crimp beads
We'd love to hear from you. If you have any questions, comments, or jewellery-making tips of your own, please share them in the comments section below.
We will publicly show your name and comment on this website. Your email is to ensure that the author of this post can get back to you. We promise to keep your data safe and secure.