
Earrings with large colourful bead fringes, often referred to as Greenlandic earrings, are more popular than ever, and the variations and patterns are almost endless. In this example, we use the well-known tubular Delica seed beads, but traditional round seed beads (Greenlandic beads) work just as well and give a more robust result with wider patterns.
Below, Charlotte guides you through the technique and materials so that you can make your own pair of ‘Greenlandic’ earrings tailored to your taste.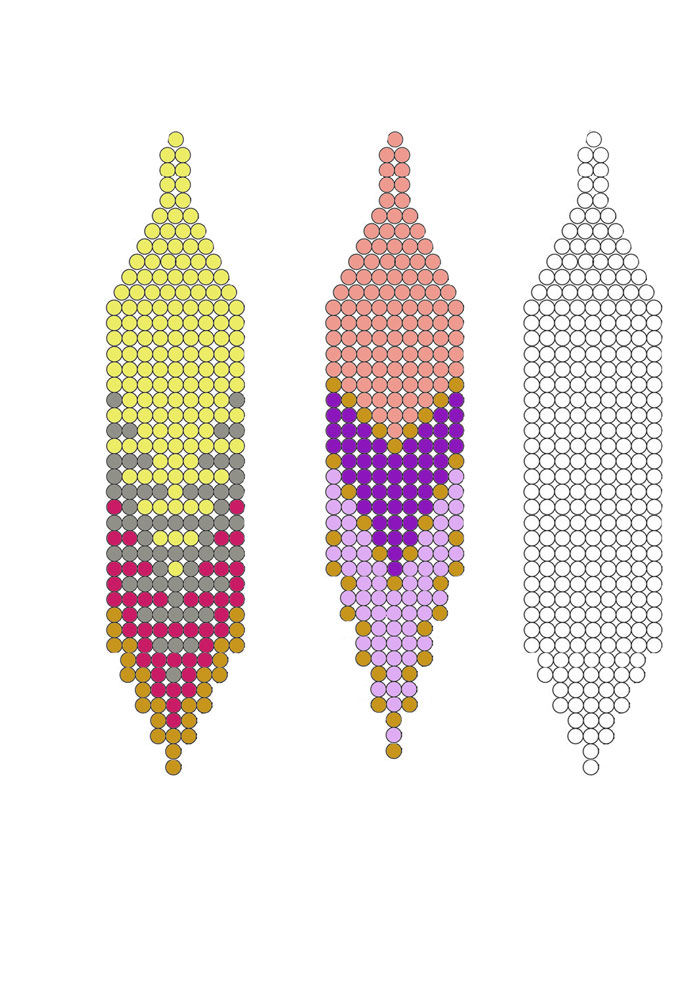
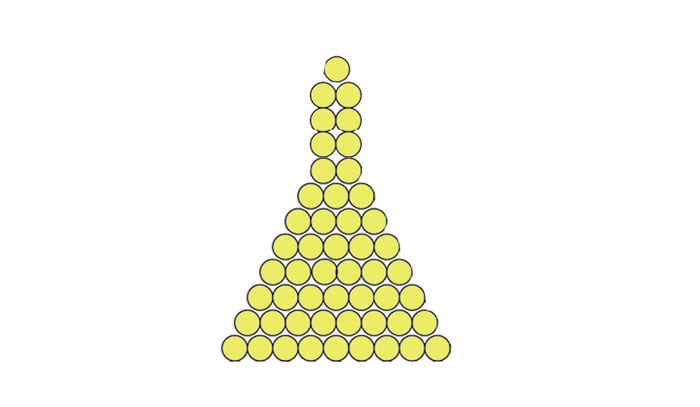
Click here for printable beading patterns.
Click here for the indiginous pattern and the flag of Greenland.
We used the following beads for the indiginous fringe earrings:
Miyuki seed beads size #11
Ivory, Picasso Turquoise, Dark Brown Galvanized
Red, Yellow, Light Lemon, Orange + Dark Navy (small model)
You need the following beads for the Greenland flag fringe earrings:
Miyuki seed beads size #11
Delica seed beads size #11
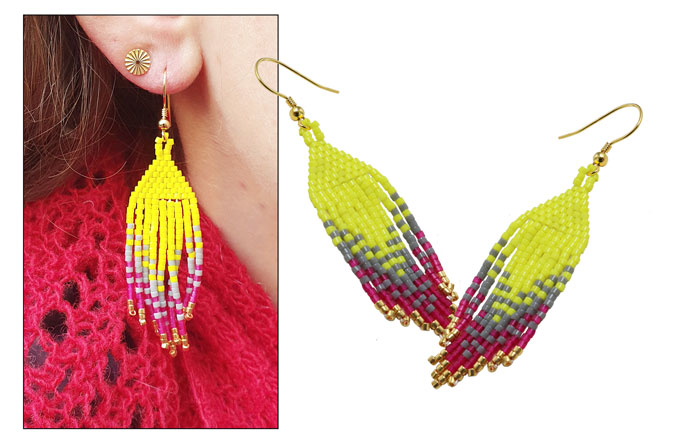
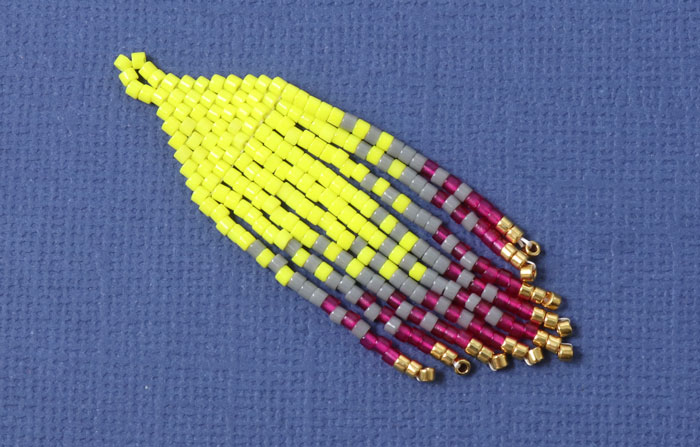
Fringe Earrings with Delica Beads - Model 1 - yellow
You need the following DIY components to make these earrings:
Delica beads, size #11, bright yellow
Delica beads, size #11, fuchsia
Delica beads, size #11, 24 carat gold-plated
1 pair of earwires with spiral and ball, gold-plated sterling silver
approx. 2 x 60cm FireLine, 6LB, white (for the upper part/brick stitch)
approx. 2 x 1m Nymo beading thread, size D, white (for the fringes)
(alternatively, Miyuki beading thread)
 Start by sewing the top part of the earring using the brick stitch technique. We use FireLine thread for a firmer end result.
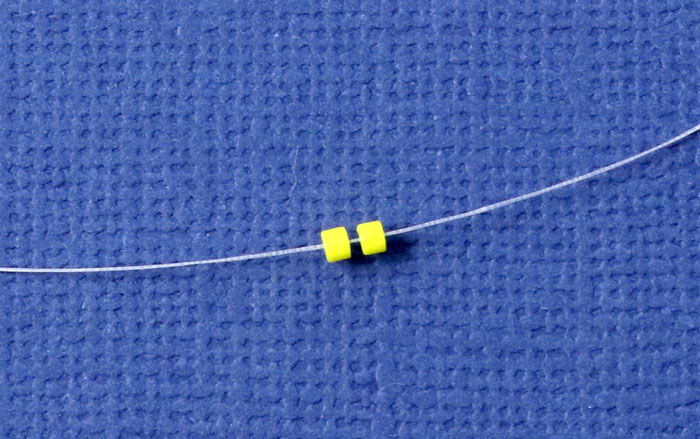
Begin by creating the base row: string 2 beads.
Then sew through the first bead again – from bottom to top.
Tighten the thread to form a loop.
The beads are now close together. Leave a thread end of approx. 8 cm.
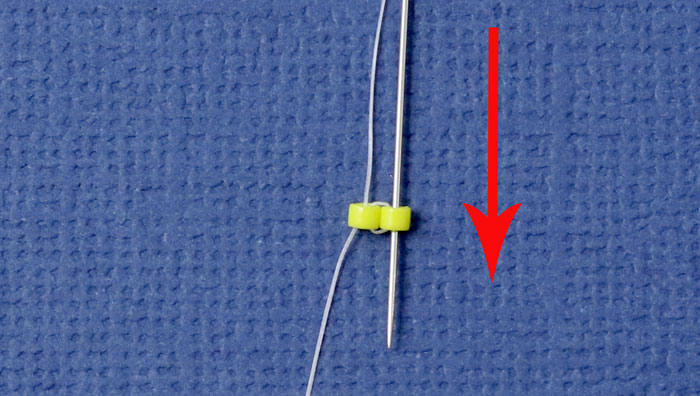
Sew back through the second bead – from top to bottom.

When you tighten the thread, pull evenly downwards or upwards so that the beads remain next to each other.
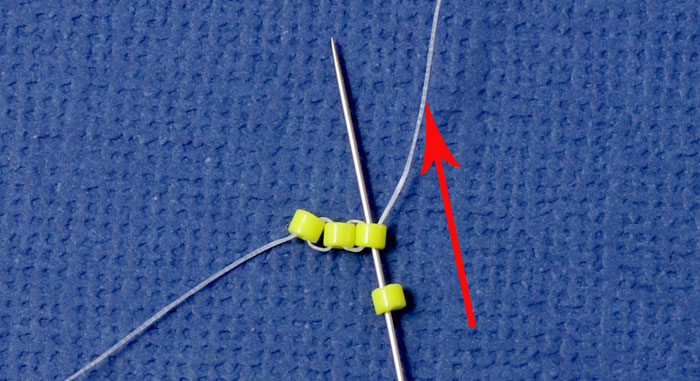
Now sew on the third bead. String a bead and pass the needle back through the second bead from top to bottom.
Now there are three beads placed side by side.
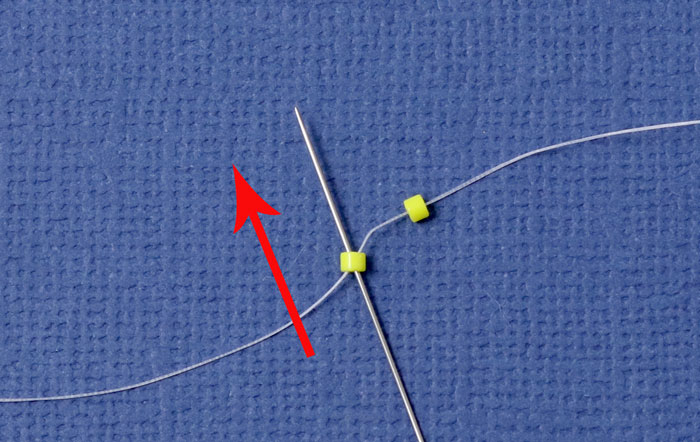
Before the 4th bead can be sewn on, the needle must be moved one bead to the right.
Sew through the 3rd bead – from bottom to top.
String 1 bead ... and sew through the 3rd bead from bottom to top .
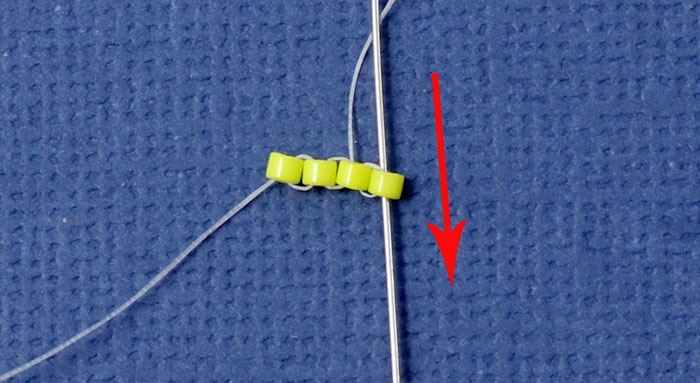
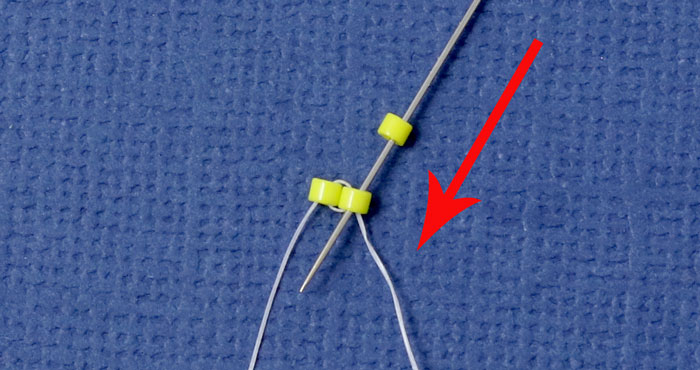
Now the needle must move to the right again by one bead. Sew through the 4th bead – from top to bottom.
String a bead and sew through the 4th bead from top to bottom.
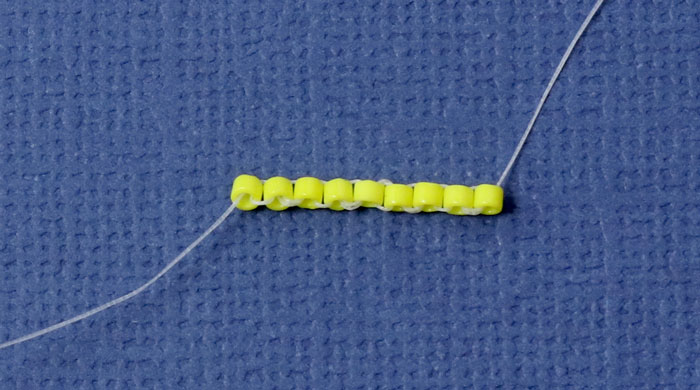
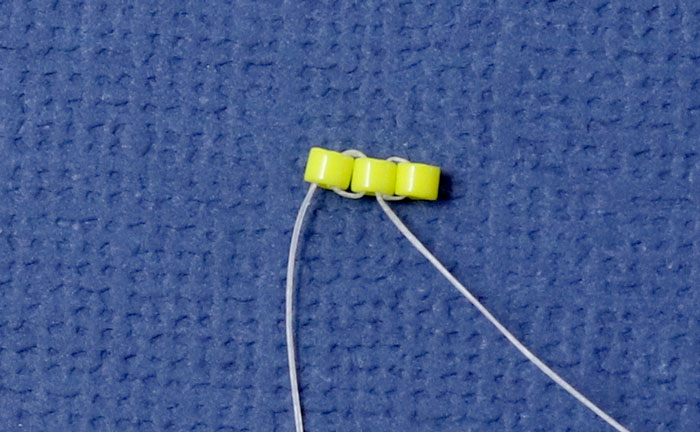
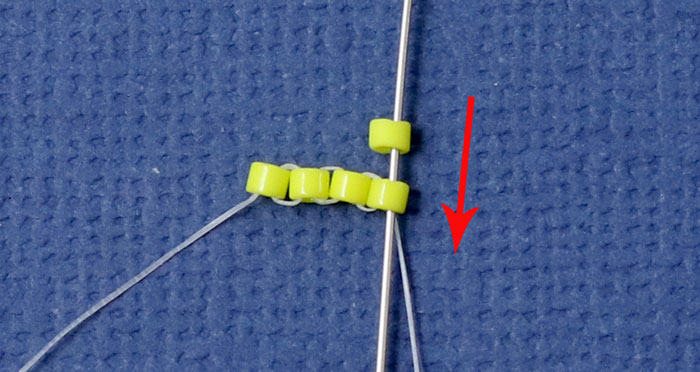
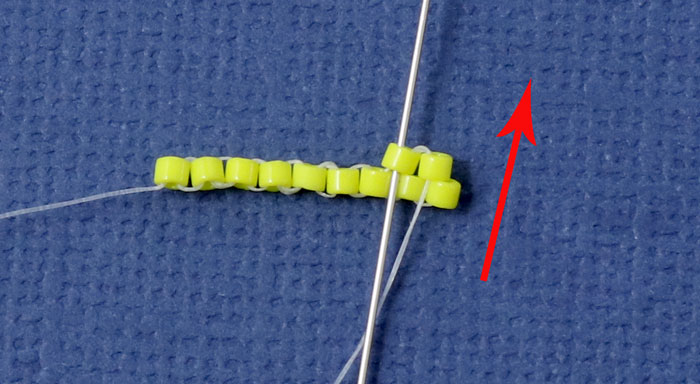
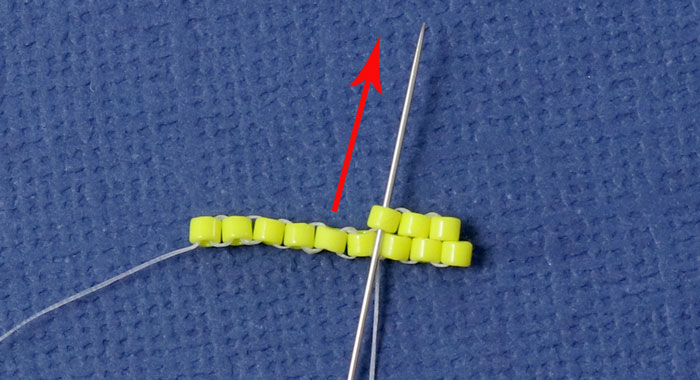
Continue in the same way, sewing on one bead after another... until you have a total of 9 beads in the row. Finally, pass the needle through the last bead so that the thread goes upwards (see picture).
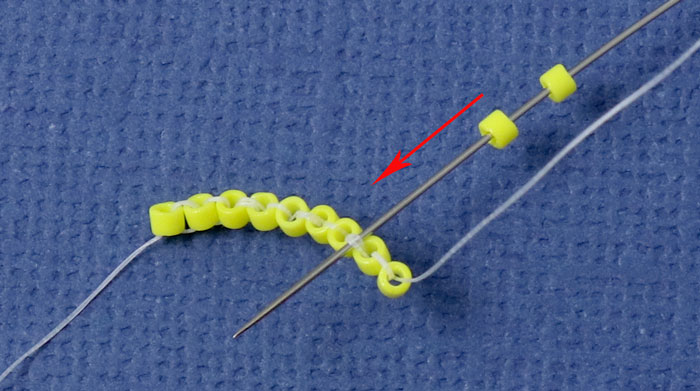
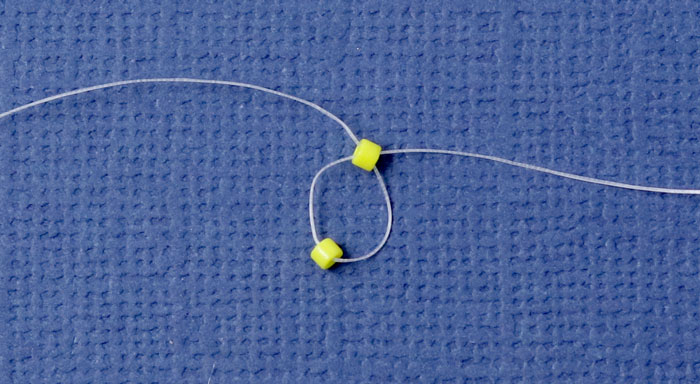
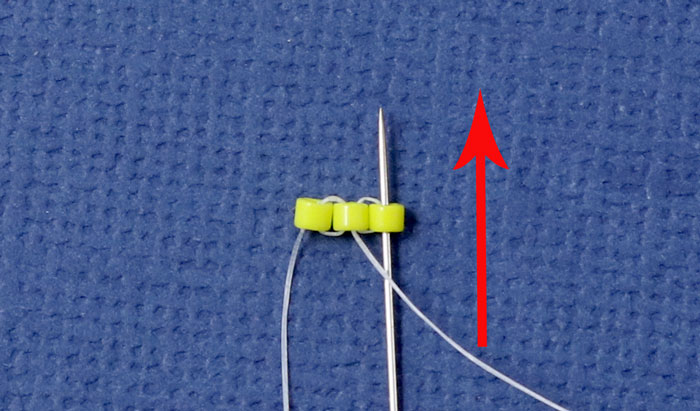
The next row is sewn on using brick stitch. Each row starts with 2 beads.
String 2 beads ... and sew under the thread between the 2nd and 3rd beads. From now on, the brick stitch rows are sewn from right to left (see picture).
Tighten the thread. The two beads are now leaning against each other.
Sew back through the second of the two beads – from bottom to top. Now the two beads are fixed in place (see picture).
Pass the needle back through the first bead, from top to bottom.
Then sew through the second bead again – from bottom to top.
Tighten the thread so that the beads sit close together ... and are shifted half a bead to the left.
The remaining beads in this row are sewn on one by one.
String a bead ... and sew underneath the thread between the 3rd and 4th bead (see picture).
Tighten the thread.
Sew through the bead again - from bottom to top.
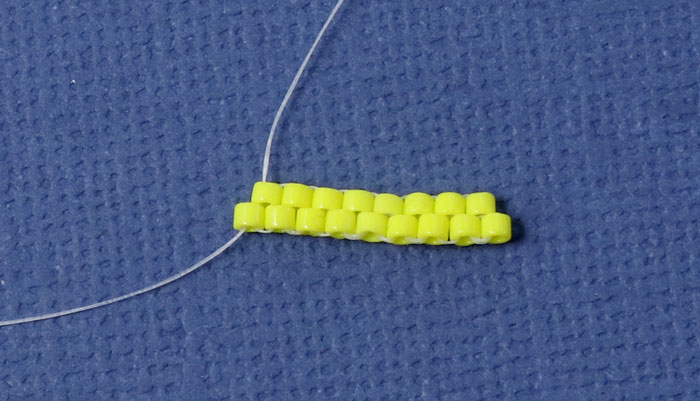
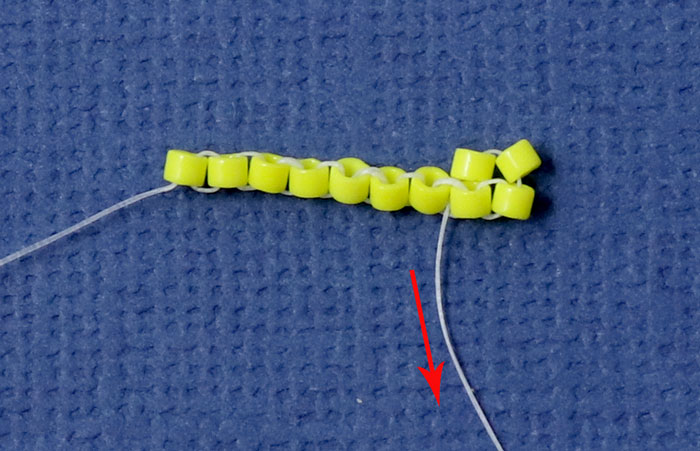
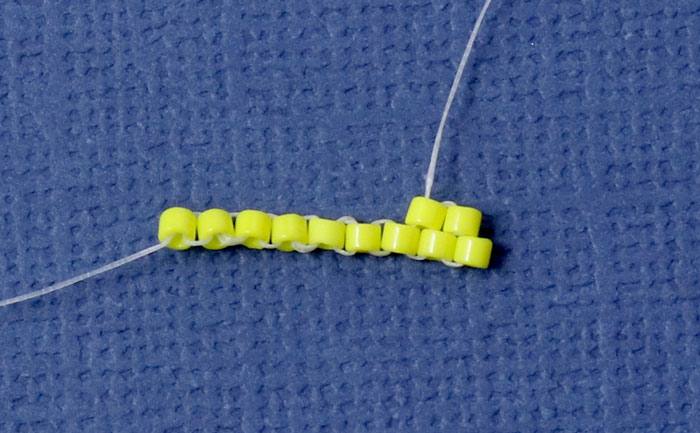
Sew on one bead after another in the same way ... until you have a row of 8 beads (see picture).
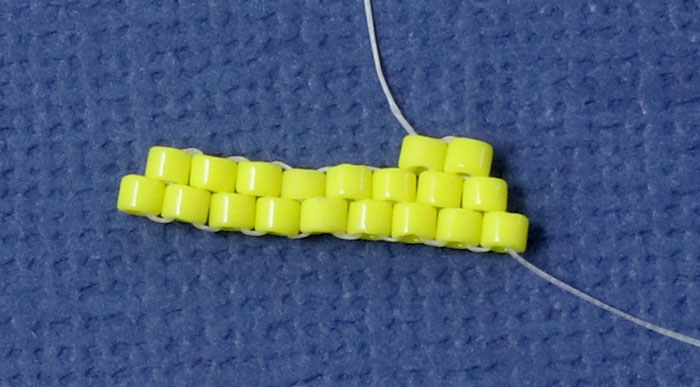
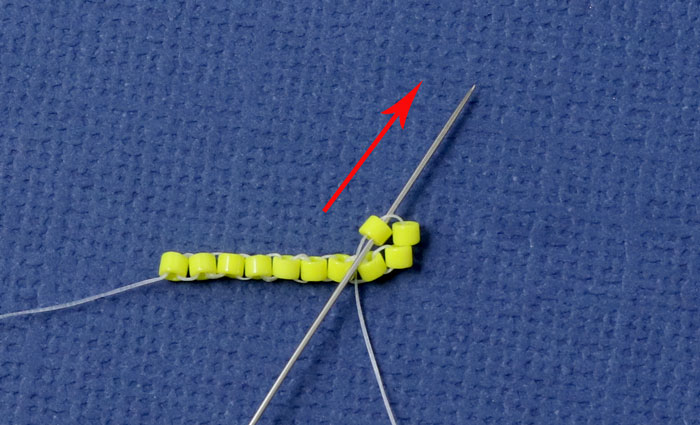
Turn the piece over and sew on the first 2 beads in the same way as described above.
Finish the 3rd row by sewing on one bead at a time until the row consists of 7 beads (see picture).
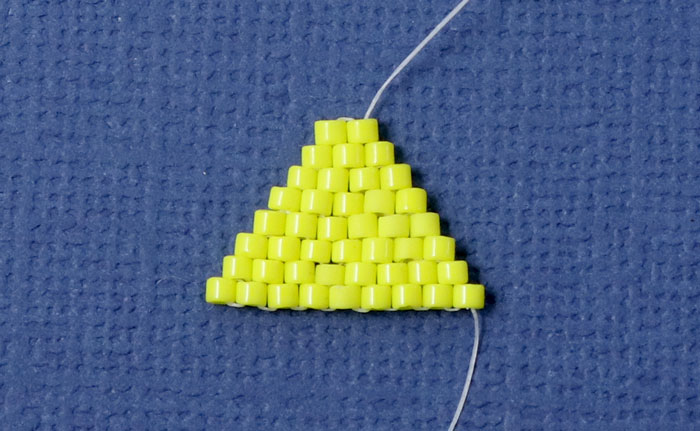
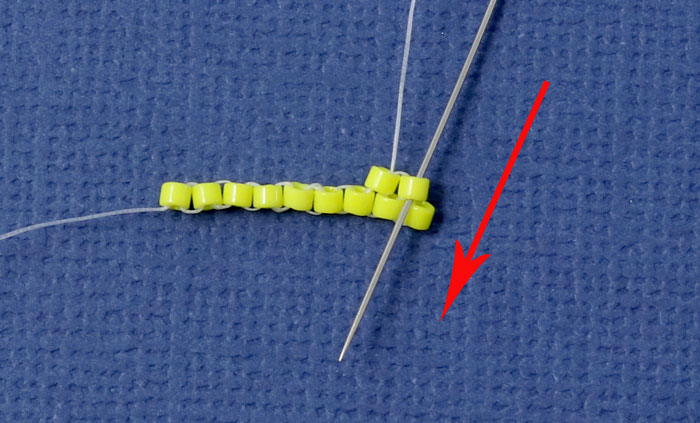
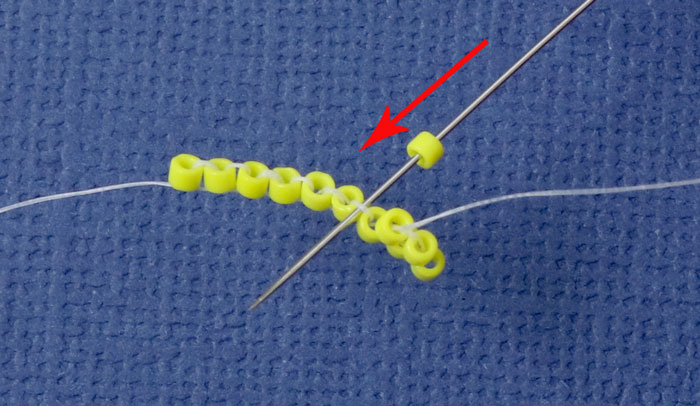
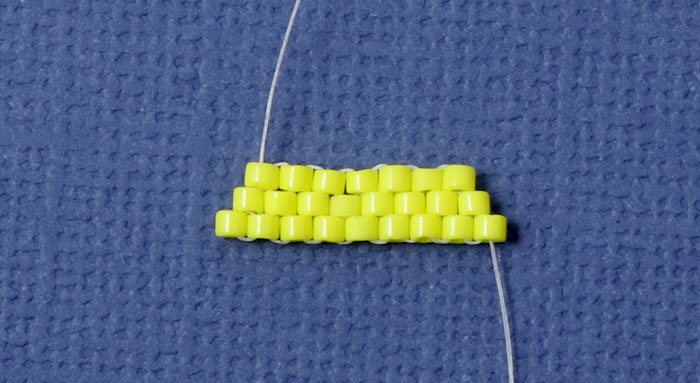
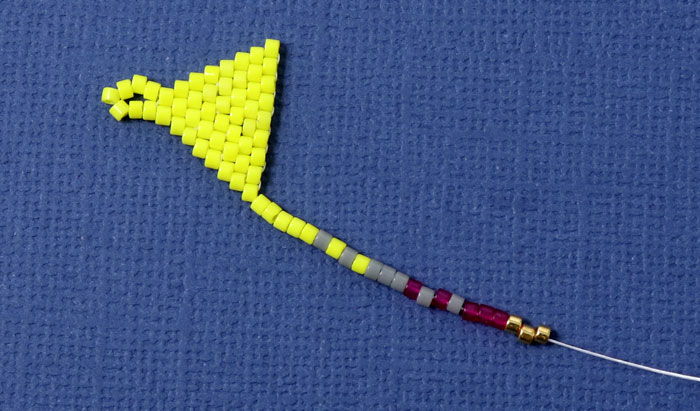
Sew the next rows in the same way. The last row consists of only 2 beads.
String 7 beads ... and sew through the bead next to the one from which the thread comes out of (see picture).
Secure the thread buy sewing through random beads.
ZSecure the other thread end in the same way and cut off the excess thread.
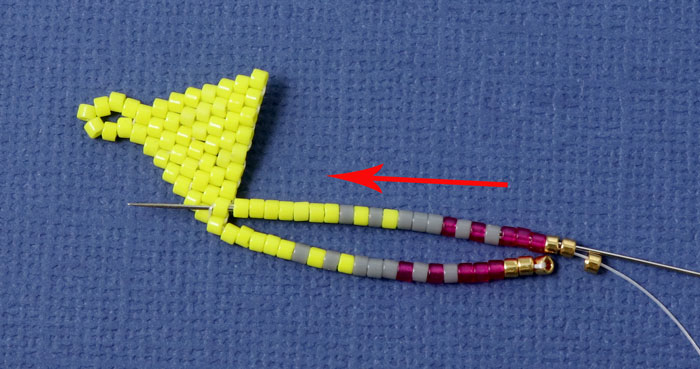
Now you are going to make the fringes. For this, you use Nymo thread.
Stretch the Nymo thread straight first, then weave in the end of the thread by sewing through random beads. Make sure that the thread comes out of the bead at the bottom left.
Cut off the excess thread.

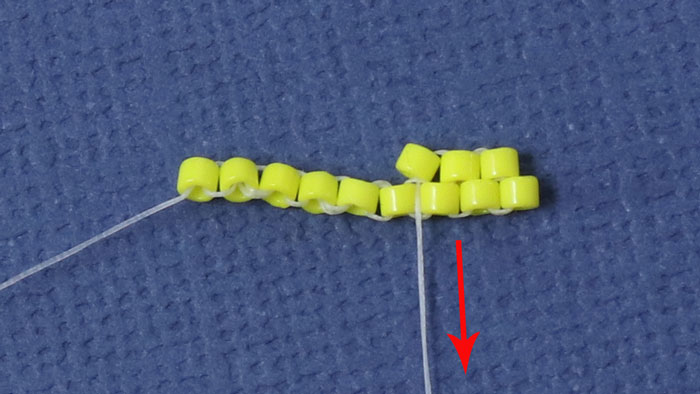
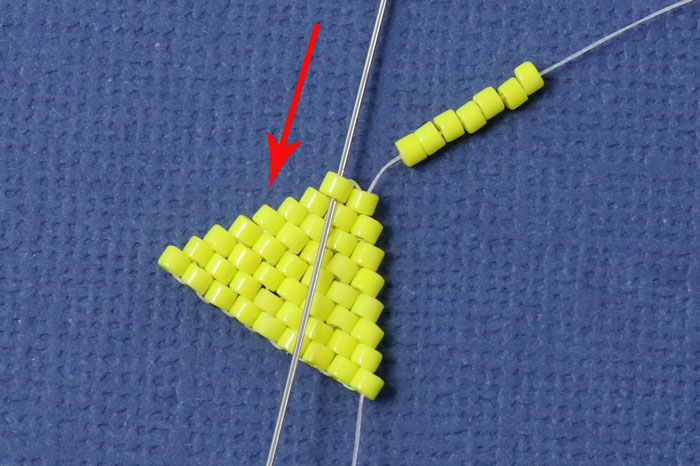
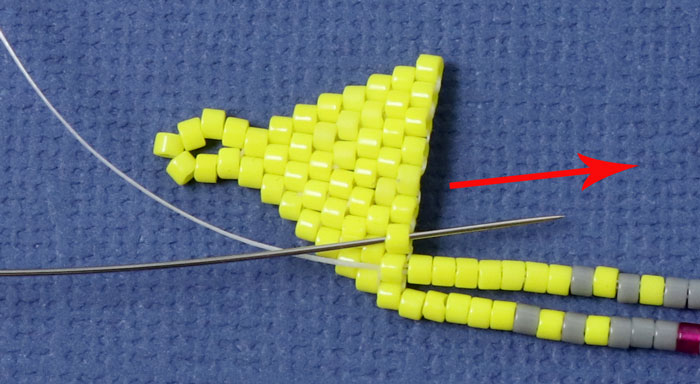
Now it's time to make the first row. Follow the pattern for row 1, ehen you string beads.
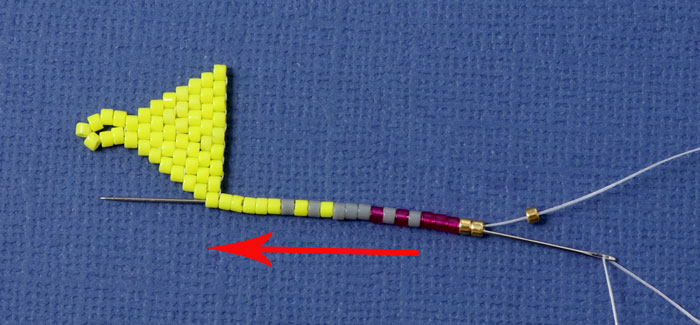
Skip the last bead and pass the needle through the remaining beads in the row + the 1st bead in the base row.
Sew through the bead next to it. Now you are ready for the next fringe.
String the beads again according the the pattern.
Skip the last bead and sew back through the remaining beads in the row + the 1st bead in the base row...
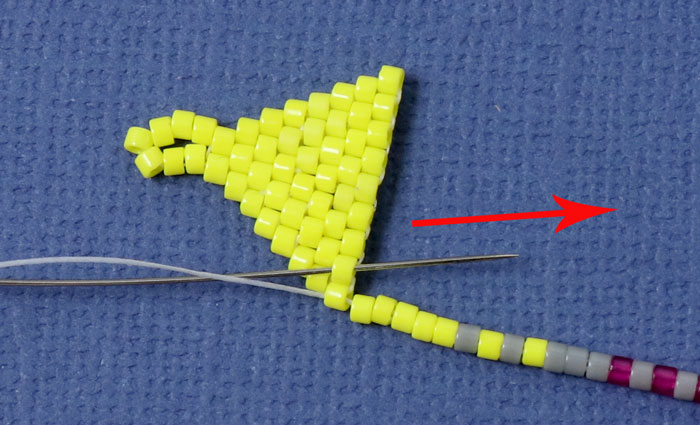
.... then pass the needle through the bead next to it.
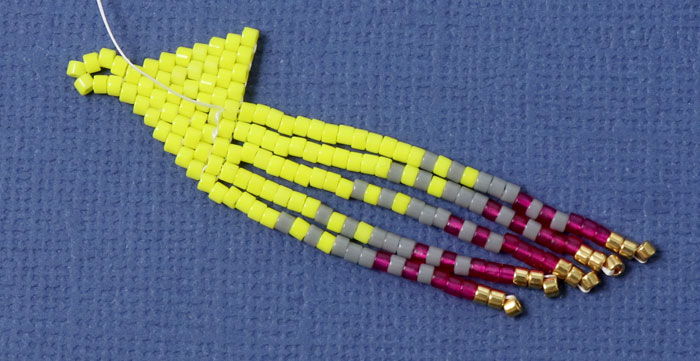
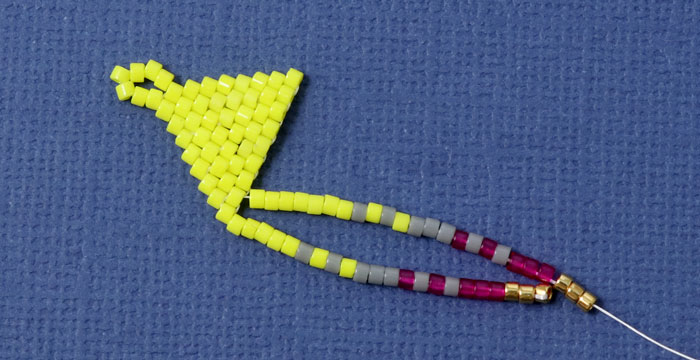
Continue in the same way, adding fringes according to the pattern...
...until all the fringes are sewn on.
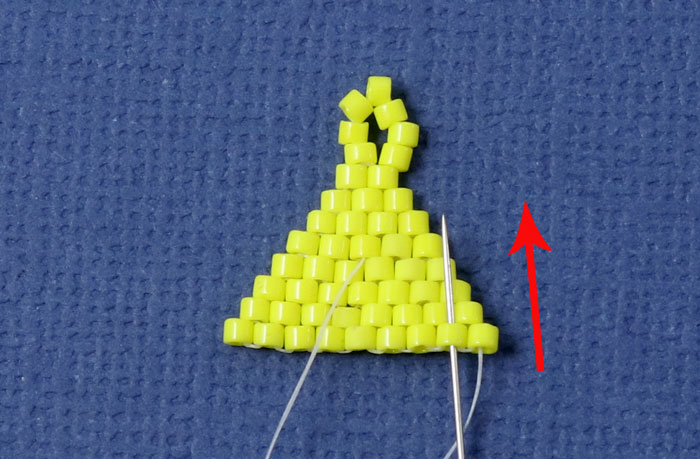
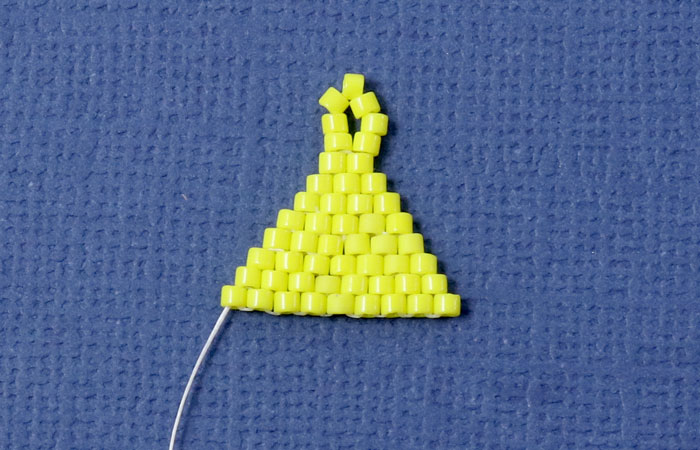
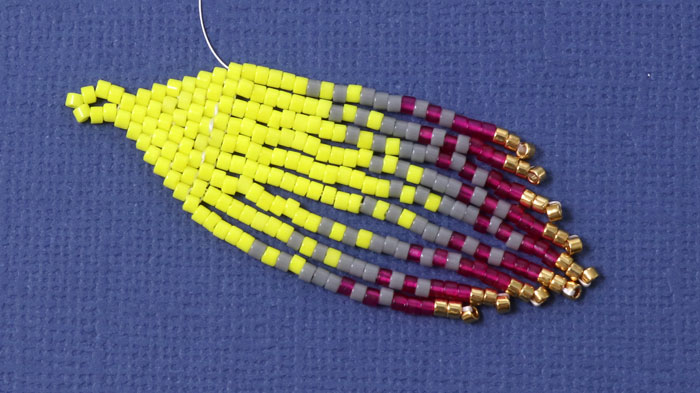
Secure the thread by sewing through random beads. Cut off the excess thread.
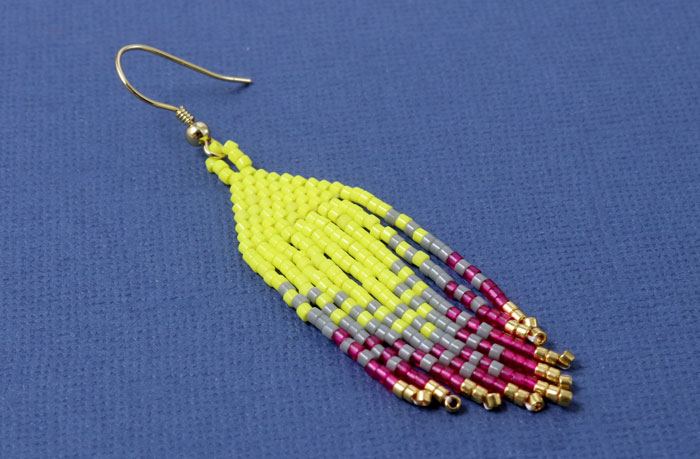
Attach the ear hook to the seed bead eyelet.
Your fringed earring is now complete. The following example is assembled in the same way.
Fringe Earrings with Delica Beads - Model 1 - Blue
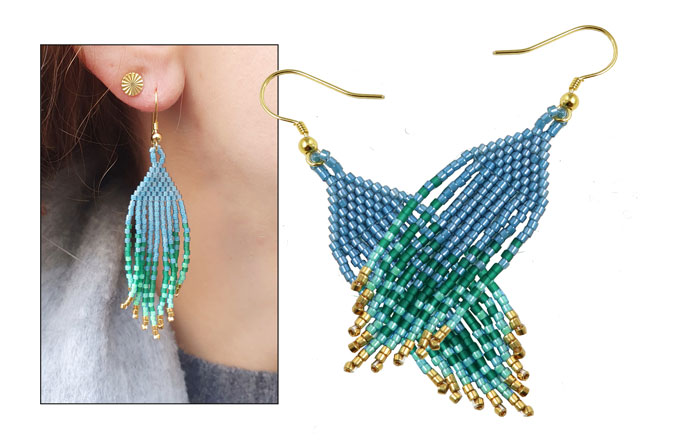
You need the following DIY components to make these earrings:
Delica beads, size #11, denim blå
Delica beads, size #11, emerald
Delica beads, size #11, mermaid green
Delica beads, size #11, 24 carat gold-plated
1 pair of earwires with spiral and ball, gold-plated sterling silver
approx. 2 x 60cm FireLine, 6LB, white (for the upper part/brick stitch)
approx. 2 x 1m Nymo beading thread, size D, white (for the fringes)
(alternatively, Miyuki beading thread)
The procedure is the same as described in the first example.
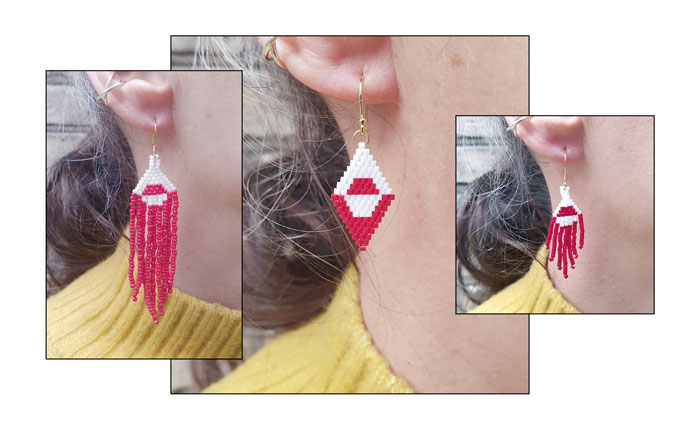
Fringe Earrings with Delica Beads - Model 1 - Pink

You need the following DIY components to make these earrings:
Delica beads, size #11, banana
Delica beads, size #11, 24 carat gold-plated
1 pair of earwires with spiral and ball, gold-plated sterling silver
approx. 2 x 60cm FireLine, 6LB, white (for the upper part/brick stitch)
approx. 2 x 1m Nymo beading thread, size D, white (for the fringes)
(alternatively, Miyuki beading thread)
The procedure is the same as described in the first example.
Fringe Earrings with Delica Beads - Model 2 - grey
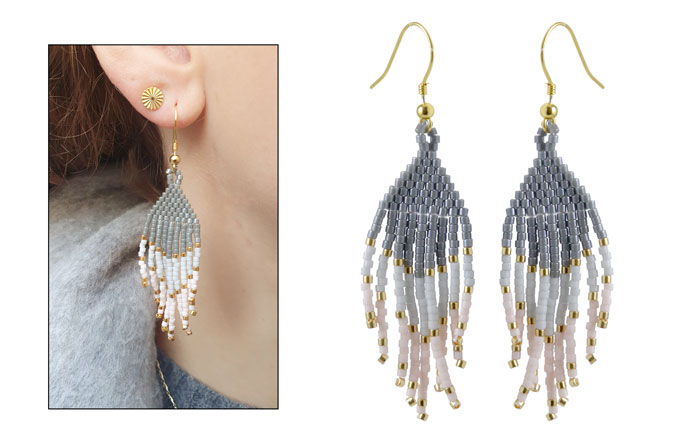
You need the following DIY components to make these earrings:
Delica beads, size #11, dark grey
Delica beads, size #11, pale grey
Delica beads, size #11, light lavender
Delica beads, size #11, 24 carat gold-plated
1 pair of earwires with spiral and ball, gold-plated sterling silver
approx. 2 x 60cm FireLine, 6LB, white (for the upper part/brick stitch)
approx. 2 x 1m Nymo beading thread, size D, white (for the fringes)
(alternatively, Miyuki beading thread)
The procedure is the same as described in the first example.
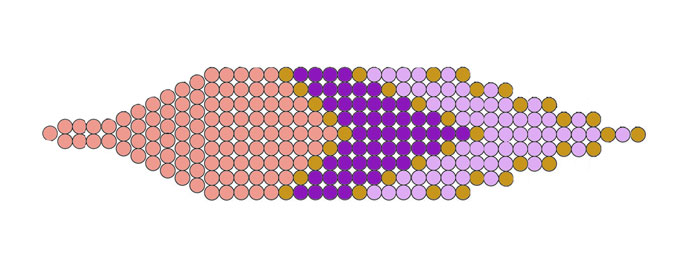
Model 2 has a different pattern but the same number of beads in the base row.
Fringe Earrings with Delica Beads - Model 2 - Peach
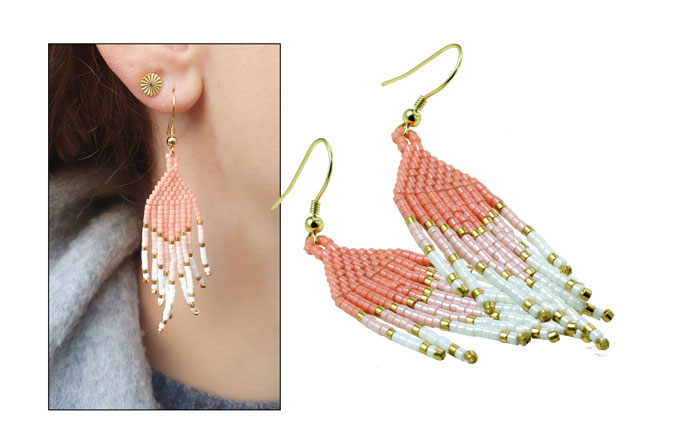
You need the following DIY components to make these earrings:
Delica beads, size #11, rose peach
Delica beads, size #11, light salmon-coloured
Delica beads, size #11, off-white
Delica beads, size #11, 24 carat gold-plated
1 pair of earwires with spiral and ball, gold-plated sterling silver
approx. 2 x 60cm FireLine, 6LB, white (for the upper part/brick stitch)
approx. 2 x 1m Nymo beading thread, size D, white (for the fringes)
(alternatively, Miyuki beading thread)
The procedure is the same as described in the first example.
Have fun - and remember that you can always contact us for help :-)
We will publicly show your name and comment on this website. Your email is to ensure that the author of this post can get back to you. We promise to keep your data safe and secure.