Here we show you how to use the looper-plier jewellery tool for quick and easy making of loops on metal wire. The plier can be ordered at Smyks.com and is a really good investement for all who are working with jewellery making and beading on a regular basis. For example it is easy to create links out of beads by forming even loops on both sides of a bead as the plier allows for making loops close up to the bead hole.
See also Smyks’ comprehensive guide to jewellery pliers here
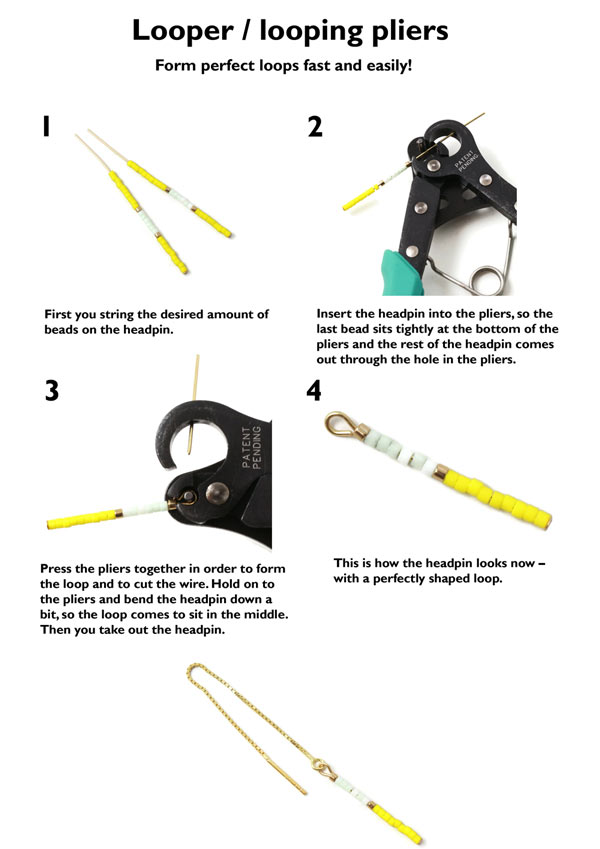
Looper / looping pliers
Form perfect loops fast and easily!
1
First you string the desired amount of beads on the headpin.
2
Insert the headpin into the pliers, so the last bead sits tightly at the bottom of the pliers and the rest of the headpin comes out through the hole in the pliers.
3
Press the pliers together in order to form the loop and to cut the wire. Hold on to the pliers and bend the headpin down a bit, so the loop comes to sit in the middle. Then you take out the headpin.
4
This is how the headpin looks now – with a perfectly shaped loop.
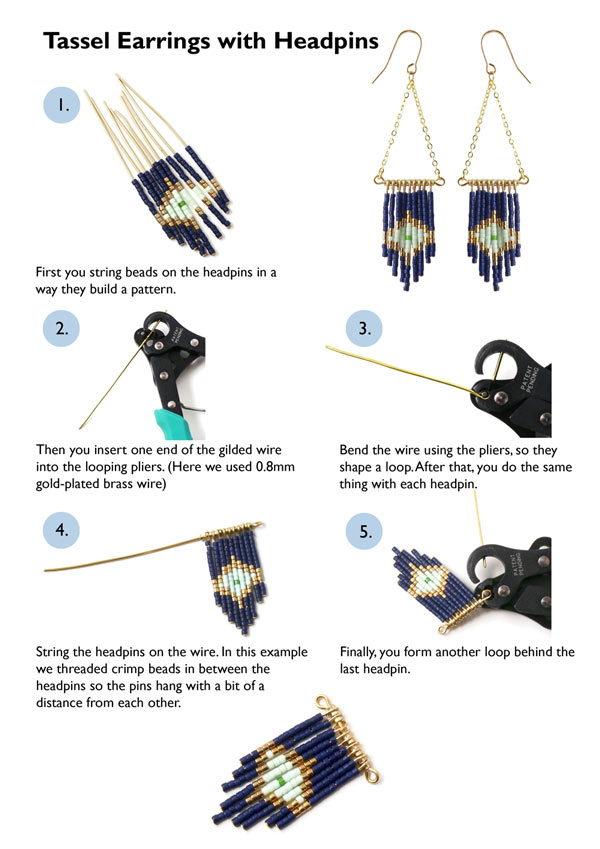
Tassel Earrings with Headpins
1.
First you string beads on the headpins in a way they build a pattern.
2.
Then you insert one end of the gilded wire into the looping pliers. (Here we used 0.8mm gold-plated brass wire)
3.
Bend the wire using the pliers, so they shape a loop. After that, you do the same thing with each headpin.
4.
String the headpins on the wire. In this example we threaded crimp beads in between the headpins so the pins hang with a bit of a distance from each other.
5.
Finally, you form another loop behind the last headpin.