Confirmation jewellery - tradition, symbolism and personal style
There are many things that need to be taken care of for the confirmation and it's not just the dress and hair, but especially the jewellery that needs to be found and matched.
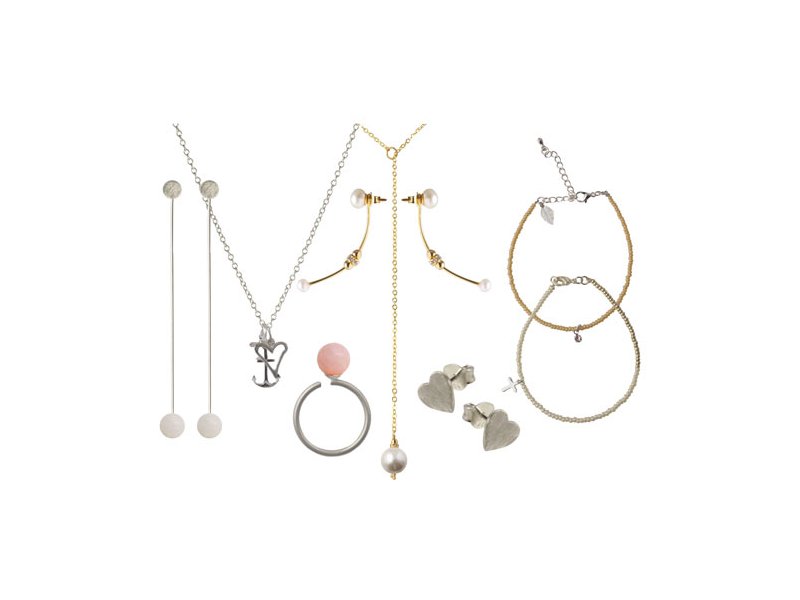
In this post, we've created some examples of jewellery for the graduate that we hope will inspire you to make jewellery for the big day, either for yourself or as an original and personal gift.
There are plenty of options for making beautiful jewellery with pearls and you can, for example, make a beautiful piece with the symbols of faith, hope and love. Please note, as this is a slightly older blog post, some of the pendants in the pictures are discontinued, but we have linked to similar jewellery pieces on the website.
See some related blog posts here:
DIY | Pearl jewellery for the party
DIY | Silver jewellery for the Confirmation party
DIY | Confirmation jewellery with Delica beads
Floating earrings with pearls

Necklace with pearl

Materials and procedure for these two pieces can be found under the under the simple pearl jewelry post. It is an earlier blog post where you will be able find further inspiration in the jewellery with pearls directory.

Earstuds with hearts

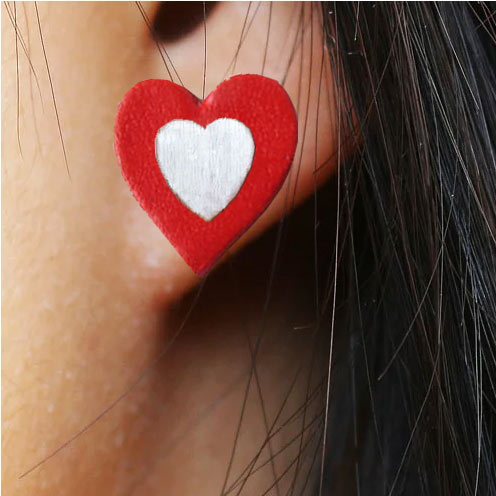
These earstuds with hearts, 6mm in sterling silver can be used as is. The shown earstud is also available in gilded sterling silver and black sterling silver.
As an alternative you can also choose to use a leather hearts, behind the silver heart. The leather pendants are available in a variety of colors.

Bracelet with seed beads & cross

For this bracelet, the following materials are used:
20cm tigertail beading wire, thickness 0,30mm
2 pcs. crimp beads, silver-plated
2 pcs. jumpring, 4mm, silver
seedbeads color: opaque pearl
seedbeads color: silver
1 pc. jumpring, 4mm, sterling silver
1 pc. lobster claw clasp, 9mm, sterling silver
1 pc. sterlingsilver cross pendant, 9mm
You can read how to make this bracelet under the blog post with delica beads.
Bracelet with seed beads and charms

For this bracelet, the following materials are used:
20cm tigertail beading wire thickness 0,30mm
2 pcs. crimp beads, silver-plated
2 pcs. closed jumpring, 4mm, silver
seedbeads color: caramel
2 pcs. jumpring, 4mm, sterling silver
1 pc. lobster claw clasp, 9mm, silver
1 pc. silver krystal charm 3mm
1 pc. jewelry chain extender, silver
1 pc. leaf charm, 11mm, silver-plated brass
Necklace with faith, hope & love

For this necklace, the following materials are used:
60cm cable chain, 30AR, sterling silver
Alternative: finished 41 cm long necklace with clasp, ready to use here
1 pc. simple heart pendant, silver plated brass
1 pc. anchor pendant, sterling silver
1 pc. Sterling silver cross pendant
1 pc. jumpring, 4mm, sterling silver
1 pc. jumpring 3mm, sterling silver
Begin by applying a 4mm jumpring to the cross pendant. Now, place the heart, the anchor and the cross on the chain, closing the chain with a 3mm jumpring.
There is no locking mechanism in this necklace, since it is long enough to go over your head.
Earrings with moonstone bead

For these earrings, the following materials are used:
1 pair earstuds with pad, brushed sterling silver, 4mm
2 pcs. eyepin, sterling silver, 0,5mm
2 pcs. rainbow moonstone bead, 8mm, half-drilled
+ adhesive
Glue the end of the eyepin to the half-drilled moonstone. The eyepin can be a little bent, so carefully adjust it before applying the adhesive.
Your earrings are now completed. The eyepin with the moonstone bead is placed behind your earlobe, before applying the lock.
For further inspiration, have a look at our older blog post with similar earrings.
Finger ring with coral bead
Here we show you how to make a fine silver finger ring with pink coral bead. The finger ring can be afjusted in size, as to fit most people.

You will need the following:
side-cutter pliers
bead reamer
finger ring, matte sterling silver with peg and cup
half-drilled coral bead, 8 mm
adhesive

The hole of the bead is a tad too small for the pin of the ring, so we recommend that you trim the hole a little with the reamer set, as shown above.

When the bead can be placed on the pin, you will discover that the pin probably is a bit too long. You will have to shorten it a bit with a side-cutter plier.

Finally, apply a little adhesive on the pin and gently place the bead on it, dispersing the glue evenly throughout. Let the adhesive dry for about 5 minutes and you are done.
Enjoy your new jewellery :-)
------------
The background
Confirmation marks an important transition - from childhood to adolescence - and is a day filled with solemnity, joy and anticipation. For generations, jewellery has played a special role in this celebration, serving as gift, memory and symbol.
What does confirmation jewellery symbolise?
Confirmation jewellery is more than just a beautiful accessory - it often symbolises the transition to adulthood, personal development and values such as faith, love and responsibility. It is therefore not unusual to choose jewellery with symbolism such as crosses, hearts, zodiac signs or initials that can be worn for many years and become a lasting memory.
Popular materials and trends
Silver and gold are classic choices that never go out of style. Many people also choose jewellery with genuine pearls, which add a timeless and natural look. Pearls symbolise wisdom and purity - qualities that fit beautifully with the confirmation message.
Modern confirmands are also attracted to jewellery with personal touches: small pendants, engraved texts, coloured stones or birthstones that reflect their own identity and style.
The history behind the tradition
Throughout history, jewellery has been part of confirmation gifts in many cultures - often given as a symbol of love and support from family. In the past, girls typically received a necklace or bracelet, while boys received a watch. Today, traditions are more flexible and jewellery is chosen with a focus on individuality and lasting value.
Create your own confirmation jewellery
At smyks.dk you have the opportunity to learn how to make your own jewellery - a meaningful way to give a confirmation gift or as a creative activity the confirmand can be a part of. By designing the jewellery yourself, you get something truly unique that is both personal and thoughtfully created. It's also a calm and meditative process where you can express your feelings through creativity.
Handmade jewellery is not just a gift - it's a story. A story about who you are and where you are going.
We will publicly show your name and comment on this website. Your email is to ensure that the author of this post can get back to you. We promise to keep your data safe and secure.