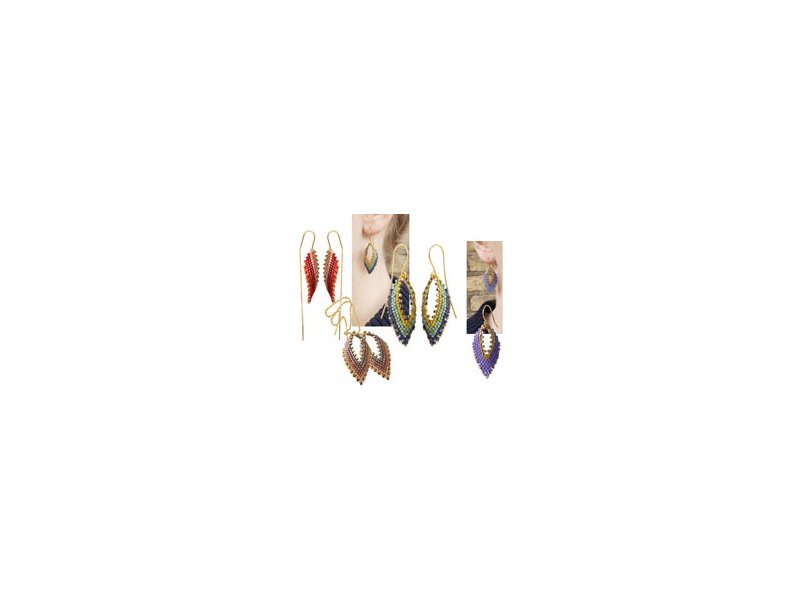

The history behind the iconic Russian Leaf design
The Russian Leaf beading technique has a fascinating background and has become a valued part of contemporary beadwork and jewellery making. Originally developed in Russia, it carries a notable heritage within the craft.
The name Russian Leaf refers to the pattern’s distinctive, leaf‑like shape. Using small seed beads, the technique creates a delicate, organic form, often enhanced by combining beads of different sizes and colours to add depth and texture.
Historically, Russian Leaf‑style beadwork was used to create intricate decorative elements on clothing, particularly on traditional Russian garments. These embellishments were not only artistic expressions but also a way of conveying cultural symbols and identity through handmade pieces.
Today, the Russian Leaf technique remains popular among beadwork enthusiasts and jewellery makers. It is used to create everything from elegant earrings and pendants to more elaborate pieces such as necklaces and bracelets. Its aesthetic appeal and precise craftsmanship make Russian Leaf a cherished and respected part of beadwork traditions.
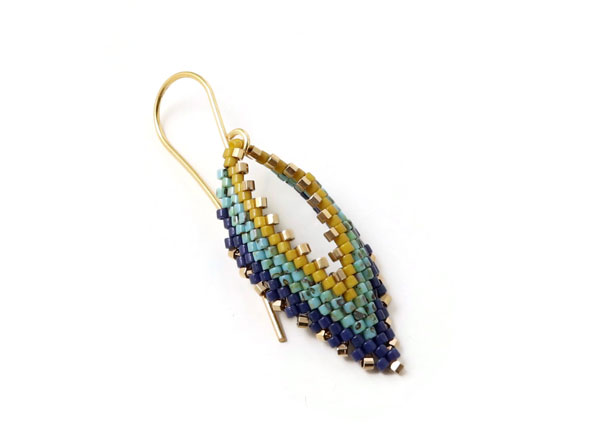
Russian Leaf Earrings with Long Earwire

In this blog post, we present the elegant "Russian leaf" pendants, which are sewn by hand with Delica seed beads. We use the well-known Peyote Stitch technique, which has also been reviewed in the previous blog post Peyote jewelry with Delica in combination with seed beads size # 11, but there is nothing in the way of using other sizes, as the technique is equally suitable.
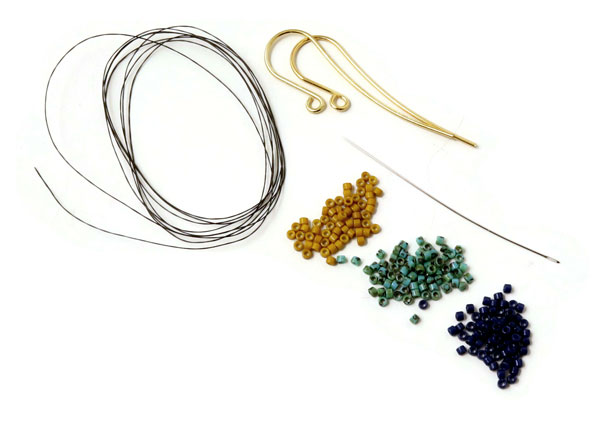
We used the following DIY components to make these earrings:
- 1 pair of long earwires with loop, gold-plated sterling silver
- Delica beads, curry size #11
- Delica beads, turquoise/blue, picasso size #11
- Delica beads, navy size #11
- Delica beads, 24 carat gold-plated size #11
- approx. 2 x 1m FireLine, 8 LB, black
(alternatively FireLine 6LB)
Note you will find Smyks' entire selection of size #11 Delica beads here
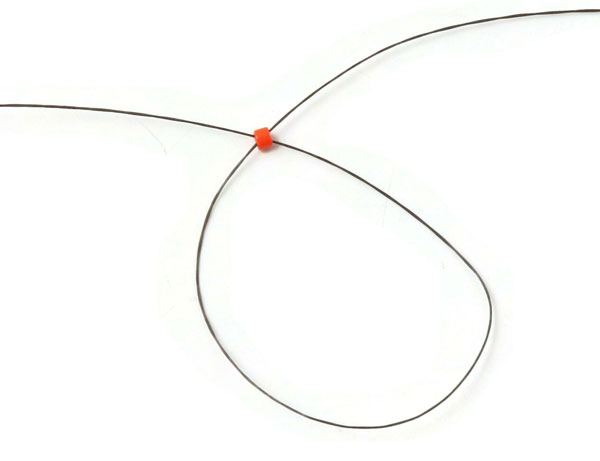
First, you string a stopper bead. You can use any bead for this purpose. Place the bead in the middle of the thread and pull the thread through the bead one more time from the other side.
The stopper bead will be removed, once it is not needed any more.
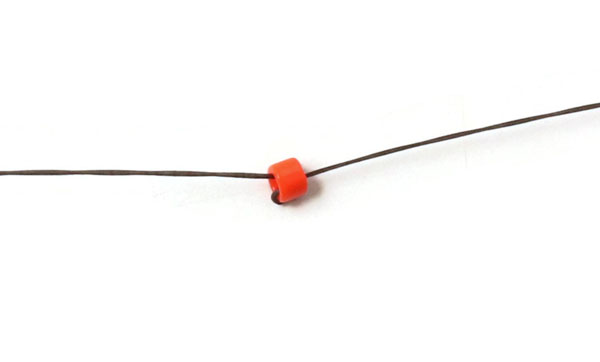
Tighten the thread ... The stopper bead has to be placed in the middle of the thread because the two sides of the leaf are sewn individually.
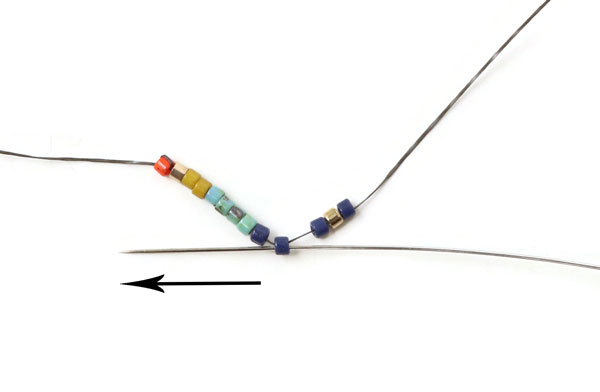
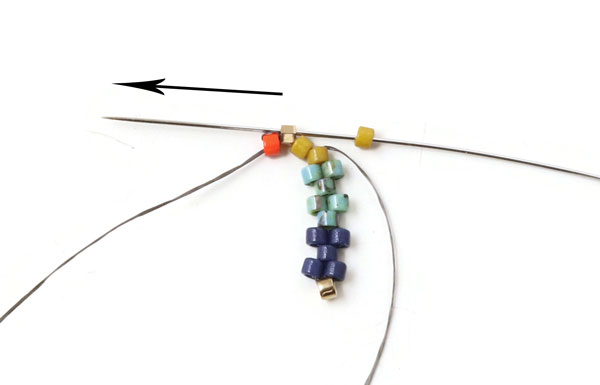
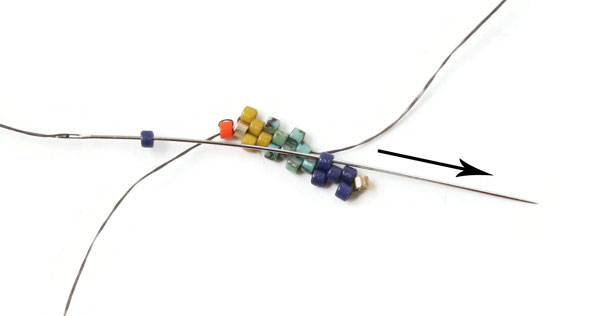
Thread 12 beads, in the order shown in the picture starting with 1 golden bead.
Sew back through the 4. bead.
Tighten the thread...
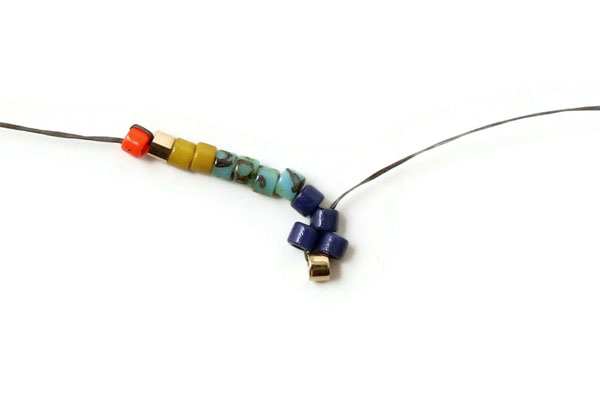
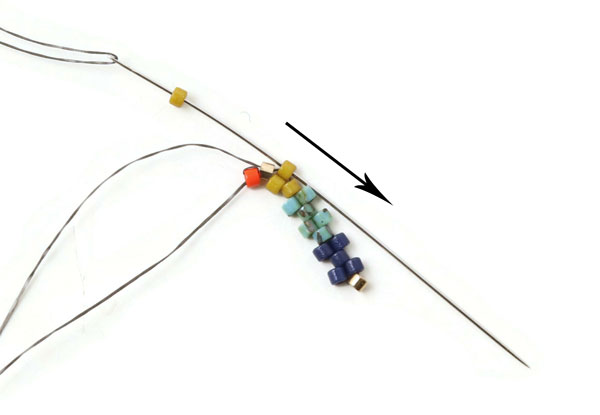
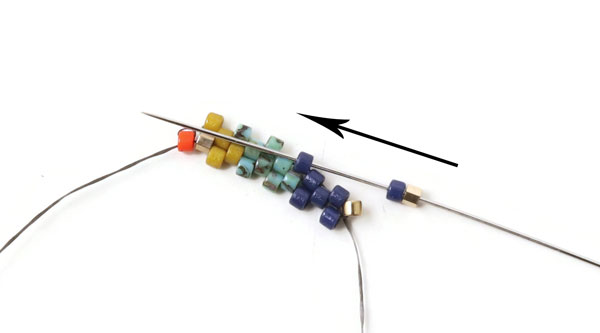
Now, you sew the beads on one by one applying the peyote stitch. Thread a blue bead ... skip one bead ... and sew through the next one.

Thread a turquoise bead ... skip one ... and sew through the bead next to it.
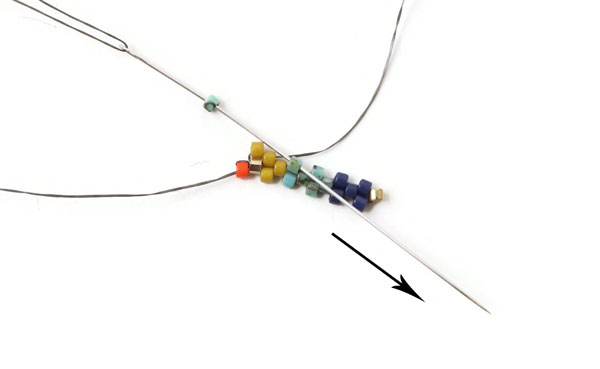
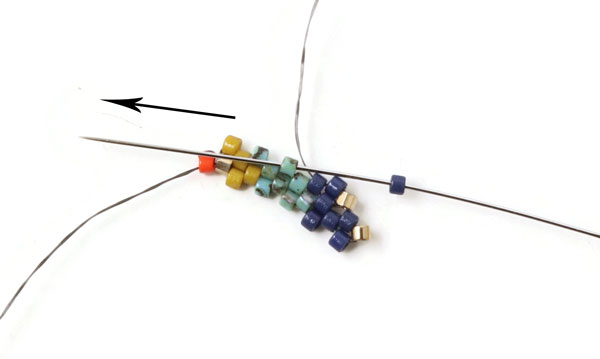
Repeat this procedure ...
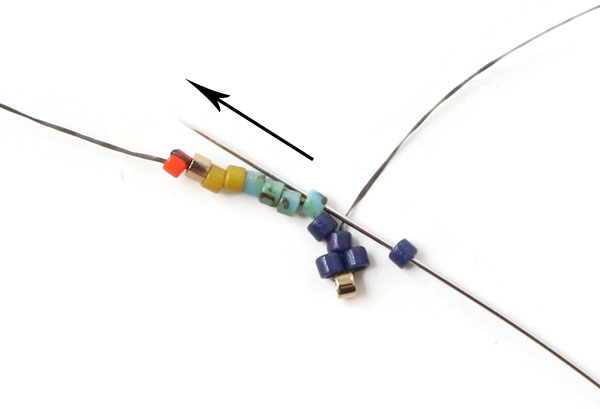
When the last bead in this row is fastened, you sew through the first golden bead.
Thread a yellow bead and sew back through the last yellow bead.
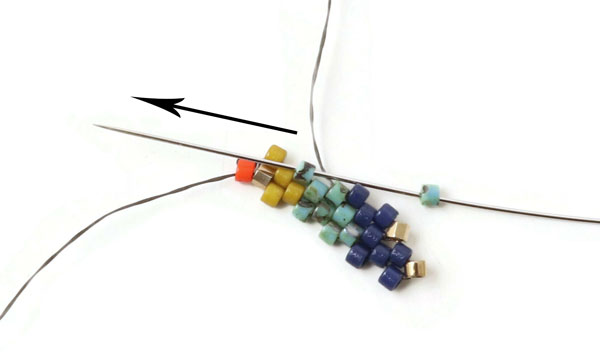
Thread a turquoise bead and sew through the next turquoise bead which "sticks out".
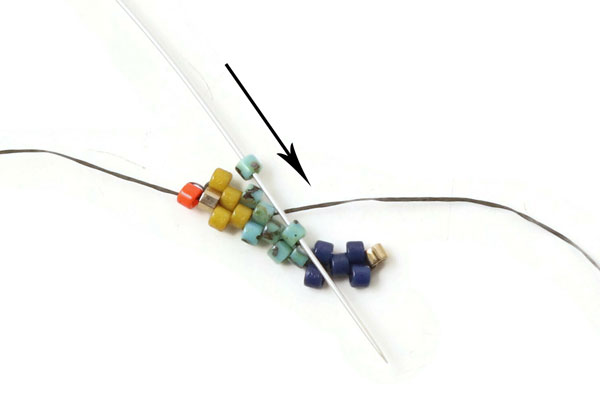
Sew the next turquoise bead on in the same way ...
.... and the next blue bead....
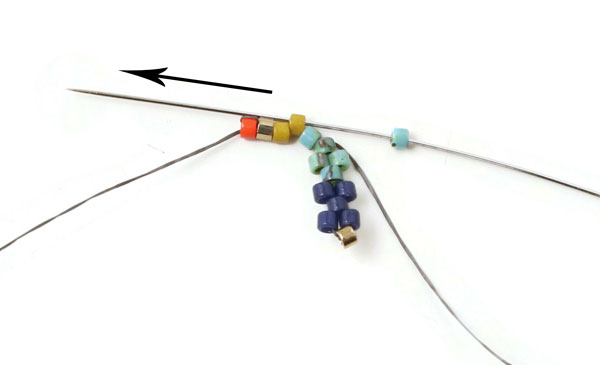
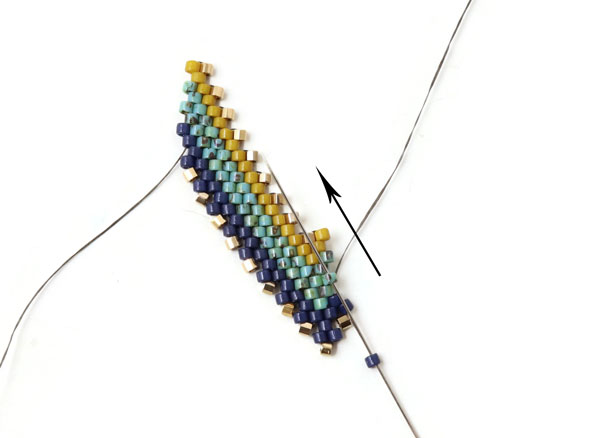
Then you turn your work and sew backwards. String 1 golden and 1 blue bead and sew through the first blue bead that sticks out.
Every time you turn your work at the bottom of the leaf, you thread 2 beads.
Continue in the same way with the peyote stitch adding one bead at a time.
... and one more bead ...
... and the last bead in this row.
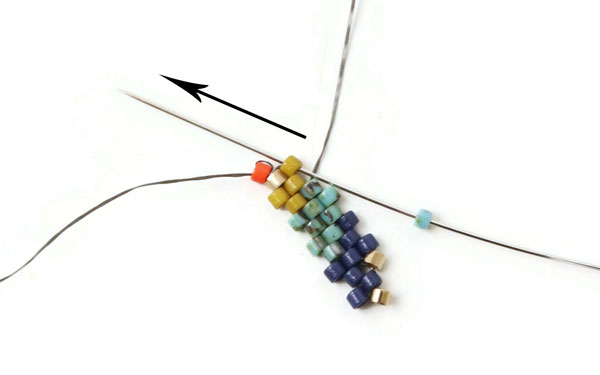
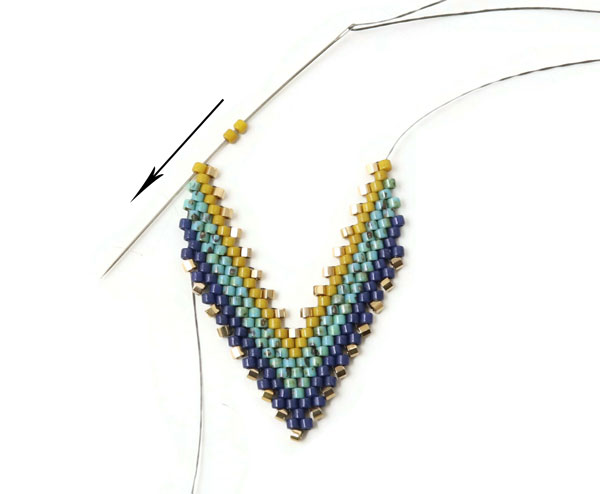
Now you turn your work again. String 3 beads (1 yellow + 1 golden + 1 yellow) and sew back through the first yellow bead - top down.
Tighten the tread. Each time you turn your work at the top of the leaf, you string 3 beads.
Continue sewing in the same way ... add a bead at a time and sew through the bead that sticks out.

Stop at the bottom of the leaf at the last blue bead that sticks out, string 2 beads and sew back.
Continue sewing back and forth in the same way until there are 9 golden beads on each side.
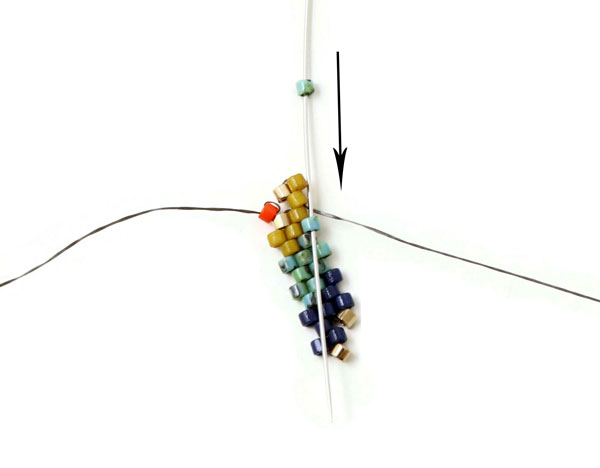
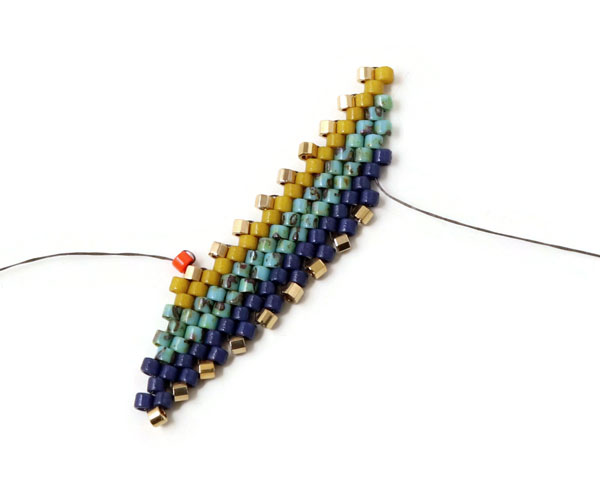
Remove the stopper bead ... and turn your work. Now you are going to sew the other side of the leaf.
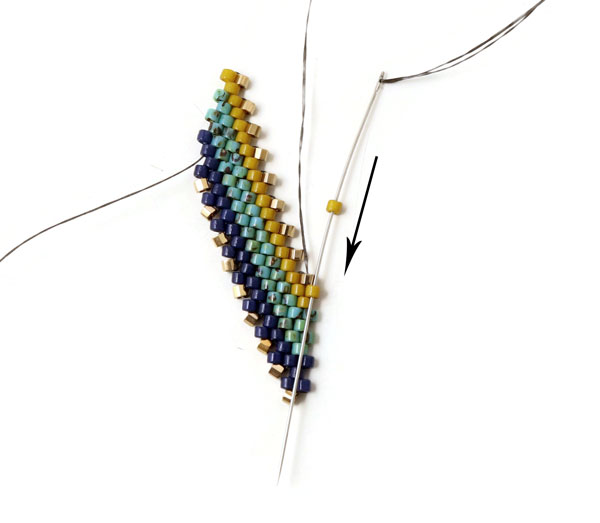
Thread 1 yellow bead and sew back through the first yellow bead.
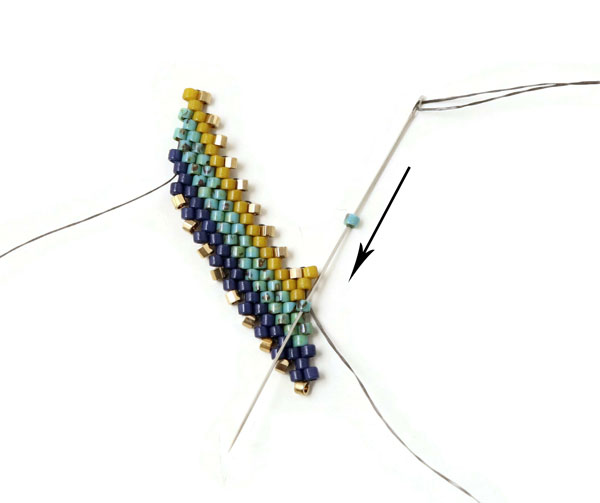
Continue in the same way adding one bead at a time.
Turn your work when you reach the bottom, as you did earlier.
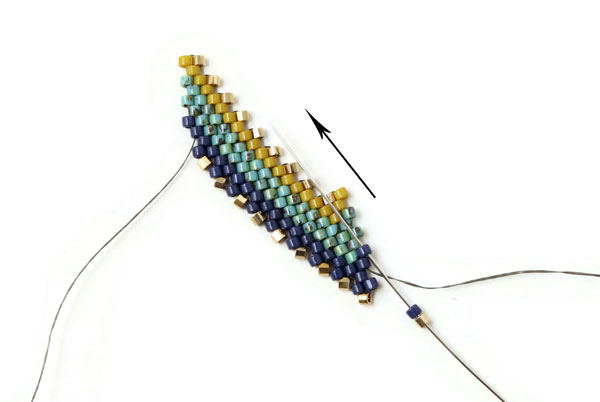
Continue sewing the rows back and forth in the same way.
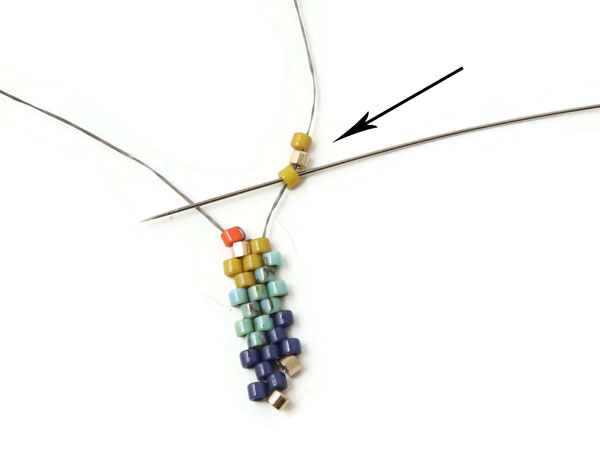
When the opposite side of the leaf is finished with 9 golden beads on each of the edges, you sew through random beads so the thread comes out of the upper yellow bead.
String 2 yellow beads and sew through the upper yellow bead on the opposite side of the leaf.
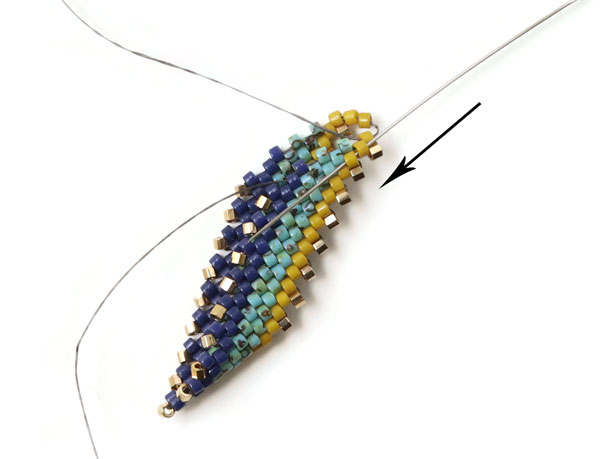
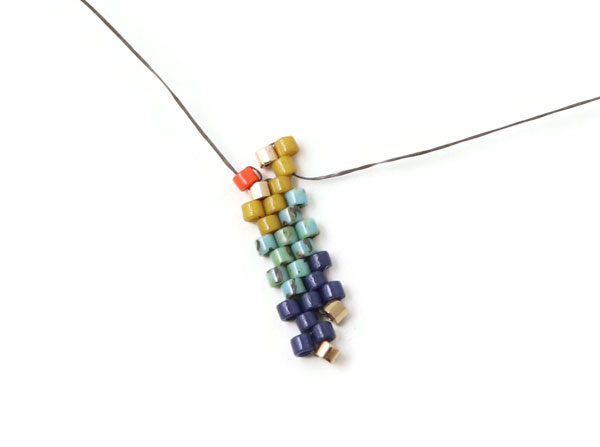
If the leaf has to be tautened, you can sew all the way back through the inner yellow row to tighten the leaf.
The other thread end can be sewn through the outer blue row for the same purpose.
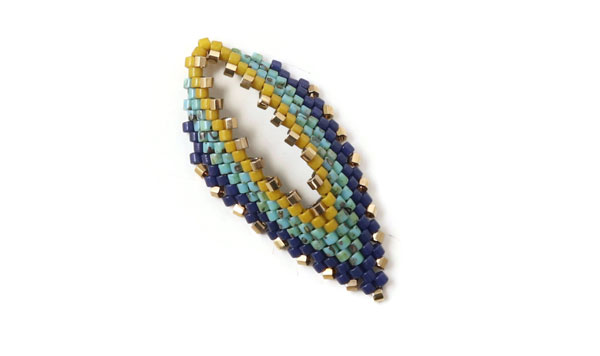
Then you sew the threads up through 4-5 random beads before you cut them.
Finally, you open the loop of the earwire carefully, insert the leaf ... and close the loop again.
Russian Leaf with Earthread
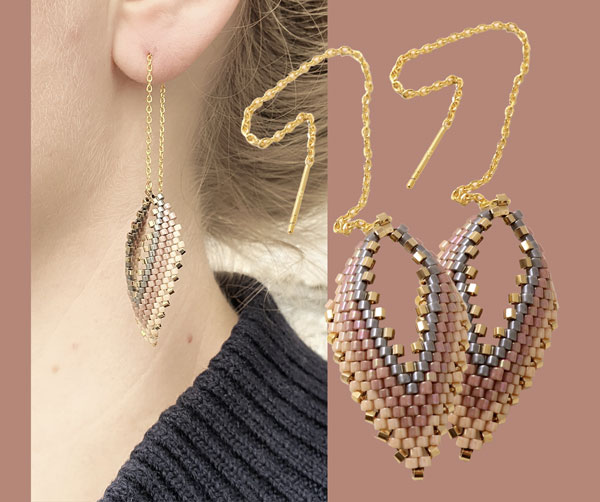
We used the following DIY components to make these earrings:
- 1 pair of earthreads with peg and loop, cable chain, 8cm
- Delica beads, dark grey
- Delica beads, dark brown iridescent
- Delica beads, light beige
- Delica beads, 24 carat gold-plated, hexagonal
- approx. 2 x 1m FireLine, 8 LB, black
(alternatively FireLine 6LB)
This leaf is made in the same way as described above. But here we only used one golden bead to connect the two sides of the leaf.
Then we sewed another golden bead on top of the other, opened the loop of the earthread, inserted the upper golden bead ... and closed the loop again carefully.
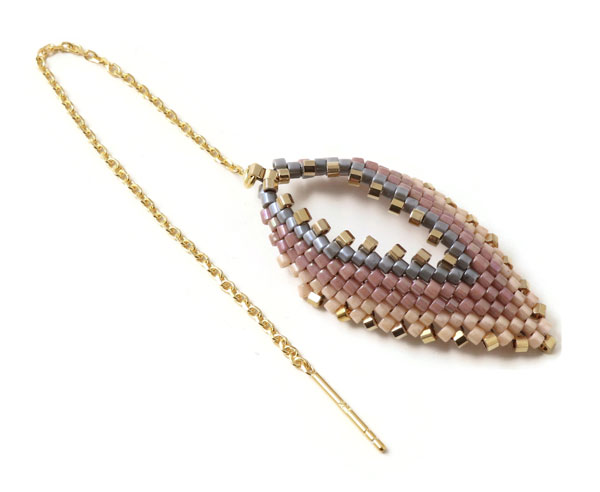
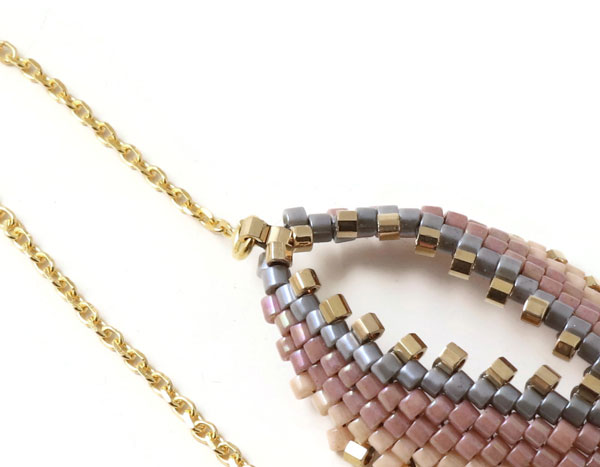
Russian Leaf with Earwire and Chain
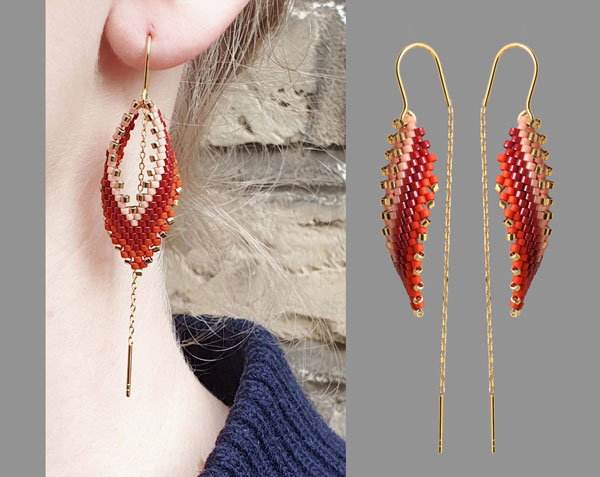
We used the following DIY components to make these earrings:
- 1 pair of earwires with cable chain, gold-plated silver
- Delica beads, melon
- Delica beads, bordeaux
- Delica beads, coral, matte
- Delica beads, 24 carat gold-plated
- approx. 2 x 1m FireLine, 8 LB, black
(alternatively FireLine 6LB)
The procedure is the same as described in the fist example. Open the loop of the earwire carefully, insert the leaf ... and close the loop again.
Russian Leaf - single colour with a gold border
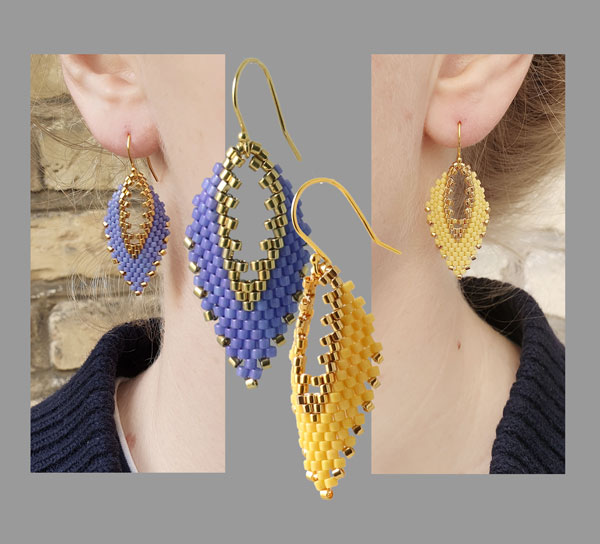
We used the following DIY components to make these earrings:
- 1 pair of earwires, standard, with ball, gold-plated sterling silver
- Delica beads, banana yellow or
- Delica beads, purple
- approx. 2 x 1m FireLine, 8 LB, black
(alternatively FireLine 6LB)
The procedure is the same as described in the fist example. Use the golden beads for the inner row and the edges.
We will publicly show your name and comment on this website. Your email is to ensure that the author of this post can get back to you. We promise to keep your data safe and secure.