
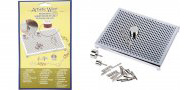
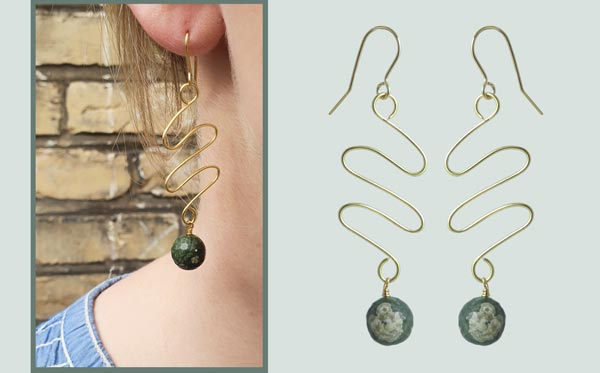
You can easily make your own ornamental links and earwires with this wire links board. First you place the studs on the board in the pattern you want to create, then you wind the wire around the studs. See more tutorials showing how to make the most beautiful earrings with a wire-link board here.
This way you can form small, delicate links or large, impressive links with a lot of beads. In this blog post, we want to inspire you and help you to get started with your wire links board. The board is available in two versions: a a lower priced smaller one made of plastic and a larger one made of metal.
Create jewellery with wire links - an ancient technique
Earrings made with wrapped wire in different shapes and patterns have a long and varied history, appearing in cultures and civilisations across the world.
The technique of winding wire around forms to create jewellery has been practised for thousands of years. Many communities have used it in their traditional jewellery‑making, including Indigenous groups in the Americas and certain regions of Africa and Asia, where wire wrapping helped create distinctive and meaningful pieces.
Historically, the method involved wrapping fine threads—often metal wires such as silver or gold—around a shape or framework to build patterns and decorative details. These pieces were not only beautiful but also symbolic, expressing cultural values, rituals or social status.
Today, wire wrapping has evolved into a modern jewellery‑making technique used to create earrings and many other pieces. Makers often work with sterling silver, gold‑plated wire and other metals to form contemporary designs that still echo the craftsmanship of earlier traditions. It remains a creative, hands‑on technique that connects past and present.
We’re delighted to help you explore this historic craft with jewellery components, tools and beads from Smyks—so you can recreate these beautiful techniques yourself.
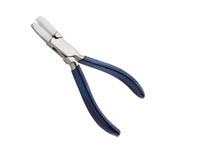
This type of flat-nose pliers with nylon jaws is a good choice because it prevents scratches on the jewellery parts you work on. The pliers can for example straighten out the wire when you are done with your ornamental link and have removed it from the board.
We recommend the following tool for all examples:
round-nose pliers, cutting pliers, chain-nose pliers, flat-nose pliers with nylon jaws
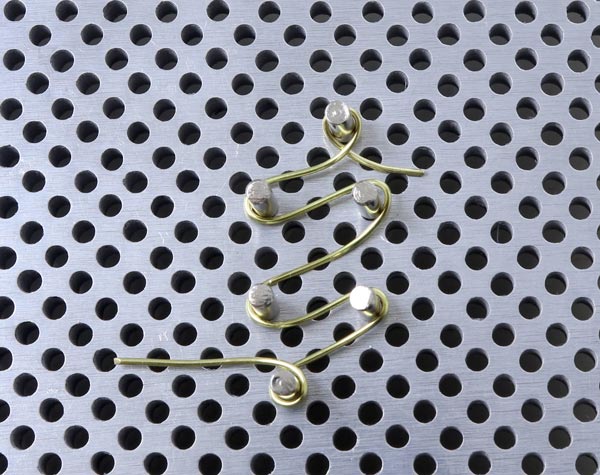
Wire Link "Snake with Amethyst"
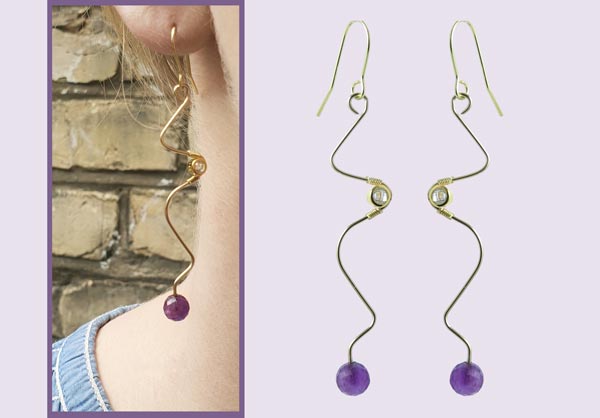
We used the following DIY components to make these earrings:
- 1 pair of earwires, gold-plated sterling silver
- 2 faceted amethyst beads, half-drilled, 6mm
- 2 beads with crystal, gilded sterling silver, 4mm
- approx. 2 x 15cm wire, 0.8mm, gilded sterling silver
- approx. 2 x 8cm wire 0.4mm, gilded sterling silver

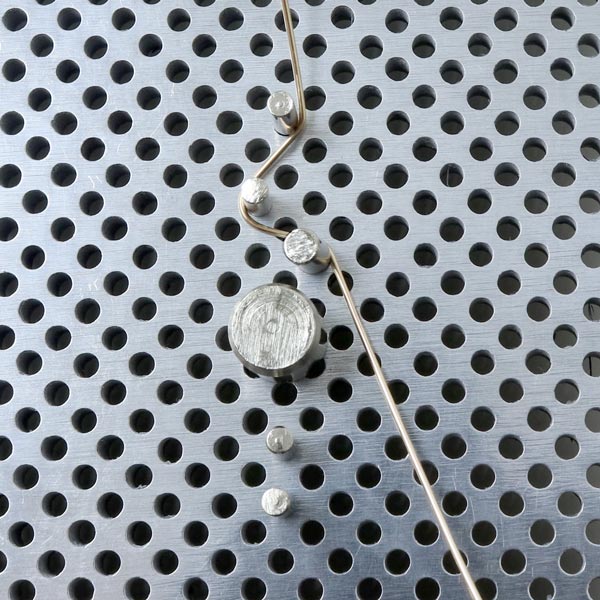
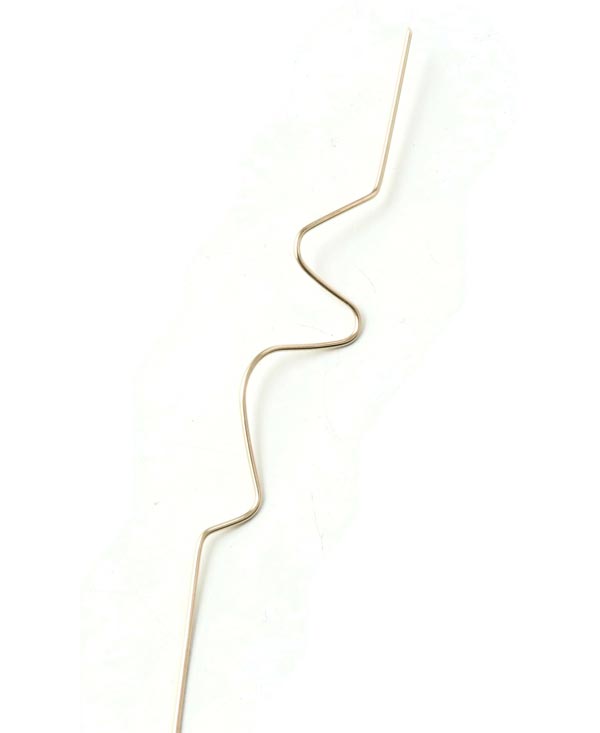
Place the studs as shown in the picture and start shaping the wire so it sits tightly around the studs.
Continue like this ... as shown in the picture ... until you have reached the last stud.
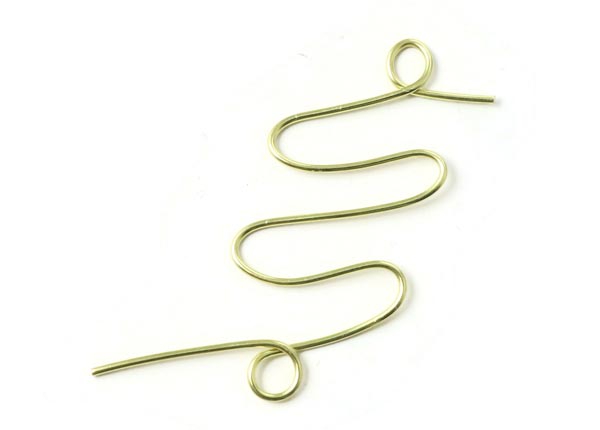
Remove the wire from the board.

Use round-nose pliers to shape a loop with the upper wire end.
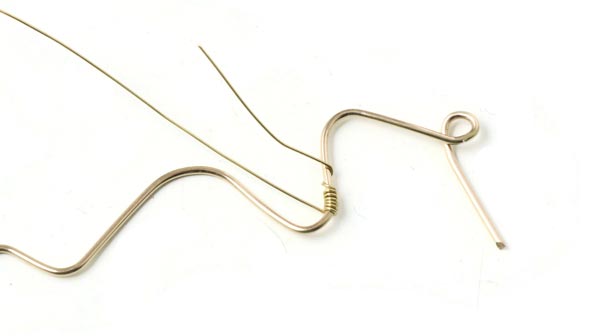
Now you take the thin wire (0.4mm) and wind it around the thicker wire close to the narrow curve ... see picture.
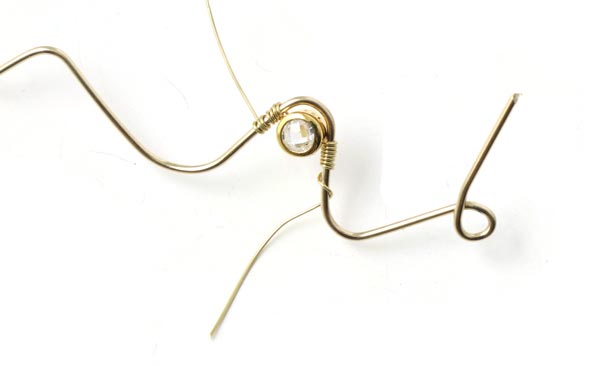
Thread the bead with crystal on the thin wire and place the bead in the middle of the curve. Then you wind the wire around the other side of the curve.
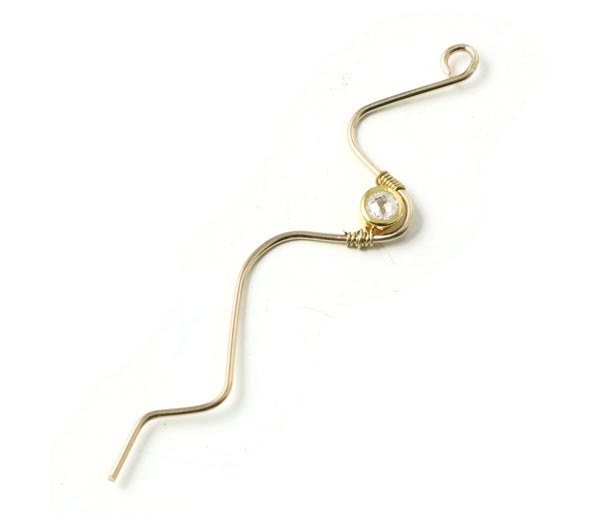
Cut off the excess wire at the loop and the crystal. After that, you decide how long you want the wire link to be and cut it to size.
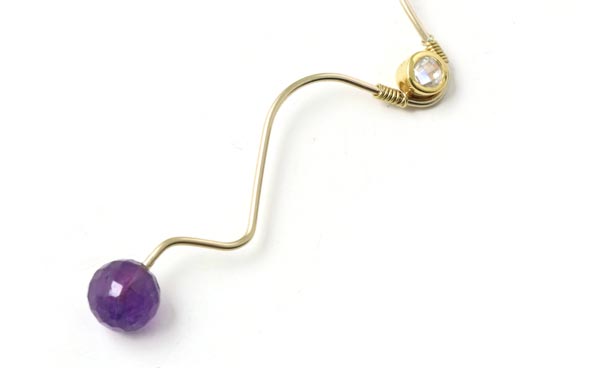
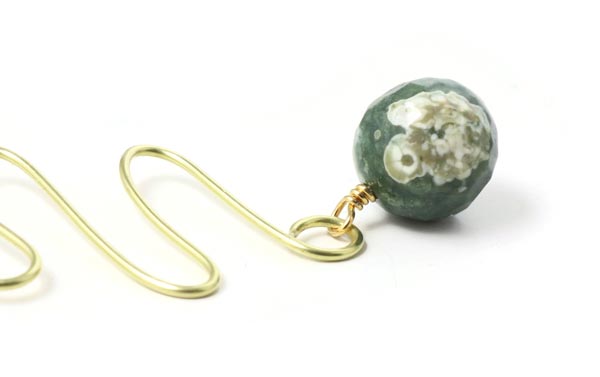
Once you have cut the wire link to size, you glue the end of the wire into the half-drilled amethyst bead.
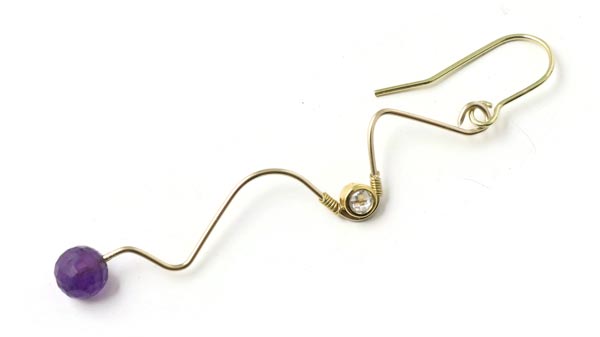
Fasten the earwire to the loop.
Wire Link "Snake with Jasper"
We used the following DIY components to make these earrings:
- 1 pair of earwires, gilded sterling silver
- 2 headpins with pad, gilded sterling silver
- 2 Kambaba Jasper, 10mm
- 2 x 15cm wire, 0.8mm, gilded sterling silver
Place the studs and bend the wire around the studs as shown in the picture.
Remove the wire from the board.
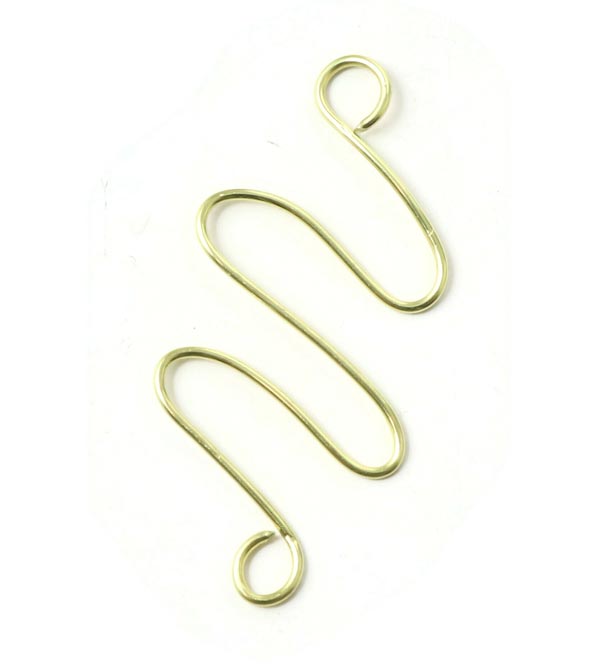
Shape a loop on each end of the wire with the help of round-nose pliers - and cut off the excess wire.
Pull a headpin through the bead ... and shape a loop with windings over the bead. Insert the loop into the wire link loop.
For step-by-step instructions please read our guide How to shape a loop over a pearl or bead.
Chandelier Earrings with Swarovski Teardrops
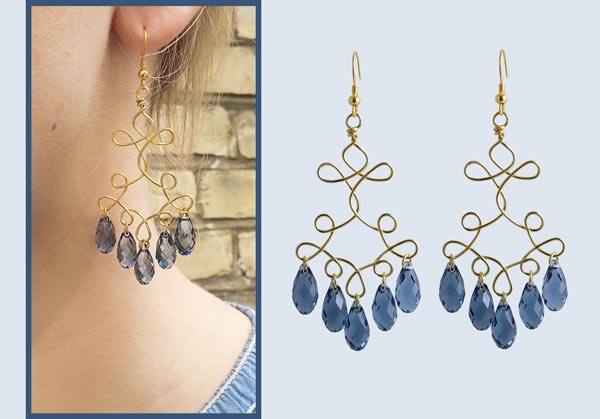
We used the following DIY components to make these earrings:
- 1 pair of earwires, gold-plated sterling silver
- 10 jumprings, 4mm, gilded sterling silver
- 10 Swarovski teardrops, denim blå
- approx. 2 x ...cm wire, 0.8mm, gilded sterling silver

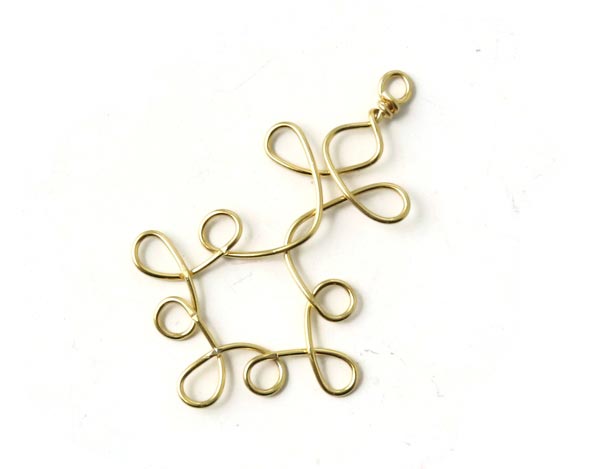
First, you place the studs as shown in the picture.
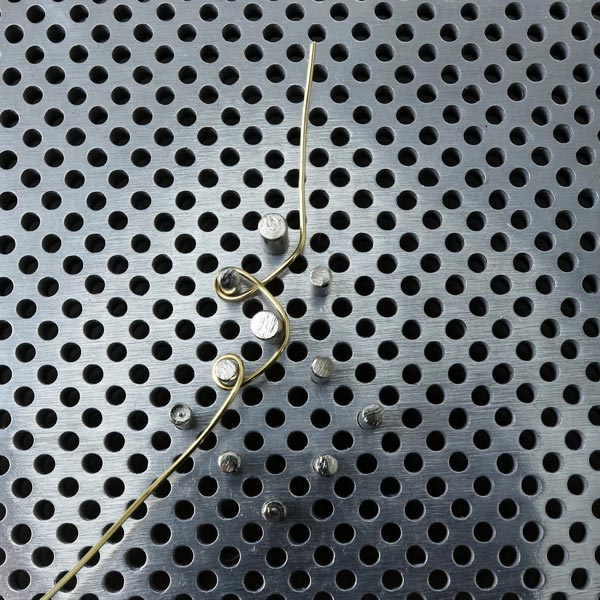
Then you bend the wire around the studs as shown in the pictures...

... first on the left side ....
... then on the right side ....
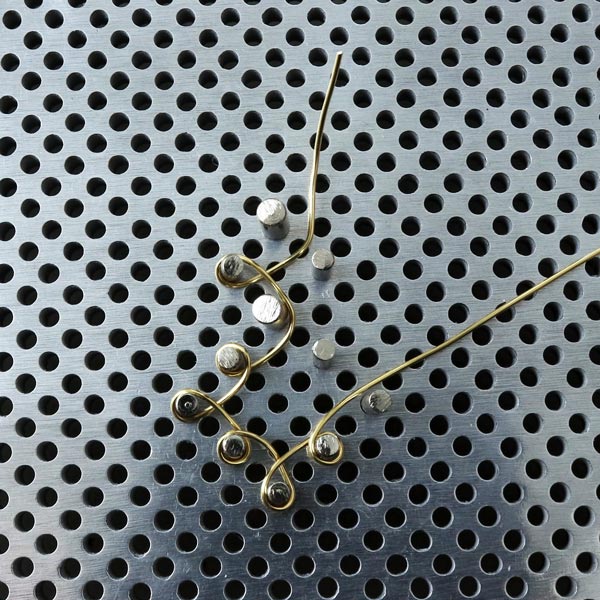
... and all the way up. The finished wire link should look like this:
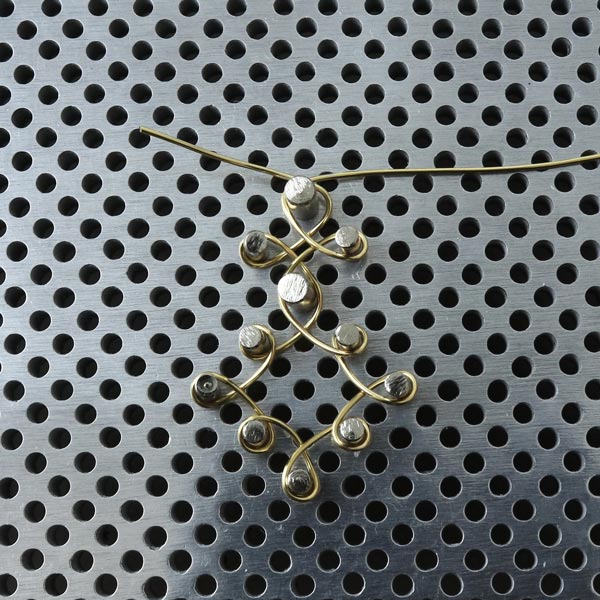
Remove the wire from the board.
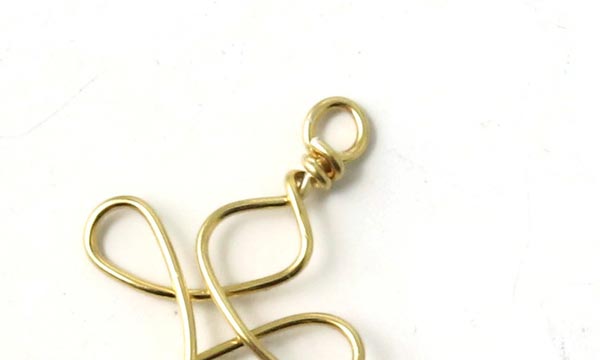
Shape a loop with one end of the wire - and wind the other wire end a few times around it.. After that, you cut off the excess wire.
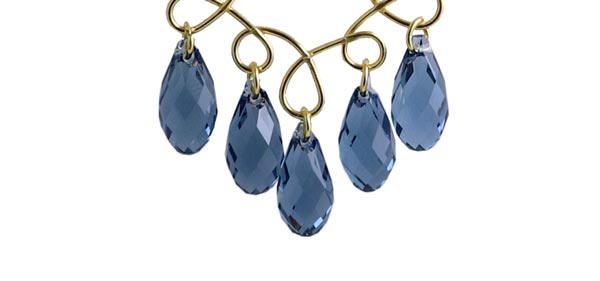
Fasten the Swarovski teartrops with the help of 4mm jumprings. Close the wire loops carefully with a pair of pliers. Once the loops close tightly, the teardrops stay in place.
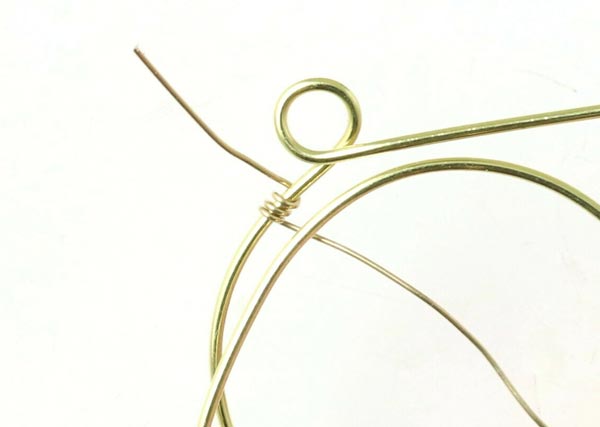
Wire Link "Hoop with Gemstones"
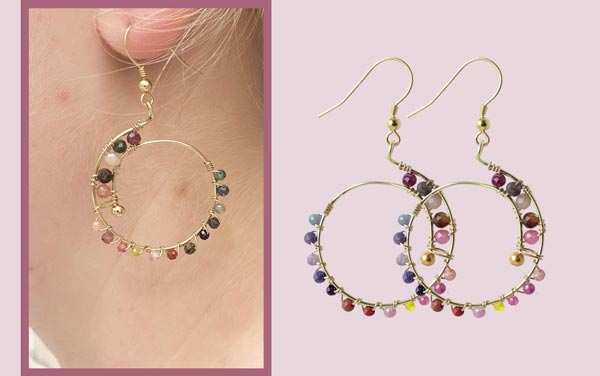
We used the following DIY components to make these earrings:
- 1 pair of earwires, gold-plated sterling silver
- approx. 2 x 15cm wire, 0.8mm, gilded sterling silver
- 10 tourmaline beads, 3mm
- 24 tourmaline beads, 2mm
- 2 locking beads 3mm, gilded sterling silver
- apprx. 2 x 20cm wire 0.4mm, gilded sterling silver
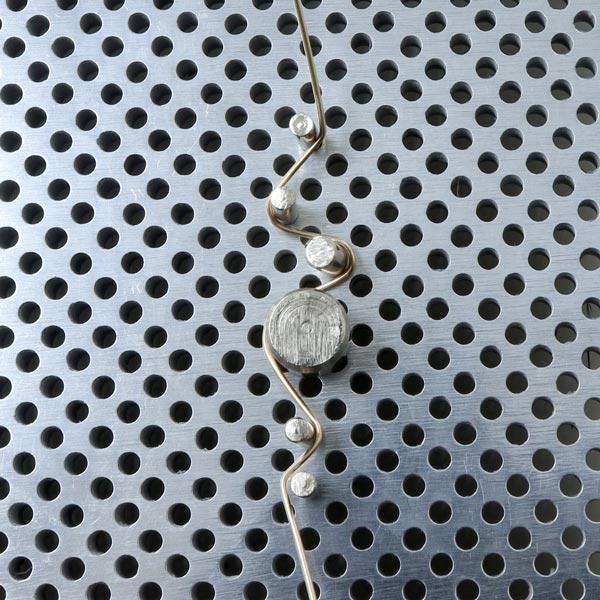
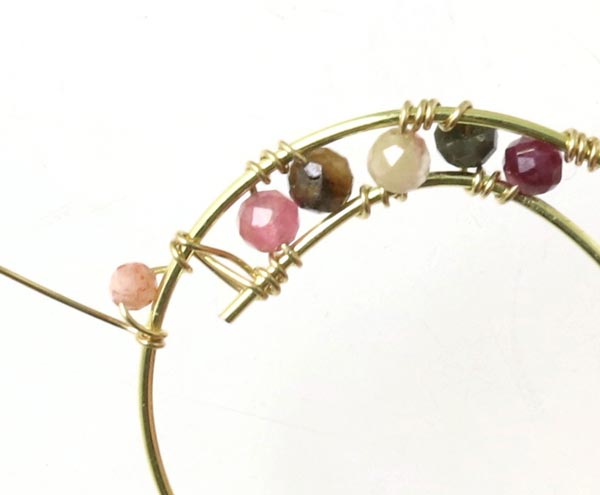
Place the studs as shown in the picture. First you wind the wire around the little stud, after that around the large stud.

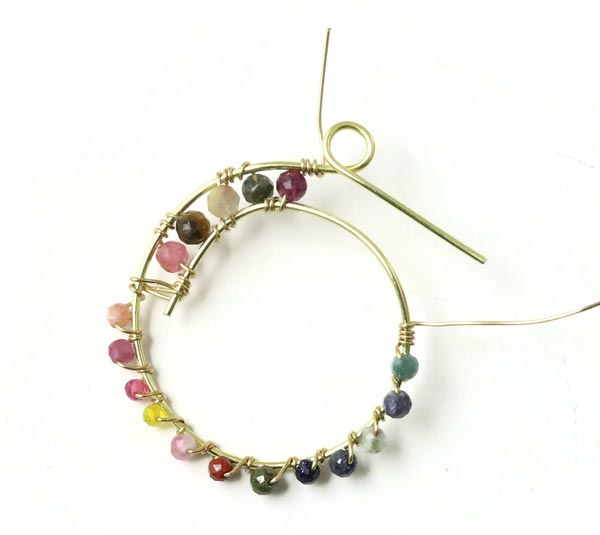
Remove the wire from the board.
Then you start winding the thin wire around the hoop close to the loop.

Thread the first 3mm bead on the thin wire and wind it around the inner wire of the hoop. See picture.
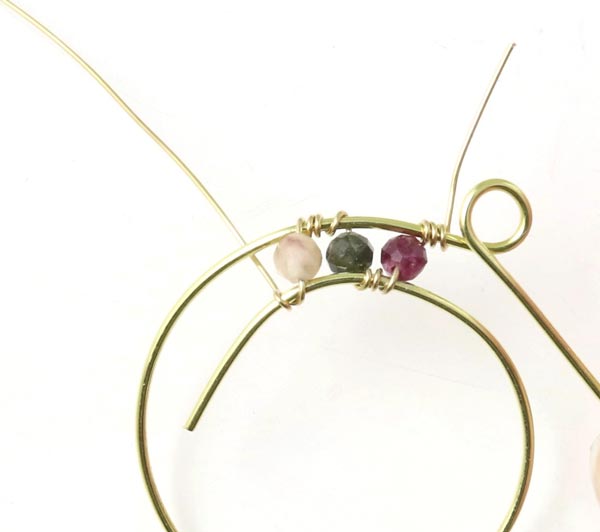
Thread the next 2 beads and wind the wire in the same way.
Thread the next 2 beads ... Here in our example we have fastened all in all 5 beads. The amount of beads depends on the size of the finished hoop.
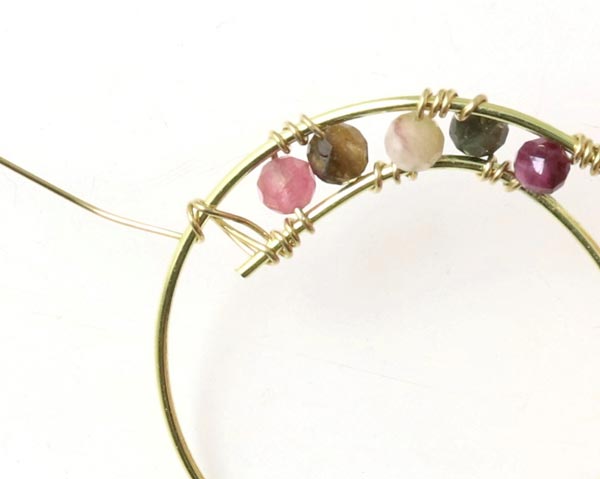
Wind the thin wire around both thick wires a few times - without adding a bead. After that, you wind the thin wire only around the outer thick wire.
Thread a 2mm tourmaline bead and place it on the outer side of the wire. Then you make a few windings.
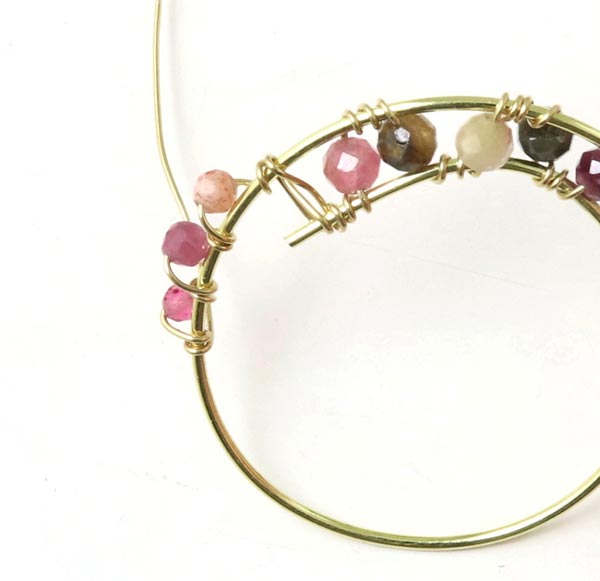
Continue fastening beads around the hoop in the same way.
You finish with 3-4 windings after the last bead.
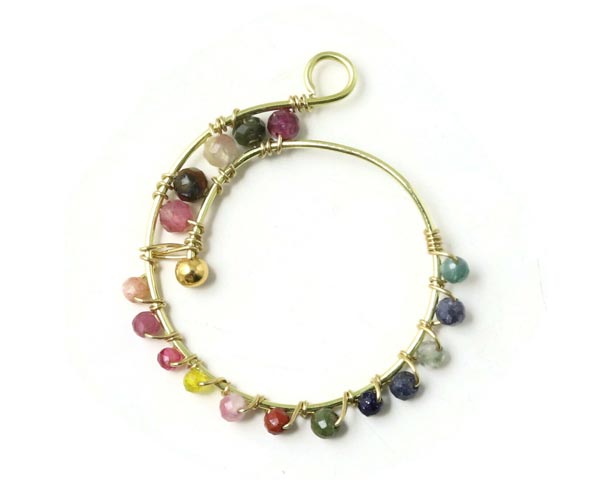
Cut off the excess wire. Glue a 3mm locking bead onto the end of the wire of the hoop.
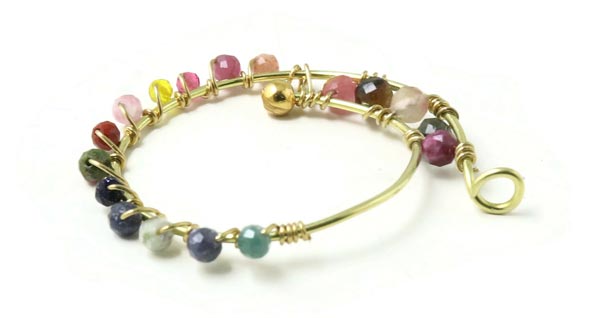
Turn the eyelet of the hoop, if necessary, so it hangs the right way.
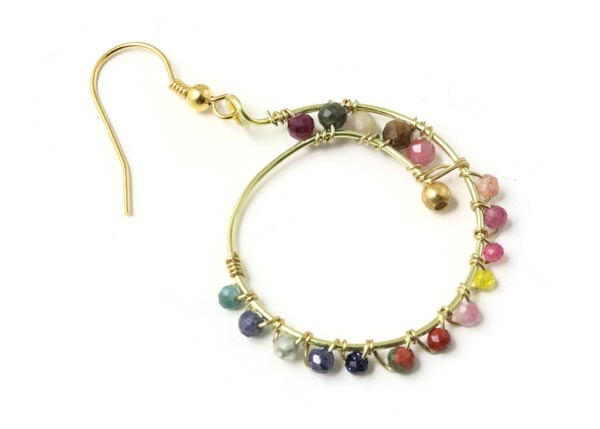
Connect the earwire to the eyelet of the hoop.
We will publicly show your name and comment on this website. Your email is to ensure that the author of this post can get back to you. We promise to keep your data safe and secure.