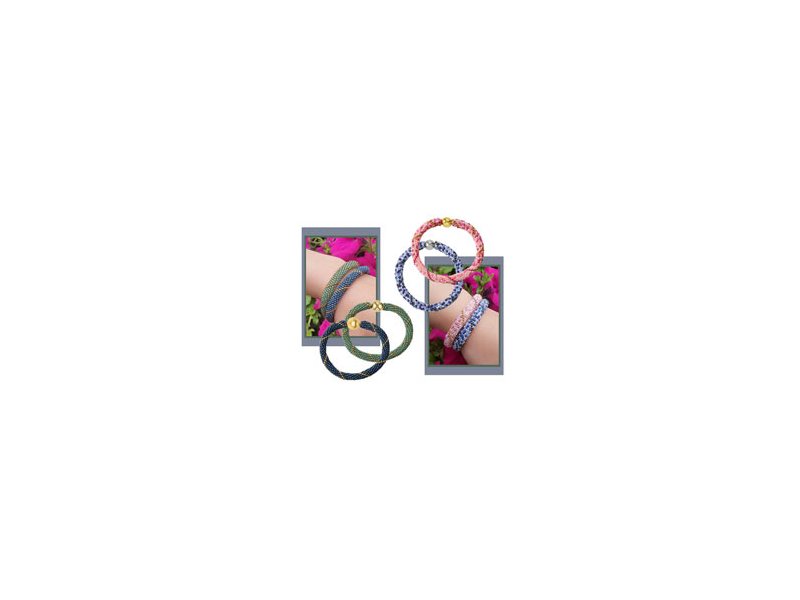
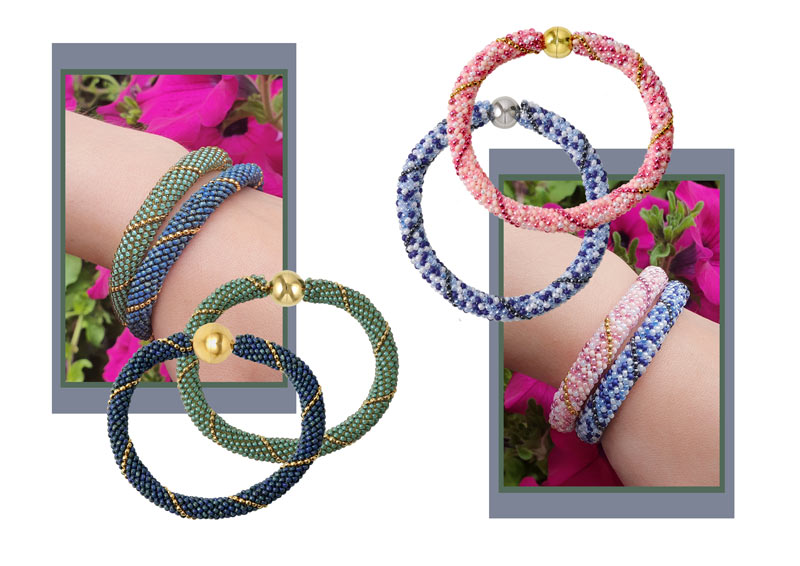
Here we show you how to make your own version of the popular beaded bangles. These bangles are made with seed beads and the sewing technique peyote stitch - with a twist.
We offer a wide range of seed beads so you can design your own individual bangle ... unicoloured with stripes, mixed colours ... or something completely different.
You can wear the bangles together with other bracelets - or you wear several peyote bangles in matching colours.
For our example bangle we used seed beads size #11.
Click here for the print version.
Bangle bracelets: in short
Bangle bracelets have a rich history stretching back thousands of years. Originating from the Indian subcontinent, they were used as jewelry and symbols of status and wealth. These bracelets were traditionally made from various materials such as gold, silver, glass, and gemstones and were often an integral part of local culture and traditions. Over time, bangle bracelets have spread globally and are now a popular part of the fashion world, where they come in different styles, materials and colors to suit different tastes and trends.
Master the Peyote stitch technique and create beadwork with historical significance!
Peyote stitch, a traditional beading technique, has deep roots in Native American cultures. Tribes such as the Navajo and Apache used it to create jewellery and decorative pieces, stitching beads together in zigzag‑like formations to form patterns and motifs. Beyond its beauty, Peyote stitch also carried cultural meaning, expressing symbols, stories and identity through beadwork. Today, it remains an important part of craft traditions and is used around the world to create striking and unique designs.
In this blog post, you’ll not only learn how to bead using the Peyote stitch technique – you’ll also discover how to give it a beautiful twist. Take a look below and create your next necklace, earrings or bracelet with Peyote stitch in unique patterns and colour combinations.
Peyote Hoops
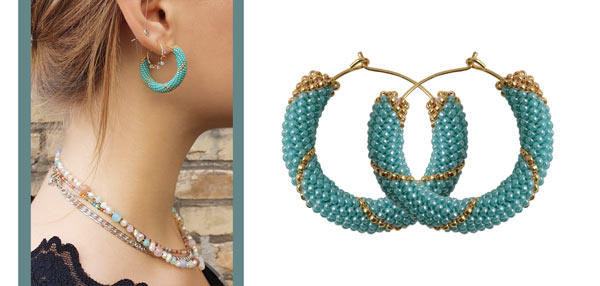
We used the following jewellery components to make these earrings:
- 1 pair of hoops, 25m, gold-plated sterling silver
- seed beads size #15, turquoise green
- seed beads size #15, 24 karat gold-plated
- approx. 4m FireLine, 8LB, white
The tubes for the earrings are sewn in the same way as the peyote bangle with magnetic clasp (see instruction below).
But for the earring tubes we used seed beads size #15 which are a bit smaller than #11. When the tube has reached the desired length, you slide it onto the hoop.
Peyote Bangle with Magnetic Clasp
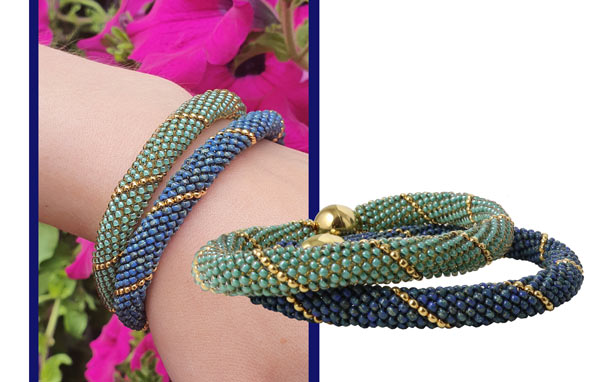
We used the following jewellery componente to make this bangle:
- Miyuki seed beads, dark teal picasso, size #11
- 1 magnetic clasp, 10mm, gold-plated steel
- approx. 5m FireLine, 8LB, black
+ wide-eye beading needle (or alternatively an ordinary beading needle)
Take approx. 2m of thread ... and string 1 bead. Sew back through the bead from the bottom up ...

... to form a loop.
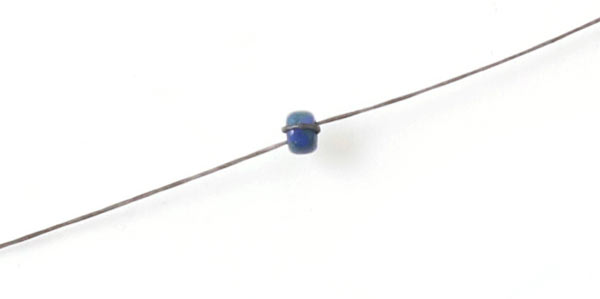
Tighten the thread and place the bead approx. 20cm from the end of the thread. This is the stopper bead which will be removed once the tube is done.
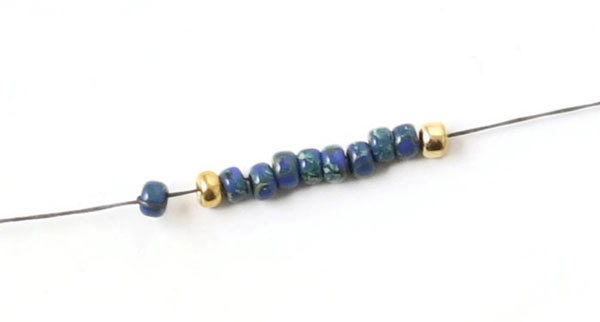
String 1 golden + 8 blue + 1 golden bead.
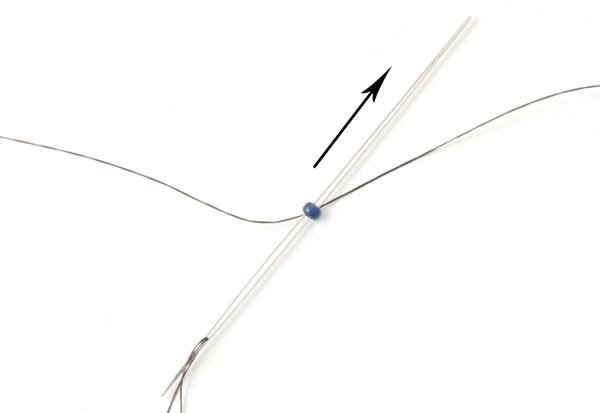
Thread 1 golden bead and sew back through the last blue bead.
Tighten the thread ... string 1 blue bead, skip 1 blue bead and sew through the next blue bead.
Then you repeat this ... you string 1 blue bead, skip 1 bead and sew through the next blue one.
Sew on 1 new bead in the same way.
After that, you sew on the last bead in this row. Now, the thread comes out of the first golden bead.

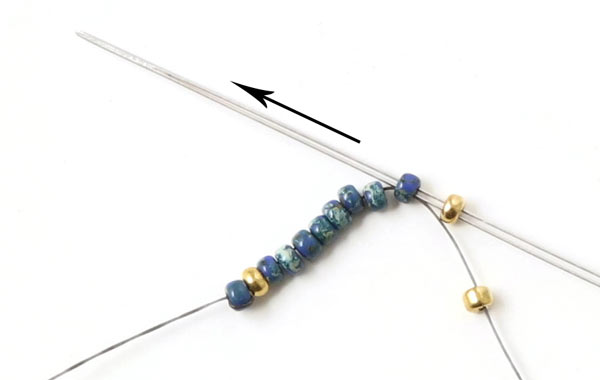
Turn your work. You always sew from the right to the left. Thread 1 golden bead and sew through the first blue bead that sticks out.
String another blue bead and sew through the next bead that sticks out.
Sew on 1 bead more ...
... and 1 more ....
Sew on the last bead in this row in the same way. Now the thread comes out of the last golden bead.
Turn you work and start sewing the next row. You thread 1 golden bead and continue sewing peyote stitch as described above.
You continue until there are 6 golden beads on one side and 5 golden beads on the other.
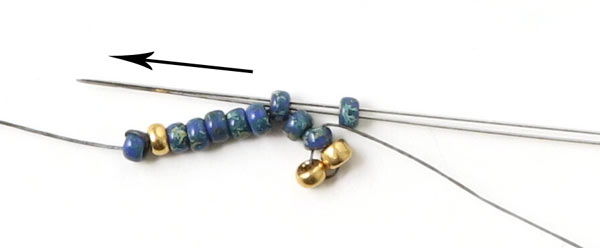
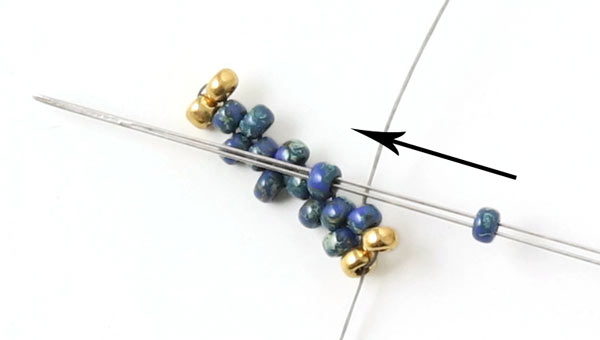
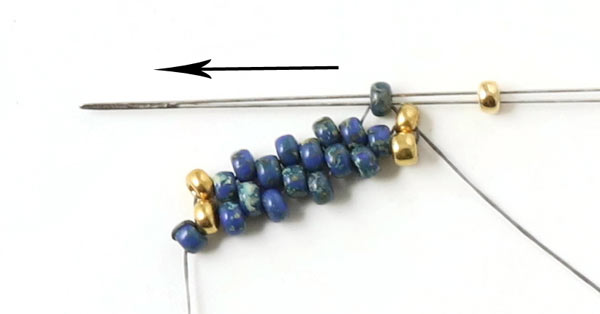
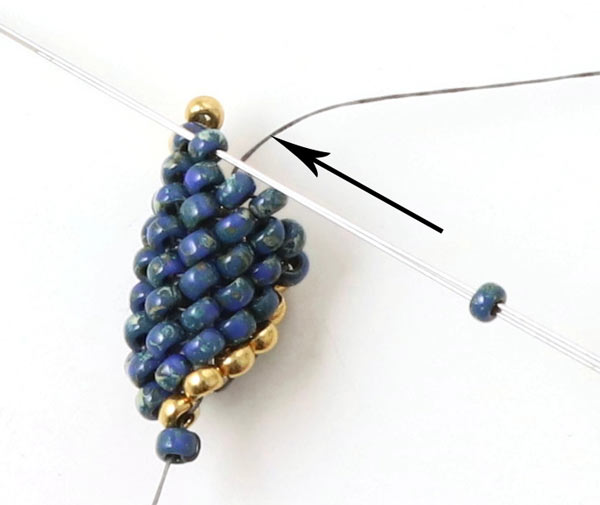
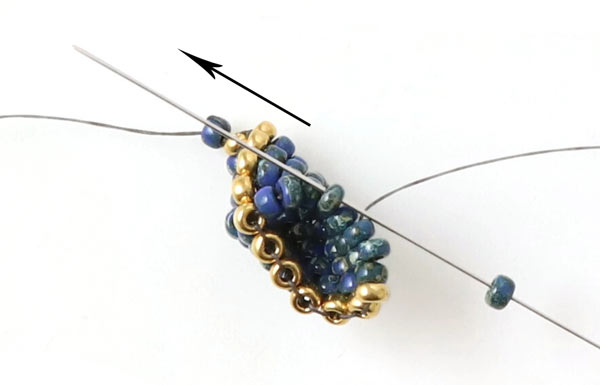
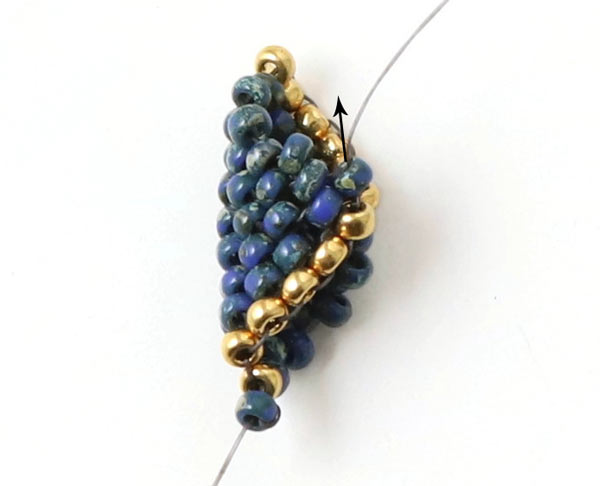
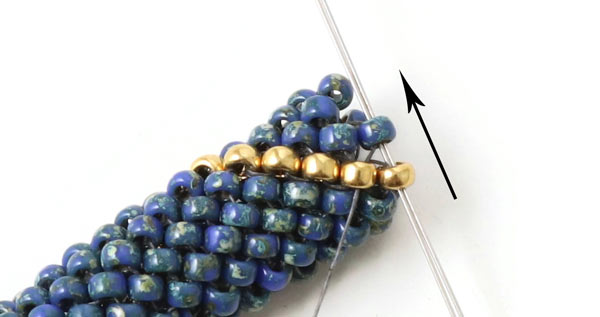
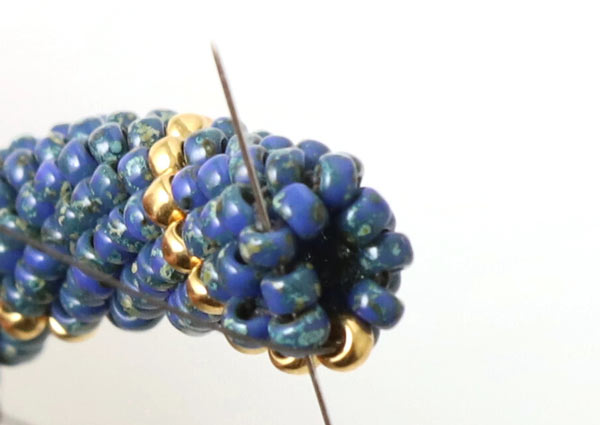
Position your work as shown in the picture. The thread comes out of the golden bead on the bottom right.
Sew through the golden bead in the upper left corner.
Then you sew through the first blue bead on the bottom right (as shown in the picture).

Picture 1
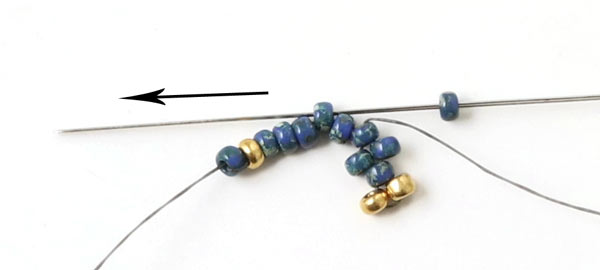
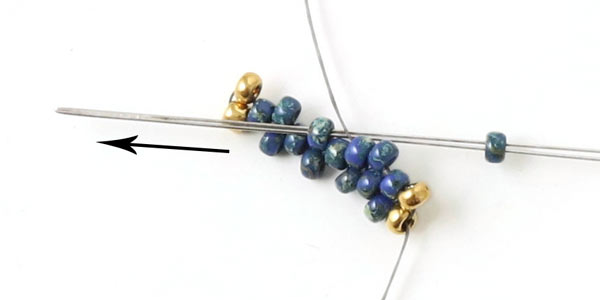
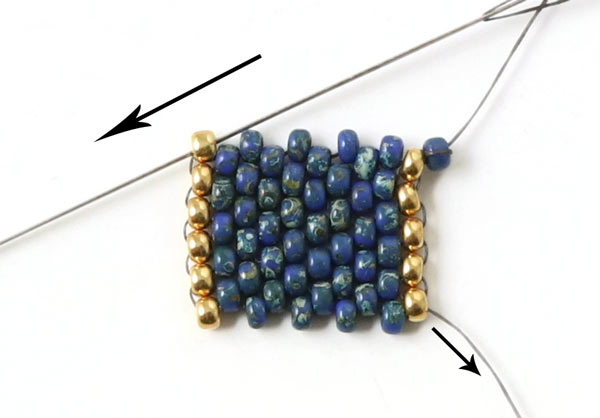
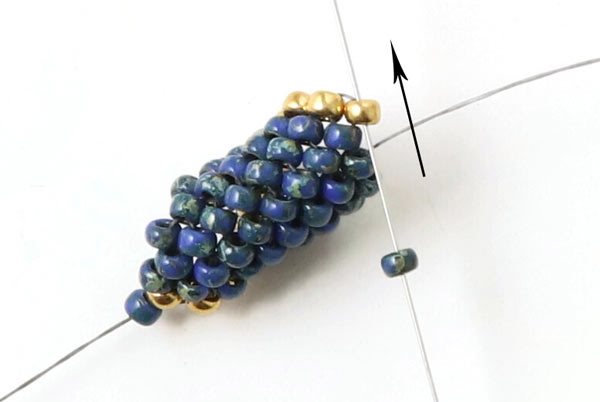
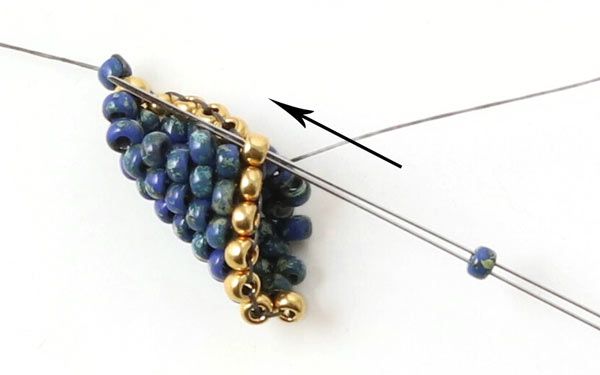
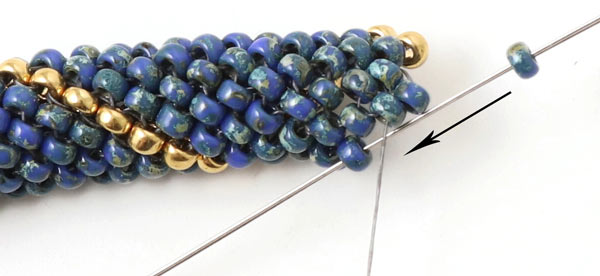
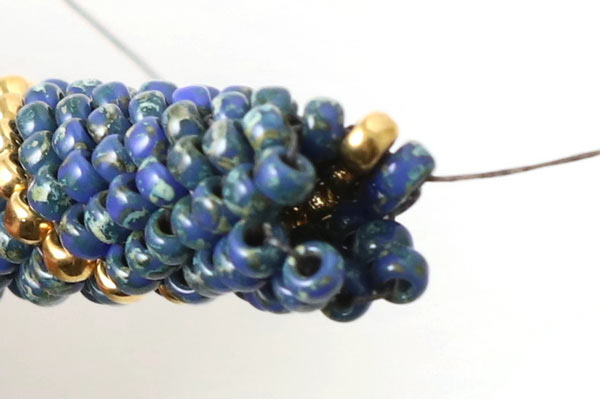
Tighten the thread... and position your work as shown in the picture. The thread comes out of the first bead that sticks out.
Picture 2
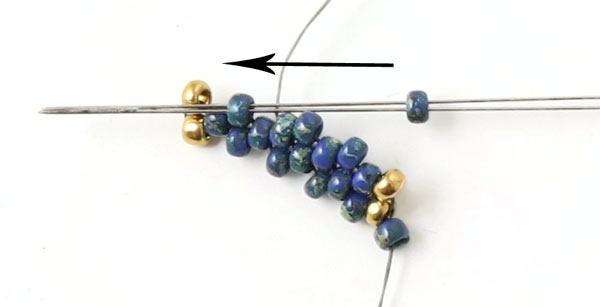
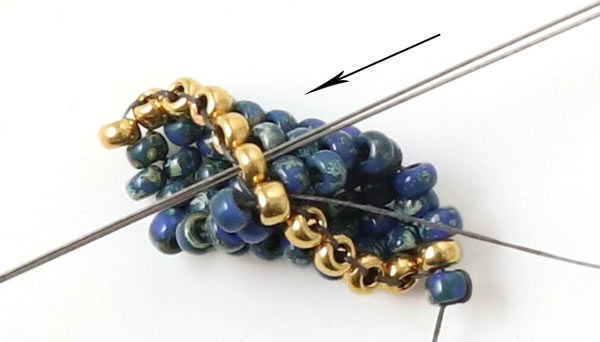
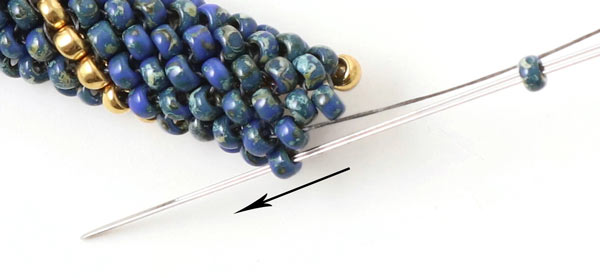
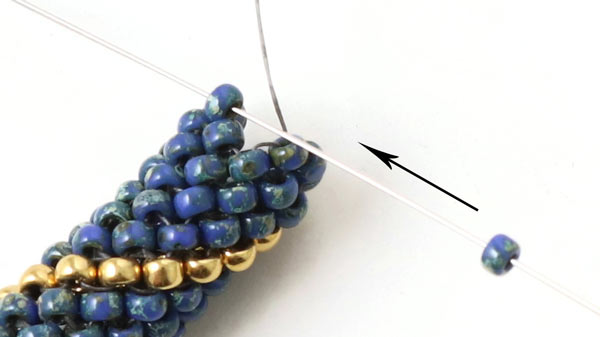
String 1 bead and sew through the next bead that sticks out.

Picture 3
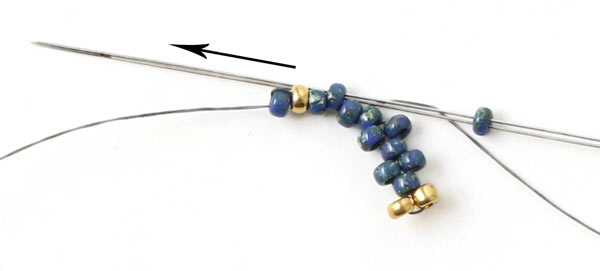
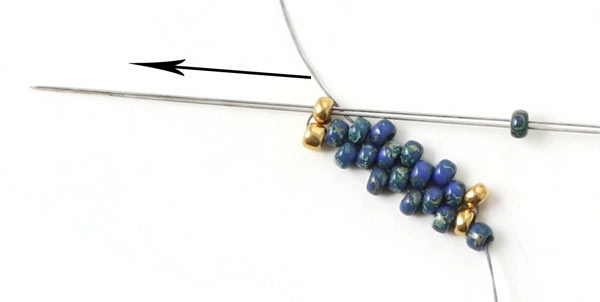
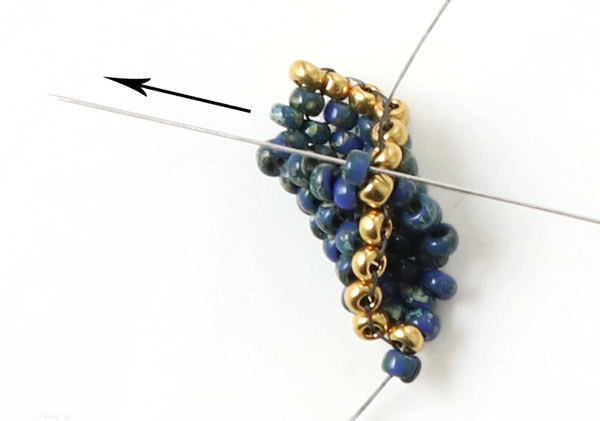
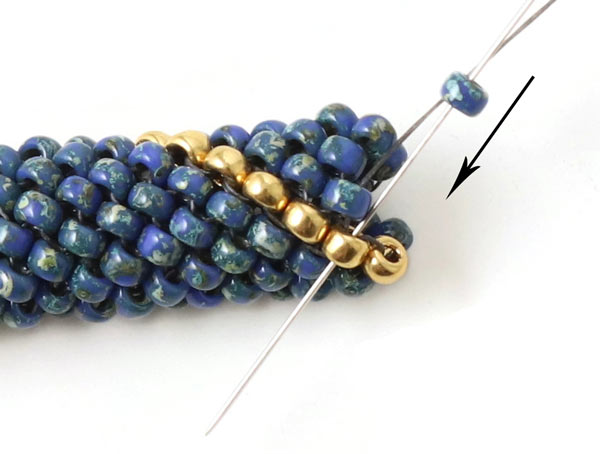
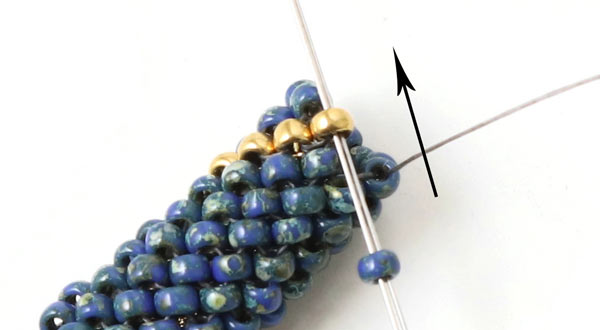
Sew on the next bead in the same way ...
Picture 4
.... and one bead more ...
Picture 5
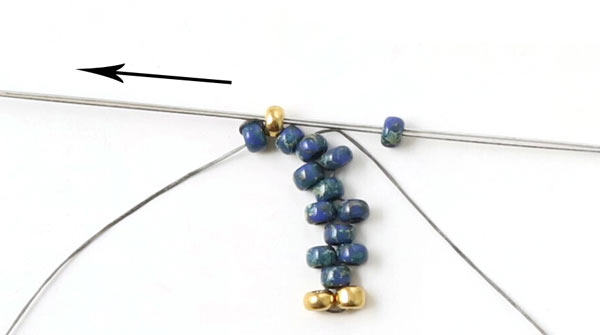
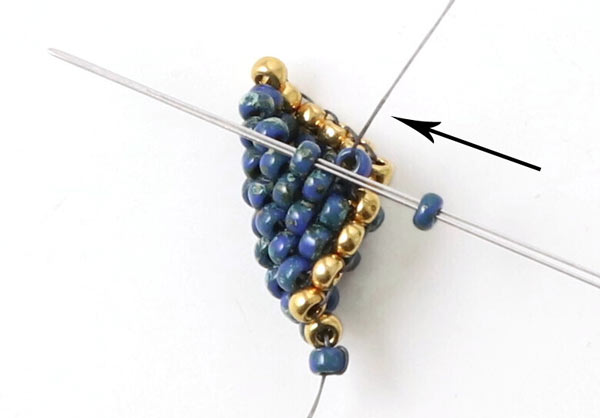
Continue this way until the thread comes out of the golden bead at the top.
Picture 6
Turn your work ... thread 1 golden bead and sew through the first blue bead that sticks out.
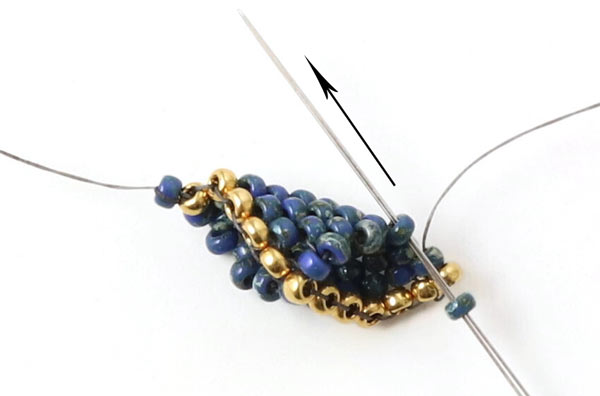
Picture 7
Continue sewing peyote stitch ... add one bead at a time.
Picture 8
... 1 more bead is added to the tube ...
Picture 9
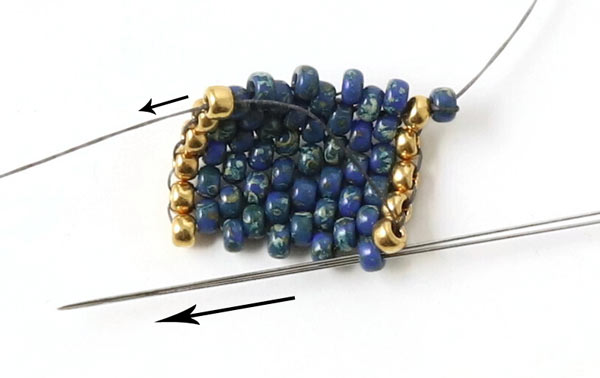
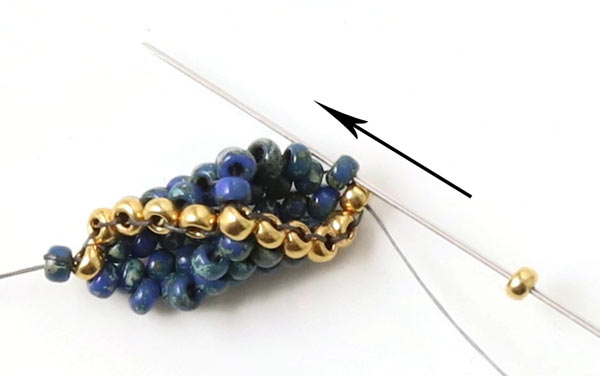
Continue like this until the needle comes out of the golden bead at the bottom.
Picture 10
Turn your work (now you are going to sew back) ... and sew through the golden bead beside it.
Picture 11
Then you sew through the first blue bead that sticks out.
Now the thread comes out of the first blue bead. Continue sewing back and forth ... turning at the golden bead at the top and the golden bead at the bottom.
Repeat pictures 1 - 11 until the bangle is at long as you want it to be. Fasten the thread by sewing it up through random beads. When you take a new thread, you fasten it in the same way - sewing through random beads - before you continue adding beads to the bangle.

From now on you have to reduce the number of beads by 1 every time you sew back - in order to form a narrow tip. Earlier you turned when the thread came out of the last golden bead at the top, now you turn when the thread comes out of the last blue bead that sticks out.
You sew on the next blue bead and continue sewing the new row like before. You turn as you did earlier, i.e. when the thread comes out of the golden bead at the bottom.
When you reach the top, you turn earlier again - when the thread comes out of the blue bead second to last.
Continue until you turn directly after the first blue bead.
Sew back through the golden bead next to it ... and continue through the blue bead that sticks out.
Now the end of the bracelet has little "tips".

String 1 bead and sew through the bead at the end of the tip next to it.
String 1 more bead and sew through the bead at the end of the next tip.
Continue this way all the way around ... until the thread comes out of the golden bead.
Sew through the next 3 beads in the circle.

Now you are going to fasten the magnetic clasp. Sew through a bead in the second row in order to position the thread a bit further down.
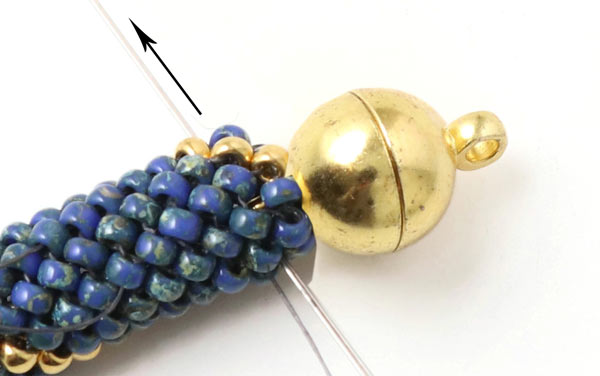
Then you insert the eyelet of the magnetic clasp into the end of the bracelet ... and sew all the way through the bracelet and the eyelet within. Now the thread comes out of the other side of the bracelet. Sew 1 more time through the bracelet and the eyelet of the clasp. Sew around the "neck" of the eyelet a few times in order to tighten the thread around. You fasten the thread by sewing it up through random beads.
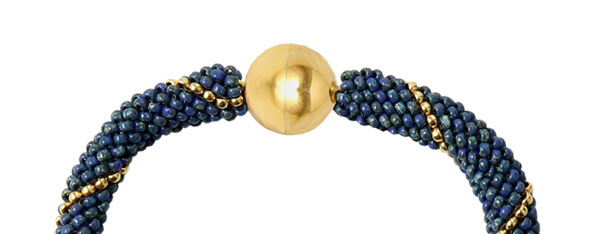
Remove the stopper bead (by pulling it off the thread carefully). Finally, you fasten the other part of the magnetic clasp to the other end of the bracelet. You sew it on in the same way.
We will publicly show your name and comment on this website. Your email is to ensure that the author of this post can get back to you. We promise to keep your data safe and secure.