
Dear reader:
In this blog post by Smyks.com, our designer Charlotte shows you how to make cute bow jewellery. The bow as an elegant symbol of love and faithfulness is experiencing a revival and we predict that it will become the spring trend 2024 here in Denmark.
We show you how easily you can make your own versions of beaded bows with different materials and how to incorporate them in earring designs, bracelets, necklaces and more. You find the list of the DIY components used underneath every design. You can simply pick from the list as you please - maybe you have already got some of the items :-)
As we do not want to compromise on quality, the links guide you to the best products in our assortment. But most of our design examples can be made with cheaper alternatives. That applies to wire, clasps, jumpring and others. You can find these alternative using the search function on top of the page. But for all jewellery making techniques we recommend the following three types of jewellery pliers: Chain-nose pliers + Flat-nose pliers + Flush cutter pliers
 |
 |
 |
|
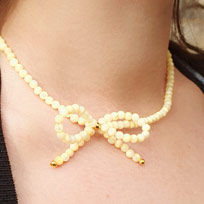
Necklace, bow made of yellow shell pearls |
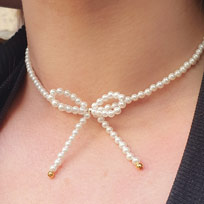
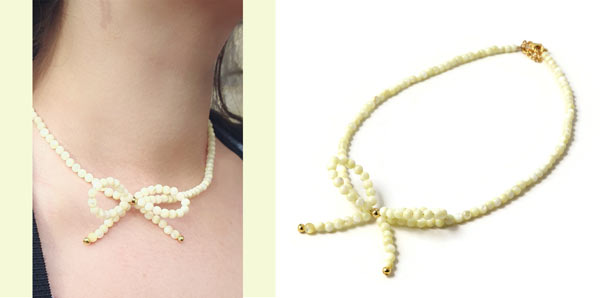
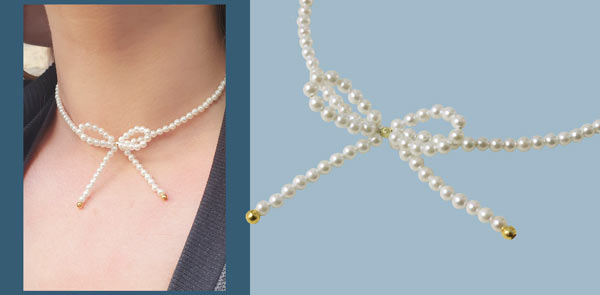
Necklace, bow made of white shell pearls. |
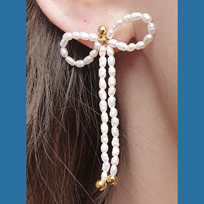
Ear stud, long bow made of freshwater pearls |
 |
|
|
 |
 |
|
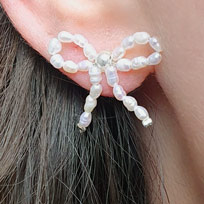
| Ear stud, small bow made of freshwater pearls |
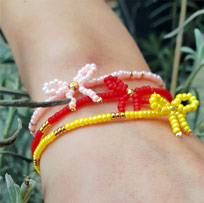
Bracelet, bow made of seed beads beads |
|
|
|
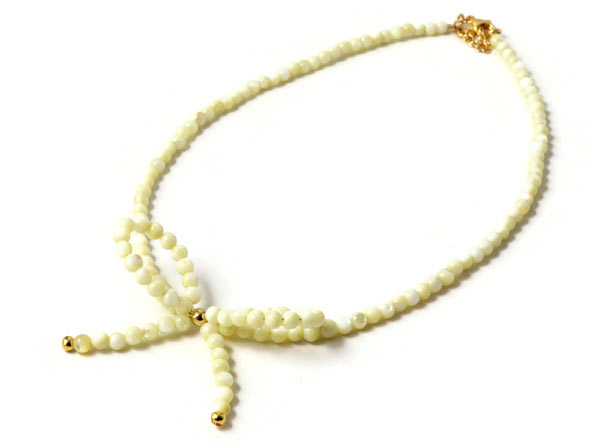
Necklace with Yellow Shell Bead Bow
We used the following DIY components to assemble this necklace:
(approx. 140 beads for a 35cm long necklace)
Beading wire, 0.30mm, approx. 2x40cm
Crimp beads, gold-plated sterling silver
Jumprings, closed, 5mm, gold-plated sterling silver
Jumprings, open, 4mm, gold-plated sterling silver
Lobster claw clasp, 11mm, gold-plated sterling silver
Chain extender with 6mm coin, gold-plated sterling silver
Bead, 4mm, gold-plated sterling silver
Crimp covers, 3mm, gold-plated sterling silver
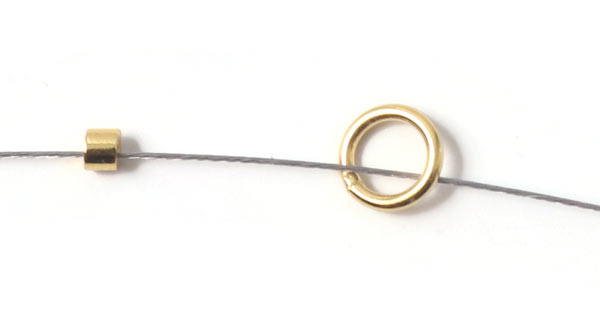
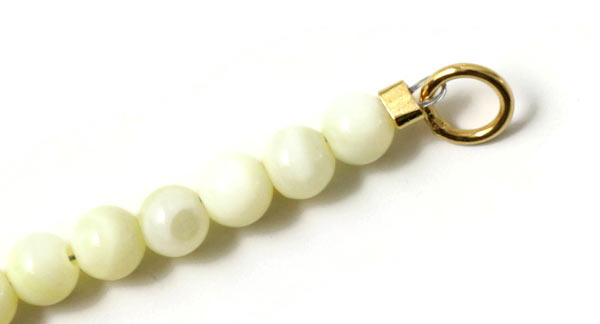
This pearl necklace with bow is made in two parts. Cut approx. 40cm of wire off ... and string a crimp bead and a closed jumpring on the piece of wire.

Pull the wire back through the crimp bead.
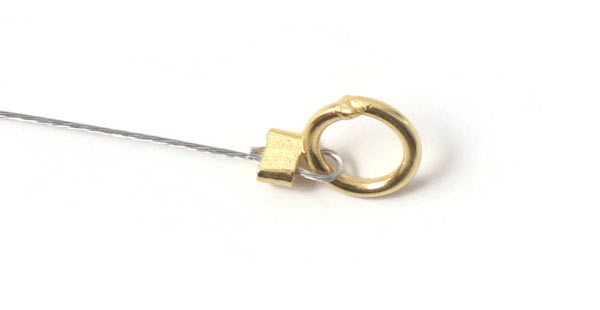
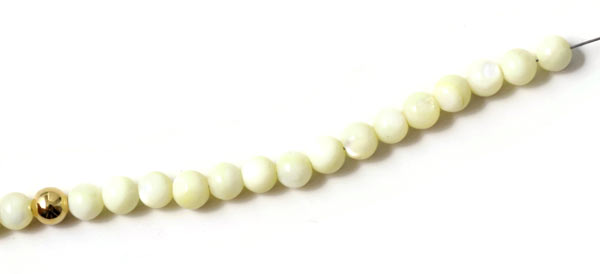
Press the crimp bead flat and cut off the excess wire. You can also cut off the wire further down and pull the first 4-6 beads over double wire to make the necklace more robust aroung the clasp.
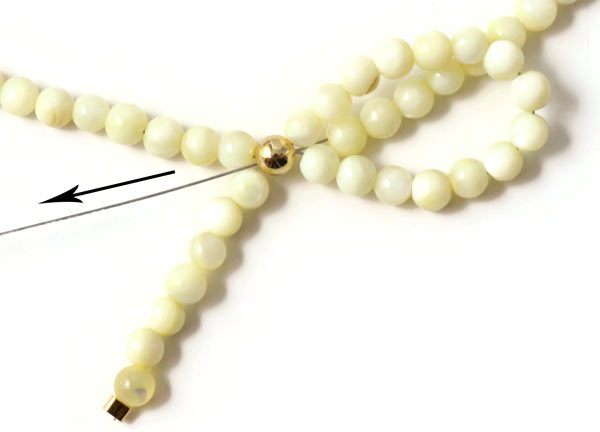
String the desired amount of shell beads (until you reach the centre of the necklace).
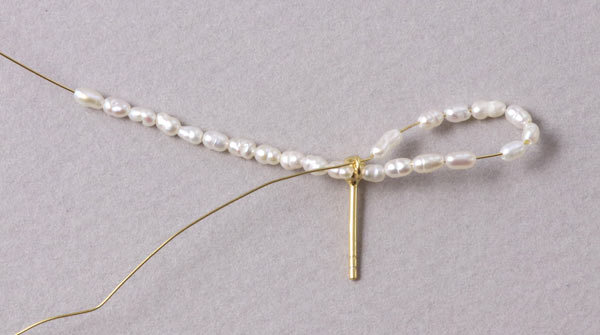
String 1 golden bead which marks the middle of the necklace.
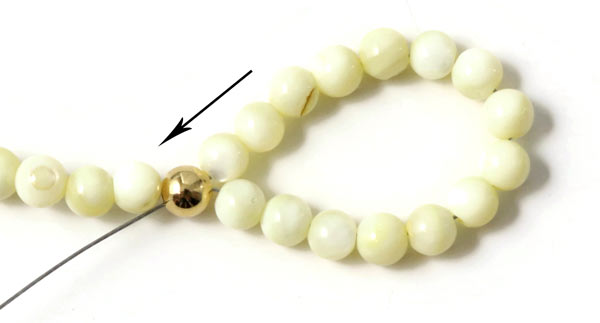
String another 15 shell beads ... and pull the wire back through the golden bead. This is the first loop of the bow.
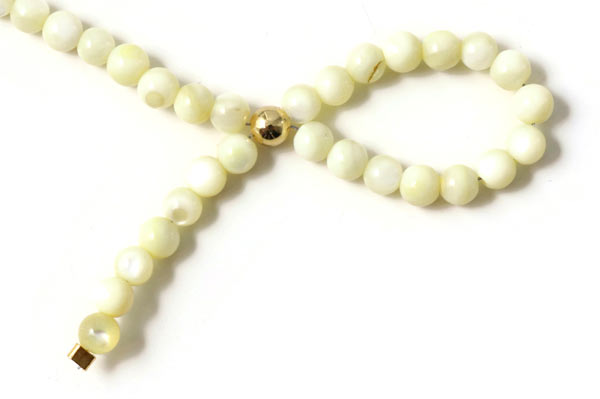
String 7 shell beads + 1 crimp bead. Press the crimp bead flat and cut off the excess wire. This is the first half of the necklace.
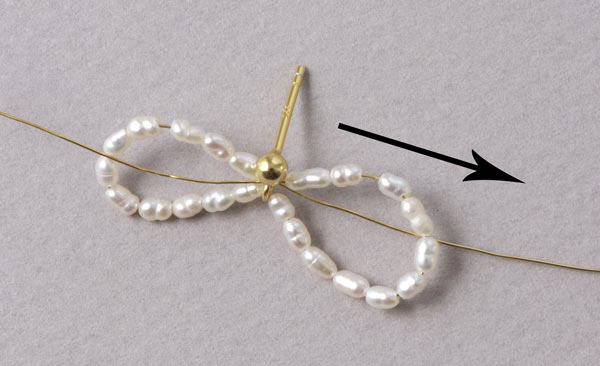
Now you start the second half in the same way. When the second half has reached the same length as the first one, you pull the wire through the golden bead again.
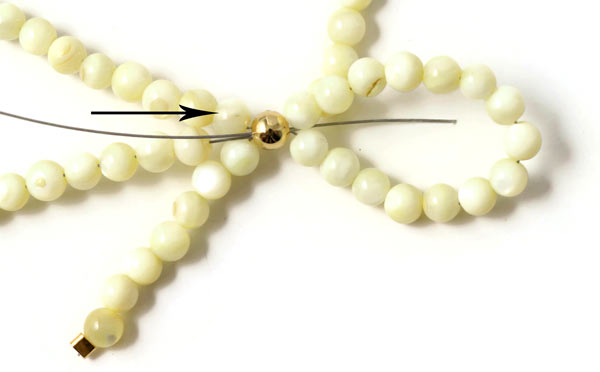
String 15 shell beads ... and pull the wire back through the golden bead again.

Tighten the wire. The other loop of the bow is done.
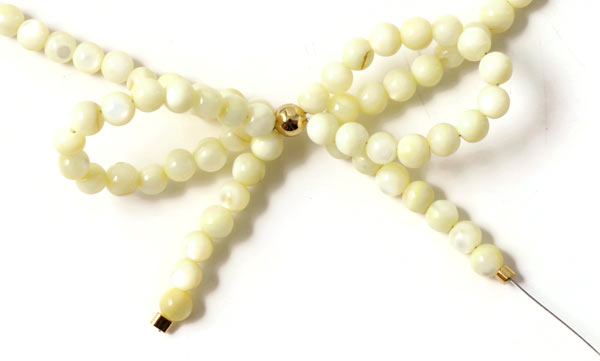
String 7 shell beads + 1 crimp bead ... and press the crimp bead flat.
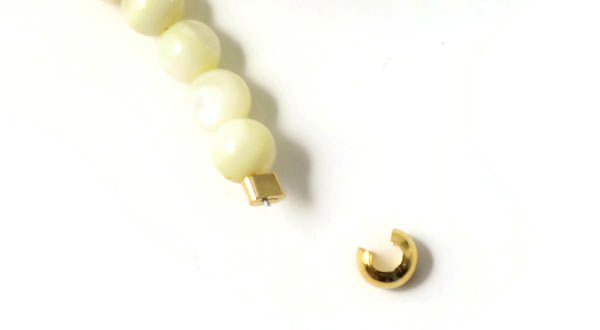
Hide the crimp beads with crimp covers.
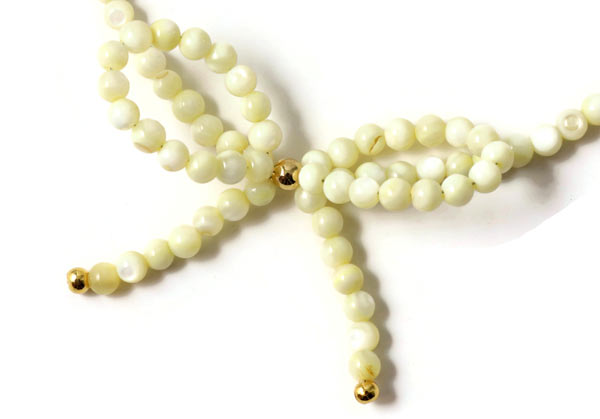
Now, the ends of the bowknot have a nice finish.
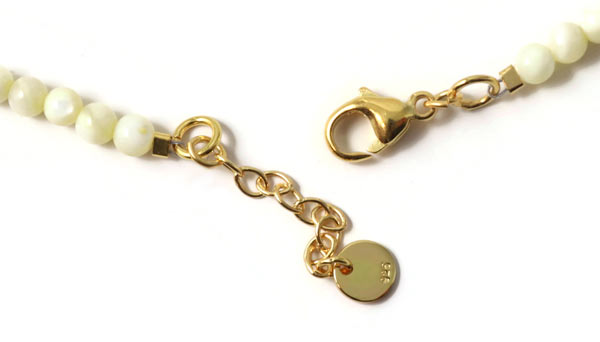
Finally, you fasten the lobster claw clasp and the chain extender to the ends of the necklace with the help of open 4mm jumprings.
Necklace with Shell Pearl Bow
For this necklace, you follow the same instructions as in our first example and you need the following components:
Shell pearls, 3mm (for this necklace approx. 150 beads = length approx. 35cm)
Beading wire, 0.30mm, approx. 2x40cm
Crimp beads, gold-plated sterling silver
Jumprings, closed, 5mm, gold-plated sterling silver
Jumprings, open, 4mm, gold-plated sterling silver
Lobster claw clasp, 9mm, gold-plated sterling silver
Chain extender with 6mm coin, gold-plated sterling silver
Disco ball bead, gold-plated brass
Crimp covers, 3mm, gold-plated sterling silver
Earstuds with Freshwater Pearl Bow
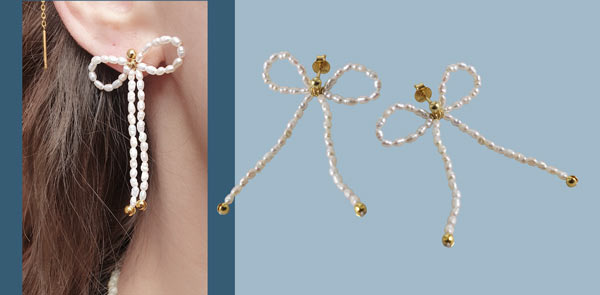
For these earrings, we used the following DIY components:
Wire, 0.4mm, gold-plated stering silver
Silk beading thread, 0.45mm, white
Beads, 2mm, gold-plated sterling silver
Crimp covers, 3mm, gold-plated sterling silver
Earstuds with 3mm ball and eyelet, gold-plated sterling silver
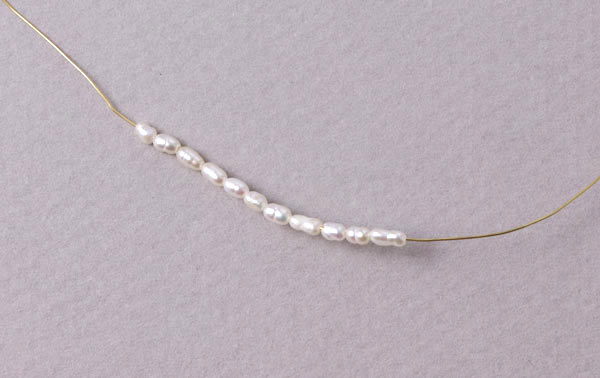
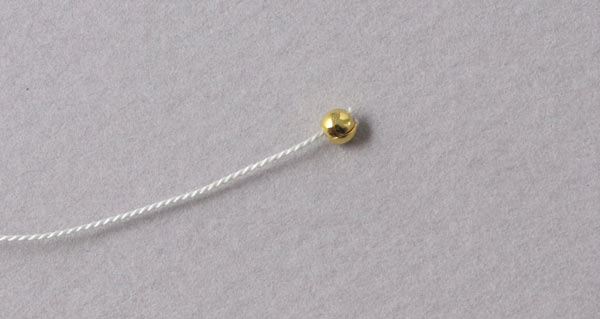
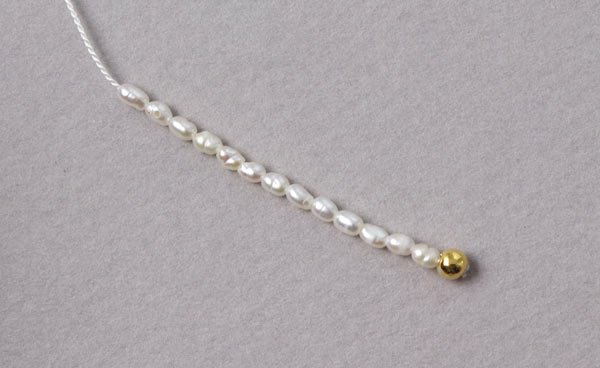
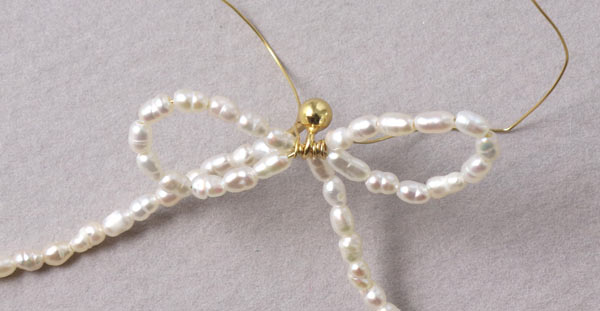
Cut off approx. 15cm of beading wire ... and string 11 freshwater pearls.
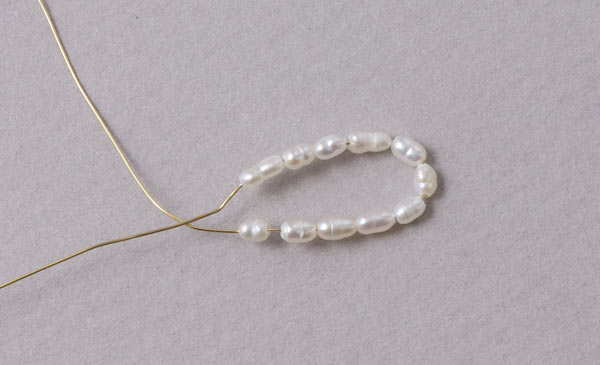
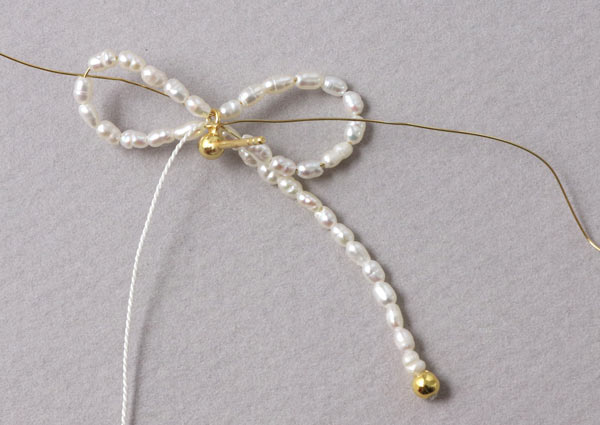
Form the first loop of the bow with the wire.
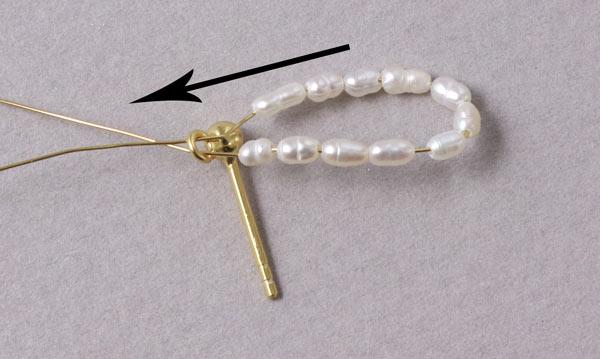
Pull both wire ends through the eyelet of the earstud.
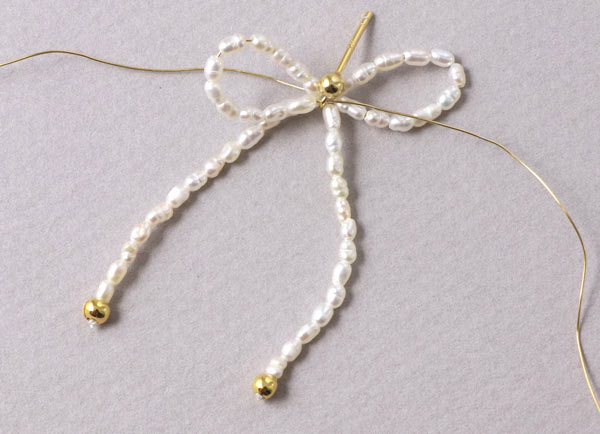
String 11 pearls on one of the wires ...
... and pull this wire back through the eyelet of the earstud. Tighten the wire. (Before you wind the wire, you finish the bow ends.)
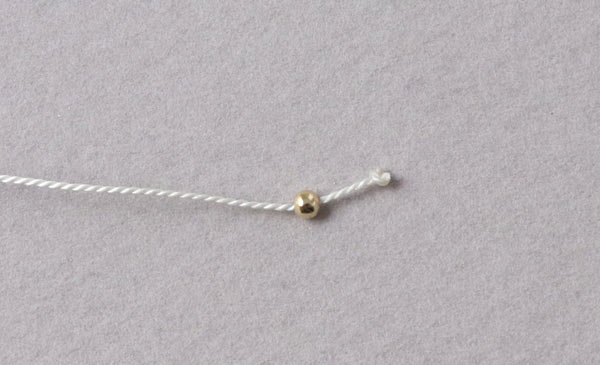
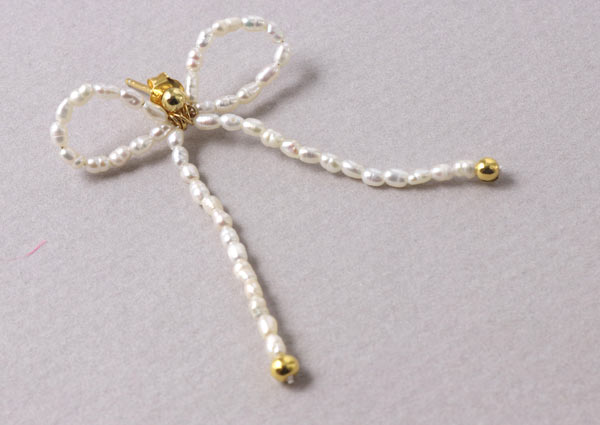
For the ends of the bow, you take silk beading thread, so they dangle softly. Tie a knot into the end of the silk thread.
Apply a bit of glue on the knot and cut off the excess thread. String a little bead.
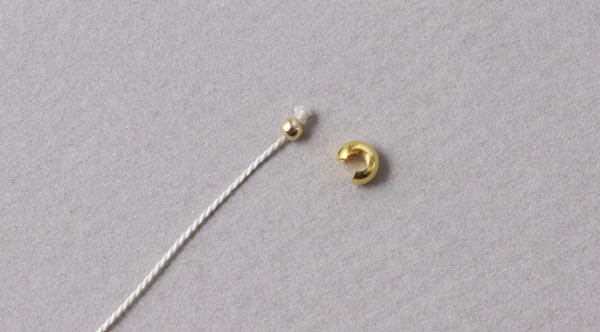
Hide the knot with a 3mm crimp cover. (You can leave out the little bead, but in that case the knot should be so large that the crimp cover cannot be pulled off. Try to tie 3-4 knots on top of each other.)
Press the crimp cover flat carefully.
String 13 freshwater pearls...

... and pull the silk thread through the eyelet of the earstud.
Tighten the thread so the pearls are close to the eyelet.
String the same amout of pearls (13 pcs.) ... and finish this second bow end in the same way as the first with a crimp cover.
Wind the two wire ends around the wire on either side of the golden bead to give the loops more stability.
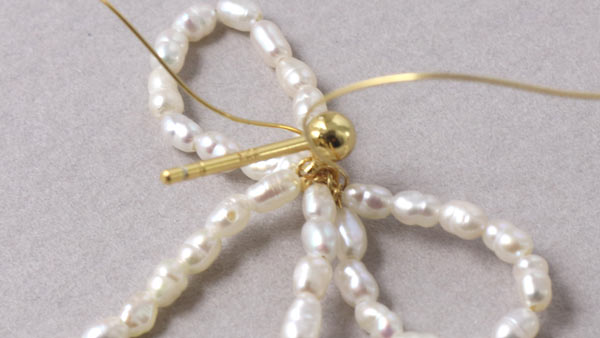
Cut off the excess wire and press the wire ends inward carefully so they do not prick.
Earstuds with Little Freshwater Pearl Bow
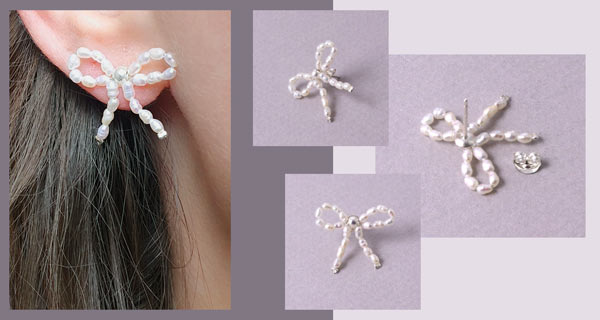
For these earstuds, we used the following jewellery components:
Earstuds with cup, sterling silver
Freshwater pearls, 2x3mm, ( 2x22 pcs. are needed)
Crimp beads, 1x1.5mm, silver-plated brass
This bow is made in the same way as explained underneath ("Bracelet with Seed Bead Bow"). You use 0.3mm silver thread and glue the finished bow into the cup of the earstud.
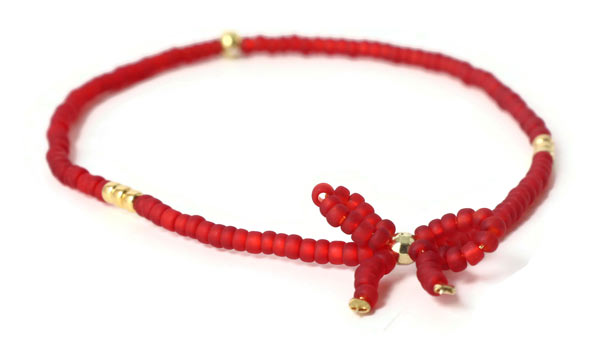
Bracelet with Seed Bead Bow
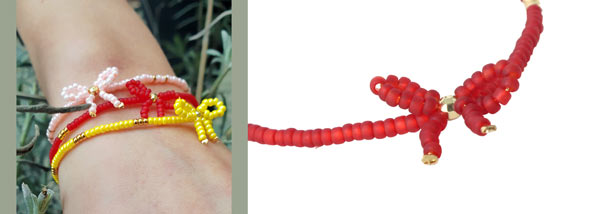
For this bracelet, we used the following DIY jewellery components:
Miyuki seed beads, size #11, matte ruby red
Miyuki seed beads, size. #11, 24 karat gold-plated
Miyuki elastic, flat, 0.6x0.8mm
Wire, 0.3mm, gold-plated copper (or 0,3mm gold-plated sterling silver)
Disco ball bead, gold-plated brass
Crimp beads, 1x1.5mm, gold-plated brass
Crimp covers, 3mm, gold-plated brass
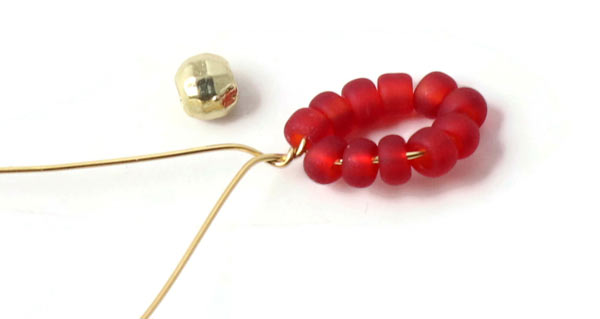
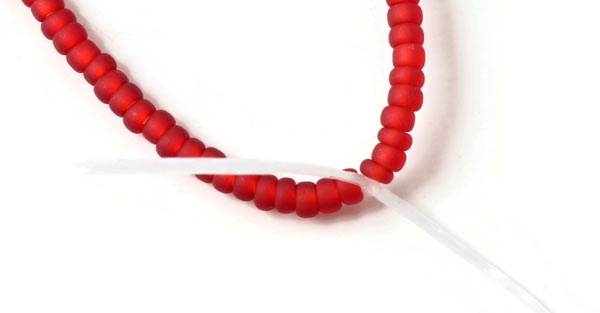
Cut off approx. 10cm of wire ... and string 11 seed beads. Form the first loop of the bow with the wire ... and wind the two wire ends around each other a few times.
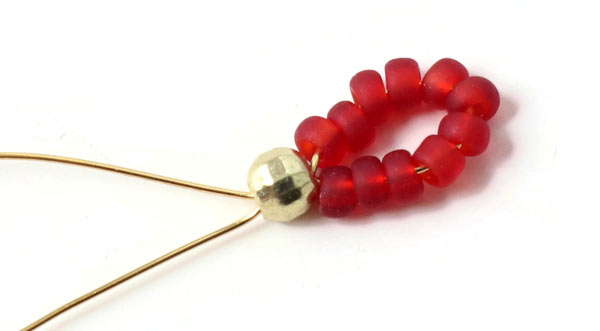
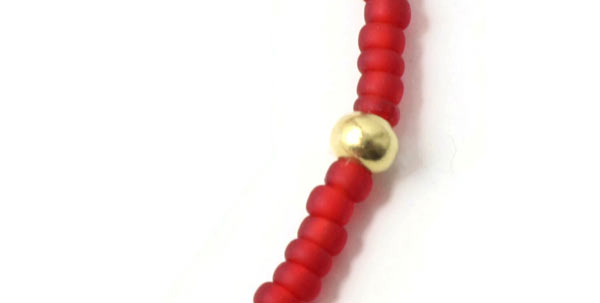
Pull both wire ends through the golden bead.
String another 11 seed beads ...
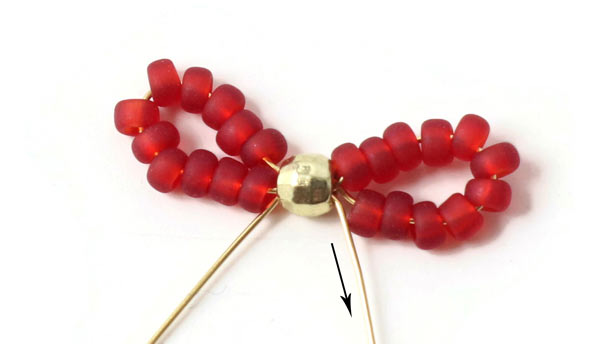
... and pull the wire back through the golden bead. Tighten the wire carefully.
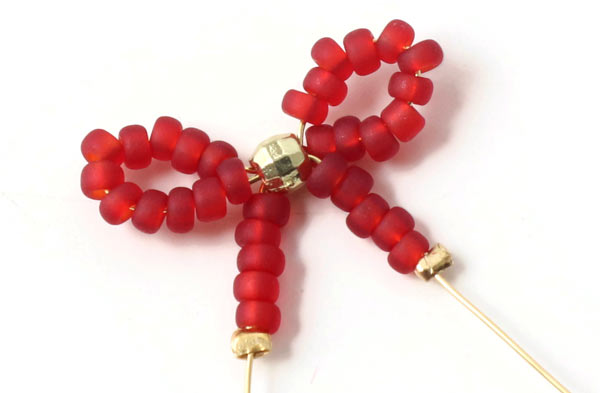
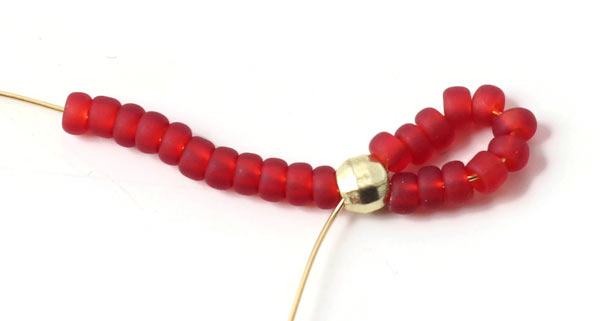
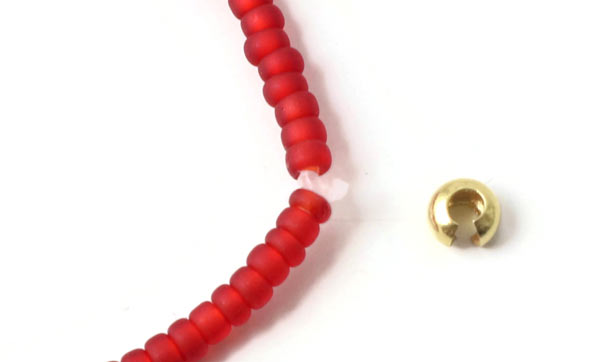
String 5 seed beads + 1 crimp bead on each wire end. Press the crimp beads flat ... and cut off the excess wire.
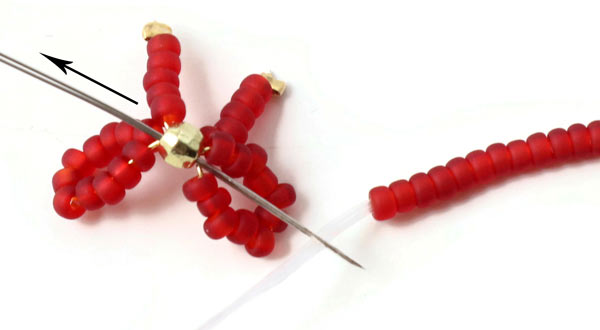
String the desired amount of seed beads onto the elastic with the help of the beading needle (the number of beads that corresponds to half of the bracelet's length) ... and pull the needle with the elastic through the golden bead.
String the same amount of seed beads on the other side for the other half of the bracelet...
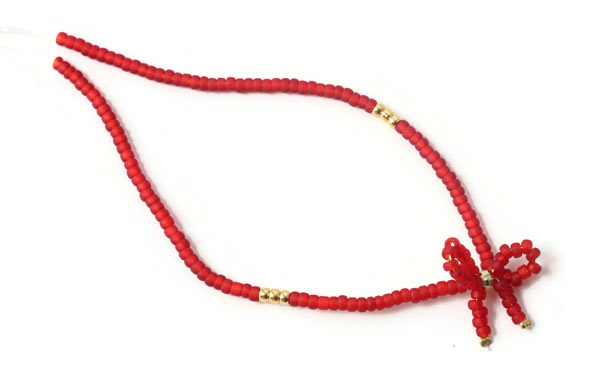
... and tie a double knot.
Apply a bit of glue on the knot ... and cut off the excess elastic.
Hide the knot with a crimp cover.
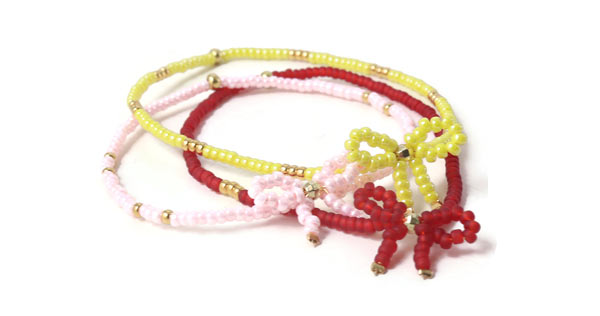
For the yellow bracelet, we used Miyuki seed beads, size #11, yellow luster.
For the pink bracelet, we used Miyuki seed beads, size #11, light pink.
Ring with Seed Bead Bow

The DIY components and the instructions are the same as for the bracelet. But as centre bead for the rings, we used a fluted bicone (gold-plated brass).
Remember that every time you purchase items on Smyks.com or in our Copenhagen shop, you ensure that our designers and creative staff can provide you with new and exciting blog content - for free and for the benefit of everyone.
Thank you for reading and have a good time with you beading activities! :-)
We will publicly show your name and comment on this website. Your email is to ensure that the author of this post can get back to you. We promise to keep your data safe and secure.