Make your own fashionable bag charms
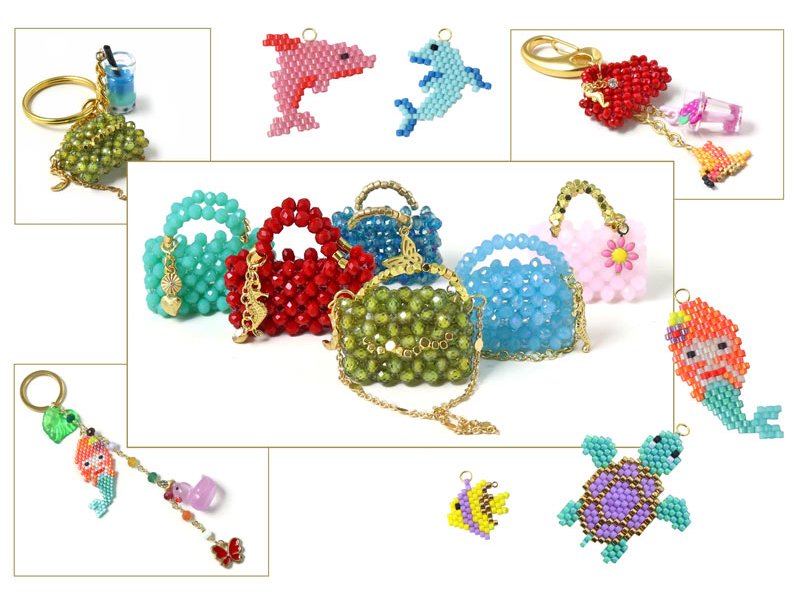
In this blog post by Smyks, we show you how to make cute, personalised and funny bag charms and keychain pendants with beads. These trendy and eye-catching little pendants can be incredibly expressive and loaded with symbolism and humour. Combine them to suit your own style or create a personalised gift for a loved one. You can make charms for keyrings, keychains, bags, mobile phones, necklaces, the car windscreens or Christmas tree decorations - the possibilities are endless.
The sewing process for the mini bag we present here is basically the same as for the large bags which we explained in the previous blog post on Beaded bags with crystals. If you're one of those who think starting with a full-size bead bag is a bit of a mouthful, you might want to start with these cute miniature bags instead. The technique is pretty much the same, and once you've mastered the small ones, it's not difficult to move on to the larger ones.
This blog post doesn't have many step-by-step pictures, so if in doubt, check out the blog post Beaded bags with crystals for more details. See also the related blog posts: Keyhangers with watch.
Jump to: bag charm
pink bag charm
heart pendant
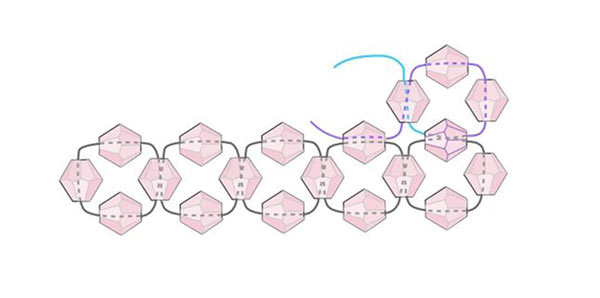
Below, you see a diagram of the pattern in its basic form.
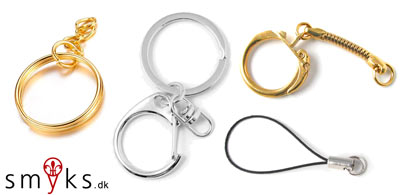
Smyks has many keyrings that make it easy to use your charm as a pendant, see our assortment of keyrings here.
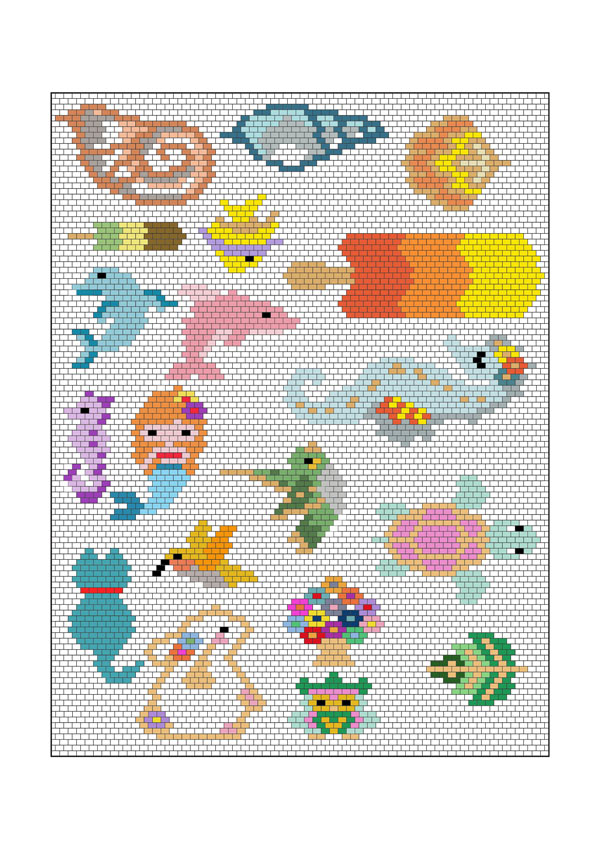
The tiny flat beaded icons are made with Miyuki Delica beads size #11, but you can use other sead beads, too. They are sewn together with brick stitch, a beading technique we introduced in our blog post on Brick Stitch Earrings where we walk you through the basics.
Download the pattern sheet here: Pattern Sheet Summer and Sea.
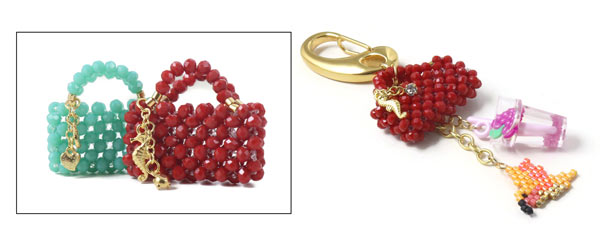
Mini Charm: Bag with Red Crystal Beads
For this little bag charm, we used the following DIY components:
Celestrial crystal beads, red, 3x2mm, 1 strand
Nylon beading thread, thickness 0.30mm, approx, 2m
1 small seahorse charm, gold-plated sterling silver
1 small pendant with crystal, gold-plated brass
2cm cable chain, gold-plated silver or a chain extender, gold-plated brass (cheaper)
1 jumpring, diameter 5mm, gold-plated sterling silver
2 jumprings, diameter 3mm, gold-plasted sterling silver
8 crimp beads with hole, 0.8mm, gold-plated sterling silver
Other jewellery materials used:
1 Key hasp
2 pieces of cable chain with large links made of gold-plated sterling silver or gold-plated steel (cheaper)
We attached a fruit cocktail to one piece of chain and a little humming bird made of Delica beads size #11 to the other piace of chain. You find the pattern further up in this blog post.
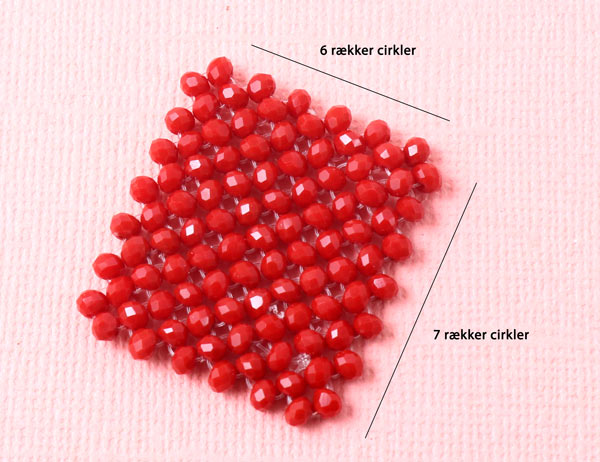
First, you sew a square with 7 rows on one side and 6 rows on the other. Secure the thread ends
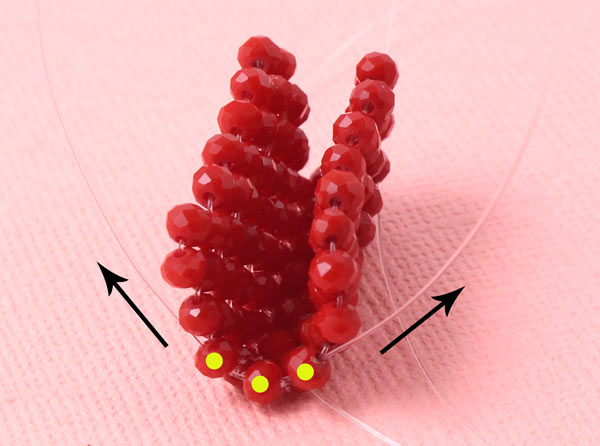
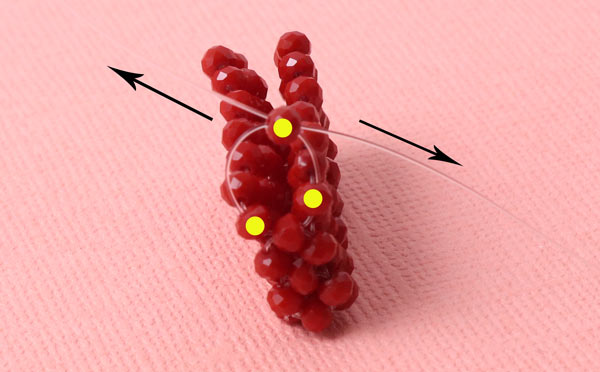
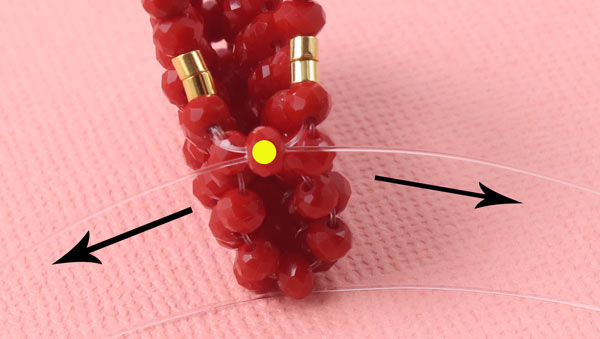
Now, you sew the sides of the bag together. Fold the square (the side with 7 beads) and cut a new piece of string. Sew the string through the centre 3 beads ... and place the beads on the centre of the string.
String a bead on the thread to the left ... and sew the thread to the right through the same bead i opposite direction.
Sew each thread end through the next bead. After that, you string a bead on the thread to the left again ... and sew the thread to the right through the same bead i opposite direction.
Attach the next bead in the same way.
Sew both thread ends through 1 bead one more time.
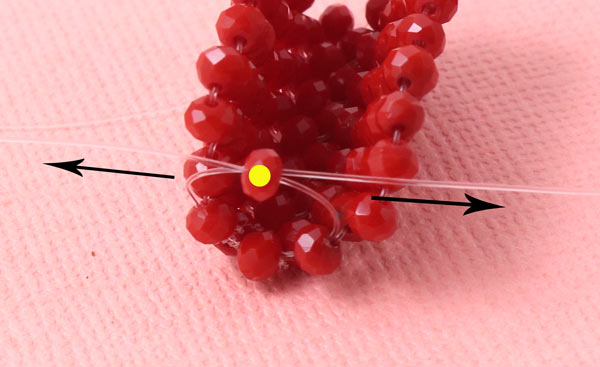
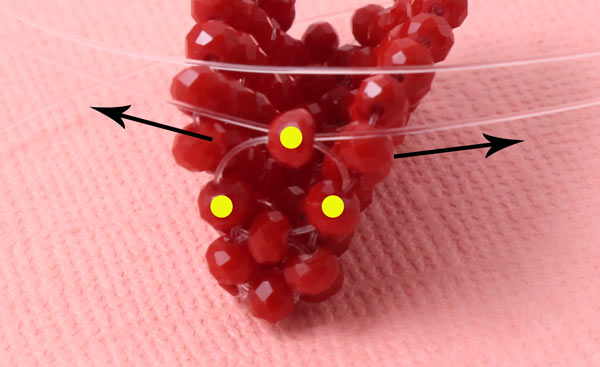
Then, you string 2 crimp beads, 8 beads and again 2 crimp beads on one of the threads...
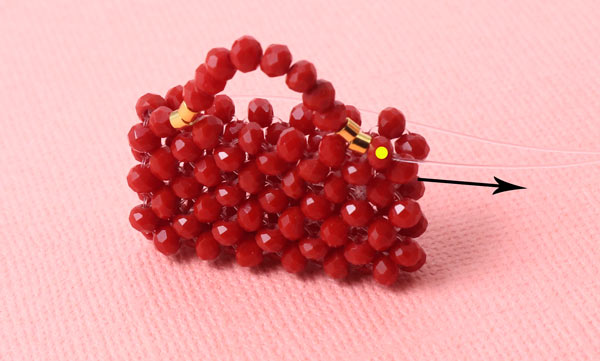
... and sew through the lasy bead in the row (see picture).

String the same amount of beads on the other thread ... and sew through the last bead on the other side of the bag.
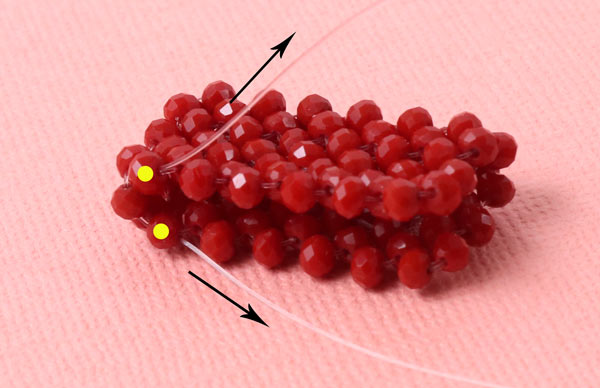
Now, you sew the other side of the bag together in the same way.
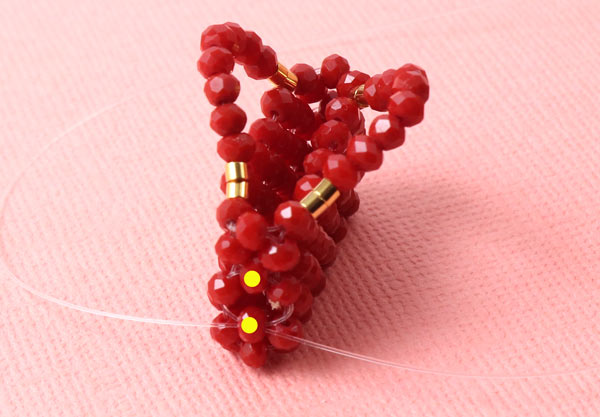
Again you sew on three more beads in total. Finally, you secure the thread ends. Your bag is done.
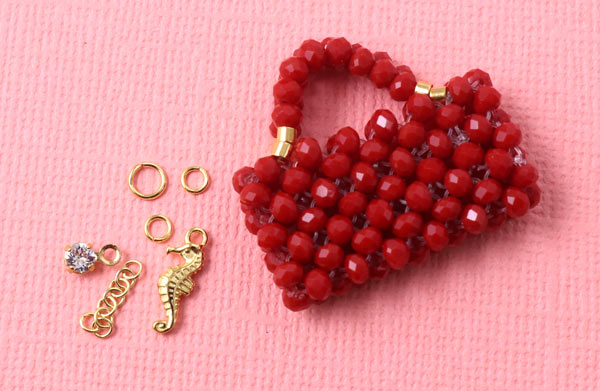
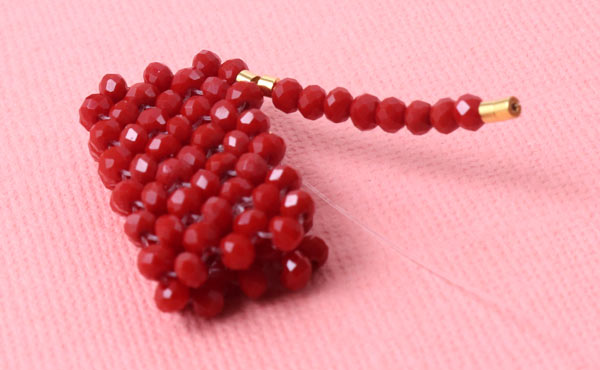
Here we add some tiny pendants as bag charms.
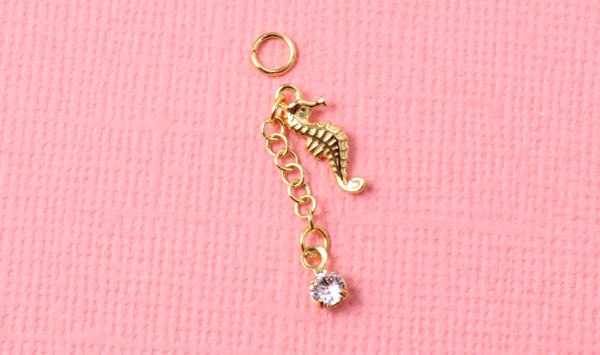
The seahorse is fastened to one end of the chain with a jumpring ... and the crystal is attached to the other end of the chain, again with a jumpring.
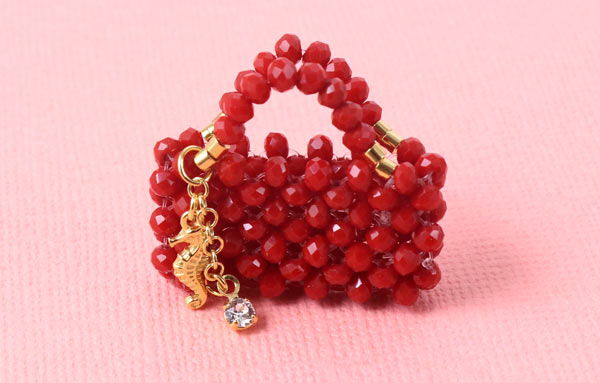
The large jumpring connects the charm with the handle of the handbag.
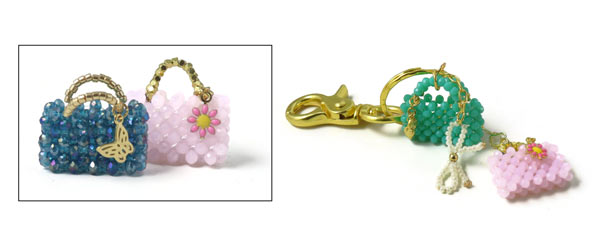
Mini Charm Bag with Pink Crystal Beads
For this bag charm, we used the following components:
Celestrial crystal, pale pink, 3x2mm
Nylon beading thread, clear, 0.30mm, approx. 2m
30 Hematite cubes, faceted, gold-plated, 1.5x1.5mm
Chain with daisies and seed beads
2 jumprings, 4x0.6mm, gold-plated steel
Other jewellery materials used:
Additionally, we used a lobster claw clasp with swivel eyelet for keys and a wavy split ring for keys, 1 piece of cable chain and 1 piece of chain with heart-shaped links. We attached another bag charm to one chain and a bow to the other.
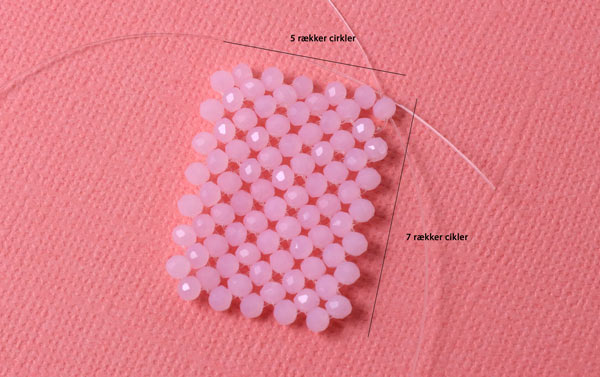
First, you sew a square with 7 rows on one sode and 5 rows on the other. Secure the thread ends.
Then, you sew the bag together as explained in the example above.
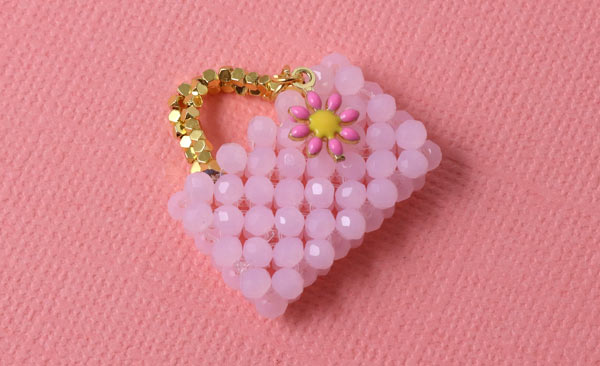
Each of the handles is made with 14 gold-plated hematite beads. Dhe little daisy is fastened with a 4mm jumpring.
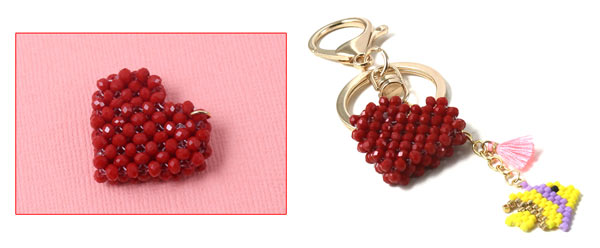
Keyring charm - heart with red crystals
For this bag charm, we used the following jewellery components:
Celestrial crystal beads, red, 3x2mm
Nylon beading thread, clear, thickness 0.30mm, approx. 3m
1 jumpring, 0.5mm, gold-plated steel (open or closed)
Other jewellery materials used:
1 keyring with lobster claw clasp and cable chain, gold-plated steel. We added a little tassel and made a little fish out of Delica beads size #11. You find the pattern on the Pattern Sheet Summer and Sea.
This heart is made with the same sewing technique as the bags. The basic pattern are circles that are connected to each other.

This guide on how to make the heart is not detailed, but you need to know how these circles are connected and when to change direction.
That's why we refer you to our blog post Beaded bags with crystals for detailed step-by-step instructions and pictures.
For this charm, you change the direction of the circles changes several times to form a heart shape.
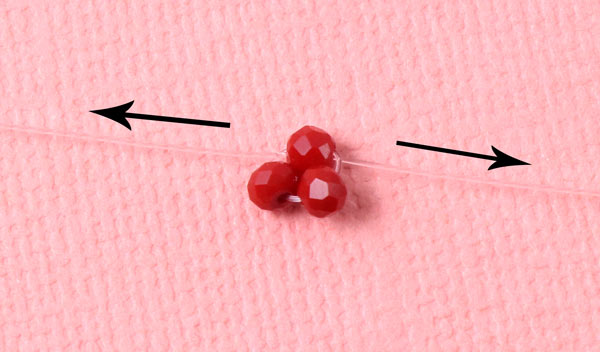
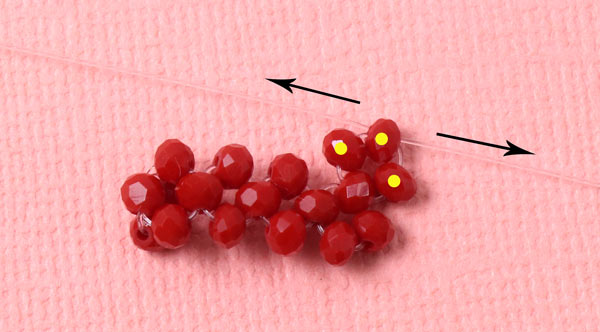
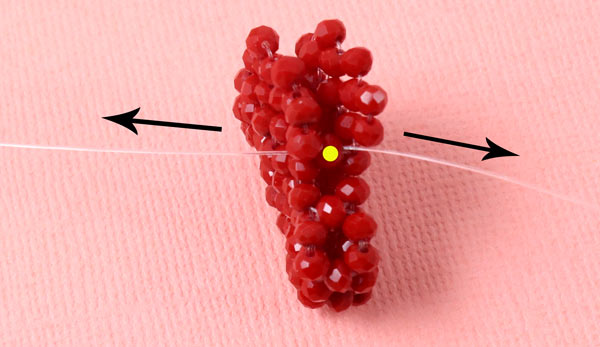
Cut off approx. 2m of thread. Start by stringing 3 beads. Then, you pass one thread end through the 3rd bead (into the opposite direction) to form a circle. Place the beads in the middle of the thread.
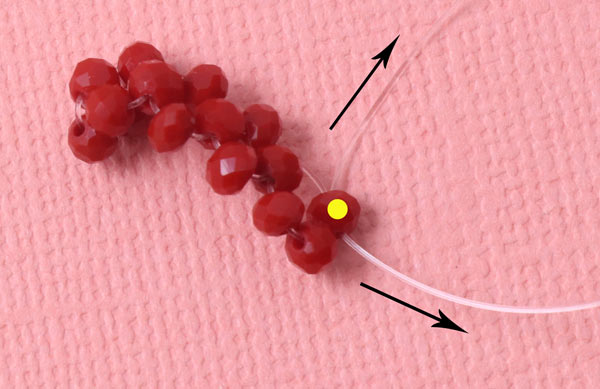
Sew 3 circles with 4 beads in each circle. String 3 beads on the thread on the right... and pass the thread on the left through the 3rd bead in the opposite direction.
The sewing direction changes, depending on which bead the threads come out of.
Now, you have a row consisting of 5 circles, where the first one consists of 3 beads.
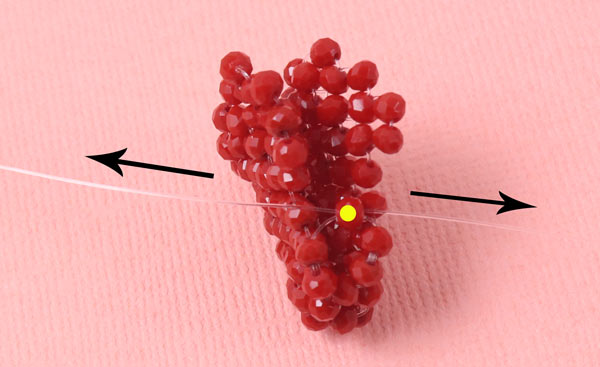
String 2 beads on the thread on the left and 1 bead on the thread on the right. Pass the thread on the right back through the 2nd bead on the thread on the left ... and tighten the thread.
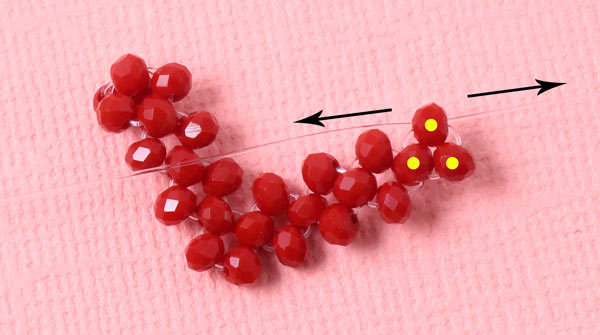
Make 2 circles in the same way. Now you string 2 beads on the thread on the right ... pass the the thread on the left through the 2nd bead into the opposite direction ... and tighten the thread.
Make 2 more circles, backwards along the last row.
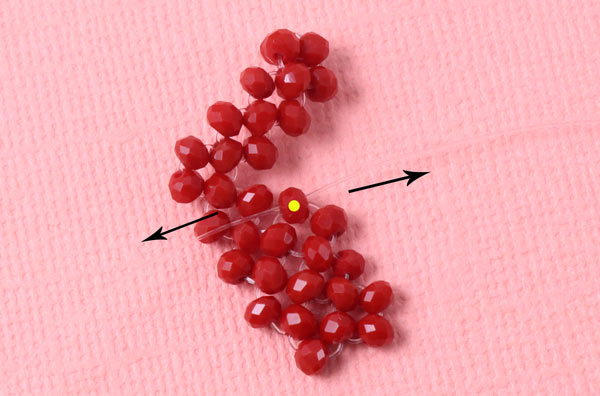
Pass the left thread through the next 2 beads.
String a bead on the left thread ... and pass the thread on the right through the same bead (opposite direction).
Add 3 more circles. You make the last circle by stringing 2 beads on the left thread ... and passing the thread to the right through the 2nd bead (opposite direction).
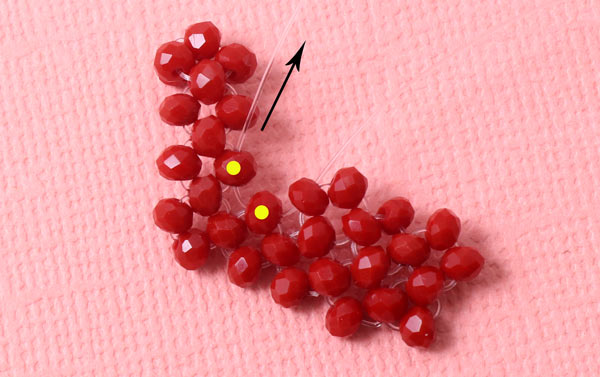
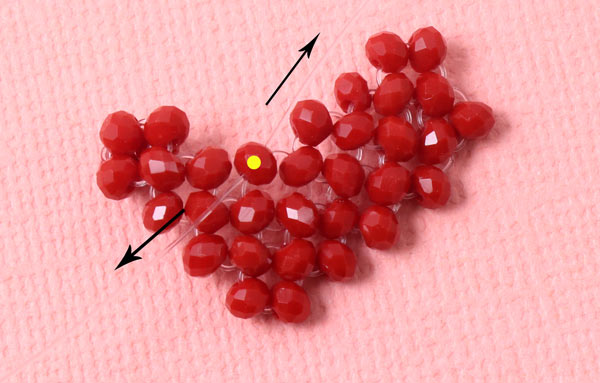
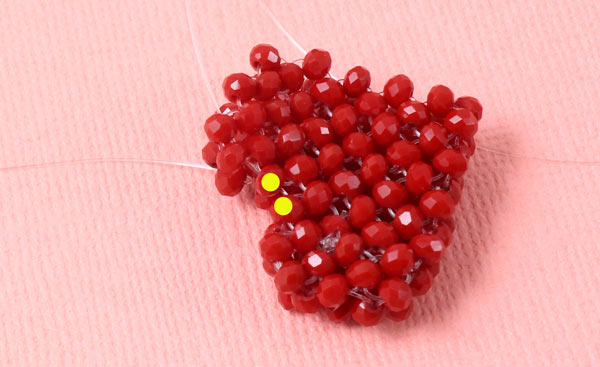
Now, sew 2 circles backwards towards the middle of the heart...
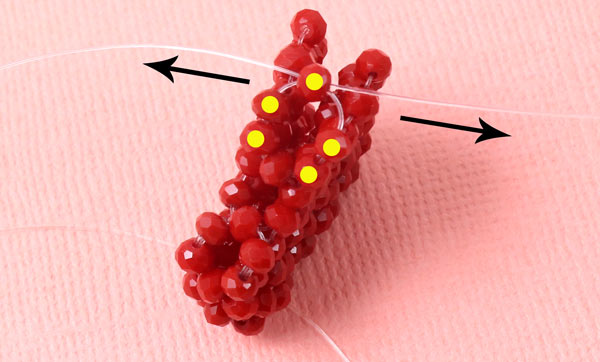
Pass the thread on the right through the next 2 beads. String a bead on the thread to the left ... and pass the thread on the right back through this bead.
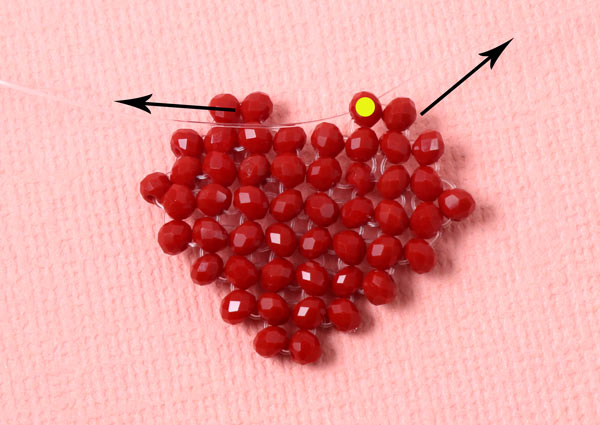
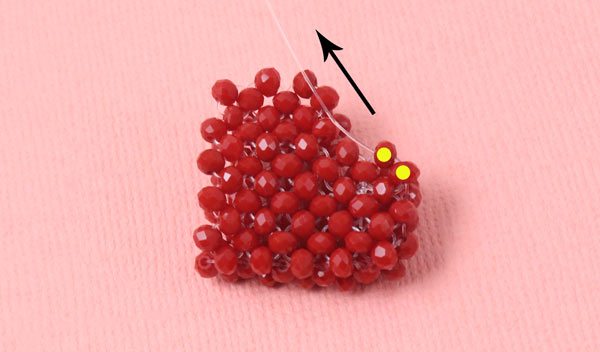
Add 2 more circles. Now, the threads come out of the 1st bead on the thread to the left (see picture).
Secure the ends and make another heart in the same way.
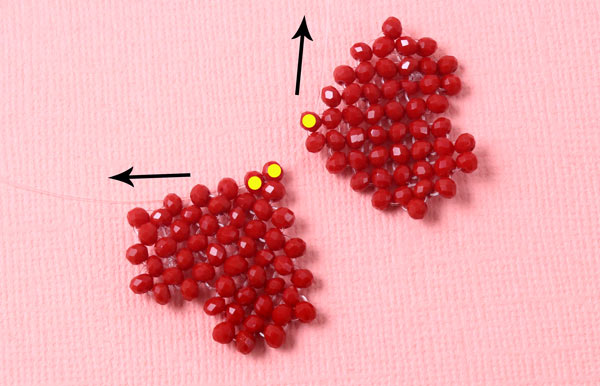
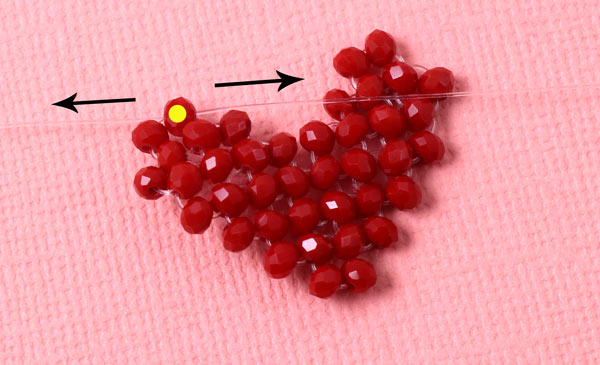
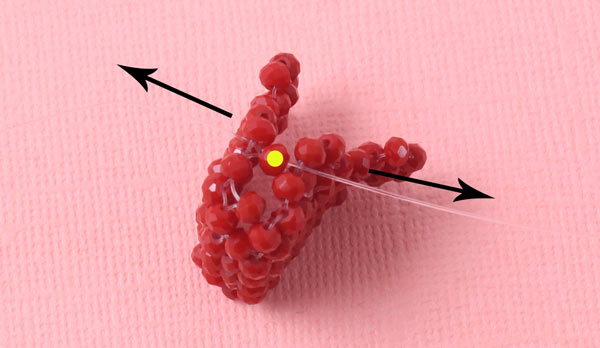
Now, the 2 hearts have to be sewn together. Pass a thread through 1 bead at the tip of the first heart. String 1 bead on the thread ... and pass the thread through 1 bead at the tip of the other heart (see picture).
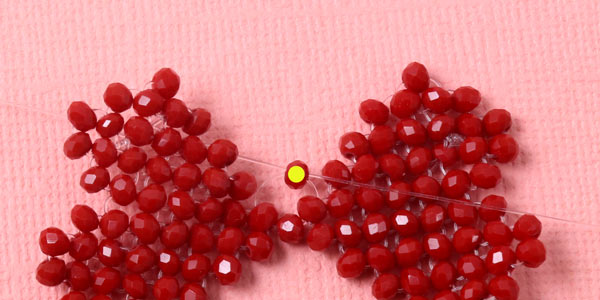
String 1 bead on the thread to the left ... and pass the thread on the right through the same bead in opposite direction.
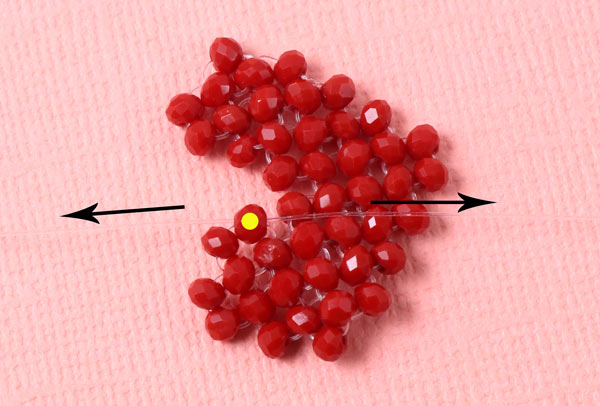
Pass both the left and the right thread through the next bead and complete the circle with 1 new bead.
Repeat this 3 times....
Now, you pass both threads through the next 2 beads.
String a bead on the left thread and pass the right thread through the same bead. Tighten the threads.
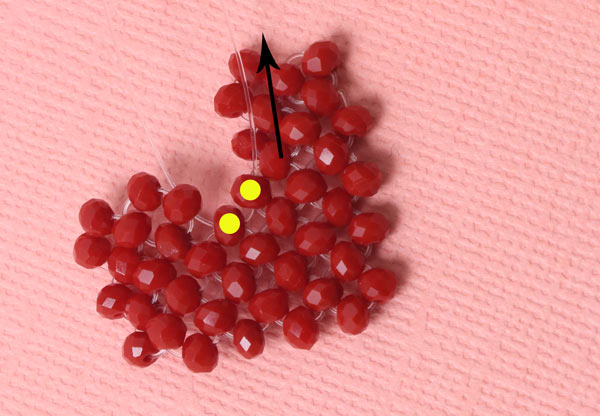
Then, you pass both threads through the next 2 beads.
String a bead on the left thread and pass the right thread through the same bead. Tighten the threads.
Now, you pass both threads through the next 2 beads. String a bead on the left thread ... and pass the right thread through the same bead. Tighten the threads.
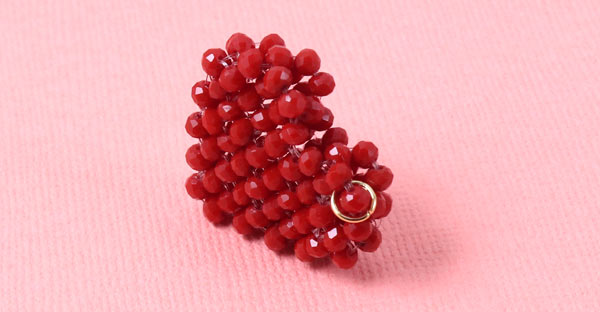
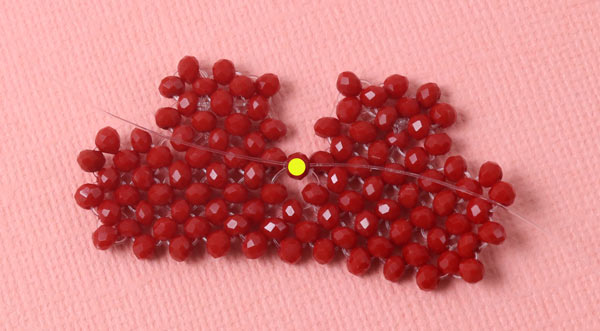
Sew the rest of the heart together in the same way as the first part of the heart. Sew a closed jumpring on while you close the heart at the top, or attach an open jumpring afterwards.
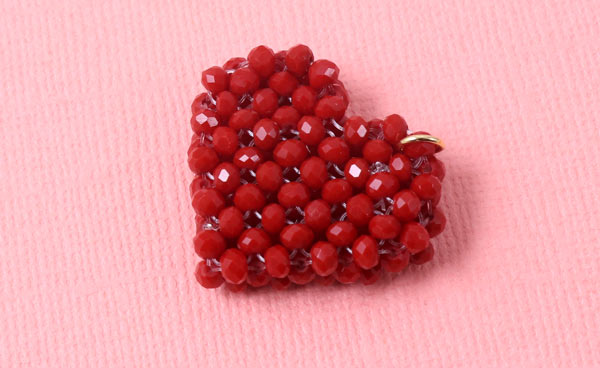
Now, your heart charm pendant is done.
Have fun - and remember that we are always there for you to answer your questions by email or personally in our shop in Copenhagen.
Your Smyks team
We will publicly show your name and comment on this website. Your email is to ensure that the author of this post can get back to you. We promise to keep your data safe and secure.