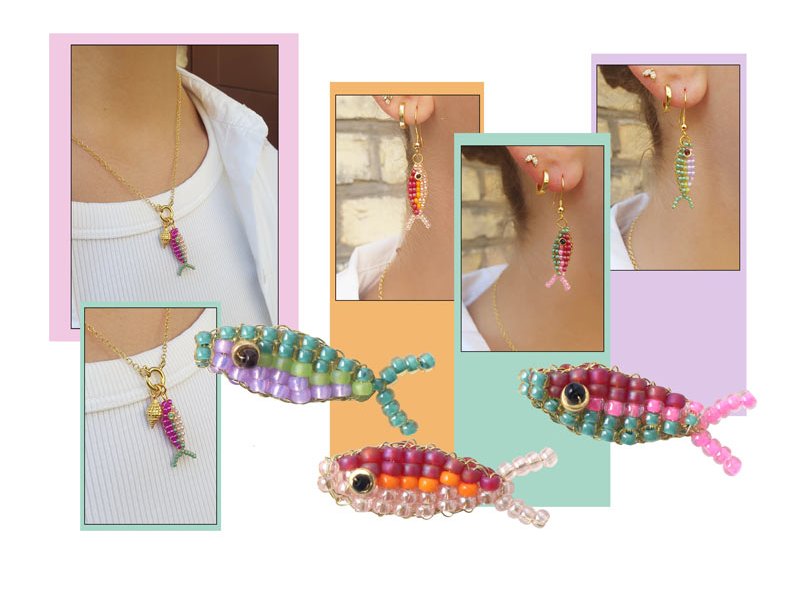
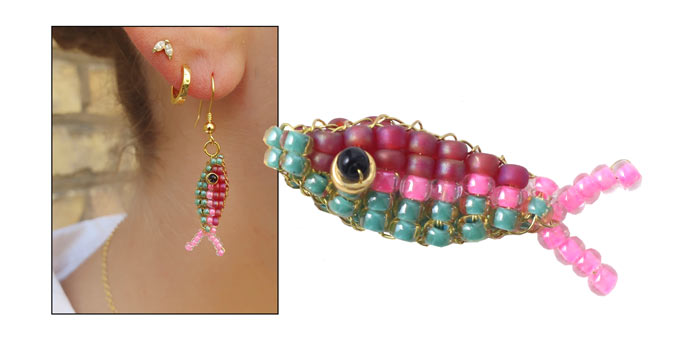
Earring with Seed Bead Fish
In this blog post, Charlotte shows you how easy it is to make small fish out of seed beads. You can decide which size of beads you prefer, as the technique is the same. In this example, we have used gold-coloured metal wire and seed beads in the popular size #11. The jewellery pendants are sewn together with the thin metal wire and finished with a small ring.
The fish can be used as jewellery pendant for necklaces, earrings and key chains or as charm for a bracelet.
The technique is super simple and requires no tools other than scissors or pliers. Most people will easily master it in no time. With a bit of practice, you will be able to make a pair of pendants in under 45 minutes.
You can also visit Smyks' bead shop in Copenhagen, where you can see all the examples in real life and get personal help to find your favourite colours for your beaded fish in our large selection of beads.
Would like to make more beaded jewellery pendants? There are several other posts on this subject on our jewellery blog. Here are just some of the latest:
DIY Seed Bead Fruits
DIY Earrings with Summer Flowers
DIY Daisy Wreath Earrings with Delica Beads
DIY Square Stitch Icons
DIY Key Chains and Bag Charms
For this earring, we used the following DIY components:
Miyuki seed beads, size #11, dark pink
Miyuki seed beads, size #11, neon pink
Miyuki seed beads, size #11, light topaz
Miyuki seed beads, size #15, black (2 pcs. for the eye)
Miyuki rondelle beads, 3mm, gilded (2 pcs. for the eye)
Wire, 0.2mm, gilded copper (approx. 50cm)
(Alteratively: Wire, 0.3mm, gilded copper)
Jumpring, closed, 4mm, gold-plated sterling silver
Earwires with spiral and ball, gold-plated sterling silver
+ flush-cutter pliers or hobby scissors
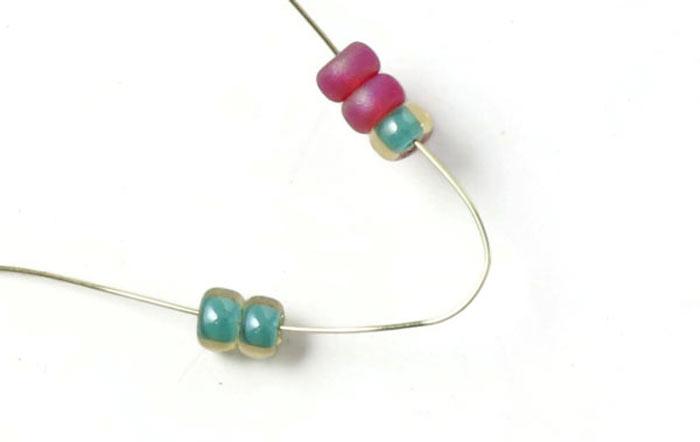
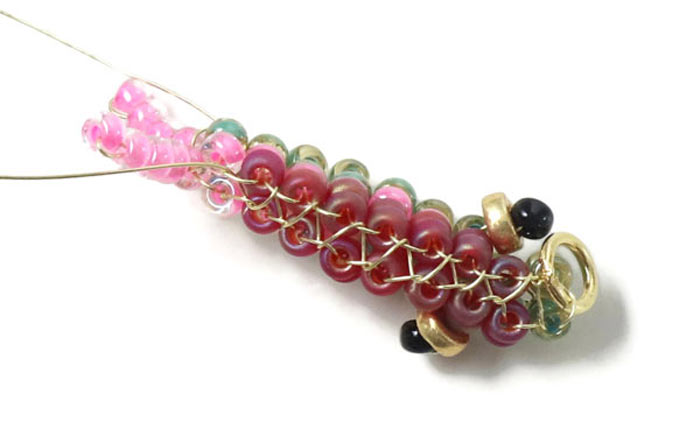
String 3 green + 2 red beads on the wire ... and place them in the middle.
Pass the wire back through the 2 red beads and 1 of the green beads and tighten the wire. The first 2 rows are done.
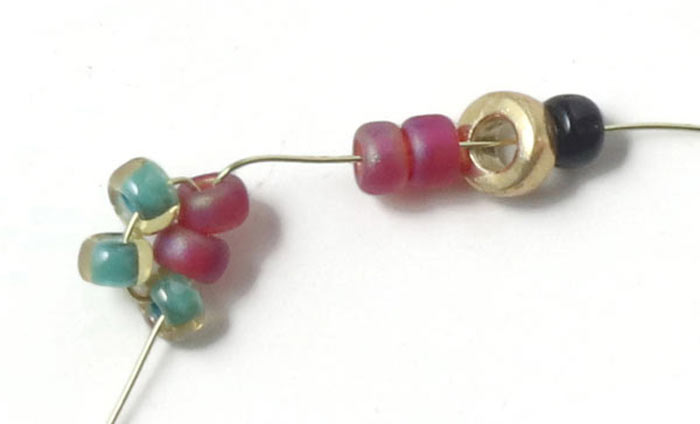
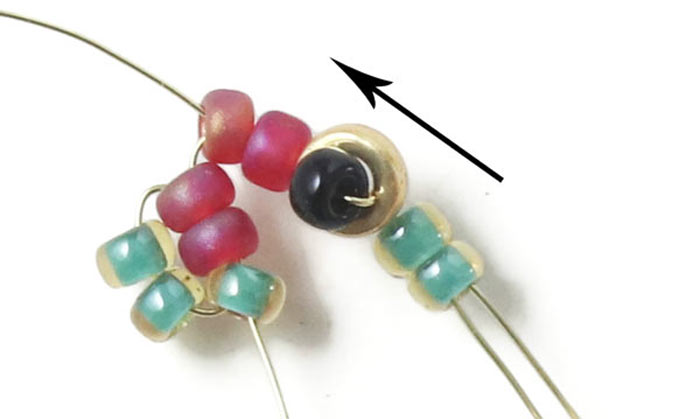
String 2 red beads + 1 rondelle bead + 1 black bead on the wire end that comes out of the red beads.
Skip the black bead ... and pull the wire back through the rondelle bead.
Tighten the wire ... and place the rondelle very close to the red bead.
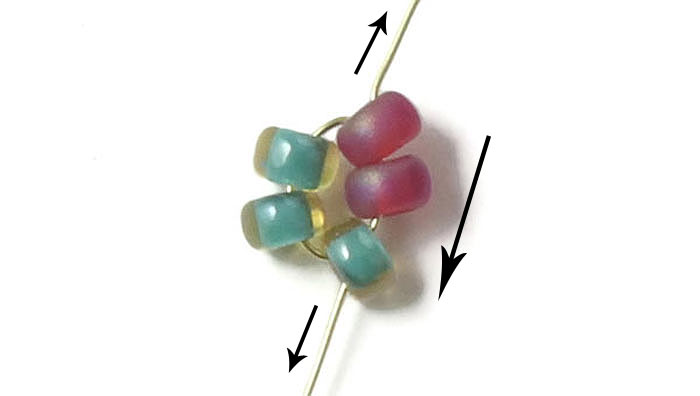
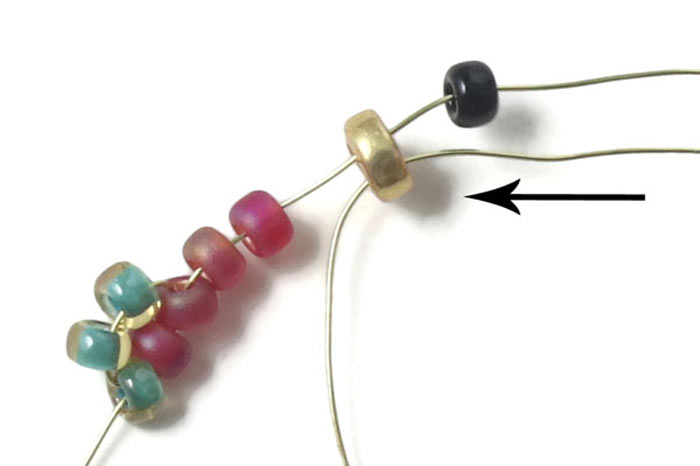
String 2 green beads ...
... and pull the wire that comes out of the green bead in the 2nd row through the 2 green beads ... and then the 2 red beads (you skip the rondelle).
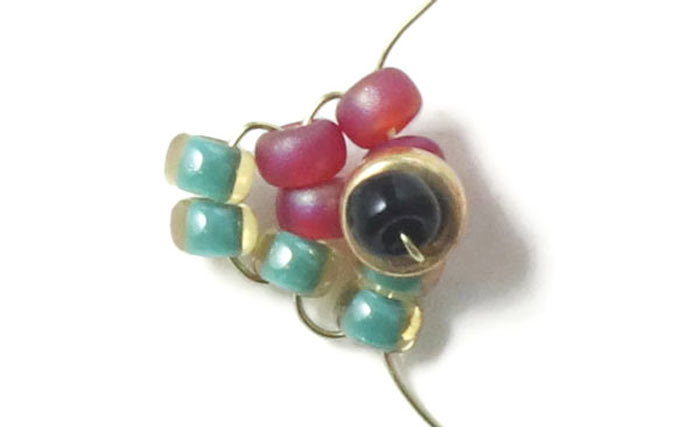
Tighten the wire ... and position the beads so that the rondelle bead and the black bead (the eye) stick up and are placed in the centre.
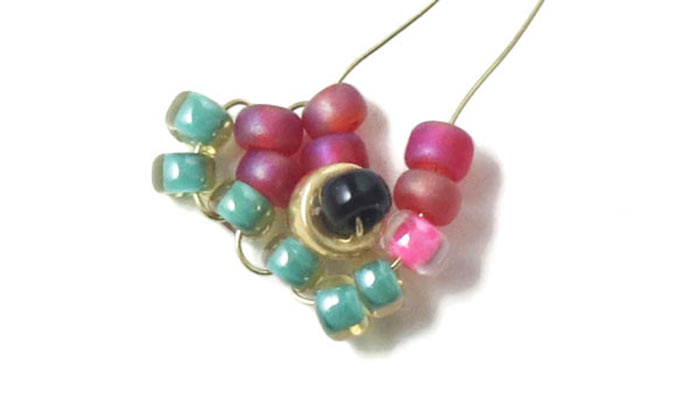
String 2 green beads + 1 pink bead + 2 red beads on the wire ...
... and pull the other wire end through all the these new beads.

Tighten the wire. Now, the 4th row is done.
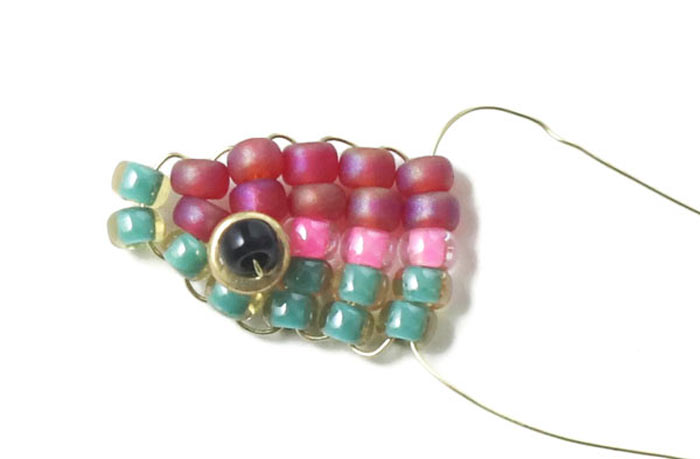
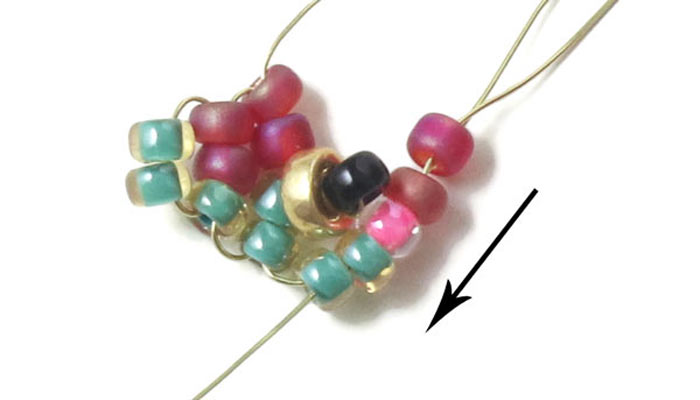
Make 2 more rows like this.
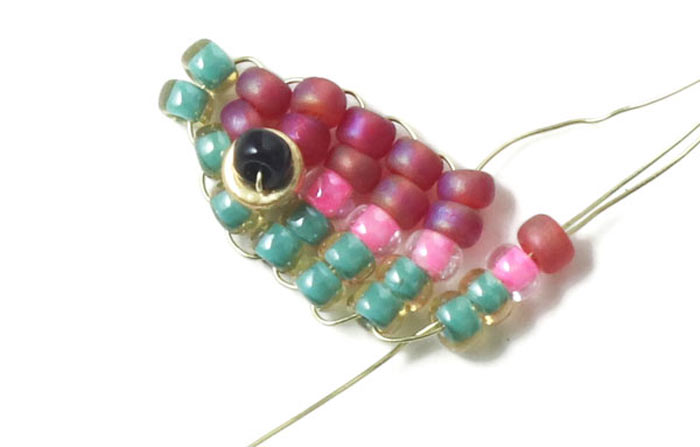
The second row of 4 beads is added in the same way (see picture).

The next 3 rows are sewn on in the same way ... with 3 beads + 2 beads + 1 bead respectively (see picture).
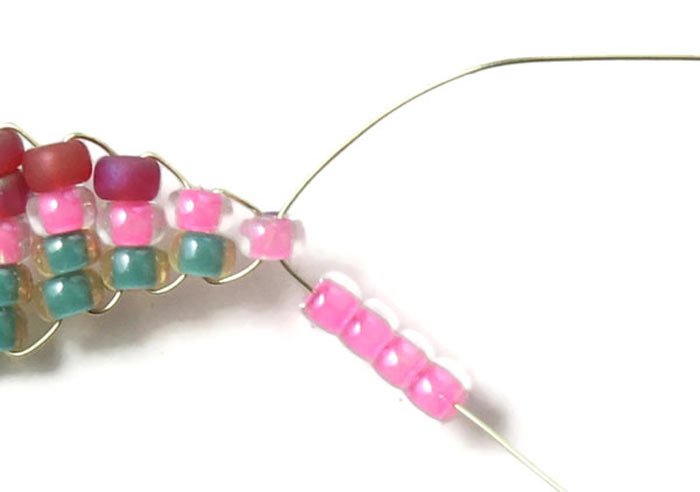
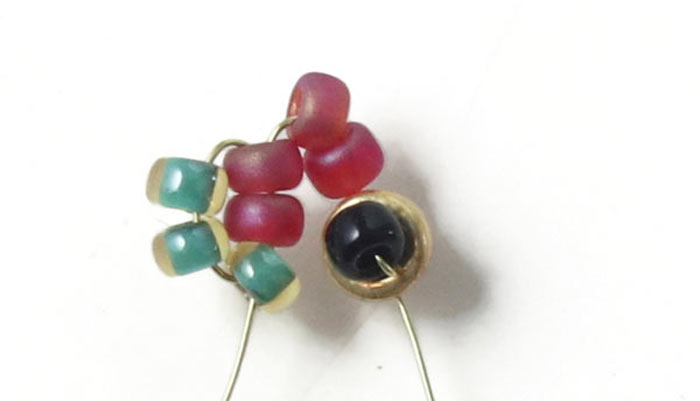
String 4 pink beads on one wire...
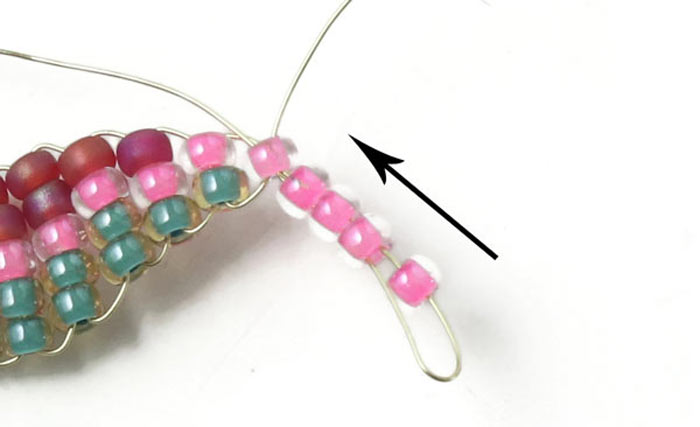
... skip 1 bead ... and pull the wire back through the next 4 beads.
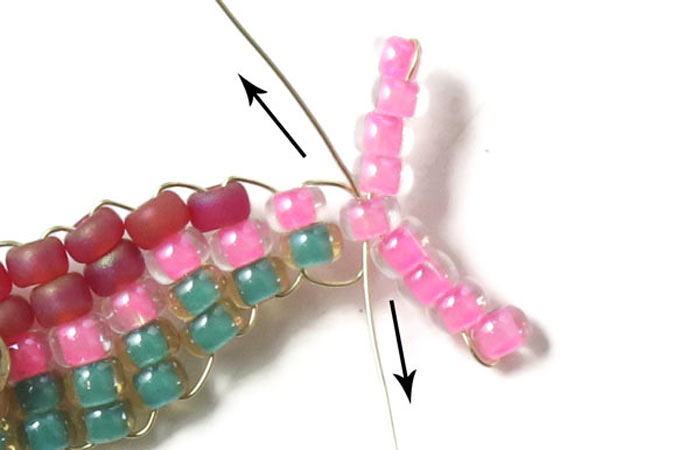
Repeat this with the other wire ... and tighten it.
One side of the fish is now complete.
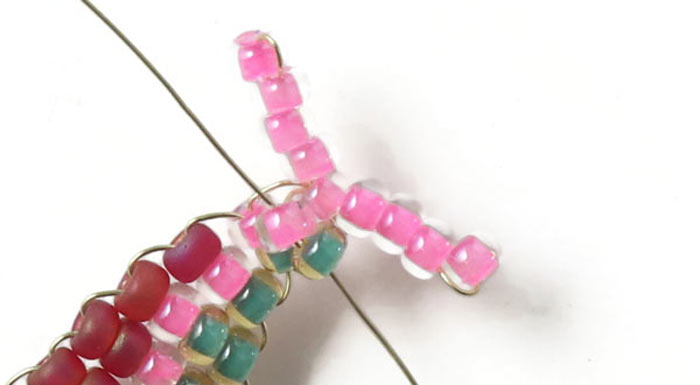
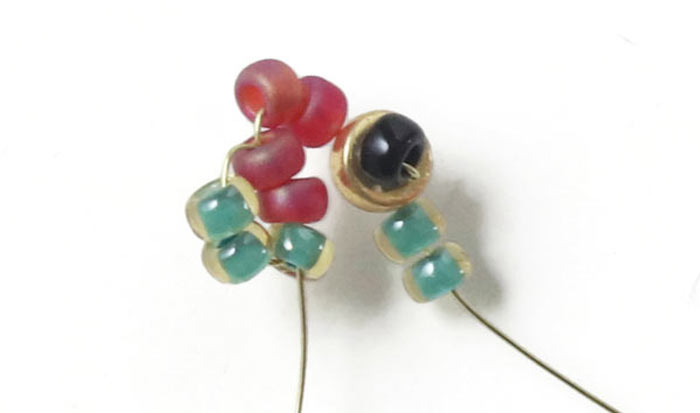
The other side of the fish is made in the same way. Start with the first 2 beads.
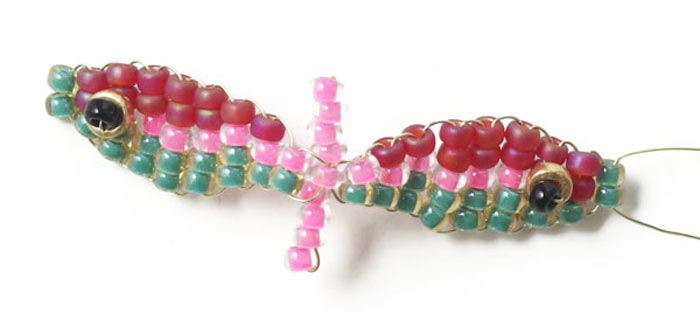
Now, the other side of the fish is finished. The two sides must now be joined together.
In the picture above, the closed jumpring is integrated when the to parts of the fish are stitched together. Alternatively, you can add an open loop after the fish has been completed.
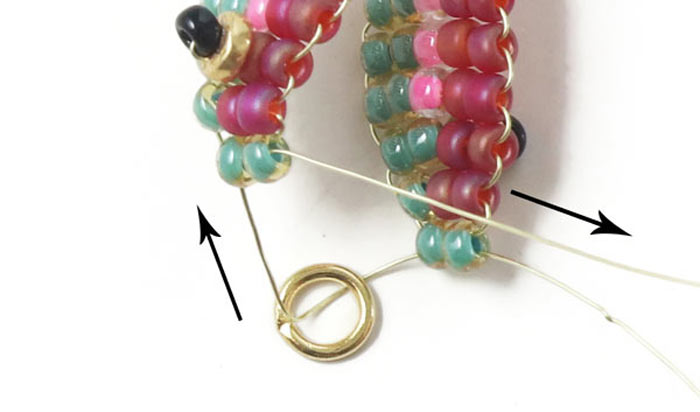
Pass one wire through the jumpring ... then through the 2 green beads on the opposite side...
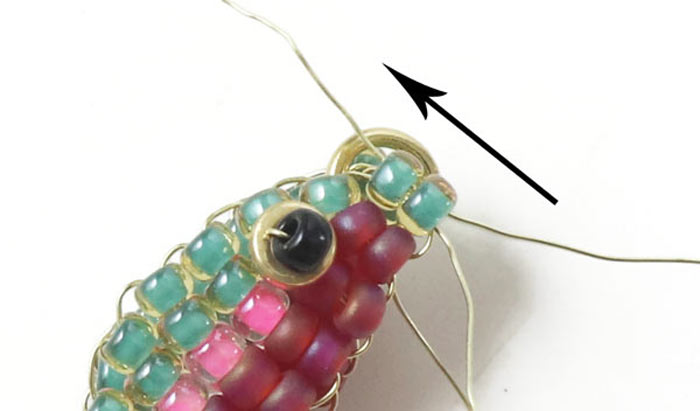
... and after that through the first 2 green beads ... so the wire ends stick out of the same 2 green beads - but in opposite directions.
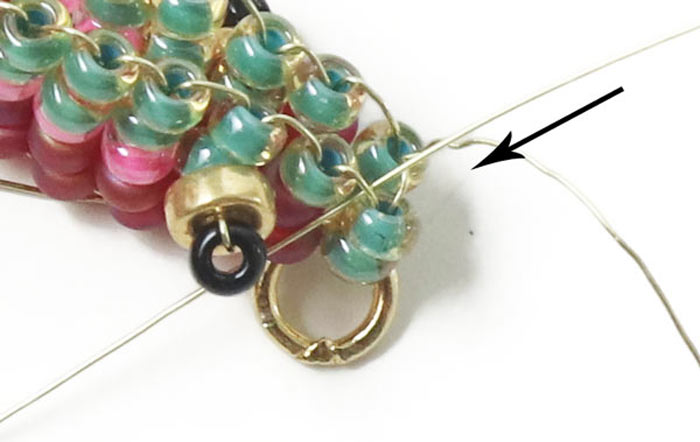
Now, you sew the two parts of the fish together. One edge at a time. Pass the wire through the ‘loop’ on the opposite side.
Next, pass the wire through the next 2 loops in one go.
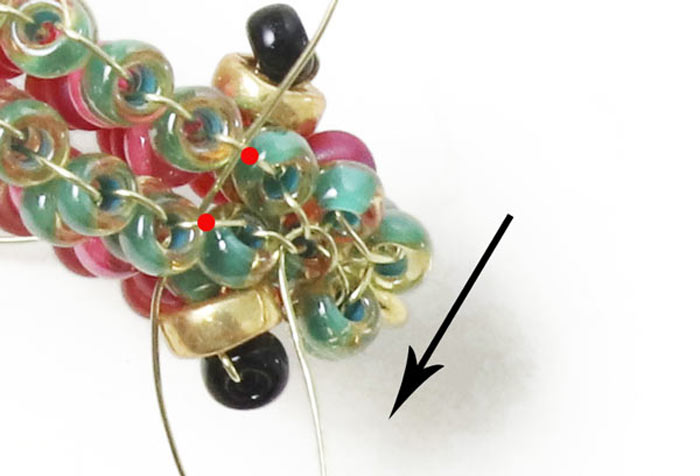
Continue in the same way all the way down ... passing the wire through 2 loops at a time (whip stitch).
Sew the other side of the fish together in the same way, using the other wire end.
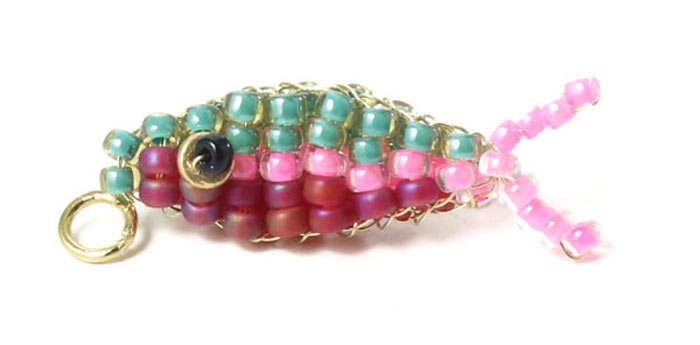
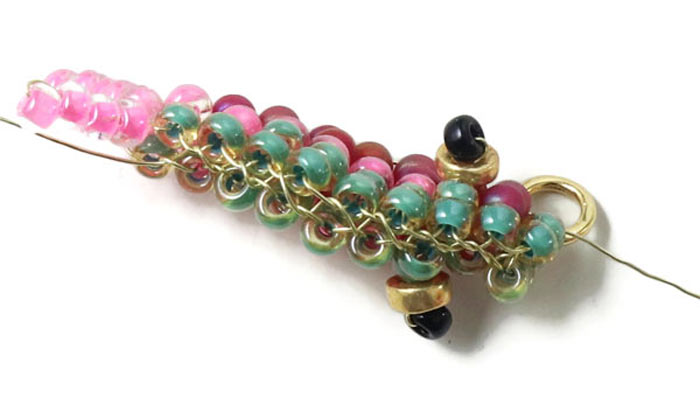
Secure both wire ends by passing them through some random beads. Cut off the excess wire.
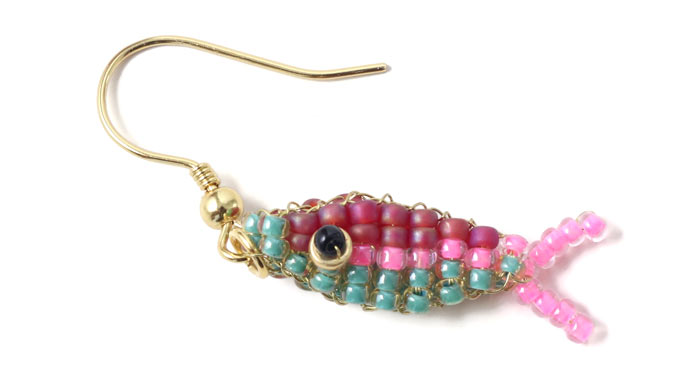
Attach the earwire you have chosen.
Congratulations, your new earring is ready! 🤩🐟🐠🎣😍
We will publicly show your name and comment on this website. Your email is to ensure that the author of this post can get back to you. We promise to keep your data safe and secure.